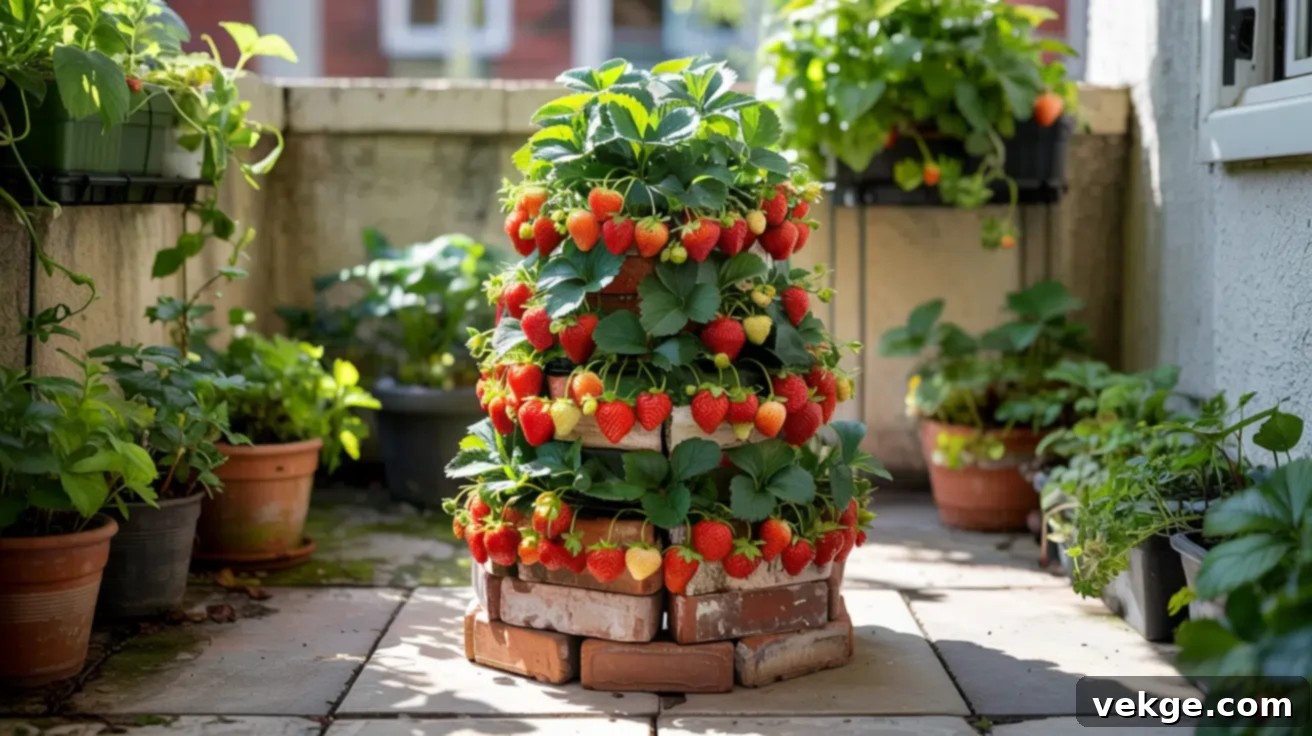
DIY Strawberry Tower: Grow Fresh Berries in Any Space with This Easy Guide
Dreaming of fresh, homegrown strawberries but limited by garden space? You’re not alone! Many gardeners, myself included, face the challenge of cultivating delicious produce in compact areas. That’s precisely why I embarked on building a DIY strawberry tower – a game-changer for maximizing yield in minimal footprint. The best part? It doesn’t require expensive tools or a hefty budget. With a bit of ingenuity and readily available materials, you can create a thriving vertical garden right on your balcony, patio, or even a small garden strip.
This comprehensive guide will walk you through my personal journey, sharing the exact steps I followed to construct a successful strawberry tower. Beyond the build, I’ll delve into various tower styles tailored for different budgets and spaces, offer invaluable tips for maintaining healthy, productive strawberry plants, and troubleshoot common issues you might encounter. Whether you’re a seasoned gardener or a complete beginner, prepare to transform your small space into a berry-producing haven.
Let’s unlock the secrets to a successful vertical strawberry garden, turning simple steps into a season full of sweet, juicy rewards.
DIY a Strawberry Tower: A Step-by-Step Guide to Vertical Strawberry Gardening
Building your own strawberry tower is a rewarding project that combines creativity with practicality. Once you’ve gathered your tools and materials, the process is straightforward: choose your design, prepare the planting holes, layer soil and plants, secure your structure, and establish a watering routine. Take it one layer at a time, and you’ll soon have a flourishing berry tower.
What You’ll Need to Build Your DIY Strawberry Tower
You don’t need a professional workshop to build a robust strawberry tower. Most items are common household tools or inexpensive purchases. Here’s a detailed list to get you started:
- Gloves and Safety Glasses: Essential for personal protection. Gloves prevent cuts and splinters, especially when working with raw materials like wood or PVC, while safety glasses shield your eyes from debris during drilling.
- Bucket or Tray for Mixing Soil: This makes preparing your custom soil mix cleaner and more efficient. A large bucket or a sturdy tarp works perfectly for blending compost, perlite, and potting mix.
- Optional Mesh or Liner: If using materials with larger holes or gaps (like some recycled buckets or crates), a fine mesh or landscape fabric liner can prevent soil from washing out while allowing water to drain.
- Watering Can or Hose with Gentle Spray Nozzle: A gentle flow of water is crucial for new plants and for ensuring soil stays in place during initial watering. Avoid high-pressure sprays that can dislodge plants or erode soil.
- Labels or Plant Markers: Invaluable if you’re planting multiple strawberry varieties. This helps you track which types perform best in your specific conditions and simplifies future planting decisions.
- Screws, Anchors, or Heavy Base Materials (e.g., bricks, weights): Provides stability, especially for taller towers or those exposed to windy conditions. Secure anchoring prevents tipping, protecting your plants and ensuring safety.
- Drill with Hole Saw Bit (recommended) or Jigsaw: For creating neat, consistently sized planting holes in plastic or wooden materials. A hole saw bit makes the job quicker and cleaner.
- Tape Measure and Marker: For accurately spacing and marking your planting holes, ensuring uniform growth and access to sunlight for every plant.
- Your Chosen Tower Material: This could be PVC pipes, plastic buckets, wooden crates, terracotta pots, or even sturdy fabric grow bags.
- Strawberry Plants or Runners: Select healthy, disease-free plants suitable for your climate. Consider everbearing varieties for a continuous harvest throughout the season.
- Potting Soil Mix: A high-quality, well-draining potting mix is vital. Look for mixes that retain moisture but don’t become waterlogged, often containing perlite or vermiculite.
Step 1: Pick a Design That Matches Your Tools and Space
The first crucial step is selecting a design that not only fits your aesthetic preferences but also aligns with your available tools, budget, and the specific characteristics of your space. For urban dwellers with patios or balconies, stackable pots (like terracotta or plastic) or vertical PVC pipes are excellent choices due to their relatively light weight, ease of assembly, and minimal footprint.
If you have a larger yard or garden, you might consider more substantial options like wooden crates, repurposed barrels, or custom-built wooden frames. When making your choice, consider the amount of direct sunlight your chosen spot receives (strawberries need at least 6 hours daily), the ease of access for watering and harvesting, and the long-term stability of the structure against wind and weather. Opt for a design that feels achievable with the resources you already possess or can acquire affordably. Remember, the goal isn’t to over-engineer, but to create a stable, soil-holding structure that gives your strawberry plants ample room to thrive.
Step 2: Mark and Drill Planting Holes the Right Way
Precise hole placement is key to ensuring each strawberry plant receives adequate light, air circulation, and space to grow. Begin by using a marker and tape measure to carefully plan the layout of your planting holes. A good rule of thumb is to maintain at least 4 to 6 inches between holes, both horizontally and vertically, depending on the expected mature size of your strawberry variety. Staggering the holes in a spiral pattern around the tower can maximize planting density while still providing individual plant access to sunlight.
A drill equipped with a hole saw bit is highly recommended for creating clean, consistent holes, typically 2-3 inches in diameter (large enough to insert the plant’s root ball comfortably). If working with round pipes or buckets, lean them securely against a wall or use clamps to hold them steady during drilling. Always wear gloves and safety glasses, and keep your hands well clear of the drill bit to prevent injury. After drilling, take a moment to smooth any sharp edges around the holes with sandpaper or a file. This prevents potential damage to the strawberry plant’s tender roots or stems once planted.
Step 3: Add Soil and Plants Layer by Layer
This is where your tower truly comes to life. Begin by filling the base of your tower with your chosen potting mix, pressing gently to remove large air pockets, but avoiding compaction. Once you have a sufficient layer of soil, carefully insert the first row of strawberry plants into their designated holes from the outside, guiding their roots inward. Ensure the crown of the plant (where the leaves emerge) is level with the outside surface of the hole, not buried too deep or sitting too high. Cover the roots well with additional soil, gently firming it around the plant.
Continue this process, adding soil and plants layer by layer, working your way up the tower. For stackable pots or buckets, it’s often easiest to plant each layer before stacking the next, preventing accidental crushing of lower plants. Utilize a high-quality soil mix that is both well-draining to prevent root rot and capable of retaining sufficient moisture to support healthy growth. A good mix might include a combination of potting soil, compost for nutrients, and perlite or vermiculite for drainage and aeration.
Step 4: Place and Support Your Tower Safely
The stability and location of your strawberry tower are critical for its success. Choose a flat, level, and sunny spot that receives at least 6-8 hours of direct sunlight daily. Set the base of your tower in a stable, wide pot, on solid ground, or a secure patio surface to prevent it from tipping. If the tower feels at all wobbly, don’t hesitate to use additional support. This could involve placing heavy bricks or weights around the base, or for taller structures, anchoring it to a nearby fence, wall, or sturdy post using rope or ties. Wind gusts, curious pets, or uneven ground can all contribute to instability, so a solid base is non-negotiable.
Beyond stability, consider accessibility. Place your tower where it’s easy to reach for watering, harvesting, and routine care without strain. Once your tower is firmly in place and adequately supported, it’s ready to become a productive vertical farm.
Step 5: Water it to Keep it All Growing
Proper watering is paramount for strawberry towers, as they tend to dry out faster than traditional garden beds. Always water from the top, allowing the water to slowly percolate down through each layer. This ensures uniform moisture distribution throughout the entire tower, preventing the top layers from drying out while the bottom remains excessively wet. If you notice water running out quickly, it might indicate that the soil is too dry and hydrophobic, or that your drainage is too efficient; consider adding more organic matter to improve moisture retention.
A small perforated pipe placed centrally during construction, or a watering wand, can help deliver water evenly. The frequency of watering depends on weather conditions, tower material, and plant size. In hot, sunny, or windy weather, daily watering might be necessary. During cooler periods, every few days could suffice. Always check the soil moisture with your finger a few inches deep before watering; the goal is damp, not soggy, soil. Watering in the mornings is generally best, as it allows foliage to dry before nightfall, reducing the risk of fungal diseases.
What To Do After Building Your DIY Strawberry Tower
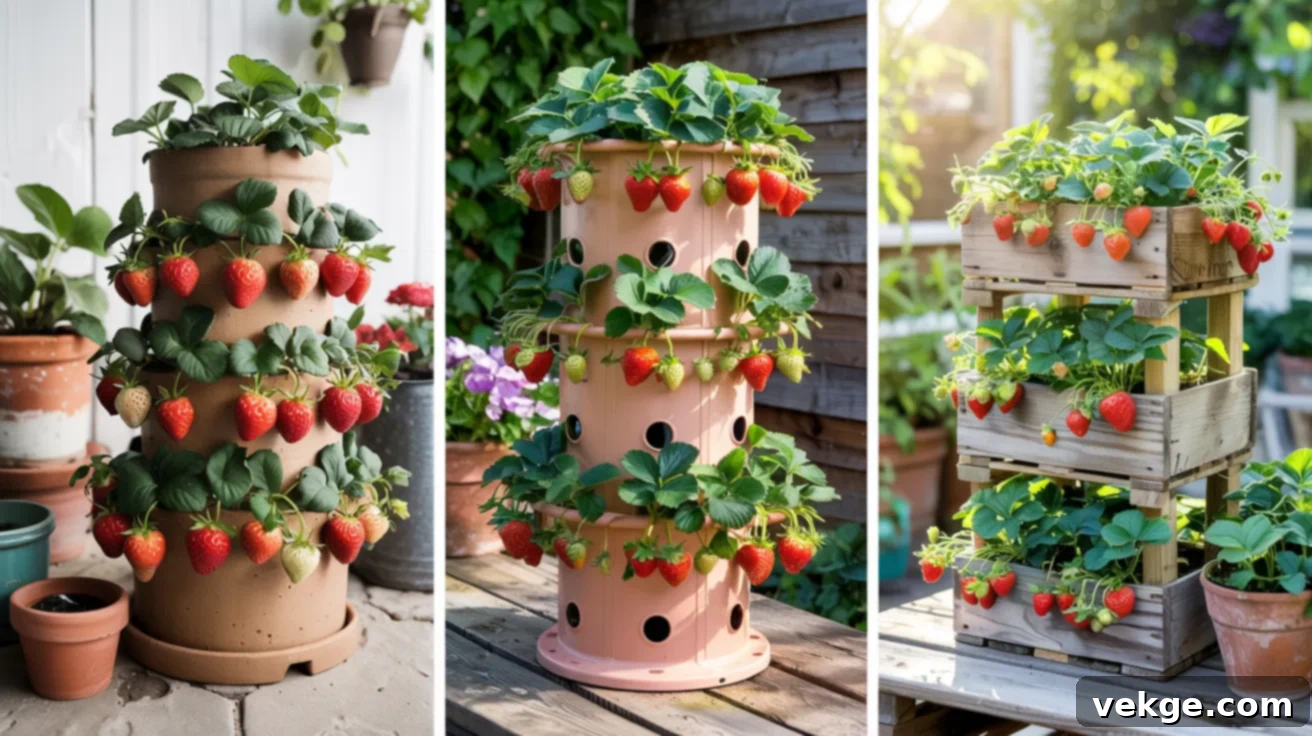
Once your strawberry tower is assembled and planted, the real magic begins with consistent, mindful care. With just a little weekly attention, your strawberry plants will remain robust, healthy, and incredibly productive throughout the growing season. You don’t need to dedicate hours; a few focused minutes here and there can make all the difference in ensuring a bountiful harvest.
- Watering Consistency: Rather than relying on guesswork, make it a habit to check the soil moisture with your fingers a few inches deep. This provides a reliable indicator of when to water. As mentioned, watering from the top allows moisture to flow through each layer, ensuring even distribution. On hot, sunny days, your tower might need watering once daily, especially if it’s made from porous materials. During cooler, overcast periods, every two to three days might be sufficient. Adjust as needed and remember that overwatering can be just as detrimental as underwatering.
- Feeding for Fruit: Strawberries are relatively heavy feeders, especially when producing fruit. A slow-release granular fertilizer applied once a month at the beginning of the growing season is an excellent option for sustained nutrient delivery. Alternatively, a gentle liquid feed (like a balanced organic fertilizer) can be applied every two weeks. Be cautious not to over-fertilize, particularly with high-nitrogen formulations, as this tends to promote lush leafy growth at the expense of berry production. Always follow the product’s instructions for dosage.
- Optimal Sunlight and Rotation: Aim for a spot that provides at least 6 to 8 hours of direct sunlight daily. This is crucial for fruit development and sweetness. If your tower is positioned such that one side consistently receives more light than the other, make it a routine to rotate the tower every few days. This simple practice ensures that all plants receive equitable sun exposure, promoting even growth and ripening across the entire structure.
- Pest, Disease, and Mold Vigilance: Regular inspection is your best defense against problems. Periodically peek under the leaves, check the base of the plants, and examine ripening fruit for signs of pests (like slugs, aphids, or spider mites) or fungal issues (like powdery mildew or botrytis mold). If you spot any diseased leaves or mushy, spoiled fruit, remove them immediately to prevent spread. Maintaining good air circulation, proper watering, and general cleanliness around the tower significantly reduces the likelihood of these issues taking hold.
- Winter Care and Protection: If you live in an area with freezing temperatures or harsh winters, proper winterization is essential for perennial strawberry plants. For moderate cold, simply adding a layer of mulch (like straw or pine needles) over the plant crowns can provide insulation. In regions with common hard frosts, you might need to wrap the entire tower in burlap or a thick frost cloth, or even move smaller, portable towers to a sheltered location like a garage or unheated shed. Ensure plants are watered well before the first freeze.
Incorporating these care practices into your routine will become second nature, and the consistent supply of fresh, delicious berries will undoubtedly prove that your efforts are well worth it.
DIY Strawberry Tower Ideas That Fit Any Budget or Space
Your strawberry tower doesn’t have to be a bland, off-the-shelf item. With a little imagination, you can customize it to perfectly match your style, your space, and your budget. Whether you’re aiming for extreme simplicity or want to add unique, functional extras, these ideas will help you grow strawberries in a way that truly reflects your personal touch and resourcefulness.
Dollar Tree Hacks with Bins, Lights, and Labels
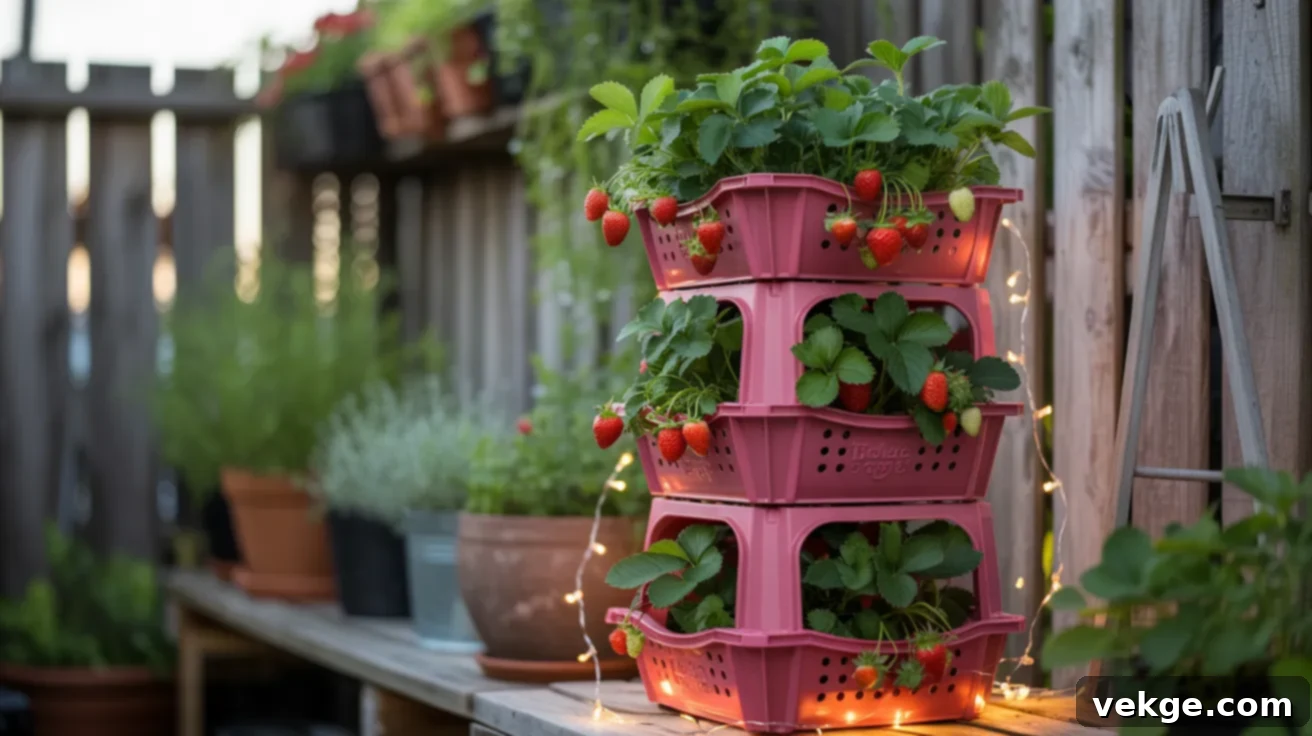
For the ultimate budget-friendly solution, head to your local dollar store. You can construct an entire functioning strawberry tower using just a few inexpensive items. Simply purchase several plastic storage bins or sturdy baskets of similar size. Stack them, securing each layer if necessary with zip ties or strong adhesive. Use a utility knife or drill to cut appropriately sized holes along the sides of each bin for planting. Fill with a good quality potting mix and insert your strawberry starts. To add a charming touch and extend evening enjoyment, consider attaching small, battery-operated puck lights or LED string lights around the tower. These setups are incredibly cost-effective, providing a substantial return in fresh berries for minimal investment. This project is perfect if you’re on a tight budget, looking for a quick weekend craft, or need a temporary growing solution with fast, visible results.
Recycled Bucket Towers with Built-In Drainage
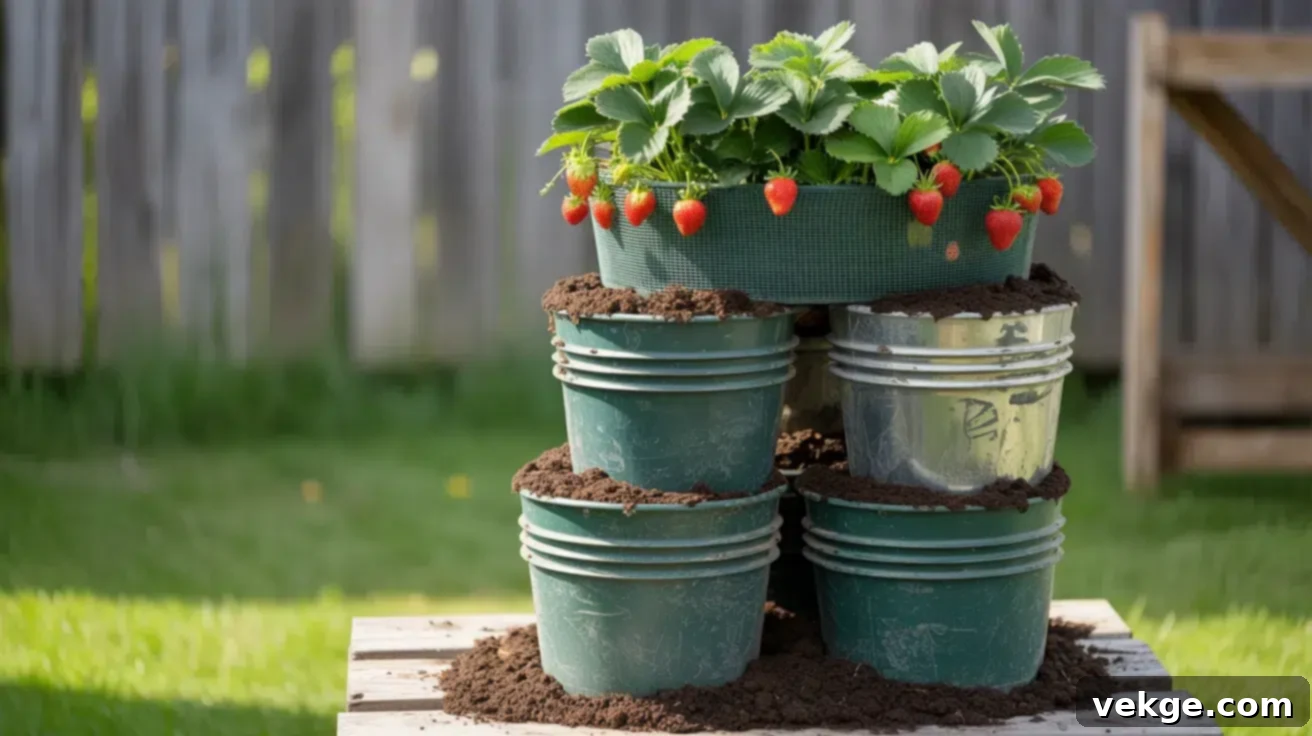
Don’t discard those old 5-gallon buckets from home improvement projects or food service; transform them into a remarkably sturdy and functional strawberry tower. Stack two to three buckets, or even more, in a staggered or straight vertical arrangement. Drill multiple holes (2-3 inches in diameter) along the sides of each bucket for planting, ensuring they are evenly spaced for light exposure. Crucially, drill several smaller drainage holes (1/4 to 1/2 inch) at the very bottom of each bucket to prevent waterlogging. If the plastic is thin, you might line the inside with landscape fabric or fine mesh to keep the soil contained while allowing water to pass. This robust setup is ideal for larger yards, patios, or even tucked into corners near a fence, offering significant planting space without any additional material costs. It’s a fantastic example of upcycling and a sustainable way to cultivate an abundant supply of fresh, organic berries.
Hanging Towers Using Mesh or Pouches
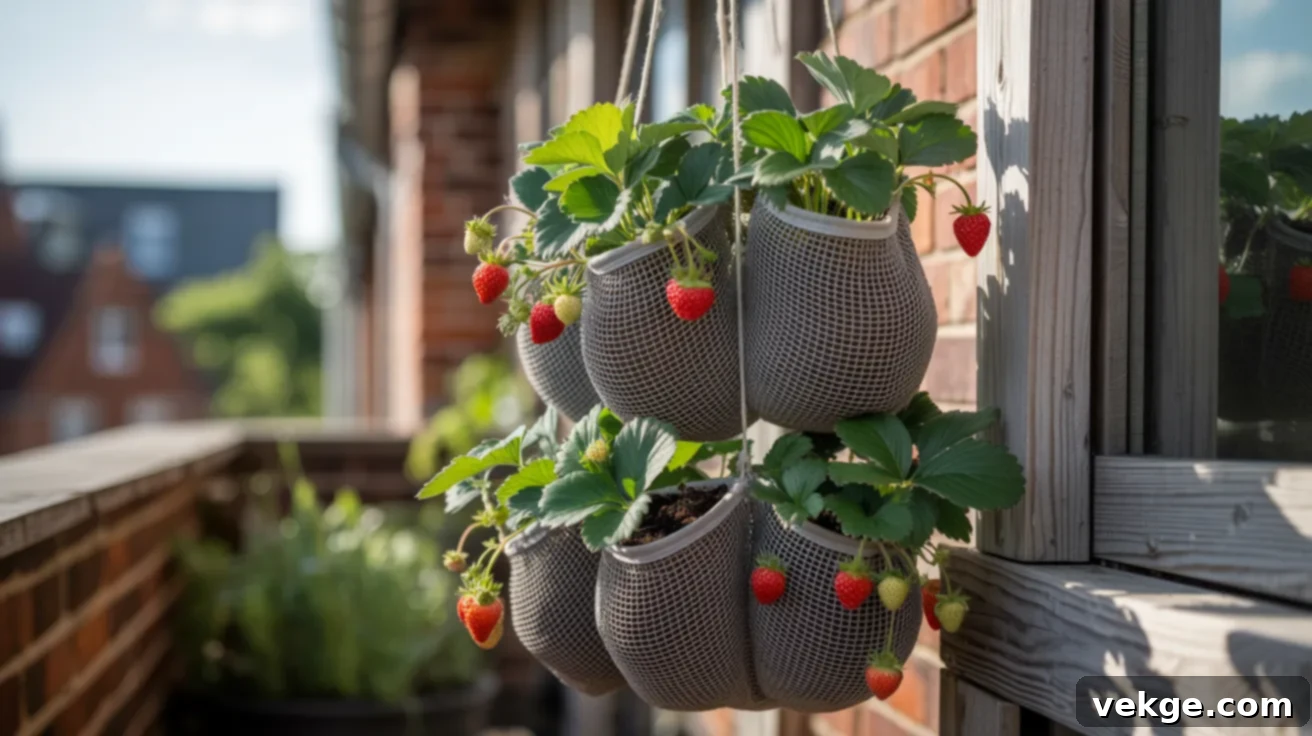
For those with extremely limited floor space, or simply a desire for a visually striking display, hanging strawberry towers are an excellent choice. These designs literally lift your garden off the ground, making efficient use of vertical air space. Options include specialized mesh planters, durable fabric grow bags with multiple pockets, or even strong, repurposed fabric pouches (ensure they can support the weight of wet soil and plants). Fill each individual pocket or compartment with a nutrient-rich potting mix, then gently insert a strawberry plant. Hang your completed setup from a sturdy fence, a robust railing, or a well-secured hook in a location that receives ample direct sunlight. Hanging towers keep fruit clean and away from ground pests, free up valuable ground space, and offer a unique aesthetic. This option is particularly flexible and light, making it perfect for renters or anyone who needs a portable gardening solution that doesn’t demand much room.
Add-On Features Like Water Pipes or Plant Markers
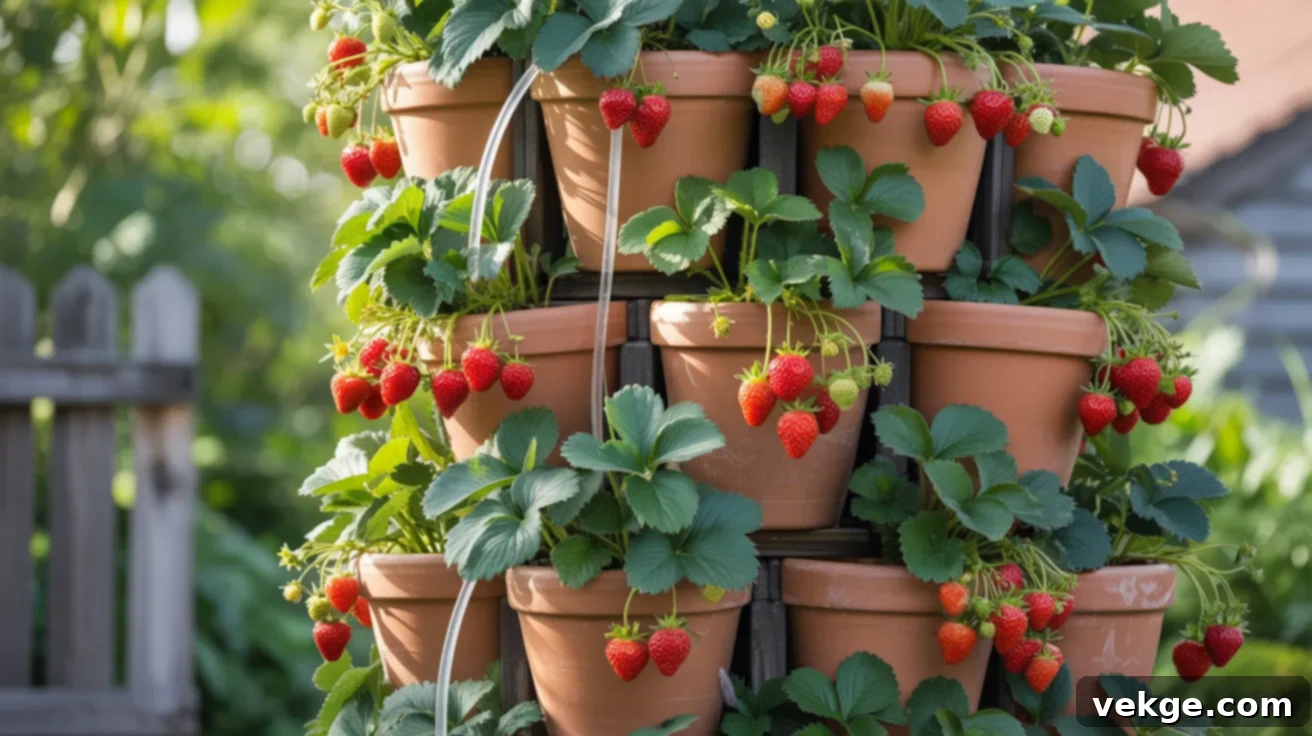
Once you have a basic tower, you can enhance its functionality with simple, yet effective add-ons. A common upgrade is to embed a thin PVC pipe (1-2 inches in diameter) with small holes drilled along its length into the center of your tower during construction. When you water from the top of this pipe, it efficiently distributes moisture evenly to all layers and plants, saving time and promoting healthier, more uniform growth. Another simple but incredibly useful feature is the addition of plant markers. You can use anything from crafted wooden sticks, repurposed plastic spoons, or even small, painted rocks to label your different strawberry varieties. These small extras require minimal effort and cost but significantly improve the manageability and organization of your vertical garden. If you appreciate order and enjoy keeping track of your plant types, these subtle enhancements can elevate your DIY strawberry tower experience without adding significant work.
Common Problems With Strawberry Towers and How to Fix Them
Even with the best intentions and careful construction, vertical strawberry towers can sometimes present a few challenges. The good news is that most common issues are relatively easy to diagnose and remedy once you know what to look for. Proactive observation and quick action can keep your plants healthy and productive. Here are some of the most frequent problems encountered with strawberry towers and their practical solutions.
1. Dry Soil or Wilting Leaves
Problem: Your strawberry plants appear limp, their leaves are drooping or crispy, and the soil feels bone-dry. Strawberry towers, especially those exposed to full sun or strong winds, tend to dry out much faster than traditional garden beds due to increased air circulation around the container.
Solution: Begin by checking the soil moisture not just on the surface, but a few inches down with your finger. If it’s dry, water thoroughly from the top, allowing the water to slowly soak through all layers. If water runs straight out, your soil might be too hydrophobic (repelling water); try mixing in more organic matter like compost or coco coir to improve its water retention capabilities. Applying a layer of mulch (like straw or wood chips) on the top surface of the tower can also significantly reduce evaporation and help the soil retain moisture for longer periods.
2. Mold or Rot Near the Base
Problem: You notice soft, discolored (often black or brown) berries, fuzzy mold on leaves, or a musty smell, particularly near the bottom of your tower. This is typically a sign of excessive moisture and poor air circulation.
Solution: First, ensure your tower has ample drainage holes at the very bottom of each layer or container to prevent water from pooling. If not, add more. Use a lighter, well-draining soil mix (one that includes perlite or vermiculite) to prevent compaction and improve aeration. Water slowly and carefully to avoid oversaturating the bottom layers. Immediately pick off any berries that show signs of softening or mold to prevent the spread of fungal diseases. Keep the area around the base of your plants clean and free of old, decaying leaves, as these can harbor moisture and pathogens. Increasing air circulation around the tower can also help.
3. Bugs Eating Your Plants or Fruit
Problem: You spot ragged holes in leaves, mysterious bites out of ripening berries, or visible pests like slugs, snails, aphids, or small beetles. Strawberries are a favorite snack for many garden critters.
Solution: Regular inspection is key. Check under leaves and around the base of plants for pests. For crawling pests like slugs and snails, create a barrier around the base of your tower with crushed eggshells, diatomaceous earth, or copper tape. For flying insects or birds, consider using fine mesh covers or netting draped over the tower. Aphids can often be dislodged with a strong spray of water or treated with insecticidal soap. Promptly remove and dispose of any damaged or spoiling fruit, as this can attract more pests. Encourage beneficial insects (like ladybugs) by planting companion flowers nearby.
4. Plants Getting Too Little Sun
Problem: Your strawberry plants are producing few berries, the leaves are pale green or yellow, and growth appears weak or leggy. This indicates insufficient sunlight. Strawberries require a minimum of 6 hours of direct sunlight per day, ideally 8-10.
Solution: If possible, reposition your entire tower to a sunnier location in your yard or patio. If moving it isn’t an option, and one side of the tower consistently receives less light, make a habit of rotating the tower every few days. This simple action ensures that all plants get their fair share of sun exposure, promoting even, vigorous growth and maximizing berry production on all sides. Adequate sunlight is paramount for strawberry health and the development of sweet, flavorful fruit.
5. Tower Leaning or Falling Over
Problem: Your strawberry tower appears unstable, leaning precariously, or has already tipped over. This is a common issue with taller structures, often due to an inadequate base, uneven ground, or strong winds.
Solution: Before planting, always ensure your tower’s base is wide and heavy enough to support the full weight of the tower filled with wet soil and plants. Use a wide, heavy pot as a base, or surround the bottom with bricks, concrete blocks, or other weights for added stability. If you live in a windy area, tying the tower securely to a fence, sturdy post, or railing with strong rope or straps is highly recommended. Ensure the weight of the soil and plants is evenly distributed as you fill the tower. Water slowly and carefully, as rapid watering can sometimes cause the soil to shift, leading to instability. A well-secured tower protects your plants and prevents frustrating accidents.
Harvesting and Replanting Tips for a Continuous Berry Supply
The moment your strawberries ripen is incredibly satisfying, but understanding when and how to harvest, along with planning for future seasons, is key to maximizing your tower’s potential. Here’s a detailed look at my proven methods:
- Pick When Fully Red and Slightly Soft: Patience is a virtue when it comes to strawberry harvesting. Wait until the entire berry is a vibrant, uniform red color, including the part directly under the cap. A ripe strawberry will also feel slightly soft to the touch, but not mushy. Avoid picking prematurely, as strawberries do not continue to ripen significantly after being picked. When harvesting, gently pinch or snap the stem about half an inch above the berry, or use small scissors to snip it, leaving the green calyx (the leafy cap) attached. This helps the berry stay fresh longer and prevents damage to the plant.
- Harvest in the Morning: The best time to pick strawberries is in the cool hours of the morning, after the dew has dried but before the heat of the day sets in. Berries harvested at this time are typically at their sweetest and firmest, and they will also have a longer shelf life. Ensure the berries are dry when picked to minimize bruising and mold.
- Trim Dead or Damaged Leaves Regularly: After each harvest, or as part of your weekly care routine, take a few moments to inspect your plants. Use clean pruning shears or sharp scissors to snip off any yellowing, brown, or damaged leaves. This practice not only keeps your tower looking tidy but also improves air circulation around the plants, reducing the risk of fungal diseases. Removing dead foliage also discourages pests, as they often hide in decaying plant matter. Healthy leaves contribute to overall plant vigor and better fruit production.
- Swap Out Old Plants and Utilize Runners: Strawberry plants are most productive in their first two to three years. After this, their yield tends to decline. For continuous high production, it’s a good practice to replace your older plants every couple of seasons. You can easily do this by propagating new plants from the “runners” (stolons) that healthy strawberry plants send out. Simply pin a node from a runner onto a small pot of soil next to the mother plant; once it establishes roots, you can snip it from the parent and plant it in your tower. Alternatively, purchase fresh, disease-free bare-root or potted plants for a quick refresh. This ensures your tower remains vibrant and fruitful year after year.
By incorporating these simple yet effective harvesting and replanting strategies, you’ll not only enjoy a steady supply of delicious berries but also ensure the long-term health and productivity of your DIY strawberry tower.
Final Thought
Building a DIY strawberry tower is more than just a gardening project; it’s an invitation to cultivate fresh, organic fruit right outside your door, regardless of how much space you have. You are now equipped with all the essential steps, comprehensive care tips, and creative, budget-friendly ideas to embark on your vertical gardening adventure. From choosing the perfect design to troubleshooting common issues and ensuring a bountiful harvest, you have the knowledge to succeed.
Whether you opt for a simple stacked bucket design or a more elaborate custom build, your strawberry tower promises to provide you with an abundance of sweet, juicy berries throughout the entire growing season. The true secret to success lies in selecting a design that suits your personal needs and resources, consistently providing the necessary care, and most importantly, enjoying the fulfilling process of watching your plants thrive. Embrace the learning journey, experiment with different setups, and discover what works best in your unique space. For more innovative home and garden solutions, continue exploring other resourceful blogs to keep growing smarter and greener!
Frequently Asked Questions About DIY Strawberry Towers
Can I grow strawberries in a tower indoors?
Yes, growing strawberries indoors in a tower is absolutely possible, but it does require careful attention to specific environmental factors. You’ll need a location that receives ample sunlight, ideally a south-facing window that provides at least 6-8 hours of direct light daily. If natural light is insufficient, invest in good quality grow lights (LED full-spectrum lights are highly recommended) to supplement or replace natural light. Ensure your indoor tower is lightweight enough to move if needed and includes a sturdy tray underneath to catch any excess water, preventing damage to your floors. While indoor growing helps avoid many outdoor pests, you’ll likely need to assist with pollination; gently shaking the flowers or using a soft brush to transfer pollen between blossoms can encourage fruit set.
How many strawberry plants can I fit in a single tower?
The number of strawberry plants you can fit in a single tower largely depends on its size and the specific design, particularly the number and spacing of planting holes. A typical small PVC pipe tower or a stackable pot system might comfortably accommodate 10 to 20 plants. Larger structures, such as those made from wooden crates, repurposed barrels, or multiple 5-gallon buckets, can often hold up to 30 or even more plants. The crucial factor isn’t just the sheer number, but ensuring that each individual plant has sufficient space for its roots to develop, adequate air circulation around its foliage, and unobstructed access to sunlight. Overcrowding will lead to weaker plants, smaller berries, and increased susceptibility to diseases.
Can I reuse soil from last year’s strawberry tower?
It is generally not recommended to reuse soil directly from last year’s strawberry tower for a new batch of strawberries. Old soil can deplete essential nutrients, become compacted, and more importantly, may harbor lingering plant diseases, fungi, or pest eggs that could affect your new plants. If you absolutely must reuse it due to budget or availability, it’s best to rejuvenate it significantly. Mix the old soil with an equal amount of fresh, high-quality compost or new potting mix to replenish nutrients and improve structure. For an added layer of caution, you can sterilize the mixture by baking it in a shallow tray in an oven at a low temperature (around 180°F or 82°C) for 30 minutes. However, for the healthiest start and the best possible yield, using fresh, sterile potting mix is always the superior choice for new strawberry plantings.
Do I need to rotate my strawberry tower regularly?
Yes, rotating your strawberry tower regularly is a highly recommended practice, especially if your tower is positioned in a location where one side consistently receives more sunlight than the other. Strawberries are sun-loving plants, and uneven light exposure can lead to lopsided growth, with plants on the shadier side becoming leggy, producing fewer berries, and ripening unevenly. Turning your tower every few days – perhaps every 2 to 3 days – ensures that all plants receive an equitable amount of sun exposure. This simple act promotes uniform, vigorous growth across the entire tower, resulting in a more consistent and abundant harvest from all sides.
Can I plant herbs or flowers in the same tower as strawberries?
Yes, you can absolutely incorporate other plants into your strawberry tower, but it’s important to choose companion plants carefully. Stick to herbs or flowers that are known to be beneficial companions for strawberries, meaning they won’t compete heavily for nutrients or water and may even offer advantages like pest deterrence. Excellent choices include basil (which some believe enhances berry flavor), chives (repels certain insects), marigolds (known to deter nematodes and other pests), and borage. Avoid planting aggressive herbs like mint, which can quickly take over the entire tower with its fast-spreading root system, choking out your strawberry plants. Always research companion planting guides to ensure a harmonious and productive multi-plant tower.
