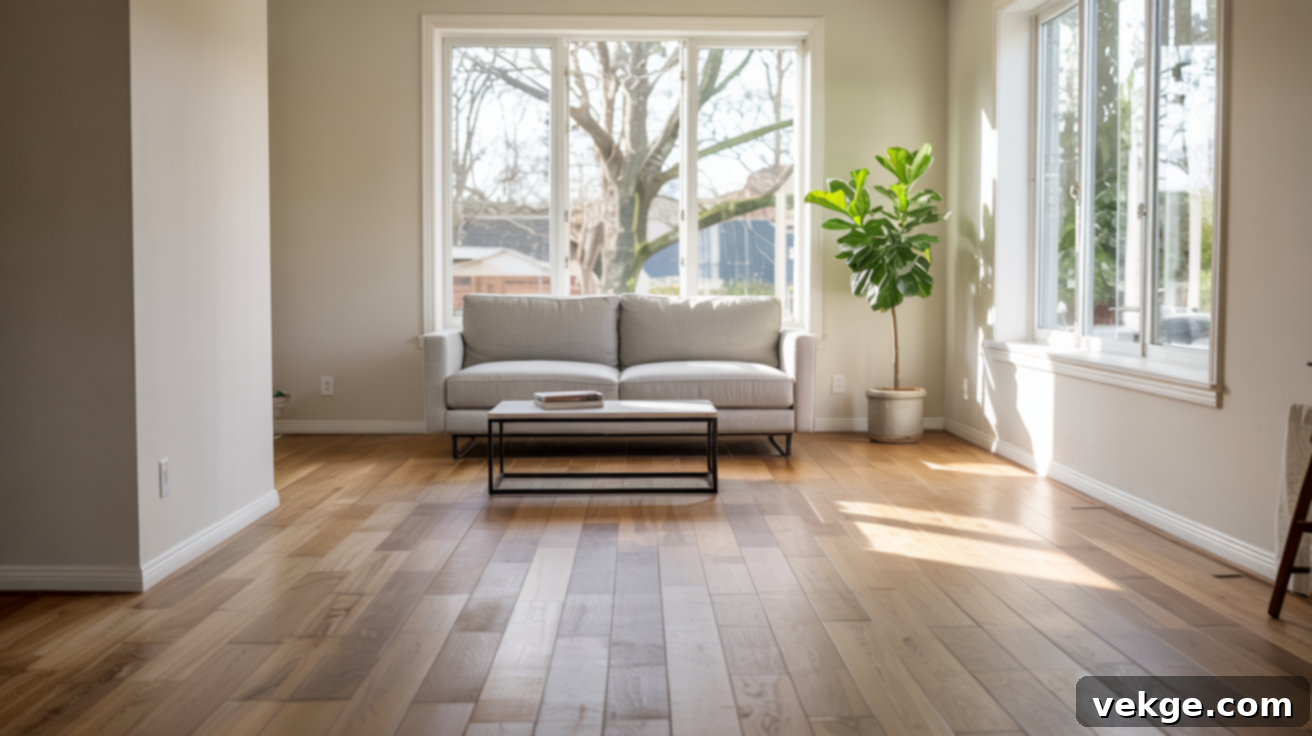
Can You Sand Engineered Hardwood? The Ultimate Guide to Refinishing Your Floors
Engineered hardwood flooring offers the timeless beauty of real wood with enhanced durability and stability. But a common question that arises for many homeowners is: can you sand engineered hardwood floors? The straightforward answer is yes, but with crucial caveats. The ability to sand these floors largely depends on the thickness of their top layer, known as the wear layer or veneer.
This comprehensive guide will demystify engineered hardwood, explain the intricacies of sanding, and help you determine when a simple recoat might be a more sensible and cost-effective option. Before you even think about renting a sander, it’s vital to understand the limitations of your specific flooring. Over-sanding can lead to irreversible damage, turning a renovation project into a costly replacement.
We’ll walk you through everything from identifying your floor’s characteristics to gathering the right tools, executing each step with precision, and maintaining your revitalized floors for years to come. By the end of this guide, you’ll have a clear understanding of what your engineered hardwood floors can truly handle, empowering you to make informed decisions for their upkeep and longevity.
Understanding Engineered Hardwood Flooring
Engineered hardwood flooring represents a practical and visually appealing choice for many homes, offering the aesthetic charm of solid wood with improved structural stability. It’s a popular option for those seeking the natural warmth and character of wood without some of the common drawbacks associated with solid hardwood, such as susceptibility to moisture and temperature fluctuations.
The construction of engineered hardwood is its defining characteristic, setting it apart from its solid counterpart. It consists of multiple layers, each serving a specific purpose:
- The Top Layer (Veneer/Wear Layer): This is the most crucial layer for sanding. It’s a slice of real hardwood, available in various species like oak, maple, hickory, or walnut. The thickness of this veneer dictates how many times the floor can be sanded and refinished throughout its lifespan.
- The Core (Substrate): Beneath the veneer lies a robust core, typically made from multiple cross-laminated layers of plywood or high-density fiberboard (HDF). This layered construction provides exceptional stability, making engineered hardwood less prone to warping, cupping, or gapping in environments with fluctuating humidity and temperature. The cross-grain arrangement of the core layers counteracts the natural expansion and contraction of wood.
- The Backing Layer: At the very bottom, a backing layer, often made of wood, adds further stability and helps balance the floorboard, preventing it from bowing or arching.
This multi-layered structure results in a flooring product that is highly durable, versatile, and suitable for installation in areas where solid hardwood might not perform as well, such as basements or over concrete slabs. Its unique build provides a stable foundation that enhances its longevity and allows it to maintain its appearance over many years of daily use.
Can You Sand Engineered Hardwood Floors?
Yes, you can sand engineered hardwood floors, but this capability is entirely contingent upon the thickness of the real wood veneer (wear layer) on top. This is the critical factor that determines whether sanding is a viable option for refreshing your floors. If the wear layer is sufficiently thick, sanding can effectively remove minor surface imperfections, scratches, and the old finish, allowing for a new stain and protective coat.
The number of times an engineered hardwood floor can be sanded directly correlates with its veneer thickness:
- Thin Veneers (less than 2mm): Floors with veneers under 2mm are generally not suitable for sanding. There simply isn’t enough real wood to remove without exposing the core layer, leading to irreparable damage. In these cases, a “screen and recoat” is usually the only option for surface rejuvenation.
- Moderate Veneers (2mm – 3mm): Floors with a 2mm to 3mm wear layer might tolerate one to two light sandings over their lifetime. Extreme caution is advised to ensure minimal material removal.
- Thicker Veneers (4mm – 5mm): Engineered hardwood with a 4mm to 5mm veneer offers more flexibility, typically allowing for two to four sanding sessions. These floors provide a good balance of durability and refinishing potential.
- Very Thick Veneers (6mm+): Floors boasting a 6mm or thicker wear layer are the most robust, often capable of being sanded as many as five or six times, closely mimicking the refinishing potential of some solid hardwood floors.
It is absolutely essential to know the specifications of your engineered hardwood before attempting any sanding. Always check the manufacturer’s guidelines or, if unknown, perform a careful inspection to gauge the veneer thickness. Overlooking this crucial detail can lead to costly mistakes and the premature deterioration of your beautiful flooring.
What Happens If You Sand Engineered Hardwood Too Deep?
Sanding too deep into engineered hardwood flooring carries significant risks and can result in irreparable damage. The primary danger is cutting through the real wood veneer and exposing the plywood or high-density fiberboard (HDF) core beneath. Once this structural core is exposed, the floor’s aesthetic appeal and structural integrity are compromised in several ways:
- Irreversible Aesthetic Damage: The core layer has a distinctly different appearance and texture than the real wood veneer. It will not take stain or finish in the same way, leading to visible, unsightly patches that are impossible to conceal. Your floor will lose its uniform, natural wood look.
- Compromised Durability: The core layer is not designed to be the walking surface. Exposing it can make the floor more susceptible to moisture damage, wear, and splintering, drastically shortening its lifespan.
- Uneven Surface: Sanding through the veneer can create depressions or uneven areas on the floor, which can be visually distracting and even pose a tripping hazard.
- Costly Replacement: Unlike minor surface scratches that can be fixed, damage to the core layer cannot be repaired with simple solutions. In most cases, if you sand too deep and expose the core, the only viable solution is to replace the damaged planks or, in severe cases, the entire floor, which is a far more expensive and labor-intensive undertaking than refinishing.
This highlights why proper assessment of the wear layer and careful, controlled sanding techniques are paramount. For floors with very thin veneers (typically under 2mm), sanding should be avoided entirely to prevent these types of irreversible consequences.
Materials and Equipment You’ll Need for Sanding
Undertaking a sanding project for engineered hardwood requires a specific set of tools and materials to ensure a successful outcome. Having everything ready before you begin will streamline the process and help you achieve professional-looking results. Remember to select items that are appropriate for your specific floor and project scope.
- Drum Sander: This heavy-duty sander is used for efficiently stripping the old finish and leveling on large, open floor areas. It’s powerful, so it requires careful handling.
- Edge Sander / Orbital Sander: Essential for reaching areas where the drum sander cannot, such as along baseboards, in corners, and around fixtures. An orbital sander can offer more control for detail work.
- Sandpaper (60 to 220 grit): You’ll need a range of grits. Start with a coarser grit (60-80) to remove the old finish and deeper imperfections, then progress to medium (100-120) for smoothing, and finally fine grits (150-220) for a silky-smooth surface ready for finishing.
- Shop Vacuum Cleaner / Dust Extractor: Crucial for removing dust and debris between each sanding pass and before applying any finish. A clean surface is vital for a smooth, even finish.
- Floor-Safe Cleaner: A gentle, pH-neutral cleaner specifically designed for wood floors, used for pre-sanding preparation and post-refinish maintenance.
- Applicators (Brush, Roller, or T-Bar Applicator): For applying wood stain and polyurethane finish evenly. The type depends on the product and your preference.
- Clean Rags or Cloths: For wiping away dust, applying stain (if preferred), and cleaning up spills.
- Wood Stain (Optional): If you wish to change or enhance the color of your floor after sanding, a high-quality wood stain compatible with your engineered hardwood and chosen finish. Always test in an inconspicuous area.
- Polyurethane Finish (Water-based or Oil-based): The protective top coat. Water-based options dry faster and have lower VOCs, while oil-based finishes are known for their durability and ambering effect over time.
- Screening Pad (Optional): Used with a buffer for a “screen and recoat” process, or for light buffing between finish coats to ensure adhesion and smoothness.
- Safety Gear: This is non-negotiable. Always wear a dust mask or respirator, safety glasses, and hearing protection, especially when operating power sanders. Gloves are also recommended when handling stains and finishes.
- Furniture Pads: To place under furniture legs after refinishing to prevent future scratches.
Sanding Engineered Hardwood: Step-by-Step Guide
Refinishing engineered hardwood through sanding is a multi-stage process that demands patience, precision, and the right equipment. If your floor’s wear layer permits, this guide will help you achieve a beautifully refreshed floor. Always work systematically and prioritize safety.
Step 1: Thorough Preparation and Equipment Gathering
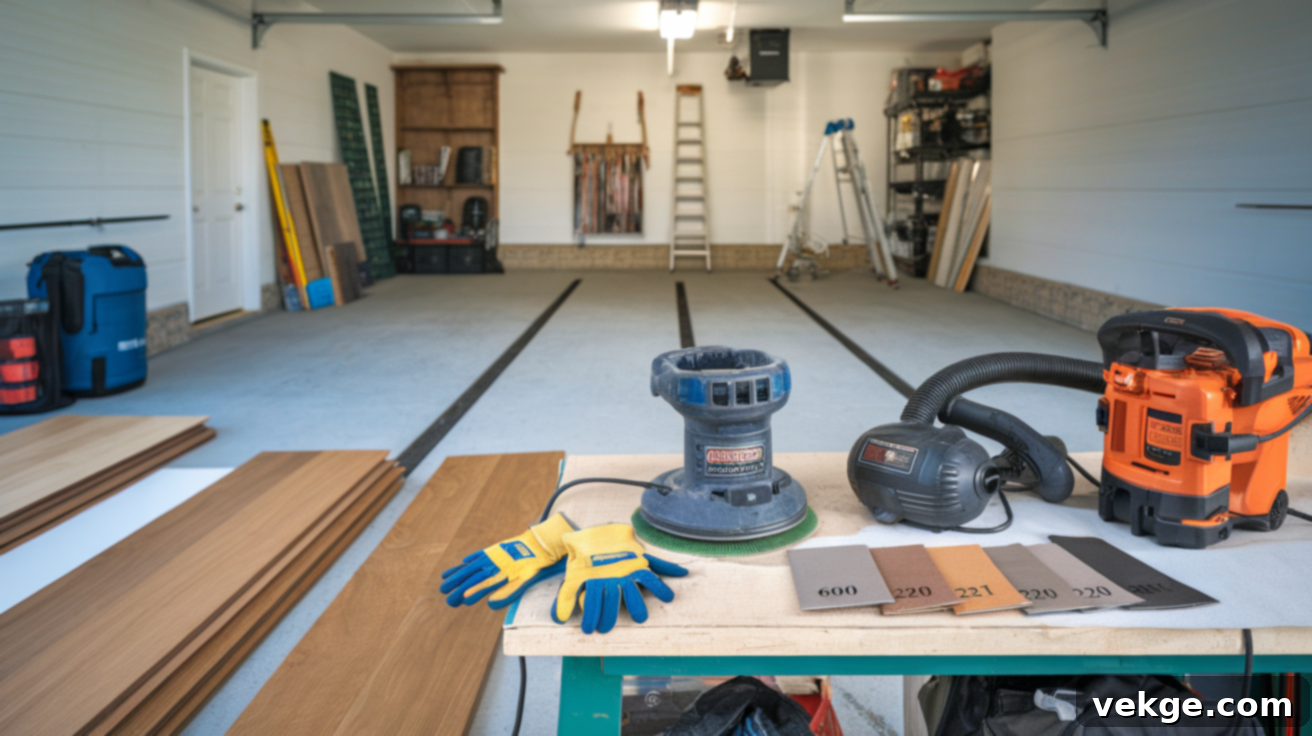
Before any sanding begins, thorough preparation is paramount. First, completely empty the room of all furniture, rugs, and decor. Remove baseboards or shoe molding to allow for edge sanding right up to the wall. Clean the floor meticulously with a vacuum and a floor-safe cleaner to remove all dirt, grit, and wax residue. Inspect for any loose or damaged planks; these should be repaired or replaced before sanding. Finally, gather all your equipment, including the drum sander, edge sander, a range of sandpaper grits (from 60 to 220), a shop vacuum, and essential safety gear (dust mask, safety glasses, hearing protection).
Step 2: Sanding in Progressive Stages
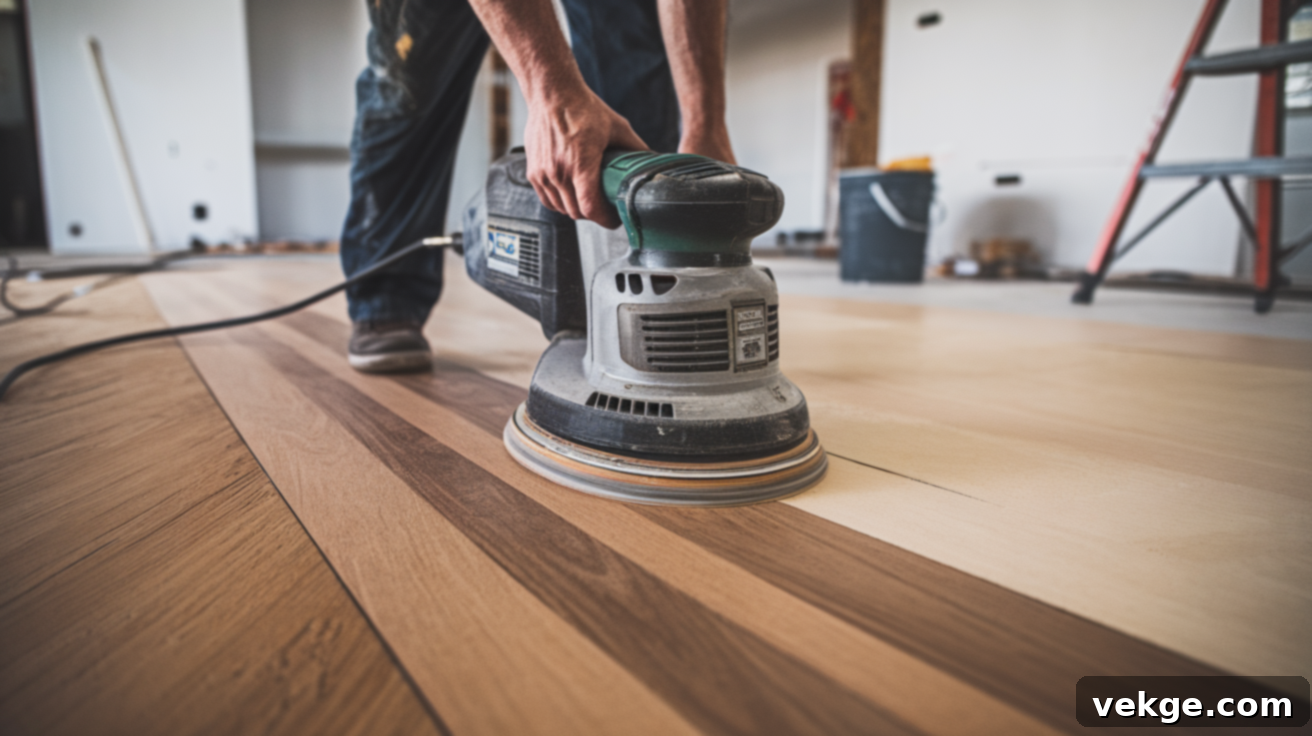
Sanding is done in stages, progressively moving from coarser to finer grits. Begin with a coarse grit sandpaper (e.g., 60 or 80 grit) on the drum sander to strip away the old finish and remove significant imperfections. Always sand in the direction of the wood grain, maintaining a consistent, smooth motion. Overlap each pass by a few inches to ensure even coverage and prevent lines. After completing the main floor area, use the edge sander with the same coarse grit around the perimeter and in tight spaces. Vacuum thoroughly before moving to the next grit. Repeat this process with a medium grit (e.g., 100 or 120) to smooth out the initial scratches, and then finish with a fine grit (e.g., 150-220) to achieve a silky-smooth surface ready for finishing. Each progressive grit should remove the scratch marks left by the previous, coarser grit.
Step 3: Restaining the Wood (Optional)
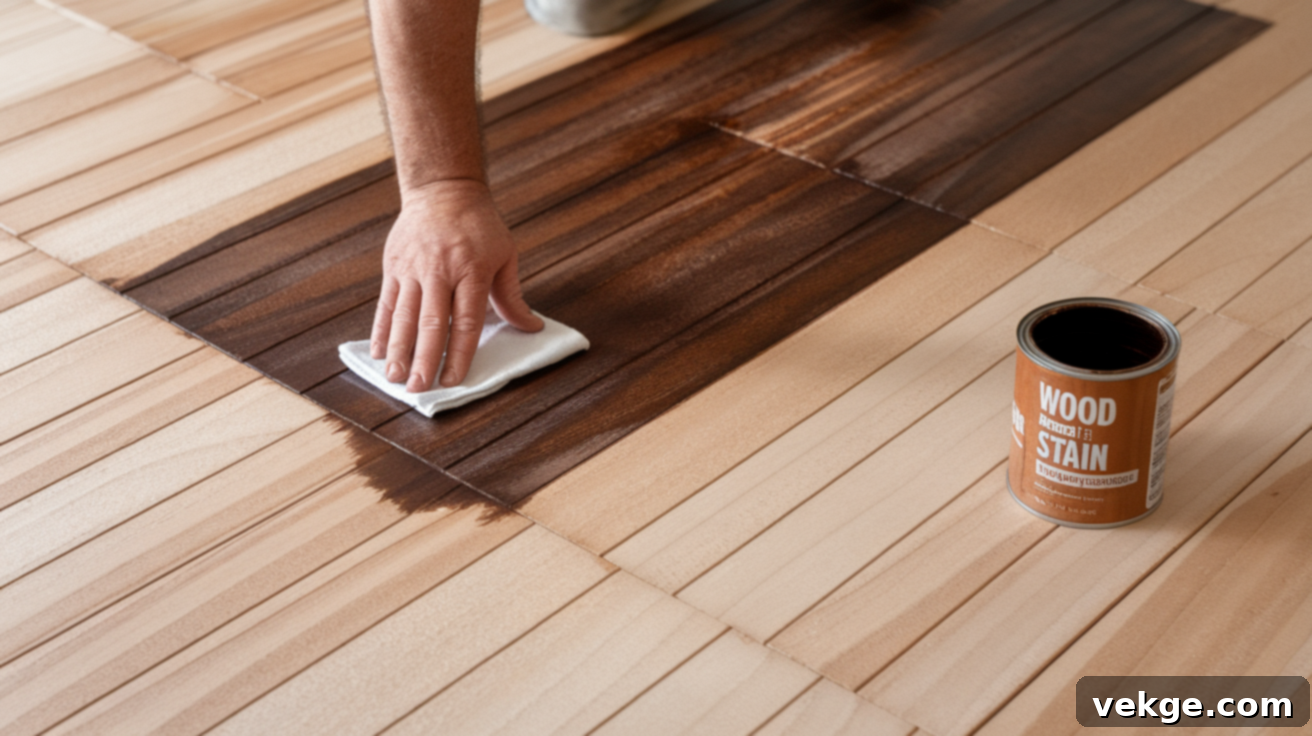
If, after careful sanding, your engineered hardwood’s wear layer remains sufficiently thick and intact, you have the option to change or enhance its color with a wood stain. This step is purely optional but can dramatically alter the room’s aesthetic. Choose a high-quality wood stain that is compatible with engineered hardwood and your chosen finish. Before applying, test the stain in an inconspicuous area (like a closet or under an appliance) to ensure you achieve the desired color. Apply the stain evenly with a clean cloth or applicator, working in small sections and wiping off any excess before it dries to avoid blotchiness. Allow the stain to dry completely according to the manufacturer’s instructions, which can take several hours or even overnight. Proper drying is crucial to ensure the subsequent finish adheres correctly.
Step 4: Applying a New Protective Finish
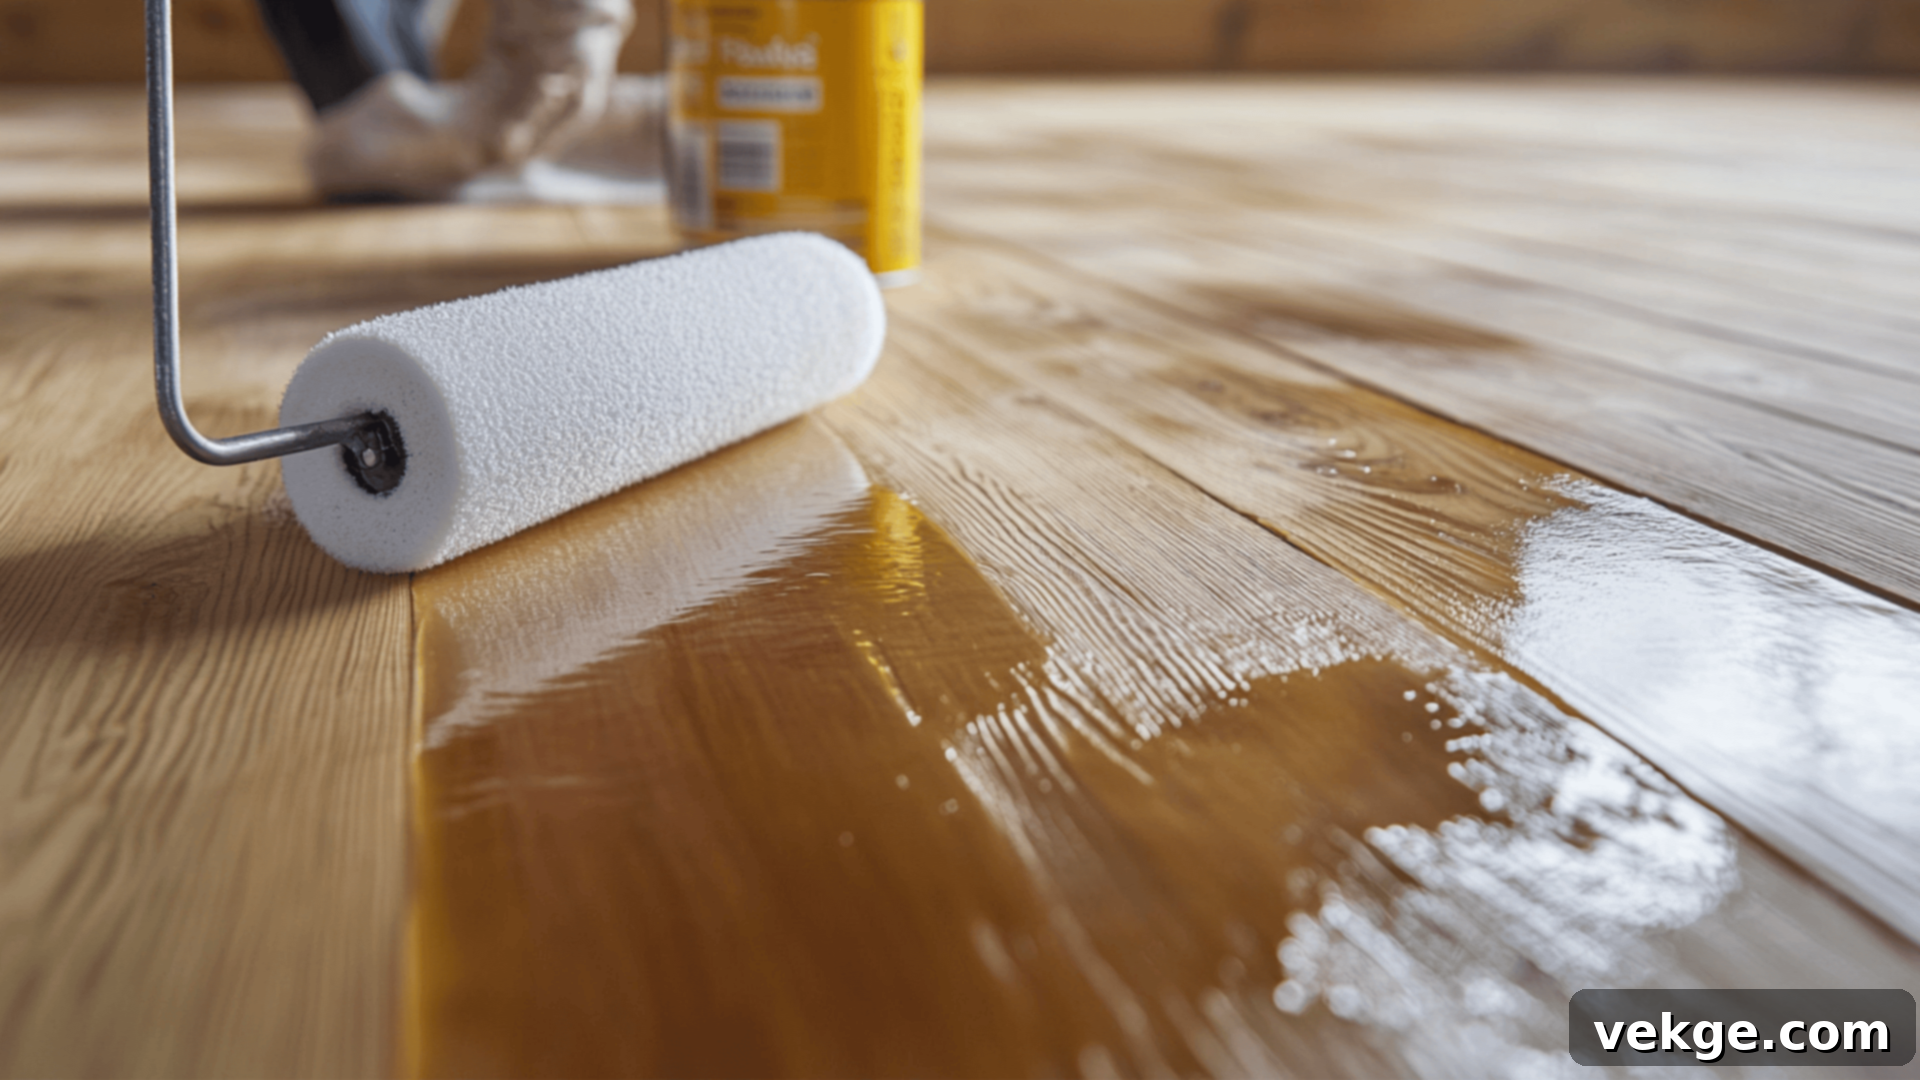
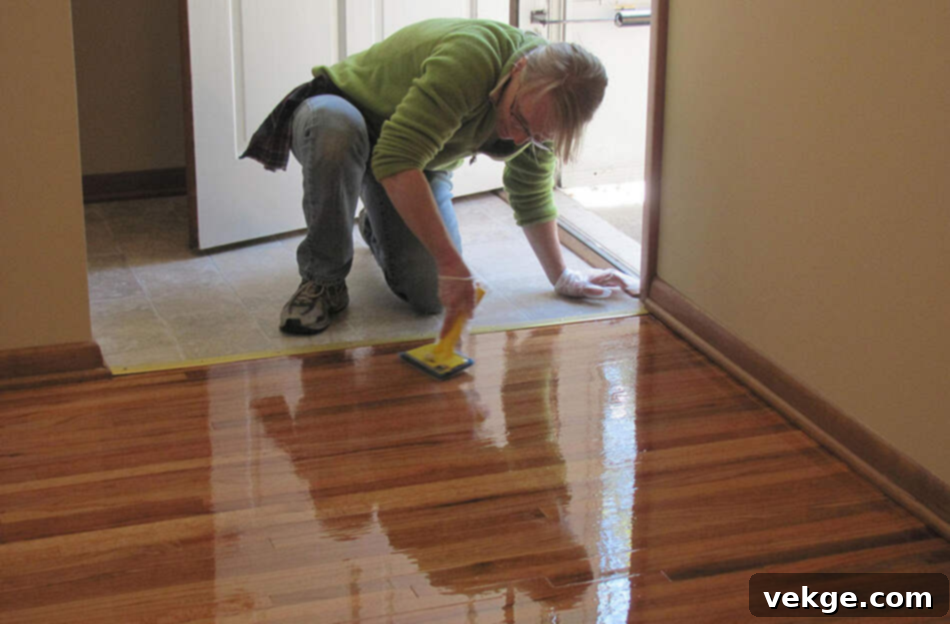
Once sanding is complete and any optional staining has fully dried, it’s time to apply the protective finish. Polyurethane is the most common choice, available in water-based or oil-based formulations. Water-based polyurethane is favored for its faster drying time, lower odor, and clearer finish, which doesn’t amber over time. Oil-based polyurethane, conversely, offers excellent durability and a warmer, amber tone that deepens with age. Apply the finish in thin, even coats using a T-bar applicator, roller, or brush. Work from one end of the room to the other, moving towards the exit. Allow each coat to dry thoroughly according to the manufacturer’s instructions before applying the next. Lightly abrade (buff with a fine screening pad or sandpaper, 220-grit or higher) between coats to ensure good adhesion, then vacuum and wipe clean before the next application. For robust, long-lasting protection, aim for at least two to three coats, or even more in high-traffic areas. The final coat typically requires a longer curing time before heavy furniture can be moved back or rugs can be laid down.
When to Recoat Instead of Refinish
Not every floor showing signs of wear requires a full, aggressive sanding and refinishing process. In many situations, a simpler and less invasive method called “screen and recoat” can effectively restore the floor’s luster and protective layer, extending its life without the significant undertaking of a full refinish.
The key to choosing between recoating and refinishing lies in the nature and depth of the damage to your floor. If the wear is superficial and primarily affects the finish rather than the wood veneer itself, recoating is often the smarter, quicker, and more cost-effective choice.
What is a Screen and Recoat Process?
A screen and recoat is a method designed to refresh the top protective layer of your engineered hardwood without removing any of the wood veneer. The process involves:
- Deep Cleaning: The floor is thoroughly cleaned to remove all dirt, grease, and residue.
- Screening/Buffing: A floor buffer equipped with an abrasive screen (usually 120-180 grit) is used to lightly abrade the existing finish. This step scuffs the surface, creating a microscopic texture that allows the new finish to adhere properly. It removes surface scratches and dullness but does not penetrate into the wood itself.
- Vacuuming and Wiping: The floor is meticulously vacuumed and then wiped down with a tack cloth or a damp mop to remove all dust particles.
- Applying New Finish: One or two fresh coats of polyurethane finish are applied over the abraded surface, restoring its shine and protective qualities.
This process is much less messy, faster, and typically more affordable than a full sand and refinish, making it an excellent maintenance option for floors showing minor wear.
When Recoating is the Better Choice for Engineered Hardwood
Recoating is the ideal solution for engineered hardwood floors that exhibit:
- Light Surface Scratches: Scratches that are only in the finish and do not penetrate into the wood veneer (you can’t catch your fingernail in them).
- Dullness or Lack of Shine: When the floor has lost its original luster due to everyday foot traffic and cleaning, but the wood itself is still in good condition.
- Minor Scuffs and Abrasion Marks: Surface marks from shoes or light furniture movement.
- Thin Wear Layer: For floors with a very thin wear layer (under 2mm), where sanding would be too risky and could expose the core.
- No Deep Stains or Gouges: If there are no deep gouges, significant color changes, or stains that have penetrated the wood itself. Recoating will not fix these deeper issues.
Recoating extends the life of your floor by reinforcing the protective layer, preventing deeper damage to the wood. It’s a proactive maintenance step that can delay the need for a full refinish by many years.
Common Visual Cues Indicating the Need for Refinishing or Recoating
Understanding when your engineered hardwood floors need attention is crucial for their longevity and appearance. Here are some common visual cues:
- Widespread Dullness: If your floor looks consistently dull or lacks its original sheen even after thorough cleaning, the protective finish is likely wearing thin.
- Surface Scratches: Minor scratches that are only visible in the top coat of the finish (not deep into the wood) often indicate that a recoat is sufficient. If scratches are deep enough to catch your fingernail or expose bare wood, then sanding and refinishing might be necessary.
- Fading or Discoloration: Uneven fading, particularly in high-traffic areas or spots exposed to sunlight, suggests the finish is no longer providing adequate protection, and the wood itself is being affected.
- Rough or Textured Areas: If the floor feels rough or less smooth in certain spots, it can indicate that the finish has worn away, leaving the wood more vulnerable.
- Water Spots or Stains: Persistent water rings or dark spots that don’t wipe away often mean moisture has penetrated the finish and stained the wood, usually necessitating sanding to remove the affected layer.
- The “Water Test”: A simple test is to put a few drops of water on a questionable spot. If the water beads up, the finish is still largely intact. If it soaks in quickly and darkens the wood, the finish is worn through, and the wood is exposed, signaling a need for refinishing.
By regularly monitoring these signs, you can address issues promptly, choosing between a less intensive recoat or a full refinish, and ultimately preserving the beauty and integrity of your engineered hardwood floors.
Professional vs. DIY: What’s Better for Engineered Hardwood?
Deciding whether to tackle engineered hardwood refinishing yourself or hire a professional is a significant consideration. The “right” choice hinges on several factors: the condition and value of your floors, your personal skill level, the time you have available, and your budget.
When to Hire a Professional for Engineered Hardwood Refinishing
Hiring a professional is often the safer and more reliable option, especially in these scenarios:
- Thin Wear Layer: If your engineered hardwood has a very thin veneer (e.g., 2mm or less), the risk of sanding through to the core is extremely high. Professionals have the experience and specialized equipment (like dustless sanders and fine-tuned orbital sanders) to work with minimal material removal.
- Expensive or High-Value Floors: For premium or custom engineered hardwood, the cost of a professional service is a small investment compared to the potential expense of replacing floors damaged by improper DIY attempts.
- Deep Damage or Extensive Repairs: If your floor has significant gouges, deep stains, or loose planks that require intricate repair before sanding, a professional will have the expertise to address these issues correctly.
- Uneven or Challenging Subfloors: Floors with uneven sections or those in oddly shaped rooms can be tricky to sand evenly. Professionals have the skill to adapt their techniques to these challenges.
- Lack of Experience or Time: Operating heavy-duty sanding equipment effectively requires practice and a feel for the machine. If you’re unfamiliar with the process or simply don’t have the time to dedicate to a multi-day project, a pro will complete the job efficiently and with high quality.
- Warranty Concerns: Some engineered hardwood manufacturers may have warranty clauses that require professional installation or refinishing.
While hiring a professional incurs a higher upfront cost, it often provides peace of mind, superior results, and reduces the risk of costly mistakes.
DIY Approach for Engineered Hardwood
A DIY approach can be rewarding and budget-friendly, but it comes with its own set of challenges and demands:
- Thick Wear Layer: DIY is most suitable when your engineered hardwood has a generous wear layer (4mm or thicker), providing a greater margin for error.
- Mild Surface Wear: If your floor only requires a light sanding to remove superficial scratches and old finish, a DIY job is more manageable.
- Budget-Friendly Projects: Renting equipment and purchasing materials is generally cheaper than professional services, making DIY attractive for those on a tight budget.
- Requires Proper Tools, Patience, and Careful Technique: You’ll need to rent or purchase the necessary equipment, learn how to operate it safely, and commit to following each step meticulously. A mistake, such as stopping the sander in one spot or applying too much pressure, can leave permanent marks or sand through the veneer.
- Time Commitment: A DIY refinishing project is time-consuming, spanning several days for sanding, drying between coats, and final curing.
Professional vs. DIY: Quick Comparison
This table summarizes the key considerations when choosing your approach:
| Option | Best For | Things to Watch For |
|---|---|---|
| Hire a Pro | Expensive floors, thin wear layers, deep damage, complex repairs, peace of mind | Higher cost; ensure you hire a reputable and experienced professional |
| DIY Approach | Thick wear layers, mild surface wear, budget-friendly projects, hands-on experience | Requires proper tools, significant time commitment, patience, and very careful technique to avoid costly mistakes |
Ultimately, the biggest differentiator between solid hardwood and engineered hardwood (in terms of refinishing) is the thickness of the top layer. A pro can confidently handle tricky engineered floors, especially if repairs or deep sanding are needed. DIY works well if the wear layer is thick enough and you’re ready to follow each step with utmost care and attention to detail.
Post-Refinish Maintenance Tips for Engineered Hardwood
Once your engineered hardwood floors have been beautifully refinished, the work isn’t over. Proper ongoing maintenance is key to preserving their renewed appearance and extending the life of the fresh finish. Simple, consistent habits can significantly delay the need for another round of sanding or repairs, keeping your floors looking pristine for years.
Daily and Weekly Cleaning Routine
To protect your new finish and prevent premature wear, adopt a gentle but effective cleaning routine:
- Regular Sweeping or Vacuuming: Daily or every other day, sweep with a soft-bristle broom or vacuum with a hard floor attachment. This removes grit and abrasive particles that can scratch the finish.
- Damp Mopping: Use a damp mop (not soaking wet) with a pH-neutral, floor-safe cleaner specifically designed for engineered hardwood. Avoid harsh chemicals, oil-based soaps, steam cleaners, or excessive water, as these can damage the finish and even the wood itself.
- Immediate Spill Cleanup: Accidents happen, but prompt action is crucial. Wipe up spills immediately with a clean, dry cloth to prevent moisture from penetrating the finish and causing stains or damage.
- Avoid Abrasives: Never use abrasive cleaners, steel wool, or harsh scrubbing pads on your engineered hardwood floors.
Long-Term Protection and Preventative Measures
Beyond daily cleaning, implementing long-term protective measures will safeguard your investment:
- Furniture Pads: Place felt or rubber pads under the legs of all furniture to prevent scratches and dents when items are moved.
- Area Rugs and Mats: Use area rugs in high-traffic zones (e.g., living rooms, hallways) and entry mats at all exterior doors. These act as barriers, trapping dirt, moisture, and debris before they can reach your floors.
- Maintain Consistent Humidity: Engineered hardwood is more stable than solid wood, but extreme fluctuations in temperature and humidity can still affect it. Aim to keep your home’s humidity levels between 35-55% using humidifiers in dry months and dehumidifiers in humid seasons.
- Lift, Don’t Drag: When moving heavy furniture or appliances, always lift them rather than dragging them across the floor. Use furniture glides or moving blankets for protection.
- Pet Care: Keep pet nails trimmed to minimize scratches.
- Consider a Recoat Schedule: Depending on foot traffic, plan to have your floors professionally “screened and recoated” every 3-7 years. This proactive measure replenishes the protective layer before extensive damage occurs, significantly delaying the need for a full refinish.
- UV Protection: If your floors are exposed to direct sunlight, consider using UV-protective window films or closing blinds/curtains during peak sun hours to prevent fading.
By diligently following these maintenance tips, you can ensure your refinished engineered hardwood floors retain their beauty, durability, and value for many years to come.
Conclusion: Confidently Refinishing Your Engineered Hardwood Floors
The question, “Can you sand engineered hardwood?” now has a clear and nuanced answer: yes, absolutely, provided your floor’s wear layer is thick enough and you approach the task with careful planning and execution. This guide has equipped you with the essential knowledge, from understanding the layered construction of engineered hardwood and assessing its refinishing potential, to gathering the right tools and meticulously following a step-by-step sanding process.
You’ve learned to differentiate between when a full sand and refinish is necessary and when a simpler, less invasive “screen and recoat” can effectively revitalize your floors. This distinction is crucial, as it can save you considerable time, money, and potential headaches, preventing costly damage to your investment. We’ve also weighed the pros and cons of a DIY approach versus hiring a professional, empowering you to make the best decision based on your specific floor, budget, and skill level.
Remember, the longevity of your engineered hardwood floors after refinishing largely depends on consistent post-maintenance care. By adopting good cleaning habits and implementing protective measures, you can ensure your revitalized floors remain a beautiful and durable feature of your home for many years to come. Take your time, protect that precious wear layer, and enjoy the renewed beauty of your engineered hardwood.
For more down-to-earth tips on floor care, home renovations, and general household maintenance, be sure to explore other valuable resources on our website. Keep your space looking its absolute best, free from guesswork and full of confidence!
