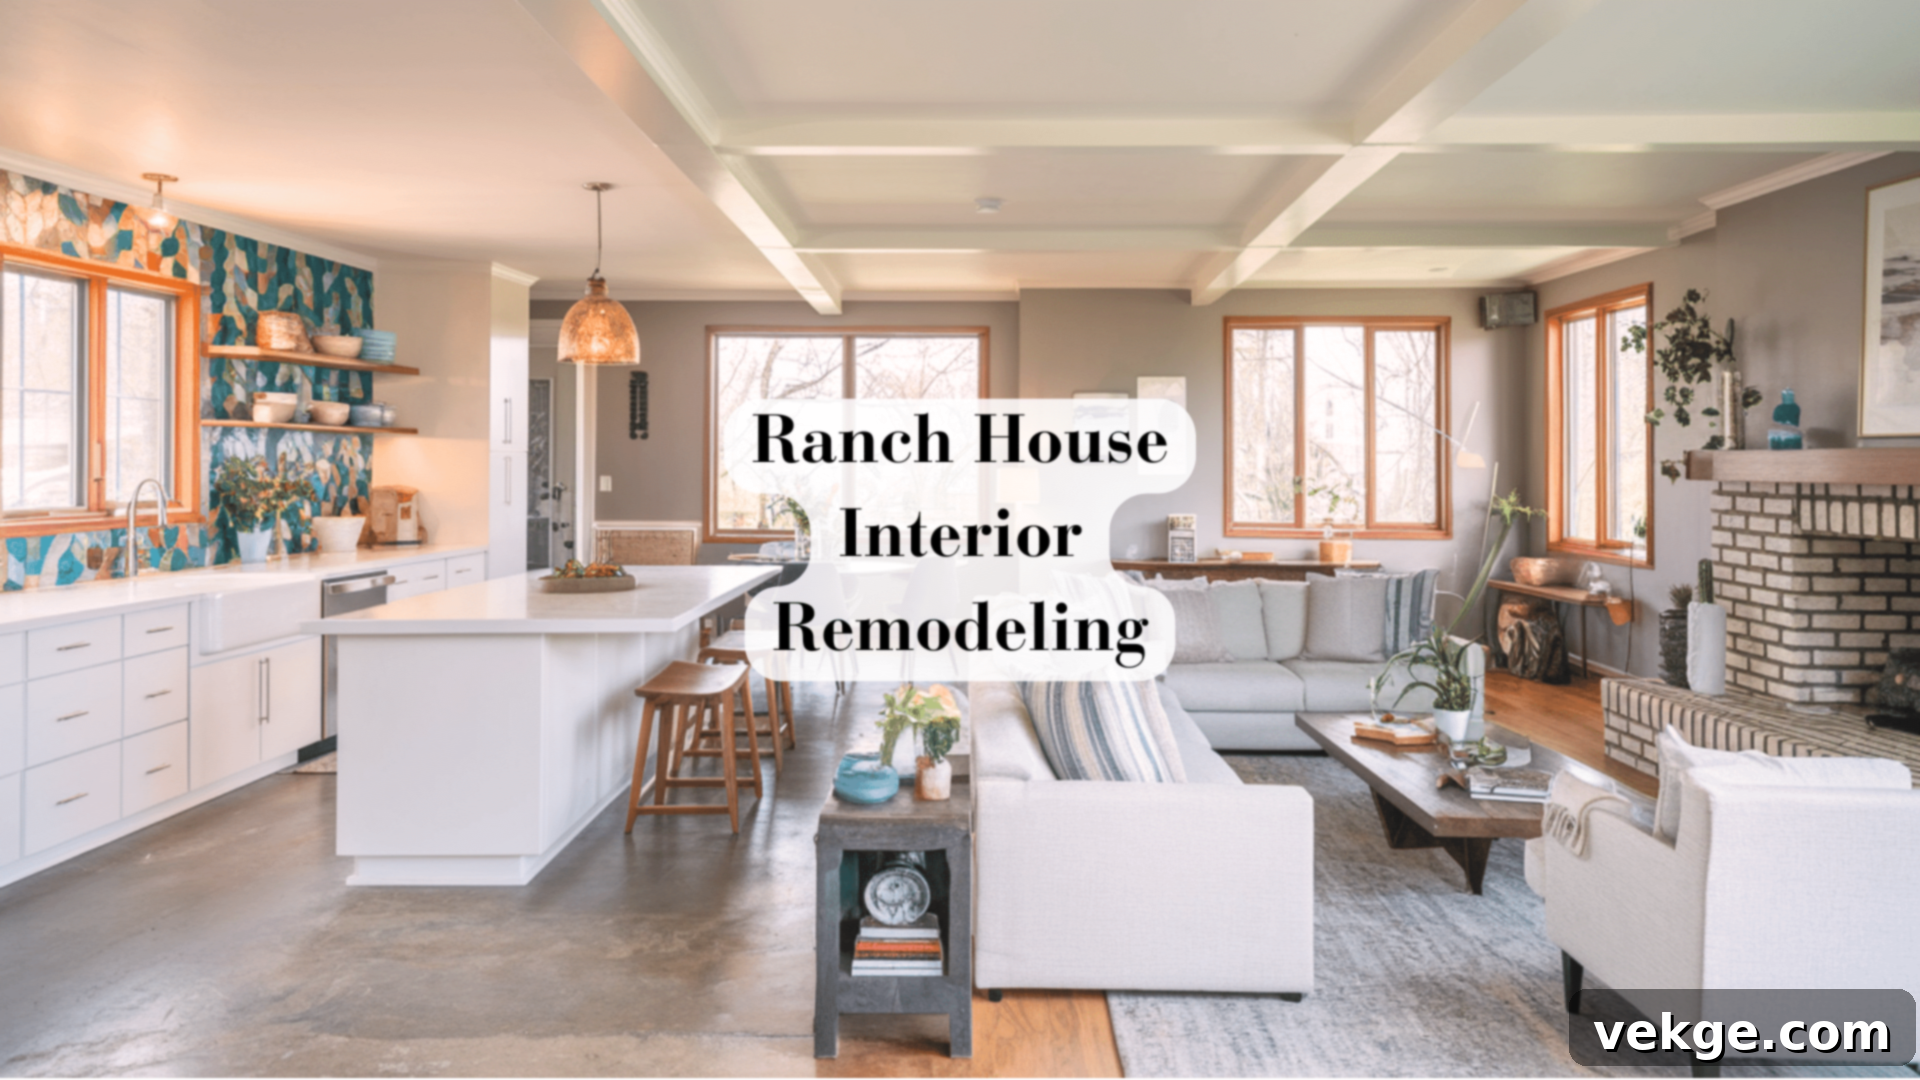
From Dated to Dream: My Complete 1960s Ranch House Renovation and Modernization Guide
When I first stepped into this 1960s ranch house, I was greeted by peeling wallpaper, worn-out carpets, and a sense of a bygone era. It was clear the home needed a significant refresh. However, beneath those outdated surfaces, I saw the robust bones of a fantastic home, brimming with untapped potential and just waiting to be lovingly restored and reimagined for modern living. This was more than just a house; it was a canvas for a dream transformation.
My six-month renovation journey meticulously turned this tired, compartmentalized ranch into a vibrant, open-concept family space. Crucially, we achieved this while respectfully preserving and highlighting its inherent mid-century charm and architectural integrity. If you’re contemplating purchasing an older ranch house, or already own one and are considering a significant overhaul, this comprehensive guide will illustrate the incredible possibilities and practical steps involved in such a rewarding project. It’s a testament to how thoughtful design and strategic planning can breathe new life into an older property.
I will walk you through every critical stage of our remodel, sharing the practical insights and hard-earned lessons from someone who lived through every dusty day and tough decision. This includes:
- Strategic approaches we employed to keep our renovation costs firmly under control.
- Which original, character-defining features we meticulously saved and integrated into the new design.
- A compelling visual journey with detailed before and after photos of every key room, showcasing the dramatic transformation.
As someone who has navigated the challenges and triumphs of a full-scale ranch renovation, I’m eager to share honest, actionable tips to help ensure your own mid-century modernization project proceeds as smoothly and successfully as possible.
Assessing the Original Layout and Unlocking Hidden Potential
Upon my initial walk-through, the shortcomings of the original 1960s layout were immediately apparent. The living room, for instance, felt perpetually dim, largely due to its small, strategically placed front windows that severely limited natural light penetration. The kitchen was a classic example of its era: a small, isolated room, completely walled off and disconnected from the rest of the home, making it feel more like a service area than the heart of family life.
Each bedroom floor was covered in ubiquitous brown carpet, contributing to a muted, uninspiring aesthetic. The hallways were further darkened by pervasive wood paneling, amplifying the enclosed sensation. This configuration of closed-off rooms created a distinctly “boxed-in” feeling that simply didn’t align with contemporary family living, where interaction and openness are highly valued. The kitchen, in particular, highlighted this disconnect with its cramped layout, barely accommodating one person to cook comfortably, let alone serving as a gathering space for family or guests.
However, it wasn’t all about what needed changing. The house held significant underlying strengths. Beneath the worn carpet, we discovered solid hardwood floors, just waiting to be uncovered and restored to their original glory. The sturdy brick fireplace stood as a natural, impressive centerpiece in the living room, a feature we knew we wanted to preserve and enhance. Even better, the foundation showed no signs of structural problems, providing a solid base for our ambitious plans.
The main issues to address became crystal clear: the pervasive walls obstructed natural light and stifled flow, and the outdated electrical systems were woefully inadequate for handling modern appliances and technology. Additionally, the existing small closets required a complete overhaul to incorporate better, more efficient storage designs, overcoming the limitations of a closed floor plan that deceptively made spaces feel smaller than their actual footprint. I dedicated considerable time in each room, meticulously noting which original features possessed the charm and structural integrity to be updated, and which genuinely required a fresh start. This deep understanding of the property’s nuances was instrumental in crafting our renovation plan, allowing us to brighten and expand spaces while thoughtfully maintaining and celebrating the home’s fundamental mid-century character and inherent appeal.
Opening Up: Creating an Inviting Open-Concept Living Space
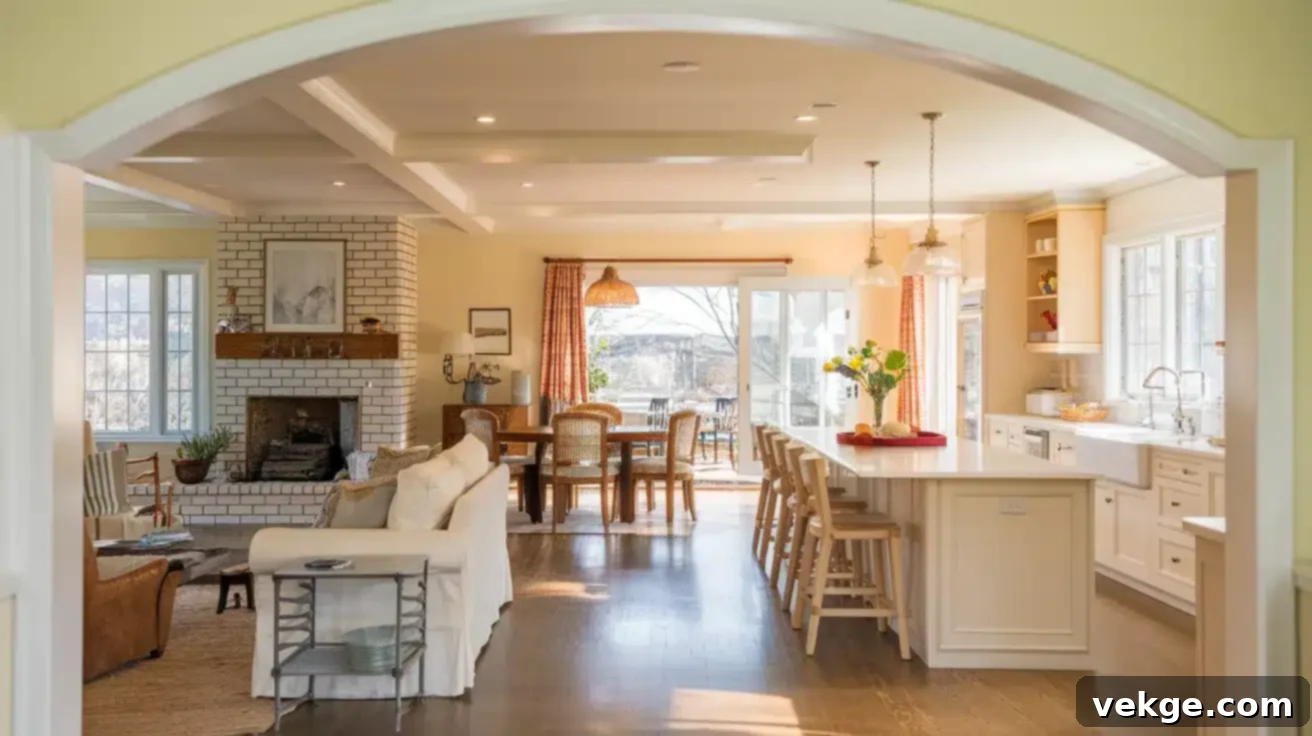
The most transformative change, undeniably, was the removal of key walls between the kitchen, dining room, and living area. This was far from a simple swing of a hammer; it was a complex structural undertaking that required the expertise of a professional structural engineer to meticulously assess which walls were load-bearing and how best to support the upper structure once they were removed. This critical first step ensured both safety and the long-term integrity of the home.
What We Uncovered Behind the Walls
- Main Support Beams: Several walls proved to be load-bearing, necessitating the installation of new steel beams and reinforcement to safely support the roof and upper floor. This was a significant part of the structural work.
- Outdated Wiring: We encountered antiquated electrical wiring throughout the removed sections, much of which was knob-and-tube or early Romex that didn’t meet current safety codes. This discovery mandated a complete electrical system update in these areas.
- Plumbing Pipes: Existing plumbing pipes for the kitchen were embedded within some of the walls. We strategically chose to reroute these to accommodate the new kitchen island and appliance layout, optimizing functionality and aesthetics.
The entire wall-removal and structural reinforcement process, coupled with the necessary electrical and plumbing adjustments, extended over three weeks. Despite the inherent dust, noise, and temporary disruption, the final outcome was undeniably worth every challenging day. Now, when I’m preparing meals in the kitchen, I can effortlessly engage in conversation with family members relaxing in the living room. Natural light, once confined, now floods from the large living room windows, reaching deep into the back of the house, dramatically altering the home’s ambiance.
This new, expansive open layout has profoundly redefined how we utilize the space. Children can comfortably complete their homework at the spacious kitchen counter while I prepare dinner, fostering a sense of togetherness. During social gatherings, friends naturally gravitate towards and around the large island, making entertaining seamless and preventing guests from feeling isolated in separate rooms. The entire main floor now feels considerably larger and more welcoming, a remarkable feat given that we didn’t add any actual square footage to the house.
Mindful of the home’s history, we carefully preserved the original archway situated between the front door and the living room. This feature beautifully frames the entry space and serves as a subtle, elegant reminder of the home’s mid-century roots. To further define each area within the open plan while maintaining connectivity, we incorporated wide-cased openings where walls once stood. This design choice provides a visual boundary without sacrificing the airy, expansive feel.
Small Changes that Made Big Differences in the Open Layout
- Relocating the Refrigerator: Moving this large appliance to a more accessible yet less obstructive position significantly improved kitchen traffic flow, eliminating bottlenecks during meal prep.
- Adding a Central Island: The new kitchen island not only provided extensive additional counter space but also created a dynamic hub for casual dining, homework, and social interaction.
- Installing Recessed Lighting: Strategically placed recessed lights throughout the main living areas eliminated dark corners and provided adaptable, ambient illumination, enhancing the overall brightness and warmth.
Modernizing the Heart: A Bright and Functional Kitchen Renovation
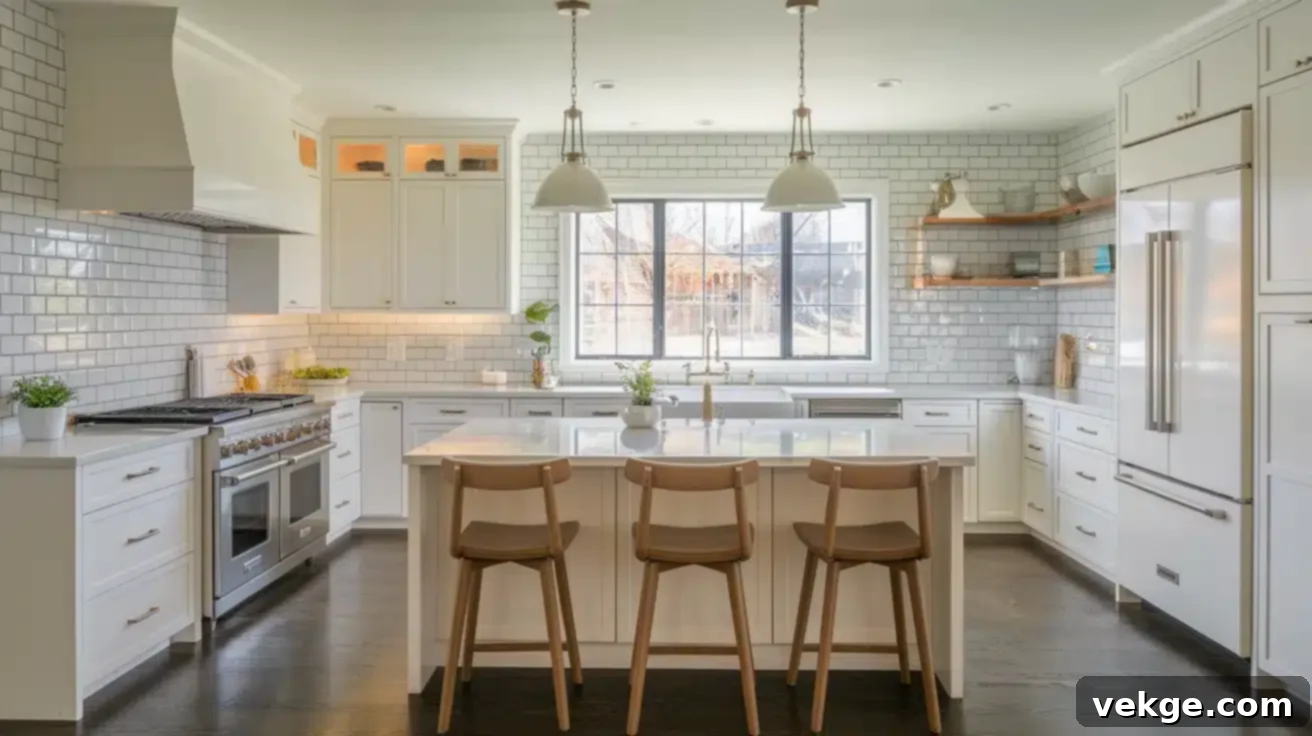
The original kitchen was a vivid testament to its age, characterized by dated yellow laminate countertops and tired, brown cabinets that offered minimal storage and functionality. In conceptualizing the new space, my primary goal was to achieve clean lines and bright, durable surfaces that would not only look fresh and contemporary now but also stand the test of time, maintaining their appeal for many years to come. This focus on timeless design was paramount.
The New Kitchen Layout Boasts:
- A Generous 6-Foot Island: This serves as the true centerpiece, offering comfortable seating for four and becoming a natural gathering spot for family and friends.
- Double the Original Counter Space: We dramatically increased usable countertop area, providing ample room for meal preparation, baking, and appliance placement.
- Efficient Pull-Out Drawers: Instead of traditional lower cabinets, deep pull-out drawers were installed for pots, pans, and small appliances, ensuring everything is easily accessible without bending or rummaging.
- A Floor-to-Ceiling Pantry Wall: This dedicated pantry area provides extensive, organized storage for groceries, dry goods, and bulk items, maximizing vertical space.
The walls are now lined with classic white shaker cabinets, chosen for their timeless aesthetic and clean lines. These are beautifully complemented by quartz countertops in a soft, elegant gray. I selected these materials not just for their aesthetic appeal but, more importantly, for their renowned durability and remarkably easy upkeep. There’s no need for specialized cleaners or elaborate maintenance routines—just simple soap and water are sufficient to keep everything looking pristine and new, which is a huge benefit for a busy family.
The backsplash introduces a subtle layer of texture and visual interest, created by white subway tiles laid in a classic brick pattern. This choice adds a touch of traditional charm that blends seamlessly with the modern elements. Under-cabinet lighting was installed to provide targeted illumination for food preparation, making tasks easier and safer, and it also casts a warm, inviting glow in the evenings, enhancing the kitchen’s ambiance.
Intelligent Storage Solutions Implemented
- Corner Cabinets with Lazy Susans: These ingenious rotating shelves maximize the use of otherwise awkward corner spaces, making every item easily reachable.
- Deep Drawers Instead of Lower Cabinets: As mentioned, these were a game-changer for organizing pots, pans, and even small appliances, vastly improving accessibility and reducing clutter.
- Dedicated Coffee Station with Hidden Outlets: A specific area was designed for coffee makers and related accessories, with outlets cleverly tucked away to maintain a clean, uncluttered look.
- Built-In Recycling and Trash Bins: Integrated pull-out bins for recycling and trash keep unsightly waste out of sight, promoting a cleaner and more organized kitchen environment.
When selecting appliances, our focus was on simple controls, energy efficiency, and unwavering reliability. The gas range features straightforward, intuitive knobs that anyone can operate, embodying user-friendliness. The French door refrigerator offers excellent visibility of all contents at a glance, minimizing food waste. My personal favorite morning spot has become the enlarged window situated over the sink. We expanded its size to maximize the influx of natural light and to provide a serene view of the backyard. A pull-down faucet paired with a deep sink basin makes cleaning large pots and pans considerably easier, further enhancing the kitchen’s practical appeal.
Revitalizing Bedrooms and Bathrooms for Comfort and Functionality
Each bedroom’s transformation began with the satisfying removal of the old, worn carpet, revealing the beautiful, original hardwood floors hidden beneath. The extensive process of sanding and refinishing these floors brought out their inherent warm wood tones, which now flow seamlessly through all the main living areas, creating a cohesive and inviting aesthetic. These rich wood tones provided the perfect foundation for crafting restful, serene spaces that feel fresh and modern without being overly fussy or sterile.
Main Bedroom Updates Focus on Comfort and Organization
- New, Energy-Efficient Windows: We installed new windows that operate smoothly, offer superior insulation, and seal properly, significantly improving energy efficiency and comfort.
- Enhanced Closet Organization: The main closet received a complete overhaul with adjustable shelving, multiple hanging rods, and drawers, maximizing storage capacity and organization.
- Quiet, Simple Ceiling Fan: A modern, low-profile ceiling fan was added for improved airflow and comfort, particularly during warmer months, without distracting from the room’s calm atmosphere.
- Soft Gray Walls: The walls were painted in a soothing, versatile soft gray, a neutral backdrop that complements any bedding colors or decor choices, allowing for easy updates over time.
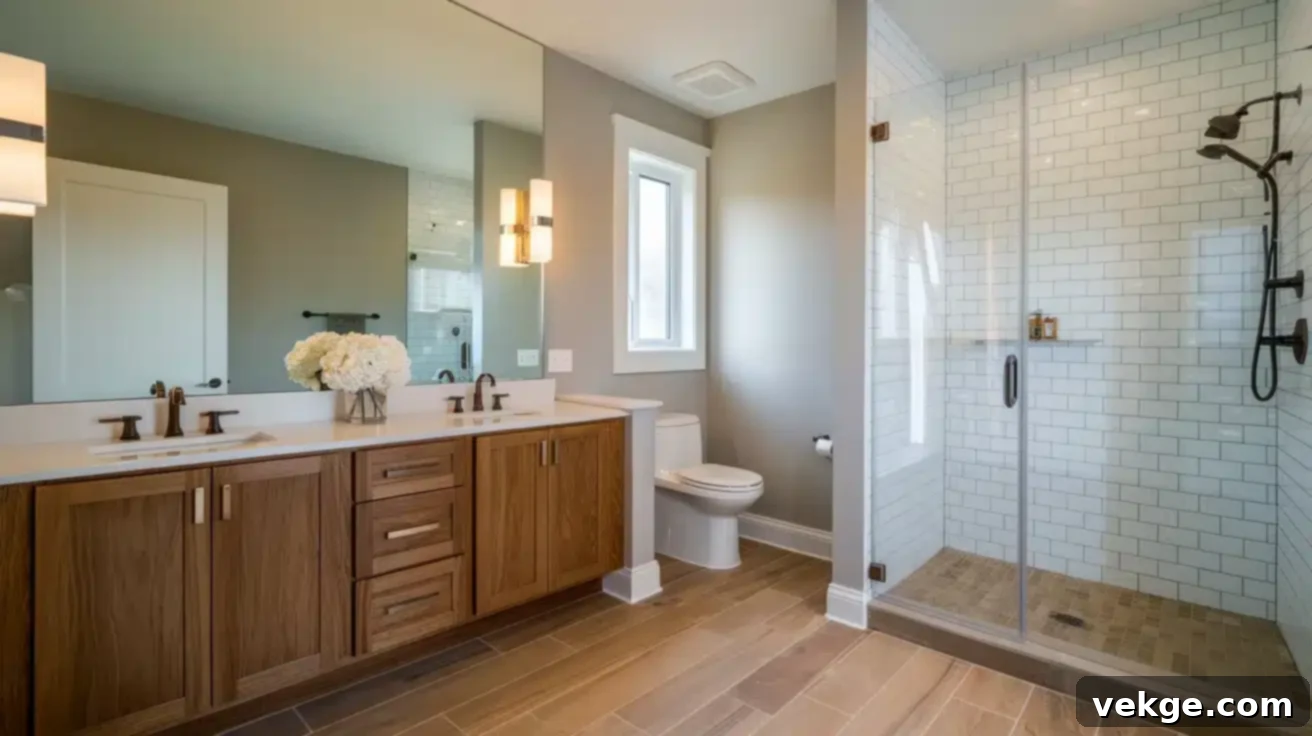
The attached main bathroom required the most comprehensive renovation. We undertook a complete gut remodel, which allowed us the opportunity to reconfigure the layout. By strategically relocating an existing linen closet, we were able to expand the shower significantly, transforming it into a much more spacious and luxurious enclosure. The new layout now features a double vanity, providing ample counter space for two, along with generous storage underneath for toiletries and linens. Simple white tiles in the shower contribute to a bright, clean aesthetic, while wood-look porcelain floor tiles introduce warmth and a touch of natural elegance, complementing the bedroom’s hardwood floors.
Guest Bathroom Improvements Prioritize Practicality and Style
- Updated Plumbing System: We replaced old pipes to ensure much better water pressure and overall system reliability, eliminating common issues found in older homes.
- Built-In Medicine Cabinet: A recessed medicine cabinet was installed for discreet, yet easily accessible, extra storage for medications and personal care items.
- New Tub with Curved Shower Rod: A modern, comfortable tub was installed, paired with a curved shower rod that subtly increases elbow room within the shower, enhancing comfort.
- Easy-Clean Porcelain Tile Floors: Durable, non-slip porcelain tiles were chosen for the floor, offering both aesthetic appeal and ease of cleaning, a practical consideration for a guest bath.
The kids’ rooms also received thoughtful, practical updates designed for their specific needs. We installed deeper closets equipped with lower rods, making it easier for them to reach and organize their own clothes, fostering independence. A section of one wall in each room was painted with magnetic paint, allowing them to proudly display artwork and photos without causing any damage to the walls. In both bathrooms, we selected fixtures that strike an ideal balance between appealing aesthetics and cost-effectiveness. The chrome faucets and shower heads are basic, reliable models that integrate seamlessly with the overall design and perform exceptionally well. Wall-mounted toilets were chosen not only for their sleek, modern look but also for the practical benefit of making floor cleaning considerably easier.
One seemingly small change yielded a surprisingly big impact: the addition of exhaust fans equipped with humidity sensors in both bathrooms. These intelligent fans automatically activate when humidity levels rise, efficiently clearing steam, preventing mirror fogging, and crucially, keeping walls and ceilings dry, thus mitigating potential mold and mildew issues. The revitalized bedrooms and bathrooms now function far more effectively for every member of the family. They aren’t overtly fancy; rather, they are exceptionally well-planned, comfortable spaces designed to make daily routines smoother, more pleasant, and effortlessly organized.
Seamlessly Incorporating Mid-Century Modern Elements into the Design
The inherent architectural style of the 1960s ranch house profoundly influenced our design choices throughout the renovation. Our guiding principle was to respectfully acknowledge and celebrate the home’s original roots while simultaneously updating and adapting it for contemporary living. This delicate balance was achieved by emphasizing clean lines, simple shapes, and functional aesthetics—hallmarks of mid-century modern design—in every update we undertook.
Original Features We Thoughtfully Preserved and Highlighted
- The Living Room’s Iconic Brick Fireplace: This sturdy, original feature was cleaned, sealed, and became a focal point, grounding the newly opened space with a sense of history.
- Existing Wood Trim Around Windows: We carefully refinished and reused the original wood trim, maintaining a consistent aesthetic and reducing material waste.
- Built-In Shelves Flanking the Fireplace: These practical and charming shelves were retained, providing character and functional display space.
- Wide Window Sills: The generous depth of the original window sills was preserved, offering unique opportunities for decor and emphasizing the home’s solid construction.
Each room now beautifully showcases a harmonious blend of old and new pieces. For instance, we carefully selected a low-backed sofa for the living room that perfectly encapsulates the mid-century modern style without appearing dated. Its simple, unadorned form and elegantly tapered legs are characteristic of the era, while the choice of fresh, contemporary fabric gives it a distinctly current appeal. This deliberate mix creates a layered aesthetic that feels both authentic and fresh.
Carefully Selected Furniture Choices Reflecting the Era
- A Round Dining Table with Slim, Tapered Legs: This choice promotes conversation and echoes the sleek, minimalist design of the 1960s.
- Simple Wood Chairs with Clean Lines: These chairs complement the dining table, prioritizing function and form over excessive ornamentation.
- Low Profile Dressers in the Bedrooms: These pieces align with the horizontal emphasis often seen in mid-century furniture, creating a sense of spaciousness.
- Wall-Mounted Light Fixtures with Straight Lines: These fixtures reinforce the clean, geometric aesthetic, serving as both lighting and art elements.
Light fixtures played an especially significant role in defining and enhancing the desired style. We carefully chose simple glass globes for overhead lights, offering understated elegance and ample illumination. For wall sconces, we opted for designs with straight lines and minimal adornment, which seamlessly integrate with the home’s mid-century modern vibe. These small yet impactful touches collectively contribute to the home’s narrative, speaking to its past while living vibrantly in the present.
The walls also received thoughtful consideration. Rather than using busy, distracting patterns, we opted for solid, muted colors that allow the carefully selected furniture and art pieces to truly stand out. Our paint color palette was directly inspired by authentic 1960s design books, featuring soft whites, warm grays, and subtle earth tones that have proven to be timeless and continue to look sophisticated today. We intentionally mixed natural materials throughout, such as the beautifully restored original wood floors contrasting with new, sleek wood cabinets in the kitchen. Brass and black steel metal accents were strategically incorporated to add visual interest and a touch of modern industrialism without appearing overly fussy. Every single piece in the home serves a distinct purpose—nothing is purely ornamental. This commitment to functionality and purposeful design is a core tenet of mid-century modernism. Anyone embarking on a ranch house renovation should always begin by appreciating the “good bones” of the existing structure and build from that foundation. The key is to retain the strong, character-defining points of the original design while thoughtfully updating the elements that matter most to your contemporary lifestyle and needs.
Enhancing Natural Light and Optimizing Ventilation for a Brighter Home
The single most impactful transformation in how the house felt and functioned was undoubtedly the strategic effort to bring significantly more natural sunlight into every corner. This endeavor began with replacing the relatively small, often obscured original windows with larger, more expansive units that extended higher toward the ceiling, dramatically increasing the light-gathering surface area.
Key Window and Light Enhancements Implemented
- Installation of a Large Picture Window: A substantial picture window was added to the living room, offering uninterrupted views and flooding the space with an incredible amount of ambient light.
- New Glass Door to the Backyard: Replacing a solid back door with a full-pane glass door not only introduced more light but also seamlessly connected the interior living space with the outdoors.
- Two Solar Tubes in Dark Hallways: These innovative light channels were installed in previously dim, windowless hallways, effectively funneling natural sunlight from the roof into these core areas.
- Replacement with Clear Double-Pane Windows: All original, often cloudy or single-pane windows were upgraded to clear, energy-efficient double-pane units, improving insulation and clarity.
The positive impact of these changes extends beyond aesthetics; it’s also noticeably reflected in our monthly power bills. The abundance of natural light during the day means a significantly reduced reliance on artificial electric lighting, contributing to energy savings. Furthermore, the new windows are designed to open fully and smoothly, allowing for excellent cross-ventilation and inviting fresh air into the home whenever the weather permits, reducing the need for air conditioning.
The solar tubes, in particular, exceeded my expectations. These simple, tubular light channels proved incredibly effective at bringing bright, clean sunshine into interior spots where traditional windows simply wouldn’t fit or were impractical. They illuminate the central hallway so effectively that we rarely need to switch on overhead lights until the evening, a constant reminder of their efficiency.
Significant Ventilation Improvements Across the Home
- New Windows with Tilt-In Functionality: Many of the new windows feature a convenient tilt-in option, making them incredibly easy to clean from the inside, a practical consideration for maintenance.
- Screen Doors on Both Main Entrances: Installing robust screen doors on both the front and back entrances allows for excellent airflow throughout the day while keeping insects out.
- Ceiling Fans in Every Bedroom: Each bedroom was equipped with a new, quiet ceiling fan, providing customizable airflow and contributing to better thermal comfort, reducing reliance on central AC.
- Powerful Kitchen Range Hood: A high-capacity range hood was installed over the gas range, efficiently exhausting cooking odors and steam directly outside, keeping the kitchen air fresh and clean.
We gave extra thought to the bathroom windows. Frosted glass was chosen to allow ample natural light to stream in while maintaining complete privacy, a crucial balance. A small, high-placed window within the shower enclosure beautifully streams morning light without requiring any curtains or blinds, creating a spa-like feel. The new glass door leading to the backyard achieved more than just bringing in light—it subtly extended our living space, making the outdoor area feel like an integral part of our home. Opening it during gatherings allows for effortless flow between the interior and exterior, perfect for entertaining. These comprehensive changes collectively made the entire house feel dramatically more open, airy, and fresh. Beyond the aesthetic benefits, improved airflow means fewer stuffy rooms, significantly lower humidity levels, and noticeably reduced air conditioning costs during the warm summer months, enhancing both comfort and efficiency.
Updating Flooring and Fixtures: Blending Durability with Style
Discovering the original hardwood floors hidden beneath layers of old carpet was akin to unearthing a forgotten treasure. This unexpected find was a highlight of the renovation. We dedicated a full week to the painstaking process of sanding and meticulously refinishing them, which brought out the rich, warm oak tones that now flow beautifully and cohesively through the main living areas. This restoration not only saved costs but also preserved an authentic piece of the home’s history.
Thoughtful Floor Choices Tailored to Each Room’s Functionality
- Living Areas: The restored oak hardwood floors provide warmth, elegance, and durability, maintaining the home’s original character.
- Kitchen: We opted for large format porcelain tiles, which minimize grout lines, making cleaning much easier and contributing to a sleek, expansive look.
- Bathrooms: Non-slip ceramic tiles were chosen for safety and ease of maintenance, providing a practical yet stylish solution for wet areas.
- Mudroom: Durable slate tiles were installed in the mudroom, known for their robustness and ability to withstand heavy foot traffic and outdoor elements.
The kitchen floor required particular attention, especially given the high traffic and potential for spills. We deliberately chose large format tiles to significantly reduce the number of grout lines, which inherently simplifies cleaning. A clever tip shared by our tile setter was to select a dark grout color rather than white; this effectively hides dirt and minor stains, keeping the floor looking cleaner for longer between deep cleans.
Carefully Selected New Light Fixtures for Enhanced Illumination and Style
- Recessed Lights in the Kitchen: These provide bright, even overhead lighting without visual clutter, ideal for task lighting.
- Simple Pendant Lights Over the Island: Two elegant pendant lights were installed above the kitchen island, offering focused task lighting and a touch of modern design.
- Wall Sconces in Hallways: Strategically placed wall sconces provide soft, ambient lighting in hallways, enhancing safety and creating a welcoming atmosphere.
- Motion-Sensor Lights in Closets: These practical lights automatically turn on when a closet door opens and off when it closes, saving energy and improving visibility.
The bathroom fixtures demanded careful planning to balance aesthetics, functionality, and budget. We chose middle-range faucets from a trusted brand, prioritizing reliability and a timeless design over fleeting trends. While not the cheapest or the most extravagant, they offer excellent performance and a cohesive look. For our specific needs and to avoid complex wall-mounting, standard floor-mounted toilets made more practical sense than their wall-mounted counterparts.
Valuable Lessons We Learned During the Flooring and Fixture Updates
- Always Buy Extra Flooring Material: It is crucial to purchase at least 10-15% more flooring material than calculated; you will inevitably need it for cuts, mistakes, and future repairs.
- Test Grout Color on a Sample Board First: Grout color can appear differently in person than in a swatch. Always test it on a small, unobtrusive sample board to ensure it matches your vision.
- Verify Light Switch Placement Height: Ensure all light switches are installed at a comfortable and consistent height for easy access, avoiding awkward reaches.
- Ensure Ceiling Fans Are Centered in Rooms: Proper centering of ceiling fans is essential not only for aesthetic balance but also for optimal air distribution and comfort.
One particularly smart decision we made was hiring an experienced electrician to add numerous additional outlets throughout the house. Older homes are notoriously lacking in power points, which can be incredibly frustrating in today’s device-driven world. Now, each room boasts outlets every six feet, a seemingly small detail that has dramatically increased flexibility in furniture placement and device charging, making daily life far more convenient.
Before and After: A Visual Journey of The Ranch House Transformation
Let me walk you through each significant space and the remarkable changes we implemented. These compelling before and after photographs truly tell the story of the transformation more vividly than words alone, offering a direct comparison of the journey from dated to dream home.
Living Room Transformation
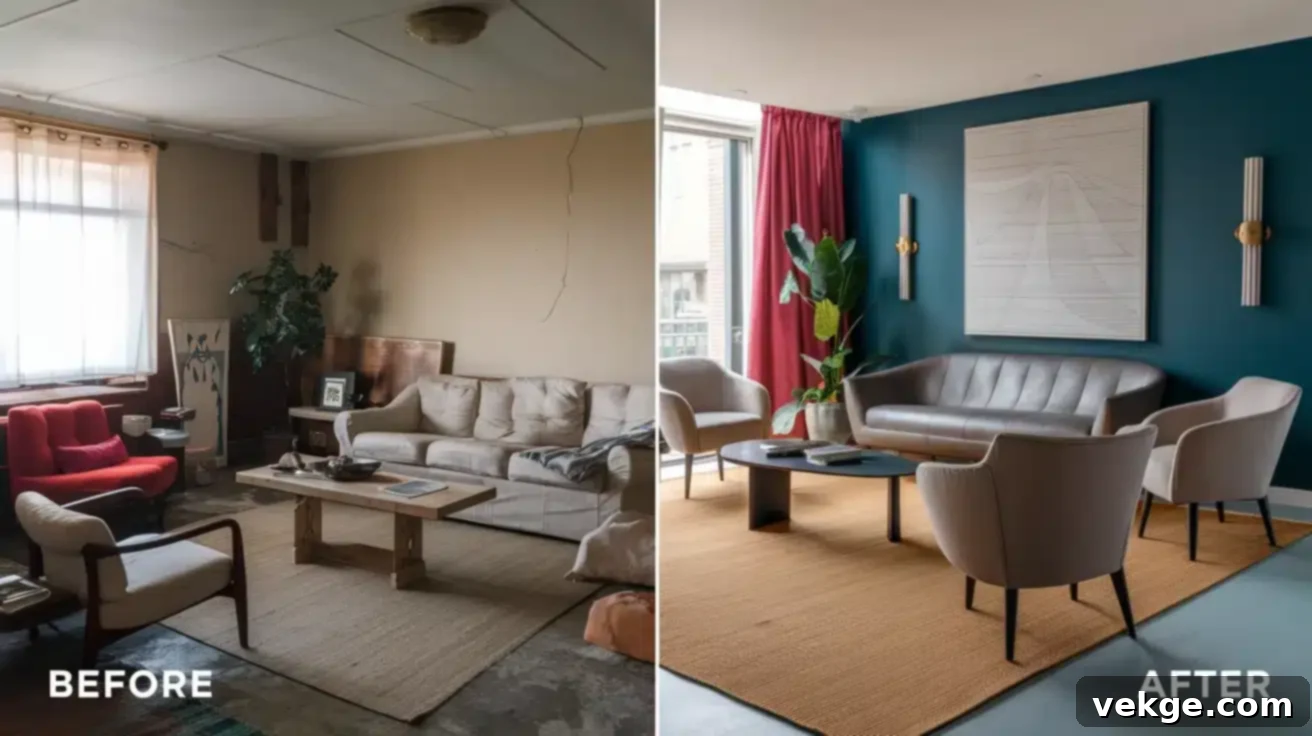
Before: The living room felt incredibly dark and enclosed. Its walls were completely covered in heavy, dark wood paneling, which absorbed light, and thick, oppressive curtains effectively blocked any natural light from reaching the interior. The once-charming brick fireplace was obscured by an outdated, orange-brown paint job, further contributing to the drab atmosphere. The space felt heavy, dated, and uninviting.
After: The transformation is dramatic. Light, neutral-toned walls now reflect and amplify natural light, making the space feel expansive and airy. The original brick fireplace has been meticulously cleaned, sealed, and stands proudly as a beautiful, authentic centerpiece, celebrating the home’s character. New, larger windows paired with simple, modern blinds now welcome an abundance of natural light, completely changing the mood and functionality of the room, making it bright, warm, and inviting for family gatherings and relaxation.
Kitchen Renovation
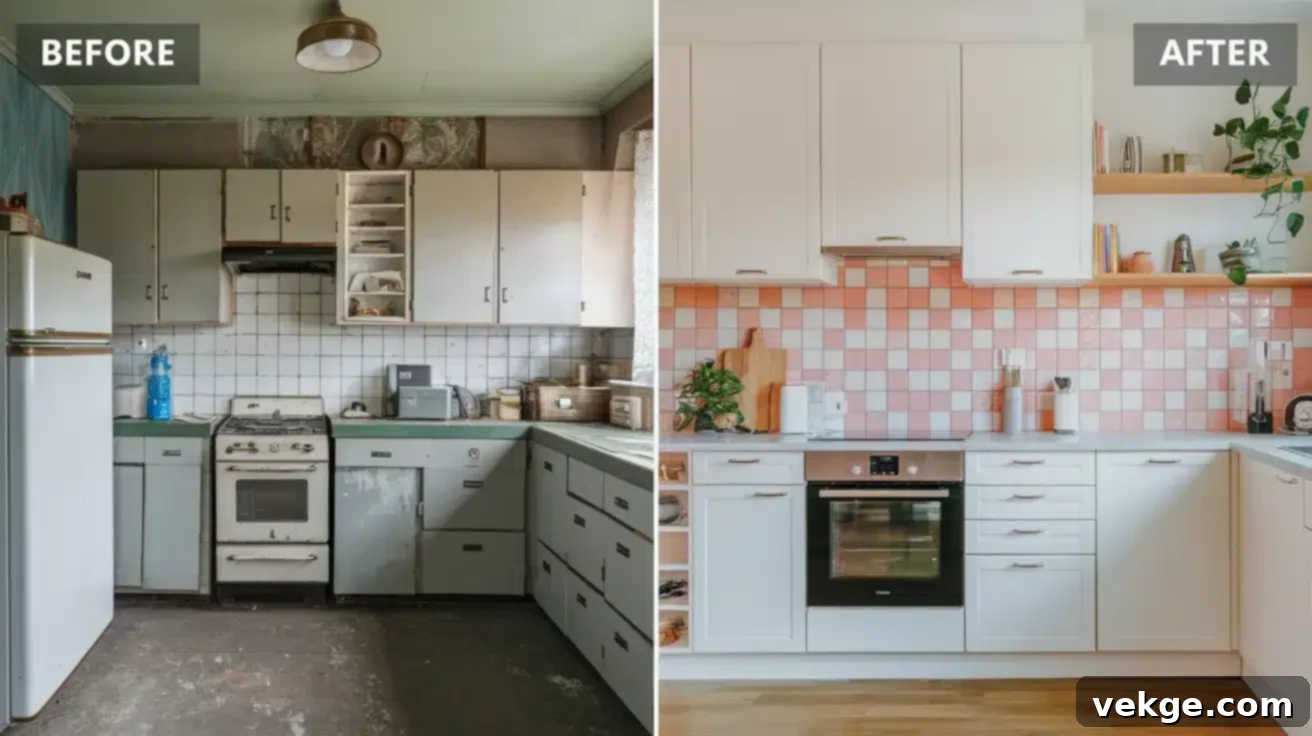
Before: The kitchen was a stark reminder of its age. It featured dated yellow laminate counters and tired, brown wooden cabinets that offered minimal storage and made the entire space feel cramped and visually heavy. The limited counter space severely restricted any serious cooking or food preparation, isolating the cook from the rest of the home.
After: A complete revolution. Crisp white shaker cabinets paired with elegant gray quartz counters create a fresh, clean, and highly functional aesthetic. The addition of a spacious central island has become the true heart of the home, offering extensive additional workspace for meal prep and serving as a welcoming gathering spot for families and friends, seamlessly integrating the kitchen into the open-concept living area.
Main Bedroom Redesign
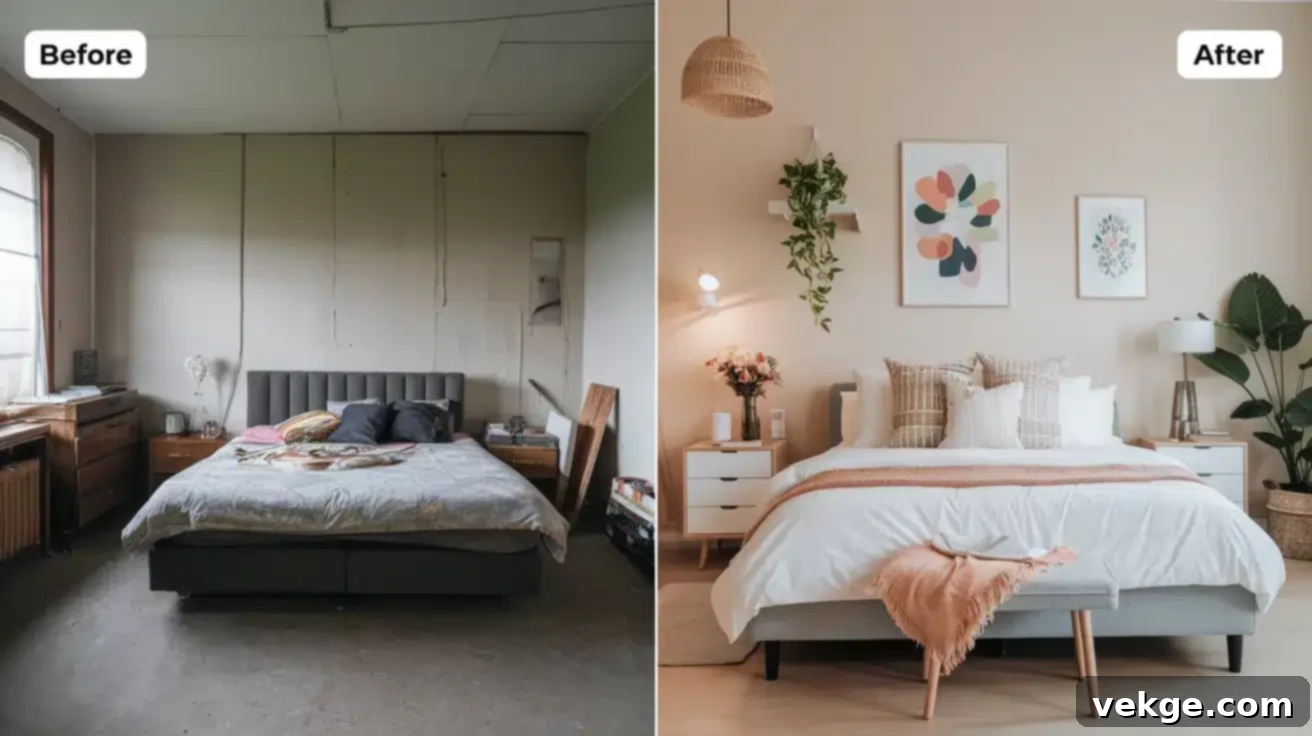
Before: This room was characterized by busy, floral wallpaper and stained, worn carpet, giving it a distinctly tired and outdated feel. A single, small window severely limited the ingress of natural light, making the room feel somewhat dim and uninspiring, lacking the serenity desired in a main bedroom.
After: The main bedroom has been transformed into a calm and serene retreat. Soft gray walls provide a soothing backdrop, while the beautifully restored original hardwood floors add warmth and timeless elegance. A significantly larger window now fills the room with abundant morning light, creating a bright, airy, and inviting atmosphere that promotes rest and relaxation, completely altering the room’s character and functionality.
Conclusion
Reflecting on our comprehensive 1960s ranch house renovation, I’ve come to realize that the changes extended far beyond mere walls and windows. This entire project was an invaluable learning experience, reinforcing the crucial lesson that meticulous planning and thoughtful execution consistently triumph over rushing ahead without a clear vision. The clean lines, expansive open spaces, and enhanced functionality we meticulously created have undeniably made our daily life smoother, more comfortable, and significantly more enjoyable.
For anyone contemplating a similar journey of revitalizing their own ranch house, I offer these fundamental takeaways and pieces of advice, distilled from our own experience:
- Invest Time in Understanding Your Home’s Strengths: Before making any drastic changes, truly assess your home’s “good bones” and unique character. Identify those original features that are worth preserving and celebrating.
- Develop a Clear and Detailed Plan: A well-thought-out plan, including architectural drawings and material selections, is your blueprint for success. It helps anticipate challenges, manage expectations, and ensure a cohesive final result.
- Allocate Extra Funds for Unforeseen Issues: Older homes often harbor surprises. Always set aside a contingency fund, ideally 10-15% of your total budget, specifically for unexpected repairs or structural fixes that inevitably arise.
The most rewarding aspect of this entire endeavor? Our renovated house seamlessly integrates the functional demands of modern family living with the timeless charm and undeniable beauty of its 1960s heritage. It stands as compelling proof that you absolutely do not need a total teardown to transform an older home into a fresh, highly functional, and aesthetically pleasing dwelling that truly works for today’s lifestyle. It’s about respecting the past while confidently embracing the future.
If you have any questions about remodeling your own ranch house, or simply want to discuss aspects of our renovation, please feel free to leave them in the comments section below. I would be genuinely delighted to share further insights and help you learn from our experience as you embark on your own transformative journey.
Frequently Asked Questions About Ranch House Renovations
How Much Did the Entire Ranch House Remodel Cost?
The comprehensive renovation of our 1960s ranch house amounted to a total cost of $85,000. This figure encompasses all aspects of the project, including both labor and materials. The largest portions of this budget were allocated to the kitchen and bathroom renovations, which collectively accounted for approximately $40,000 due to extensive plumbing, electrical, and material upgrades. We realized significant cost savings by making the strategic decision to restore and refinish the original hardwood floors found throughout the house, rather than incurring the expense of installing entirely new flooring.
How Long Should I Plan for A Similar Renovation Project?
Our specific renovation project, from the initial demolition to the final touches, spanned a total duration of 6 months. This timeline includes all phases of work. The kitchen remodel was one of the most intensive parts, taking approximately 3 weeks to complete due to structural changes and custom installations. Each of the two bathrooms required about 2 weeks of dedicated work. The remaining time was systematically allocated to the renovation of other living spaces, including bedrooms, hallways, and exterior enhancements. It’s important to factor in potential delays due to unforeseen issues, material availability, or contractor scheduling when planning your own project.
What Are the Most Common Problems When Renovating a 1960s Ranch House?
Renovating a 1960s ranch house often uncovers several common challenges that potential homeowners should be aware of. Firstly, older electrical wiring, such as aluminum wiring or outdated knob-and-tube systems, frequently requires complete replacement to meet modern safety codes and handle increased electrical loads. Secondly, existing plumbing might have corroded pipes (e.g., galvanized steel) that lead to low water pressure or leaks, often necessitating a full re-piping. Thirdly, a significant concern can be the presence of asbestos, which was commonly used in building materials before 1980. This can be found in popcorn ceilings, certain types of floor tiles (especially vinyl or linoleum), insulation, and even some adhesive materials. Professional testing and abatement are crucial if asbestos is suspected, adding to both the cost and timeline of the renovation.
