Essential Guide to Garage Door Cable Replacement: Enhancing Safety, Functionality, and Longevity
Garage door cables are often overlooked components, yet they play a critically important role in the safe and efficient operation of your entire garage door system. Over time, these cables are subjected to immense stress and daily wear and tear, making them susceptible to damage, fraying, or even snapping. Ignoring the early signs of a worn-out or damaged garage door cable can lead to significant inconvenience, costly repairs, and, most importantly, dangerous situations that could result in serious injury or property damage. This comprehensive guide will delve into what garage door cables are, why their integrity is paramount, how to identify when they need replacing, the benefits of timely replacement, and essential maintenance tips to ensure your garage door operates smoothly and safely for years to come.
What Exactly Is a Garage Door Cable?
At the heart of every functional garage door lies a sophisticated system of springs, pulleys, and cables working in harmony. Garage door cables are a vital part of this intricate opening and closing mechanism. These robust cables, typically made from aircraft-grade steel, are responsible for transferring the tension from the torsion or extension springs to lift and lower the heavy garage door. Essentially, they act as a crucial balance mechanism, counteracting the door’s immense weight, allowing it to move smoothly and safely along its tracks. Without properly functioning cables, the door’s weight would be unrestrained, making it extremely difficult, if not impossible, to operate. Moreover, an improperly functioning cable can cause the door to become uneven, jam, or even crash down unexpectedly, posing significant risks to anyone nearby and potentially damaging your vehicle or other belongings.
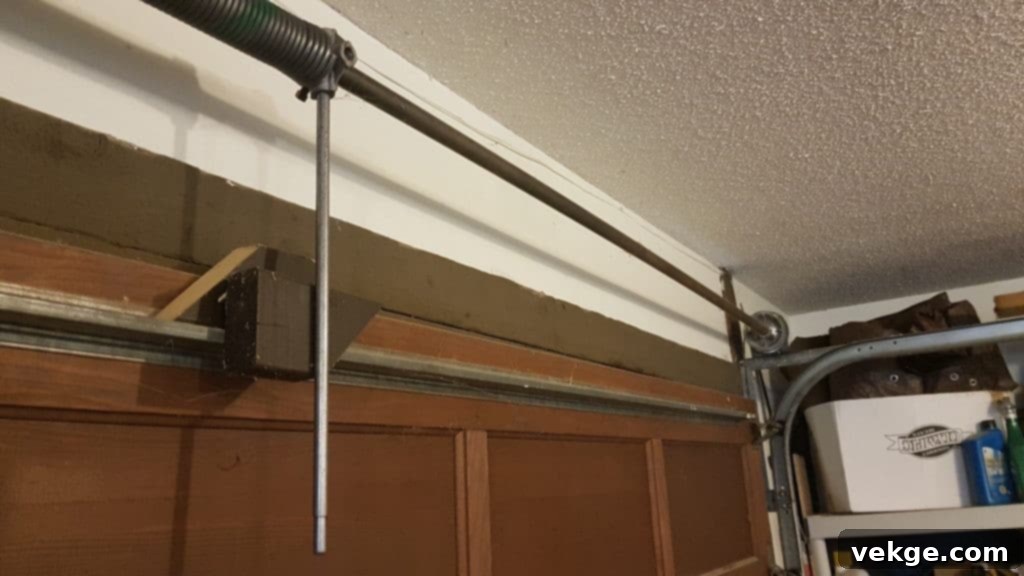
The cables are typically looped around drums located at each end of the torsion shaft (for torsion spring systems) or attached to pulleys and then to the extension springs (for extension spring systems). As the door opens or closes, the cables wind or unwind around these drums or through the pulleys, facilitating the controlled movement. Their continuous operation means they endure constant friction and stress, highlighting why their condition is paramount for the overall safety and performance of your garage door.
Key Indicators You Need to Replace Your Garage Door Cable

Recognizing the signs of a failing garage door cable is crucial for preventing accidents and maintaining the longevity of your garage door system. Paying close attention to the door’s operation and conducting periodic visual inspections can alert you to potential issues before they escalate. Here are the most common indicators that your garage door cables may need immediate attention and replacement:
- Visible Fraying or Scratches: This is perhaps the most obvious sign. Inspect the cables for any broken strands, kinks, rust, or general wear. Fraying indicates that the cable’s structural integrity is compromised and it’s on the verge of snapping. Even minor scratches can weaken the cable over time, especially if the protective coating is damaged.
- Abnormal or Uneven Door Movement: If your garage door appears to be opening or closing unevenly, with one side moving slower or lower than the other, a cable issue is highly likely. This imbalance suggests that one cable may be stretched, loose, or damaged, causing uneven tension distribution. You might notice the door getting stuck partway, moving with a jerky motion, or becoming crooked in its tracks.
- Loud Noises from the Pulley System: Unusual sounds such as grinding, scraping, popping, or snapping during operation can indicate problems with the cables or their associated components (drums, pulleys). These noises often suggest that a cable is rubbing incorrectly, binding, or that strands are breaking under tension.
- Cable Off the Drum or Pulley: If a cable has come off its drum or pulley, it typically means there’s a serious imbalance in the system, often caused by a broken spring, an obstruction, or a damaged cable itself. When a cable is off track, the door will not operate correctly and poses an immediate danger. Do not attempt to operate the door in this state.
- Door That Won’t Open or Close Completely: While this can be a symptom of various issues, if the door struggles to move past a certain point or gets stuck, particularly if it’s heavier than usual on one side, a compromised cable is a strong possibility. A slack or broken cable will prevent the door from achieving its full range of motion.
- Visible Slack in One of the Cables: When the door is closed, both cables should appear taut. If one cable is visibly slack or hanging loosely, it indicates a loss of tension, likely due to a break, stretching, or being dislodged from its drum or pulley.
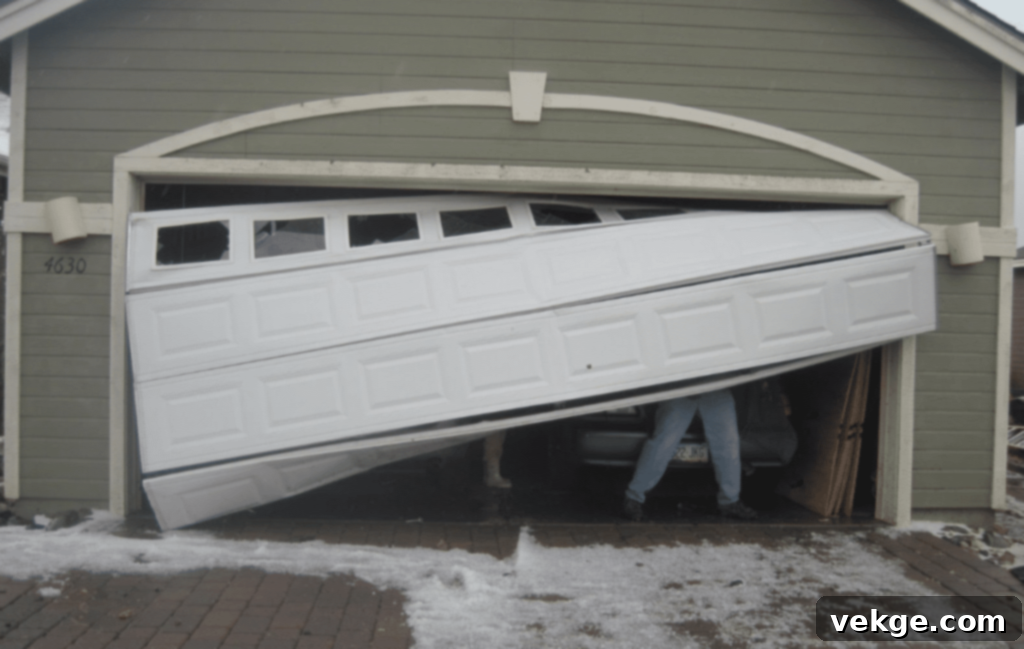
Any of the above signs warrant immediate investigation and, in most cases, prompt replacement. Ignoring these warnings can lead to the cable snapping completely, which can cause the heavy door to crash down suddenly, leading to severe injuries, damage to your property, or further extensive damage to the garage door system itself.
The Critical Advantages of Prompt Garage Door Cable System Replacement

Beyond simply fixing a problem, replacing a damaged or worn-out garage door cable offers a multitude of benefits that extend to the safety, functionality, and longevity of your entire garage system. Investing in timely cable replacement is a proactive step that protects both your family and your property.
- Enhanced Safety for People and Property: This is by far the most crucial advantage. A failing cable is a significant safety hazard. When a cable snaps, the immense tension from the springs is suddenly released, and the heavy garage door can fall rapidly and unpredictably. This can cause severe injury to anyone in its path, including children and pets, and can crush vehicles or other items stored in the garage. A new, intact cable ensures that the door remains securely balanced and operates as intended, drastically reducing the risk of such dangerous accidents.
- Restored Smooth and Balanced Operation: Worn cables often lead to jerky, noisy, or uneven door movement. When you replace a faulty cable, you restore the proper balance and tension to the system. This results in a garage door that opens and closes smoothly, quietly, and efficiently, just as it was designed to. A properly balanced garage door also reduces strain on the garage door opener, extending its lifespan.
- Extended Lifespan of the Entire Garage Door System: A single faulty component can place undue stress on other parts of your garage door system. A damaged cable can cause excessive wear on the springs, drums, pulleys, tracks, and even the garage door opener itself. By replacing worn-out cables promptly, you alleviate this stress, allowing all components to function within their design parameters, thereby significantly increasing the overall lifespan of your entire garage door system and preventing more extensive, expensive repairs down the line.
- Improved Energy Efficiency: While not immediately obvious, a garage door with a compromised cable system may not close completely or seal tightly against the weather stripping. This creates gaps that allow drafts, moisture, and pests into your garage, and critically, allows conditioned air from your home to escape or outside temperatures to penetrate. Replacing the cables ensures the door closes and seals properly, contributing to better insulation and potentially lowering your energy bills.
- Peace of Mind: Knowing that your garage door, often the largest moving part of your home, is operating safely and reliably provides invaluable peace of mind. You can open and close your garage without worry, confident that the system is secure and not posing a hidden threat.
In essence, replacing a garage door cable isn’t just a repair; it’s an investment in safety, performance, and the longevity of your home’s most-used entry point.
Choosing the Correct Type of Garage Door Cable
Selecting the right replacement garage door cable is paramount for ensuring compatibility, proper function, and safety. There isn’t a one-size-fits-all solution, as cables vary based on the type of garage door system, its weight, and the environmental conditions. Careful consideration of these factors will help you make the best choice:
- Material Type: The vast majority of garage door cables are made from galvanized steel wire, often referred to as aircraft cable due to its strength and flexibility.
- Galvanized Steel: This is the most common and recommended material. The galvanization process adds a protective zinc coating that helps resist rust and corrosion, extending the cable’s lifespan, especially in humid environments.
- Stainless Steel: Offers superior corrosion resistance, making it ideal for coastal areas or extremely high-humidity environments, but it can be more expensive.
The cable itself is typically a woven metal design (e.g., 7×7 or 7×19 strand construction), indicating how many individual wires are twisted together to form a single strand, and how many strands make up the cable. A higher number of strands (like 7×19) usually indicates greater flexibility and strength. Avoid using non-metal alternatives like rope or plastic, as they lack the necessary strength and durability for garage door applications and can lead to dangerous malfunctions.
- Cable Gauge (Thickness) and Strength: The thickness (gauge) of the cable is crucial and directly relates to the weight of your garage door. Heavier doors require thicker, stronger cables to safely bear the load. Common cable gauges range from 1/8-inch to 3/16-inch or even 1/4-inch for commercial or very heavy residential doors. Using a cable that is too thin for your door’s weight can lead to premature wear, stretching, or snapping. Always match the original cable’s gauge or consult a professional to determine the appropriate strength for your specific door.
- Length: The cable length is determined by the height of your garage door and the type of spring system (torsion or extension). Incorrect cable length will prevent the door from opening or closing fully and can cause serious operational issues. Before purchasing, measure the height of your garage door opening accurately. For torsion spring systems, cables are typically a few inches longer than the door’s height. For extension spring systems, the cable length calculation can be more complex, involving the spring length and pulley setup. It’s often best to refer to your garage door manufacturer’s specifications or measure the existing cables precisely.
- Torsion Spring vs. Extension Spring Cables:
- Torsion Spring Cables: These cables are typically thicker and connect from the bottom brackets of the door to the cable drums mounted on the torsion spring shaft above the door. They wind and unwind as the door moves.
- Extension Spring Cables: These cables are often thinner and run from the bottom brackets, through pulleys near the top corners of the door, and then connect to the extension springs that run parallel to the tracks.
Ensure you purchase the correct type of cable for your specific spring system.
- Environment and Exposure: Consider whether your garage is attached to your home and climate-controlled, or a detached structure exposed to the elements. For outdoor garages or those in high-moisture/salt-air environments, cables with enhanced rust resistance (like stainless steel or heavily galvanized) may be a better investment. Also, consider the “traffic” your garage door sees – a door used multiple times a day will experience more wear and tear, necessitating a high-quality, durable cable.
To determine the standard garage size and appropriate cable specifications, take accurate measurements of your existing cables (length and diameter) and note any markings on them. If in doubt, consulting a qualified garage door technician is always the safest approach to ensure you get the perfect match for your system.
A Step-by-Step Guide to Safely Replacing Your Garage Door Cable (DIY vs. Professional)

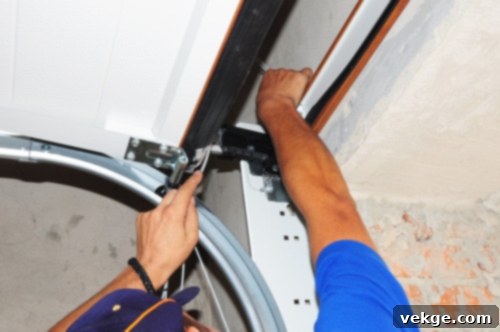
Replacing a garage door cable is an inherently complex and potentially dangerous task due to the high tension in the garage door springs. While some DIY enthusiasts might be tempted to tackle this job, it often requires specialized tools, significant strength, and a thorough understanding of garage door mechanics. **We strongly recommend consulting a professional garage door repairman.** They possess the necessary knowledge, specialized tools, and experience to perform the job correctly and, most importantly, safely, minimizing the risk of injury or further damage. However, if you are an experienced DIYer and understand the risks involved, here are the general instructions to follow with extreme caution:
- Prioritize Safety: Disconnect Power and Secure the Door: Your first and most critical step is to disconnect the power to your garage door opener. Unplug it from the ceiling outlet or switch off its dedicated circuit breaker. This prevents accidental activation during the repair process, which could lead to severe electrical-related injuries or crushing accidents. Next, prop the garage door securely in the fully open position using sturdy C-clamps or vice grips on the tracks just below the lowest rollers. This prevents the heavy door from suddenly falling while you work.
- Consult Manufacturer’s Instructions: Before beginning any repairs or installation, always refer to your specific garage door model’s manufacturer’s instructions. These manuals provide critical details unique to your system regarding spring tension, cable routing, and component replacement. Following these guidelines is essential for safe and effective repair.
- Release Spring Tension (Extreme Caution Required): This is the most dangerous part of the process and where professional expertise is invaluable. If you have a torsion spring system (a long spring mounted above the door), you MUST carefully release the tension in the springs using specialized winding bars. Never use standard tools like screwdrivers or pliers, as the immense force can cause severe injury. For extension spring systems (springs running parallel to the tracks), the tension is usually released by securing the door and then detaching the springs, which still requires extreme caution. **If you are unsure about this step, STOP and call a professional.**
- Remove the Old Cable: Once the spring tension is safely released, you can carefully detach the old, damaged cable. This typically involves unhooking it from the bottom bracket on the door and unwinding it from the cable drum (for torsion systems) or detaching it from the pulley system (for extension systems). Pay close attention to how the old cable was routed, as you will need to replicate this with the new one.
- Install the New Cable: Route the new cable precisely as the old one was installed. For torsion systems, thread the cable around the drum and secure it firmly. For extension systems, thread it through the pulleys and attach it to the spring. Ensure there are no kinks or twists in the cable.
- Adjust Cable Slack and Reapply Spring Tension: Once the new cable is in place, you may need to use pliers or other tools to adjust any cable slack, ensuring it is taut. Then, carefully reapply the spring tension (the reverse of releasing it). This step is critical for balancing the door and requires the same extreme caution as releasing the tension. Remember to always wear heavy-duty work gloves and safety glasses throughout the entire process to protect your hands and eyes from frayed wires or sudden movements.
- Never Substitute Cables: Do not use wire, rope, or any material other than a specifically designed garage door cable for replacement. These alternatives lack the necessary strength and durability, which will inevitably lead to improper functioning, immediate failure, and dangerous situations.
- Thorough Post-Repair Inspection: After completing the cable replacement and reapplying spring tension, conduct a meticulous inspection of every component of the garage door system. Check all fasteners, bolts, and nuts on the bottom brackets, cable drums, pulleys, and the garage door opener itself. Ensure they are all properly tightened and secure. Manually test the door’s balance (it should stay put when lifted halfway) and then carefully operate it with the opener a few times, listening for any unusual noises and observing its movement to ensure it’s smooth and balanced before resuming normal use.
Always remember, garage door repair is not for the faint of heart. If at any point you feel uncomfortable or out of your depth, do not hesitate to call a professional. Your safety and the proper functioning of your garage door depend on it.
The Indispensable Role of Regular Garage Door Cable Maintenance
While replacing a damaged or worn-out garage door cable is essential for immediate safety and functionality, regular, proactive maintenance is the cornerstone of preventing cable issues from occurring in the first place. By taking simple, routine steps to care for your garage door cables and the entire system, you can significantly extend their lifespan, ensure the smooth, safe, and quiet operation of your garage door, and avoid unexpected breakdowns and costly emergency repairs.
Here’s how to incorporate effective maintenance into your routine:
- Routine Visual Inspections: Make it a habit to visually inspect your garage door cables at least once a month. Look for any signs of wear such as fraying, rust, kinks, or broken strands. Check if the cables are properly seated on their drums or pulleys and if there’s any noticeable slack when the door is closed. Early detection of minor issues can prevent them from escalating into major problems.
- Cleaning: Over time, dust, dirt, and debris can accumulate on the cables and around the drums/pulleys. This accumulation can cause friction and accelerate wear. Gently clean the cables with a damp cloth to remove any grime. Ensure they are completely dry afterward, especially if you live in a humid environment.
- Lubrication: Proper lubrication reduces friction and corrosion, extending the life of your cables and other moving parts. Use a high-quality silicone-based or lithium-based garage door lubricant. Apply it sparingly to the cables (avoiding excessive buildup), as well as the pulleys, rollers, and hinges. Do this every three to six months, or more frequently if your door is used heavily or exposed to harsh weather.
- Checking Cable Tension and Balance: While not a DIY adjustment for spring tension, you can periodically check if your garage door is balanced. With the door closed and the opener disconnected, you should be able to lift the door manually. It should feel relatively light and stay open at any point you leave it. If it’s heavy, or slams shut, or springs open, it indicates an imbalance in the spring system, which directly affects cable tension. This is a sign to call a professional for adjustment.
- Professional Tune-ups: Even with diligent DIY maintenance, an annual professional inspection and tune-up are highly recommended. Experts can identify subtle issues that might escape an untrained eye, such as hairline fractures in springs, worn bearings, or subtle misalignments. They have the tools and expertise to safely adjust spring tension, lubricate all components, and ensure your entire system is operating at peak efficiency and safety. An expert like Jarred Turner, owner of Impact Doors and a specialist in garage door repairs and replacements, and his team are highly skilled in garage door installation, repair, and maintenance, offering peace of mind through their expertise.
By integrating these maintenance practices, you can dramatically reduce the likelihood of cable failure, safeguard your family, and maximize your garage door’s operational life.
Conclusion
Garage door cables, though seemingly minor components, are integral to the safe, efficient, and balanced operation of your entire garage door system. Their constant workload means they are prone to wear and tear, and ignoring the signs of damage can lead to dangerous and costly consequences. Regularly inspecting your cables for fraying, rust, or abnormal movements is not just a recommendation—it’s a critical safety measure. Promptly addressing any issues by replacing damaged or worn-out cables ensures enhanced safety for everyone, restores smooth functionality, prolongs the life of your entire garage door system, and can even contribute to better energy efficiency.
While some aspects of garage door maintenance can be tackled by a competent DIYer, the high-tension nature of cable replacement often necessitates professional expertise. Remember, your safety should always be the top priority. Don’t hesitate to consult with qualified technicians who possess the right tools, knowledge, and experience to handle these complex repairs. By staying vigilant with inspections and committing to regular maintenance, whether self-performed or professional, you can ensure your garage door remains a reliable, safe, and efficient asset to your home for many years to come.
