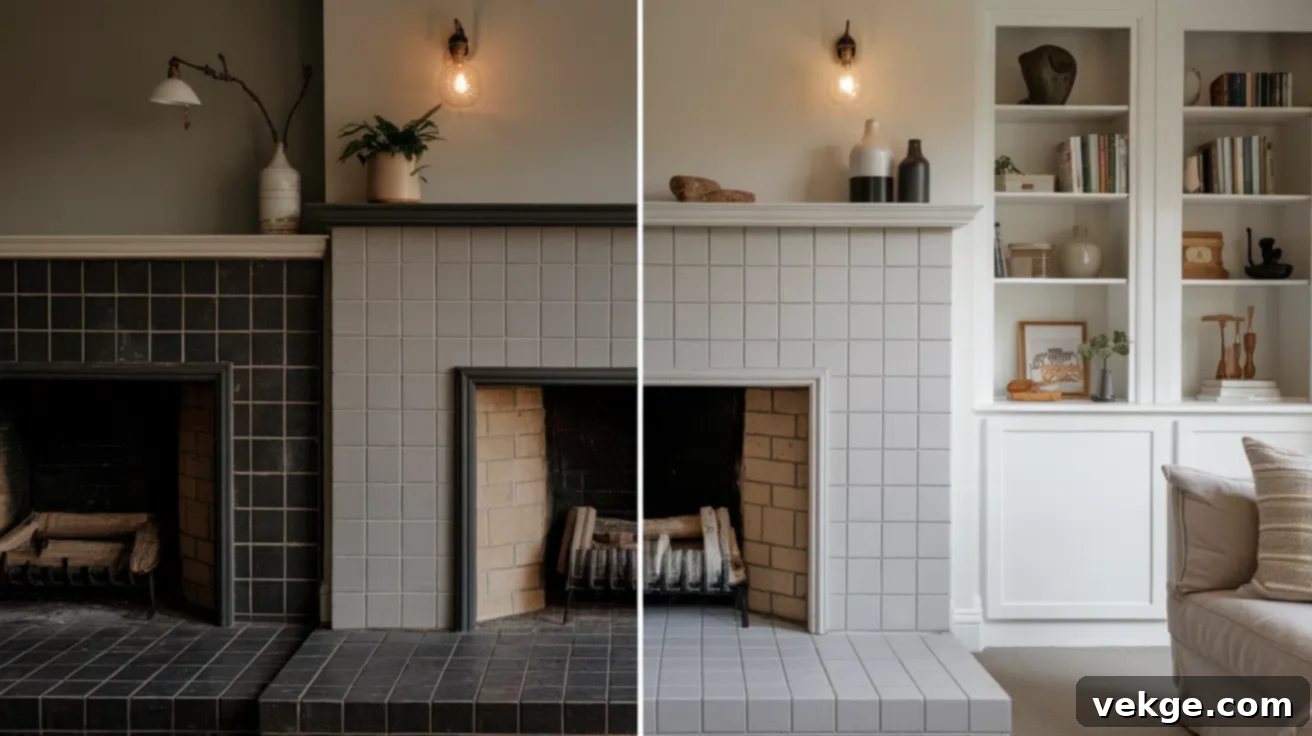
Transform Your Fireplace: A DIY Guide to Painting Tile for a Stunning Makeover
For many years, the idea of updating a dated fireplace surround seemed synonymous with costly demolition and extensive renovation. The thought of chipping away old tiles, dealing with dust, and budgeting for new materials felt daunting and often put the project on hold. However, a simple yet powerful solution exists: painting your fireplace tiles. This seemingly small DIY project can completely revitalize your living space, offering a fresh, modern look without the mess, high expenses, or the commitment of a full-scale remodel.
Once you see how straightforward and impactful this transformation can be, you’ll wonder why you didn’t try it sooner. Painting ceramic tiles on your fireplace is incredibly achievable, often much easier than most people imagine. In this detailed guide, we’ll walk you through the entire process, from initial preparation to the final coat, showcasing impressive before-and-after results. You’ll find all the necessary supply lists, clear, easy-to-follow instructions, and expert tips to ensure a beautiful and durable finish.
This is one of those home improvement updates that truly punches above its weight. It’s a project that delivers significant visual impact with minimal fuss, leaving you with a fireplace that feels perfectly integrated into your updated home aesthetic. Get ready to give your fireplace the refreshing new look it deserves!
Why Painting Your Fireplace Tile is a Smart Choice
Deciding to paint your fireplace tile offers numerous advantages, making it an increasingly popular choice for homeowners looking to refresh their interiors on a budget. It’s not just about saving money; it’s about efficiency, versatility, and achieving a bespoke look without the headaches of traditional renovation.
- Cost-Effective Renovation: The most immediate benefit is the significant cost savings. Removing and replacing old tiles involves labor, disposal fees, and the expense of new materials, which can quickly add up. Painting requires only a few essential supplies, drastically cutting down your expenditure while delivering a high-impact aesthetic change.
- Quick and Clean Process: Unlike a full tile replacement that creates substantial dust and debris, painting is a relatively clean and quick project. You can often complete the transformation over a weekend, minimizing disruption to your daily life. There’s no heavy lifting, no noisy demolition, just a smooth, progressive update.
- Instant Style Update: If your fireplace tiles are looking tired, discolored, or simply don’t match your current decor, paint offers an immediate solution. You can transform a dated, boring beige into a bold, contemporary black, a serene soft gray, or a crisp, bright white in just a few coats. This allows you to effortlessly align your fireplace with modern, farmhouse, minimalist, or any evolving interior design style.
- Customization and Personalization: Painting provides unparalleled freedom in color choice. Whether you prefer a subtle tone that blends seamlessly or a striking contrast that makes your fireplace a focal point, you can achieve your desired look. This level of customization is difficult and expensive to replicate with new tiles.
- Environmentally Friendly: By repurposing your existing tiles through painting, you’re reducing waste and contributing to a more sustainable approach to home improvement. Instead of sending old tiles to a landfill, you’re giving them a new lease on life.
Ultimately, painting your fireplace tile is a simple, effective, and budget-friendly way to achieve a significant visual upgrade, breathing new life into a central feature of your living space.
Before and After: Stunning Fireplace Tile Transformations
A fresh coat of paint has the remarkable ability to entirely alter the appearance of your fireplace, making old, weary tiles look brand new. These examples vividly illustrate how a simple change in color can dramatically shift the ambiance and style of your room, proving that a little paint goes a long way in home decor.
Example 1: White Over Brown Glossy Tile – Bright and Modern
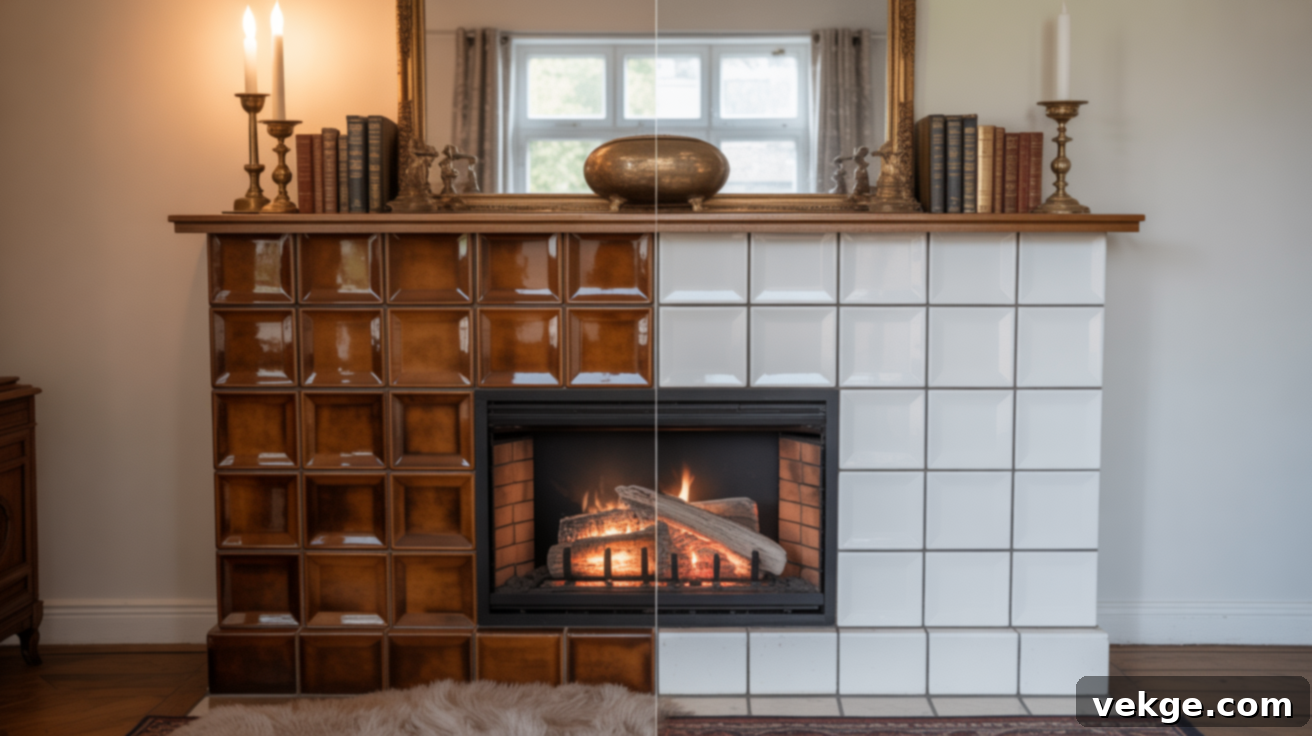
In this transformation, a dark brown, glossy tiled fireplace was given a complete overhaul by applying a clean, crisp white paint. The result is astonishing: the fireplace instantly brightens the entire room, making the space feel more open, airy, and expansive. The white finish eliminates the dated feel of the original brown, creating a clean backdrop that perfectly complements modern, Scandinavian, or classic farmhouse interior styles. It shifts the fireplace from a heavy, grounding element to an uplifting, fresh focal point, reflecting light and enhancing the room’s overall luminosity.
Example 2: Matte Black for a Contemporary Edge
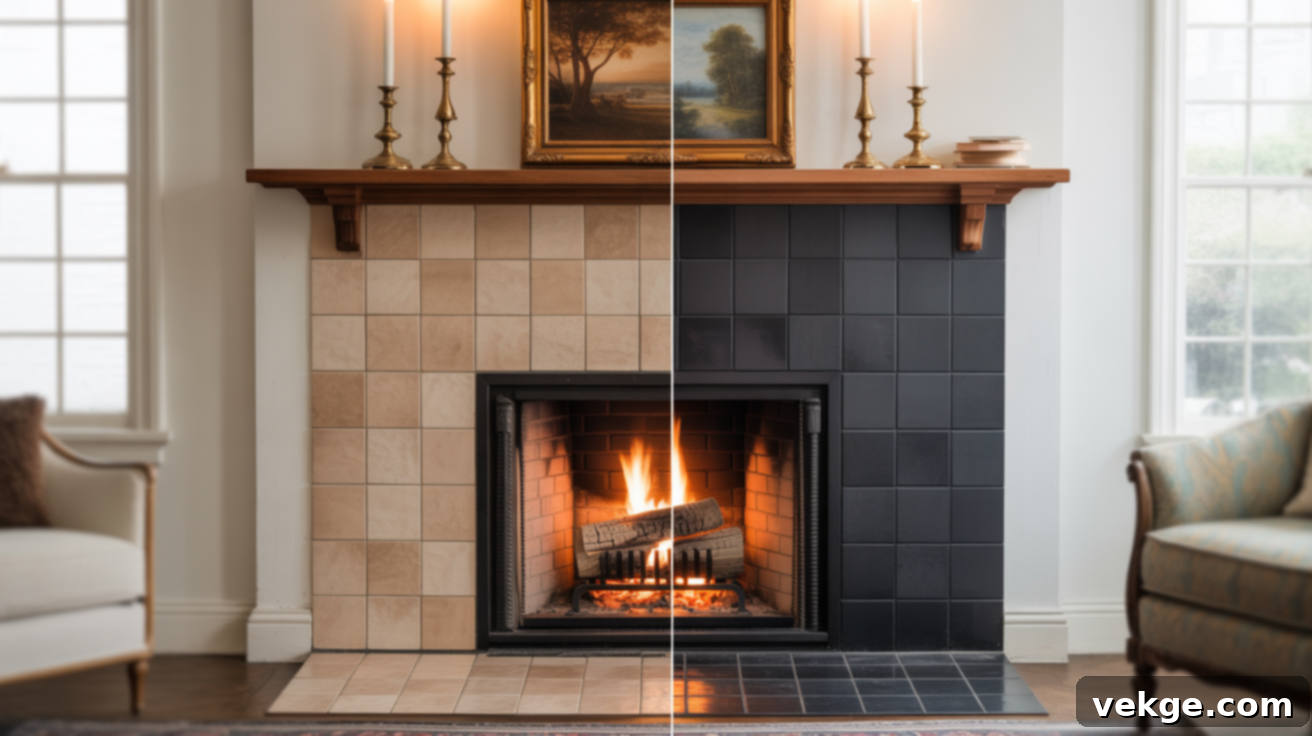
Opting for matte black paint delivers a powerful, sophisticated statement. This example showcases how a fireplace can be transformed into a sleek, contemporary centerpiece without the expense of new materials. The matte finish absorbs light, creating a dramatic contrast against lighter wall colors and furnishings. It exudes a strong, modern aesthetic, lending an architectural quality to the fireplace. This choice is ideal for rooms seeking an industrial touch, a minimalist vibe, or simply a bold, eye-catching element that anchors the space with its understated elegance.
Example 3: Soft Gray for a Harmonious, Neutral Space
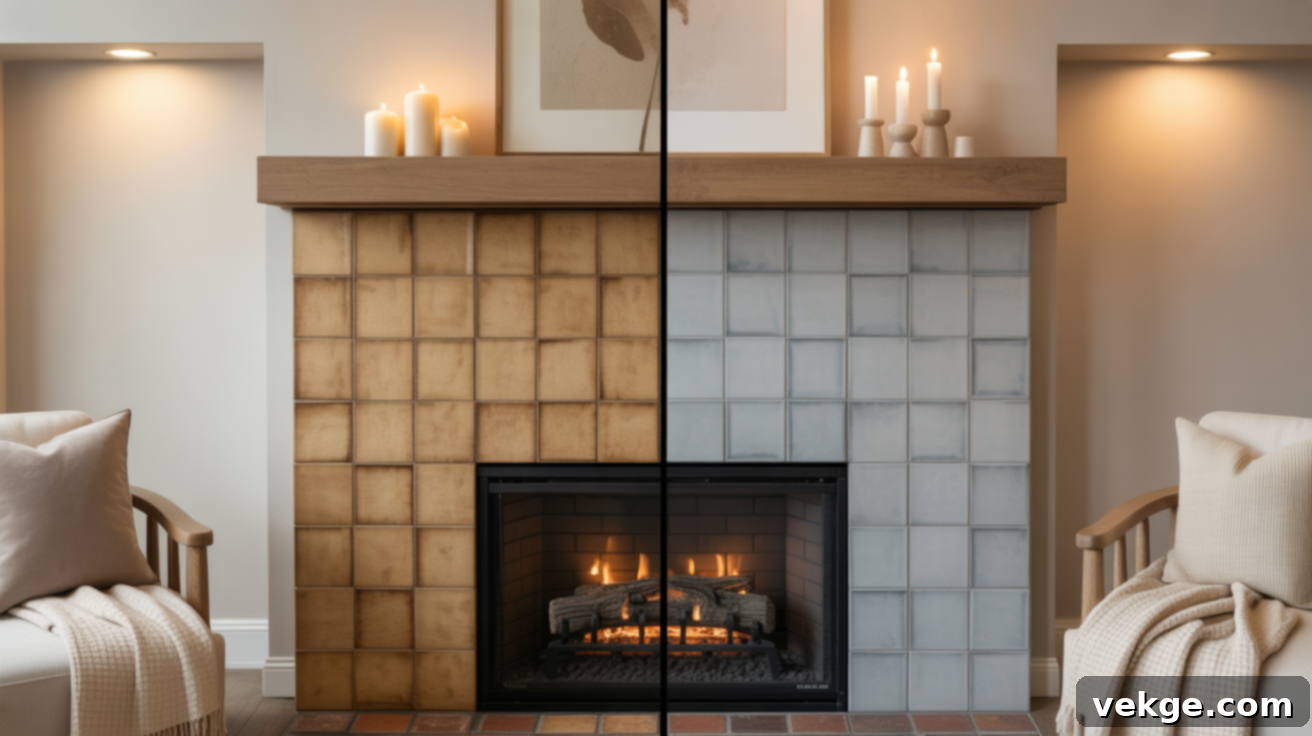
A soft gray paint can bring incredible balance and tranquility to an older tiled fireplace. This subtle yet impactful change integrates the fireplace seamlessly into a neutral room, providing a calming and sophisticated backdrop. Soft gray is incredibly versatile, blending effortlessly with various color palettes, from cool blues and greens to warm creams and beiges. It enhances the sense of coziness in traditional settings and adds a refined touch to contemporary spaces. This transformation proves that not every update needs to be dramatic to be effective; sometimes, a gentle shift in tone is all it takes to elevate an entire room’s design.
Essential Tools and Materials You’ll Need
Before you embark on your fireplace tile painting project, gathering all the correct tools and materials is crucial. Proper preparation with quality supplies not only makes the process smoother and more enjoyable but also significantly impacts the longevity and professional appearance of your finished fireplace.
- Primer: Essential for adhesion. Look for a tile bonding primer or a stain-blocking primer, especially for glossy or dark tiles. This creates a strong base for your paint.
- Tile-Safe Paint: Choose paint specifically designed for high-traffic or hard surfaces. Options include:
- Latex or Acrylic Enamel: Durable and readily available, often requiring a good primer.
- Fusion Mineral Paint: Known for excellent adhesion without much sanding, and a built-in topcoat.
- Rust-Oleum Tile Transformations Kit: A complete system designed specifically for painting tiles, often including a base coat and protective topcoat.
- Epoxy Paint: Extremely durable and water-resistant, often a two-part system, but can be more challenging to work with.
- Heat-Resistant Top Coat (Optional but Highly Recommended): If your fireplace is actively used and the tile surface gets warm (not directly exposed to flames), a clear, heat-resistant top coat will add an extra layer of protection against chipping, fading, and heat-related wear. Ensure it’s suitable for the temperatures your fireplace reaches.
- 2″–3″ Angled Brush: Perfect for precise work around edges, corners, and painting into grout lines for thorough coverage.
- Small Foam Roller (4″ or 6″): Ideal for applying smooth, even coats of paint on the flat surfaces of the tiles, minimizing brush marks and achieving a professional finish.
- Painter’s Tape (Blue or Green): For masking off adjacent walls, mantel, hearth, or flooring to ensure crisp, clean paint lines and protect surrounding areas.
- Drop Cloths or Plastic Sheeting: To protect your floor, furniture, and any other nearby surfaces from paint splatters.
- Mild Cleaner or Degreaser (e.g., TSP Substitute or Krud Kutter): Absolutely critical for thoroughly cleaning the tile surface, removing all dust, grease, soot, and grime that could prevent paint adhesion.
- Sandpaper (220-grit): An optional but highly beneficial item for lightly scuffing glossy or very smooth tiles. This creates a micro-texture that helps primer and paint adhere better, especially for long-term durability.
- Clean Rags or Tack Cloth: For wiping down surfaces after cleaning and sanding, ensuring all dust and residue are removed before painting.
- Stir Sticks and Paint Tray: For proper paint mixing and easy application with the roller.
- Safety Glasses and Gloves: To protect your eyes and hands, especially when using cleaners, primers, or certain types of paint.
Step-by-Step Guide: Painting Your Fireplace Tile for a Lasting Finish
Achieving a smooth, durable, and beautiful finish on your fireplace tile requires careful attention to each step. Following these instructions diligently will ensure proper paint adhesion and a professional look that stands the test of time.
Step 1: Thoroughly Clean the Tile Surface
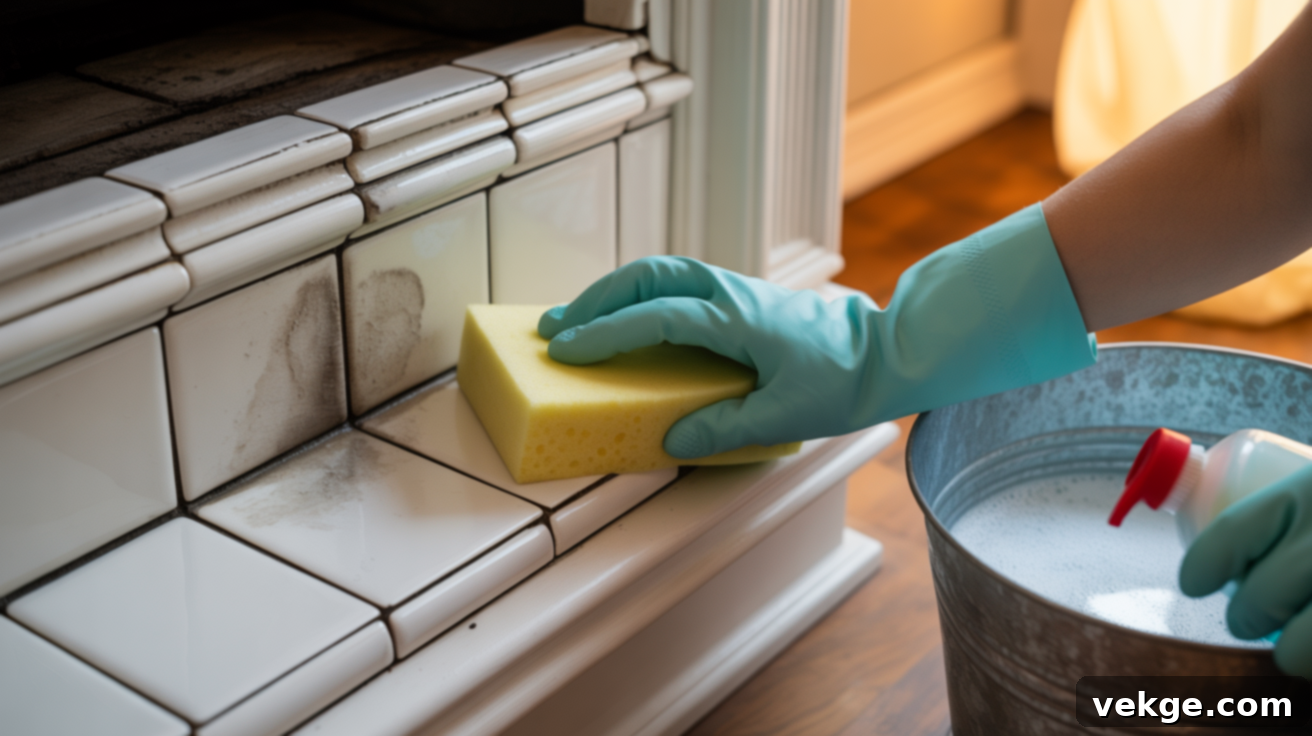
This is arguably the most critical step. Use a mild all-purpose cleaner or a degreaser like TSP (Trisodium Phosphate) substitute or Krud Kutter to meticulously clean every inch of the tile and grout. Fireplace tiles often accumulate soot, dust, grime, and sometimes even oily residues from handling or nearby activities. A truly clean surface is paramount for the paint to bond effectively. Scrub the tiles and grout lines thoroughly with a sponge or brush, paying close attention to any built-up areas. Rinse the surface multiple times with clean water and a clean rag, ensuring all cleaning solution residue is completely removed. Allow the tile to dry completely—this might take several hours, or even overnight, depending on humidity.
Step 2: Lightly Sand the Tiles (If Needed)
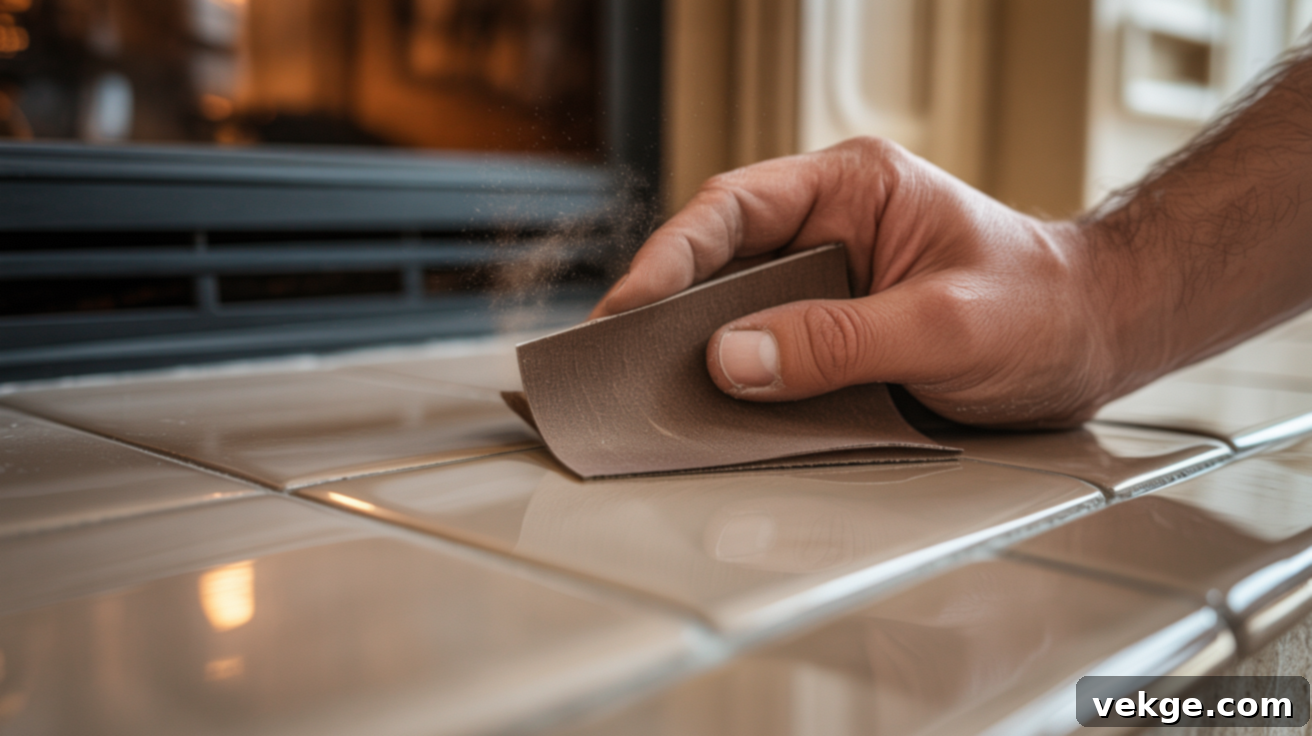
For very glossy or smooth tiles, a light scuffing with 220-grit sandpaper can dramatically improve primer adhesion. This step creates a micro-texture on the surface, giving the primer something to grip onto. You don’t need to remove the glaze entirely, just gently dull the shine. After sanding, wipe down the entire surface with a tack cloth or a damp (then dry) rag to remove all sanding dust. Any remaining dust can compromise paint adhesion and lead to a bumpy finish. This step is optional for certain paints (like Fusion Mineral) or highly porous tiles, but it’s a good insurance policy for a long-lasting finish on slick surfaces.
Step 3: Apply High-Quality Primer
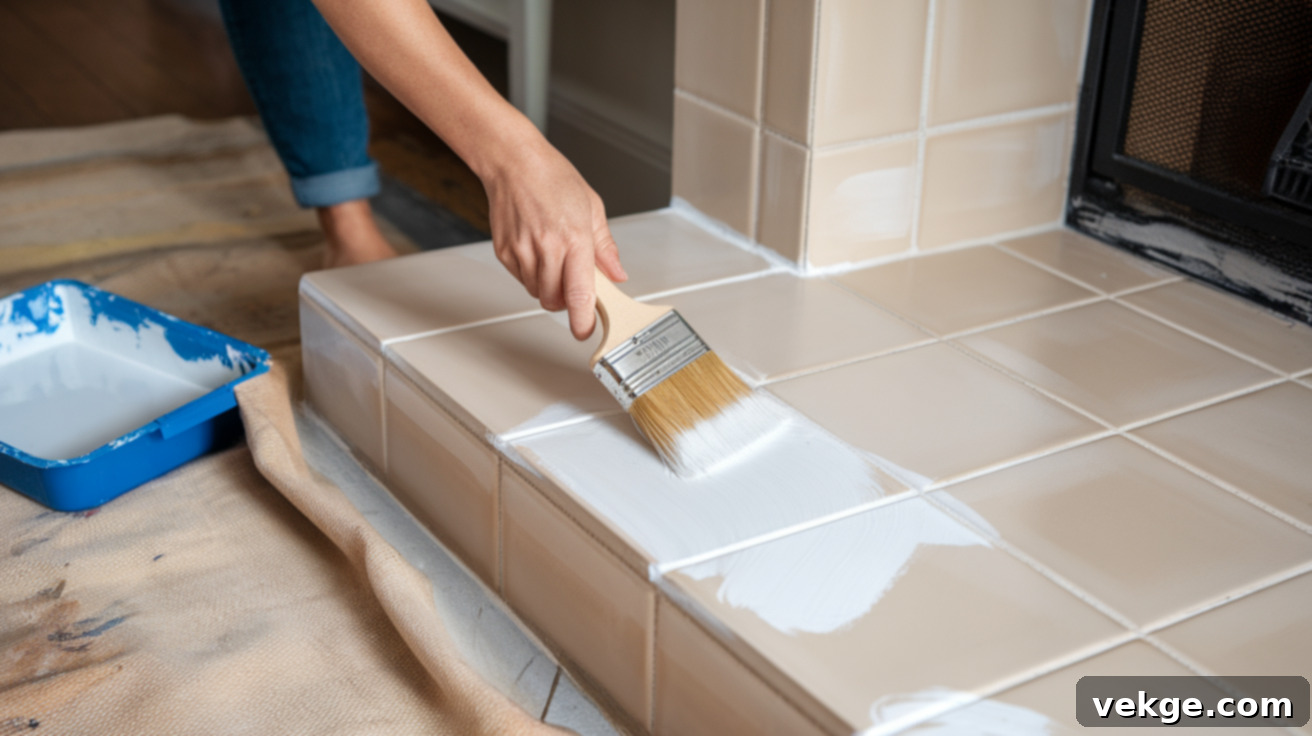
Before priming, carefully apply painter’s tape around the perimeter of the tile area, ensuring clean lines where the tile meets the wall, mantel, or hearth. Now, apply a thin, even coat of your chosen tile-bonding or stain-blocking primer. Use an angled brush for the grout lines and edges, then switch to a small foam roller for the flat tile surfaces. Roll in one direction for consistency. Primer acts as a crucial bonding layer, ensuring your paint adheres properly and reducing the likelihood of peeling, chipping, or streaking, especially if you’re painting a light color over a dark tile. Allow the primer to dry completely according to the manufacturer’s instructions. This usually takes a few hours, but don’t rush it. Applying a second thin coat of primer may be beneficial for very dark or problematic tiles, ensuring full coverage and maximum adhesion.
Step 4: Paint Multiple Thin Coats of Tile Paint
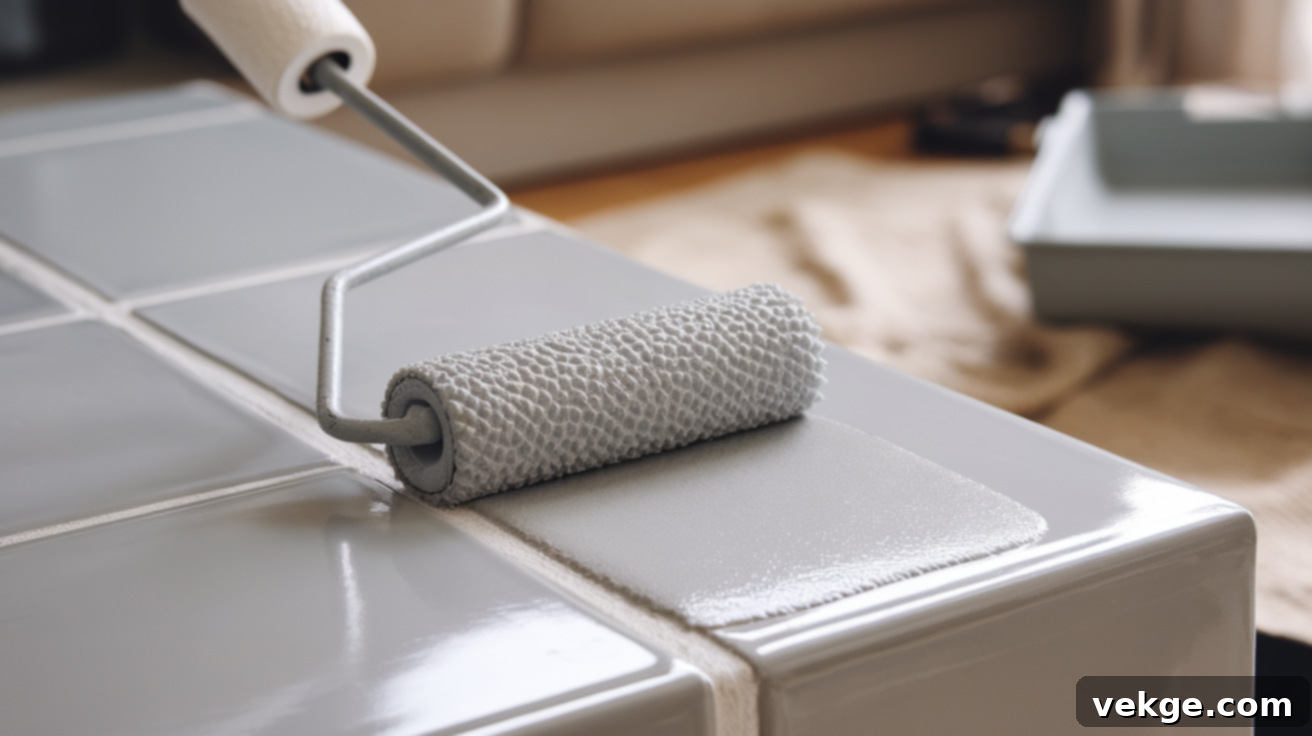
Once the primer is fully dry, it’s time to apply your chosen tile paint. The key here is to apply 2 to 3 thin coats rather than one thick layer. Thick coats are prone to drips, brush marks, bubbling, and uneven coverage, and they take much longer to dry. Start with an angled brush to carefully paint the grout lines and edges. Then, use your foam roller for the main tile surfaces, rolling in consistent, light strokes to achieve an even finish. Allow each coat to dry completely according to the paint manufacturer’s recommendations before applying the next. This typically ranges from 2-4 hours, but humidity and paint type can affect drying times. Overlapping coats while still wet can lead to a messy, uneven texture. Patience is key here; building up thin layers will give you a durable, professional-looking result.
Step 5: Apply a Heat-Resistant Top Coat (Optional, but Recommended)
If your fireplace is frequently used and the tiles get warm, applying a heat-resistant clear top coat is a wise investment in durability. This protective layer helps guard against chips, scratches, and fading, extending the life of your painted finish. Ensure the painted tiles have cured fully (this can take several days) before applying the topcoat. Use an angled brush for edges and a foam roller for flat surfaces, applying 1-2 thin, even coats. Always follow the product’s specific instructions for application and drying times. This final step seals your hard work and provides an extra layer of resilience to your refreshed fireplace.
How Long Does Painted Fireplace Tile Last?
With proper preparation and the right materials, painted fireplace tile can last for several years, providing a durable and attractive finish. On average, you can expect the finish to hold up well for 3 to 5 years with regular use and appropriate care. However, several factors significantly influence its longevity:
- Thorough Surface Preparation: This is the most crucial factor. Meticulous cleaning, degreasing, and proper priming ensure maximum adhesion of the paint to the tile surface. Any shortcuts here will inevitably lead to premature peeling or chipping.
- Quality of Materials: Investing in high-quality tile-specific paint and a good bonding primer makes a substantial difference. These products are formulated to adhere to non-porous surfaces and withstand wear better than standard wall paints.
- Application Technique: Applying multiple thin coats (rather than one thick coat) and allowing each to dry fully contributes to a harder, more resilient finish that is less prone to cracking or bubbling.
- Usage and Exposure: If your fireplace is primarily decorative, the paint will likely last much longer. For working fireplaces, tiles that get moderately warm (not directly exposed to high flame temperatures) will benefit greatly from a heat-resistant top coat. Direct, intense heat can cause paint to blister or discolor over time, so assess the temperature of your tiles during use.
- Maintenance and Care: Gentle cleaning with mild soap and water, avoiding harsh abrasive cleaners or scrubbing, will help preserve the painted finish.
By following all the recommended steps—proper prep, quality paint, correct application, and thoughtful care—your painted fireplace tile can maintain its fresh, new appearance for many years, delaying the need for touch-ups or repainting.
Can You Paint Over Previously Painted Fireplace Tile?
Yes, in many cases, you can repaint over previously painted fireplace tile, but it requires careful assessment and preparation to ensure a successful, lasting finish. The condition of the existing paint is the most critical factor to consider.
When Repainting is Feasible:
- If the existing paint is still in good condition—meaning it’s smooth, fully adhered, not flaking, bubbling, or peeling anywhere—you can generally paint directly over it.
- Start by thoroughly cleaning the surface with a degreaser to remove any grime, dust, or residue that may have accumulated.
- Lightly sand the entire painted surface with 220-grit sandpaper. This creates a fine texture that helps the new primer and paint adhere better, especially if the old paint has a sheen. After sanding, wipe away all dust with a tack cloth.
- Apply a fresh coat of high-quality bonding primer over the old paint. This acts as a new adhesion layer for your chosen topcoat.
- Proceed with painting your new coats as described in the step-by-step instructions.
When Stripping is Necessary:
- If the old paint is chipping, cracking, bubbling, flaking, or shows signs of poor adhesion, it is strongly recommended to strip it off before applying new paint. Repainting over a compromised base will likely result in the new paint failing prematurely in the same areas.
- Stripping can be done using chemical paint removers specifically designed for tile or a heat gun with a scraper, carefully following product instructions and taking safety precautions (good ventilation, gloves, eye protection).
- Once the old paint is removed, treat the tiles as if they were unpainted, beginning with thorough cleaning, sanding (if needed), and priming before applying your new paint.
Before committing to a full repaint, consider doing a small test spot in an inconspicuous area. Clean, sand, prime, and paint a small section. Allow it to fully cure (usually a week) and then gently test the adhesion with your fingernail. If it peels easily, stripping is the better long-term solution.
Expert Tips to Avoid Peeling or Fading on Your Painted Fireplace Tile
Achieving a durable and beautiful painted fireplace tile finish that resists peeling and fading requires attention to detail and patience. Follow these expert tips to maximize the lifespan and aesthetic appeal of your DIY project:
- Don’t Rush the Primer: Allow Full Drying Time: The primer is the foundation of your painted tile. Rushing this step and applying paint before the primer has fully cured (according to manufacturer instructions) will severely compromise adhesion. Even if it feels dry to the touch, the chemical bonding process may still be underway. Insufficient drying time is a leading cause of paint failure, leading to peeling and chipping down the line.
- Always Seal in High-Traffic or High-Use Areas: If your fireplace surround is in a busy part of your home, or if the tile is frequently touched (e.g., by children, pets, or when adding wood to a working fireplace), a clear topcoat is not optional – it’s essential. A durable, tile-compatible sealer or polyurethane topcoat adds a protective barrier against scuffs, scratches, and chips, significantly extending the life of your painted finish.
- Use Heat-Resistant Materials Near Direct Flames: For working fireplaces where the tile surround gets genuinely warm or hot during use (but not directly in the firebox), selecting paints and sealers specifically labeled as “heat-resistant” is crucial. Standard paints can crack, blister, or yellow when exposed to sustained heat. Always check product specifications for temperature ratings to ensure compatibility with your fireplace’s heat output. If the tiles become extremely hot or are inside the firebox, specialized high-heat paint is required, which is a different category altogether.
- Apply Thin, Even Coats: Avoid the temptation to apply one thick coat to save time. Thin, even layers build a stronger, more flexible, and more durable finish that is less likely to crack or peel. Allow adequate drying time between each coat.
- Clean with Gentle Products: Once painted, maintain your fireplace tile by cleaning it with mild soap and water. Harsh chemical cleaners, abrasive scrubbers, or steam cleaners can damage the painted surface and lead to premature wear or discoloration.
- Proper Curing Time: Even after the paint feels dry to the touch, it needs time to “cure,” meaning it reaches its maximum hardness and durability. This can take several days to a few weeks, depending on the paint type and environmental conditions. Avoid heavy use or aggressive cleaning during this curing period.
Common Mistakes to Avoid for a Flawless Finish
While painting fireplace tile is a rewarding DIY project, certain common errors can undermine your efforts, leading to a finish that chips, peels, or simply doesn’t last. Being aware of these pitfalls and how to avoid them will ensure a much better, longer-lasting result.
- Using Regular Wall Paint Only: This is one of the most frequent mistakes. Standard latex wall paint is formulated for porous surfaces like drywall and simply will not adhere properly to slick, non-porous tile. It lacks the necessary bonding agents and durability to withstand the wear and tear (and potential temperature fluctuations) of a fireplace surround. The result is almost guaranteed peeling and flaking in a short amount of time. Always use paint specifically formulated for tiles, floors, cabinets, or other hard, high-traffic surfaces, such as acrylic enamel, epoxy paint, or specialized mineral paints.
- Skipping the Primer Step Entirely: As discussed, primer is the essential bonding layer. Skipping it, or using an inappropriate primer, severely compromises the adhesion of your topcoat. Without a proper primer, even tile-specific paint may struggle to grip the slick surface, leading to an uneven finish, poor durability, and eventual peeling. Always use a high-quality bonding primer or a stain-blocking primer designed for glossy or non-porous surfaces.
- Not Letting Paint or Primer Cure Fully: There’s a significant difference between “dry to the touch” and “fully cured.” While a surface may feel dry after a few hours, the paint needs days, sometimes even weeks, to reach its maximum hardness and chemical resistance. Applying subsequent coats too soon, or subjecting the painted surface to heavy use or cleaning before it’s fully cured, can lead to marks, smudges, chipping, and a compromised finish. Always strictly follow the manufacturer’s recommended drying times between coats and the full curing time before light use or cleaning. Patience truly pays off here.
- Insufficient Surface Cleaning: Any dust, grime, grease, or soot left on the tiles will act as a barrier between the paint and the surface, preventing proper adhesion. This will lead to paint peeling off in sheets or patches. Invest time in thorough cleaning and degreasing, and ensure no residue from cleaners is left behind.
- Applying Thick Coats of Paint: Trying to achieve full coverage with one or two thick coats instead of multiple thin ones will result in an uneven, blobby, or textured finish. Thick coats are also more prone to dripping, sagging, and taking an excessively long time to dry, which increases the risk of imperfections and an overall less durable outcome. Always apply 2-3 (or more) thin, even coats, allowing sufficient drying time between each.
Conclusion: A Transformed Fireplace Awaits
Painting your fireplace tile is far more than just a minor home improvement; it’s a transformative project that can dramatically alter the mood and aesthetic of your entire living space. What might initially seem like a small fix truly holds the power to turn a dull, dated fireplace into a captivating and cozy focal point, all without the significant financial outlay or the inherent stress of demolition and full-scale renovation.
I’ve witnessed firsthand how this simple update can breathe new life into rooms, seamlessly integrating the fireplace into a fresh, modern design. With the right preparation, the selection of appropriate high-quality paints, and a healthy dose of patience throughout the process, your existing fireplace tiles can look completely brand new and stand up beautifully to the test of time.
Now that you’ve explored the comprehensive ceramic tile paint fireplace before and after process, equipped with detailed steps, essential supplies, and crucial tips for success, you have everything you need to confidently embark on your own fireplace transformation. Take each step deliberately, paying close attention to drying and curing times. Soon, you’ll be walking into a space that truly reflects your personal style and finally feels like the updated home you’ve envisioned. If this guide has inspired and empowered you, stay tuned—there are many more helpful DIY and home improvement insights waiting for you in our next articles!
