DIY Fireplace Makeover: Step-by-Step Guide to Tiling Over Brick for a Stunning New Look
Are you looking to revitalize an outdated brick fireplace and give your living space a fresh, modern appeal? Tiling over a brick fireplace is one of the most impactful and rewarding home improvement projects you can undertake. It’s a fantastic way to update a room, add significant aesthetic value, and even increase your home’s appeal. I’m thrilled to guide you through this transformative process, step by step, showing you how to turn that tired, old brick into a sleek, stylish focal point that breathes new life into your home.
This comprehensive guide is designed for both seasoned DIY enthusiasts and beginners, offering clear, actionable advice from start to finish. Here’s a sneak peek at what you’ll discover in this detailed article:
- Choosing the Right Tile: Expert tips on selecting the best types of tiles that are not only beautiful but also suitable for the unique demands of a fireplace.
- Preparation and Safety: Essential steps for preparing your workspace, thoroughly cleaning the brick, and crucial safety precautions to ensure a smooth and secure project.
- Step-by-Step Tiling Guide: A comprehensive, easy-to-follow walkthrough covering every detail, from mixing and applying thin-set mortar to precisely laying and cutting tiles for a professional finish.
- Enhancing Your Fireplace Area: Creative and simple ideas for styling and decorating the space around your newly tiled fireplace, turning it into a captivating centerpiece.
- Maintenance Tips: Practical advice and easy ways to keep your beautifully tiled fireplace looking pristine and fresh for years to come.
Choosing the Right Tile for Your Fireplace Makeover
The success of your fireplace update heavily relies on selecting the perfect tile. It’s not just about aesthetics; you need to consider durability, heat resistance, and ease of maintenance. The right tile will beautifully complement your home’s decor while standing up to the unique environment of a fireplace. Let’s explore some popular and effective options:
| Tile Type | Durability | Heat Resistance | Style | Cost | Maintenance |
|---|---|---|---|---|---|
| Porcelain | High; extremely dense and resistant to wear and tear. | Excellent; ideal for high-heat areas, does not expand or contract significantly. | Highly versatile; available in countless colors, patterns, and textures, mimicking wood or natural stone. | Moderate; offers great value for its longevity and performance. | Low; easy to clean and requires minimal upkeep. |
| Ceramic | Good; durable for most applications, but generally less dense than porcelain. | Good; suitable for fireplace surrounds, but check specific product ratings for intense heat zones. | Wide range of options; from rustic to contemporary, offering diverse design possibilities. | Low to moderate; a budget-friendly choice with good aesthetic appeal. | Low; simple to clean with standard household cleaners. |
| Natural Stone | High; marble, granite, slate, and travertine offer timeless beauty and strength. | Varies by type; some stones like slate are excellent, while others like marble can be porous and require sealing. | Luxurious, organic, and unique; each piece offers distinct veining and texture. | High; often considered a premium choice due to material and installation complexity. | Moderate to high; requires regular sealing and specific pH-neutral cleaners to prevent staining and etching. |
| Glass | Moderate; can be prone to chipping if struck forcefully. | Low to moderate; generally best used for decorative accents or areas further from the direct heat source. | Modern, shiny, and reflective; adds a touch of contemporary elegance and can brighten a space. | Moderate to high; price can vary based on quality and design complexity. | Low; easy to wipe clean, but can show streaks if not dried properly. |
| Cement | High; very durable and long-lasting, often handcrafted. | Good; can withstand significant temperature fluctuations. | Bold patterns, matte finish; ideal for creating a distinctive, artisanal look. | Moderate; often falls in a similar range to mid-grade porcelain. | Moderate; requires sealing to protect against stains and may show wear over time, developing a unique patina. |
| Metal | High; extremely robust and resistant to impact. | Excellent; particularly stainless steel or copper, which conduct heat well but can get very hot to touch. | Sleek, modern, industrial; adds a unique texture and reflective quality to the fireplace. | High; often used for accent tiles or specialized designs. | Low to moderate; specific cleaning agents may be required depending on the metal type to prevent tarnishing or scratching. |
When finalizing your tile selection, keep these crucial factors in mind:
- **Heat Output of Your Fireplace:** Understand if your fireplace generates extreme heat. The tiles closest to the firebox will experience the most heat, so choosing materials with excellent thermal resistance is paramount for safety and longevity.
- **Overall Style of Your Room:** Your fireplace should seamlessly integrate with your existing decor. Consider if you want a modern, rustic, traditional, or eclectic look, and choose tiles that reinforce that aesthetic.
- **Maintenance Commitment:** Be realistic about how much time you’re willing to dedicate to cleaning and maintaining your new tiled surface. Some materials, like natural stone, require more attentive care than others.
- **Your Project Budget:** Tiles range widely in price. Set a budget before you start shopping to help narrow down your options and ensure you stay within your financial comfort zone.
Color and Texture Choices for Fireplace Tiles
Beyond material, the color and texture of your chosen tiles play a significant role in setting the mood and visual impact of your fireplace:
- Color Impact: Light-colored tiles (whites, creams, light grays) can make your fireplace feel more expansive and brighter, reflecting light and creating an airy atmosphere. Conversely, dark colors (charcoal, navy, deep greens) can create a dramatic, sophisticated, and cozy focal point, drawing the eye and adding depth.
- Texture Appeal: Textured tiles introduce visual interest and tactile depth, often helping to camouflage minor imperfections or dust. Options include natural stone’s rough-hewn charm, relief patterns, or subtle undulations. Smooth, polished tiles, on the other hand, offer a clean, contemporary, and often luxurious feel, perfect for a sleek, minimalist design.
Remember, the tile you ultimately choose will be a dominant feature in your room’s design. Take your time, gather samples, and visualize how different options will look in your space before making your final decision. The perfect tile will not only function beautifully but also enhance the overall ambiance of your home.
Important Safety Tips Before You Start Tiling Your Fireplace
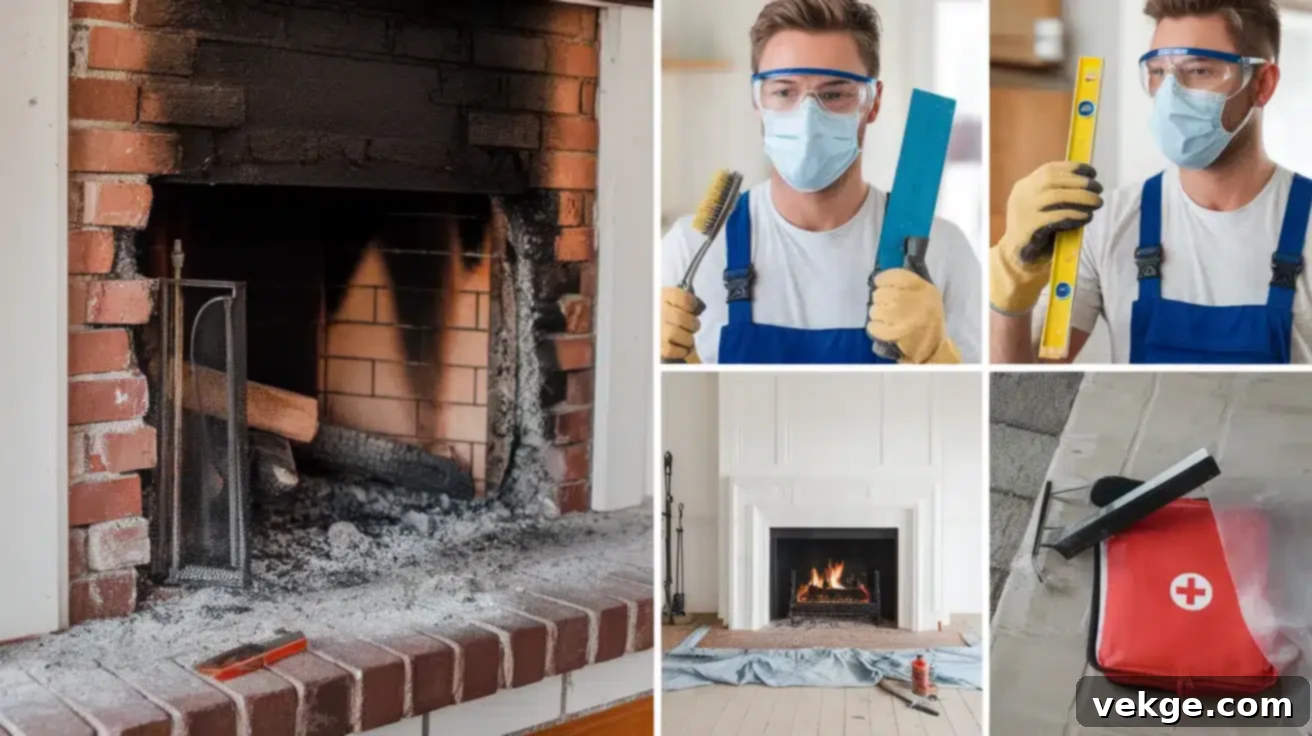
Before you even think about mixing mortar or laying your first tile, prioritizing safety is non-negotiable. Working on a fireplace involves potential hazards, from gas lines to dust and sharp tools. Following a thorough safety checklist will not only protect you but also ensure a successful and worry-free project. Here’s how to prepare safely:
- Turn Off the Gas/Electricity: This is paramount. If you have a gas fireplace, locate and shut off the gas supply at the main valve. If you’re unsure how to do this safely, or if your fireplace is electric, consult a qualified professional. Accidental gas leaks or electrical shocks can be extremely dangerous.
- Thoroughly Clean the Fireplace: Remove all ashes, debris, and any flammable materials from the firebox and hearth. Use a sturdy wire brush to aggressively scrub the brick surface, removing all soot, dirt, and loose particles. A clean surface is essential for proper adhesion and also reduces airborne contaminants.
- Inspect for Damage and Repair: Carefully examine the brick for any cracks, loose bricks, crumbling mortar, or structural damage. Any existing issues must be addressed and repaired *before* you begin tiling. Tiling over a compromised structure will lead to future problems and tile failure. Use a masonry repair compound for cracks or re-tuck any loose mortar.
- Gather Your Essential Safety Gear: Personal protective equipment (PPE) is crucial. You’ll need safety glasses to protect your eyes from dust and flying debris, a dust mask (preferably an N95 respirator) to prevent inhaling fine particles from demo or mixing, durable work gloves to protect your hands, and knee pads if you anticipate spending time kneeling.
- Prepare and Inspect Your Tools: Ensure all your tools are in good working condition. Check for frayed cords on power tools, sharp blades on cutters, and secure handles on hammers. Keep sharp tools stored safely when not in immediate use, out of reach of children and pets.
- Set Up a Clear and Protected Work Area: Clear the entire area around the fireplace of furniture, decor, and anything that could get damaged or obstruct your movement. Lay down heavy-duty drop cloths to protect your flooring from mortar, grout, and dust. Tape the edges of the drop cloths to prevent slippage.
- Ensure Excellent Ventilation: Mixing thin-set and grout can release fine dust and strong odors. Open windows, use fans, or set up a cross-breeze to ensure good airflow. This helps dissipate dust and chemical fumes, protecting your respiratory health.
- Have a First-Aid Kit Readily Available: Keep a well-stocked first-aid kit close by and ensure you know basic first aid for minor cuts, scrapes, or burns. In case of a more serious injury, know where to find emergency contact numbers.
Taking these precautions seriously will set the foundation for a safe and successful fireplace tiling project, allowing you to focus on the craftsmanship rather than worrying about preventable accidents.
Step-by-Step Guide to Tiling Over Your Brick Fireplace
Step 1: Gathering Tools and Materials & Initial Project Prep
Before diving into the physical work, a well-organized workspace and a complete inventory of tools and materials are essential. This prevents frustrating delays and ensures you have everything at hand when needed. Here’s what you’ll need:
| Category | Item | Purpose |
|---|---|---|
| Tools | Tile chisel | Used to carefully remove any existing loose material or to help chip away stubborn brick irregularities. |
| Mortising bit (for rotary hammer) | Extremely useful for breaking up tough mortar or brick if significant demolition is required to create a flat surface. | |
| 3-pound club hammer | Paired with a chisel, this provides the force needed for demolition work, breaking up old tile or mortar. | |
| Stud finder | Crucial for locating studs or wooden framing behind the drywall when securing a new mantle or cement board. | |
| Scraper blade | Effectively removes leftover construction adhesive, silicone, paint, or any other residues from the surface. | |
| V-notch or U-notch trowel | Applies thin-set mortar evenly to the backing surface, creating the necessary ridges for tile adhesion. The notch size depends on tile size. | |
| Rubber float | Used to spread grout into the joints between tiles, ensuring full coverage and a smooth finish. | |
| Tile saw (wet saw) | Indispensable for making precise, clean cuts on tiles, especially for intricate shapes or when working with hard materials like porcelain. | |
| Wedge spacers / Tile leveling system | Essential for maintaining consistent spacing between tiles and ensuring a perfectly level and flush surface, preventing lippage. | |
| 1/16-inch tile spacers | Specifically for establishing uniform grout lines, particularly important for smaller or mosaic tiles. | |
| Microfiber cloth | Used for final buffing and removing any stubborn grout haze from the tile surface after initial cleaning. | |
| Sponge | Dampened and used to wipe away excess grout from the tile surface during the grouting process. | |
| Work gloves | Protects hands from mortar, grout, and potential abrasions during the entire project. | |
| Shop vacuum | For efficient cleanup of dust and debris during demolition and after grout cleanup, keeping the workspace tidy. | |
| Painter’s tape | Used to protect adjacent walls, trim, or the floor from mortar, grout, and paint splatters. | |
| Materials | Selected tile (e.g., White marble tile) | The decorative surfacing material chosen for your fireplace. |
| Modified thin-set mortar | An adhesive specifically designed for tiling, often with polymers for enhanced bond strength and flexibility, suitable for diverse substrates. | |
| Mesh tape | Fiberglass mesh tape used to reinforce seams in cement board or drywall, preventing cracks. | |
| Construction adhesive | Optional but useful for securing elements like the mantle or specific trim pieces; provides extra hold. | |
| Grout (sanded or unsanded) | Fills the gaps between tiles, providing structural integrity, preventing moisture penetration, and enhancing the aesthetic. | |
| Wood cleat | A temporary support ledger installed horizontally to support the first row of tiles, ensuring they are perfectly level while the mortar cures. | |
| Replacement drywall or cement board (if needed) | Used to repair or create a new, smooth, flat surface over the brick if the original surface is uneven or damaged. |
Once you have all your supplies, clear the area around your fireplace completely. Remove any items on the mantle, hearth, or nearby furniture. Lay down heavy-duty drop cloths, secured with painter’s tape, to fully protect your flooring from dust, debris, mortar, and grout spills. A clean and clear workspace is crucial for safety and efficiency.
Step 2: Giving the Brick a Fresh Start – Cleaning and Preparing the Surface
A clean, stable surface is paramount for successful tile adhesion. Any dirt, soot, or loose particles will compromise the bond. Here’s how to prepare your brick:
- Start by using a stiff wire brush to thoroughly scrub off all dirt, soot, and any loose mortar or efflorescence from the brick surface. Be vigorous, as any residue can prevent thin-set from bonding properly.
- Next, mix a solution of warm water and a heavy-duty degreaser or dish soap. Apply this generously to the brick and scrub again with the wire brush, paying extra attention to stubborn stains. For very heavy soot, a trisodium phosphate (TSP) solution might be necessary (always wear protective gear when using TSP).
- Rinse the brick thoroughly with clean water, ensuring all soap residue is removed. A spray bottle can help for targeted rinsing.
- Allow the brick surface to dry completely, which might take 24-48 hours depending on humidity. Any residual moisture can affect mortar adhesion.
Step 3: Creating a Smooth, Stable Surface (Drywall or Cement Board)
Brick is inherently uneven, making direct tiling challenging. Creating a flat, stable substrate is key for a professional finish. This can be done with cement board or drywall (for areas not directly exposed to extreme heat):
- Measure the dimensions of each section of your fireplace that you intend to tile. Transfer these measurements precisely to your cement board (recommended for moisture resistance and stability) or moisture-resistant drywall.
- Cut the board to fit using a utility knife and a straight edge (for drywall) or a circular saw with a carbide blade (for cement board, always wear a dust mask).
- Attach the board directly to the brick using masonry screws, ensuring they penetrate securely into the brick or mortar joints. Space screws every 6-8 inches. For better adhesion, you can apply a thin layer of construction adhesive to the back of the board before screwing it into place.
- Use a level to check that your newly installed surface is perfectly plumb and level. If necessary, use shims behind the board in uneven areas to achieve a flat plane.
- Once all sections are installed, cover all seams between boards and any inside or outside corners with fiberglass mesh tape. Apply a thin coat of joint compound or thin-set mortar over the tape, feathering the edges to create a smooth, continuous surface.
- Allow the joint compound or thin-set to dry completely according to the manufacturer’s instructions before proceeding. Lightly sand any rough spots for a perfectly smooth canvas.
Step 4: Spreading Thin-set Mortar for a Strong, Lasting Hold
The thin-set mortar is the glue that holds your tiles in place. Correct mixing and application are vital for a strong bond:
- Prepare the modified thin-set mortar according to the manufacturer’s instructions. Use a mixing paddle attached to a drill for a smooth, lump-free consistency, similar to peanut butter. Let it slake for 5-10 minutes, then re-mix.
- Using a notched trowel (select a notch size appropriate for your tile size – generally 1/4″ to 1/2″), spread a thin, even layer of mortar onto a small section of your prepped surface. Do not cover an area larger than what you can tile within 10-15 minutes, as the mortar will begin to skin over and lose its adhesive properties.
- Hold the trowel at a 45-degree angle to create consistent, straight ridges in the mortar. These ridges help the tile bond evenly and allow air to escape.
- For larger tiles (over 12×12 inches) or natural stone, consider “back-buttering” the back of each tile with a thin layer of mortar using the flat side of your trowel. This ensures 100% coverage and prevents voids, which can lead to tile cracking.
Step 5: Laying Down the First Row of Tile with Precision
The first row sets the foundation for the entire project, so accuracy is key. Consider using a temporary wood cleat:
- Start by establishing your layout. If your fireplace has a hearth, you’ll typically start there. Otherwise, use a level to draw a straight horizontal line for your first row, especially if you’re working vertically up the fireplace surround. You can also temporarily screw a straight wooden cleat into the wall along this line to support the first row of tiles.
- Begin placing your first tile at the center of your layout, ensuring it’s perfectly aligned with your reference marks. Press it firmly into the mortar with a slight twisting motion to ensure full contact.
- Insert tile spacers (e.g., 1/16-inch or 1/8-inch) at each corner of the tile to maintain consistent grout lines.
- Work your way outwards from the center, placing adjacent tiles and maintaining even spacing. Continuously use a level (both horizontally and vertically) to check that each tile is straight, plumb, and level with its neighbors. Adjust tiles immediately as needed.
- Check for “lippage” – where one tile edge is higher than an adjacent tile. Adjust by gently pressing the higher tile or adding a tiny bit more mortar under the lower one. A tile leveling system can greatly assist with this.
Step 6: Cutting and Custom Fitting Tiles for a Perfect Finish
Most projects require cutting tiles to fit edges, corners, or around obstacles like outlets:
- Carefully measure any spaces that require a cut tile. Measure twice, cut once!
- Mark your cut lines clearly on the tile using a pencil or marker.
- For straight cuts, a manual tile cutter or a wet saw is ideal. A wet saw provides cleaner, more precise cuts, especially for porcelain or natural stone. For intricate cuts (L-shapes, circles), a wet saw with a diamond blade or a tile nipper might be necessary.
- Always test-fit your cut tile in its intended spot before applying mortar. This allows for any fine adjustments.
- Safety First: Always wear safety glasses when cutting tiles. The process can generate sharp fragments and dust.
Step 7: Reinforcing the Gaps and Allowing Mortar to Cure
Once all tiles are laid, the next crucial step is to ensure proper setting and prepare for grouting:
- Before the mortar begins to dry (within about 30 minutes after laying), re-check that all tiles are perfectly level and even. Gently press down on any tiles that feel less secure to ensure they are fully embedded in the mortar.
- Using a utility knife or a grout pick, carefully clean any excess mortar that has squeezed up into the grout lines between the tiles. This ensures your grout lines will be clean and uniform.
- Allow the thin-set mortar to cure completely. This is critically important for the long-term stability of your tile installation. Refer to the product instructions, but typically this means waiting at least 24 to 48 hours before proceeding to the grouting stage. Premature grouting can compromise the bond and lead to future issues.
Step 8: Sealing It In with Grout for Durability and Aesthetics
Grouting adds structural integrity, prevents moisture intrusion, and finishes the look of your tiled fireplace:
- Once the mortar is fully dry and cured, carefully remove all tile spacers.
- Prepare the grout according to the manufacturer’s instructions. Choose between sanded grout (for wider grout lines, typically 1/8 inch or more, as sand prevents cracking) or unsanded grout (for narrower lines, less than 1/8 inch, to avoid scratching delicate tiles). Mix thoroughly to a thick, paste-like consistency, then let it slake for 5-10 minutes and remix.
- Using a rubber float, apply the grout diagonally across the tile surface, pressing firmly to work it into all the gaps between tiles, ensuring every joint is completely filled.
- Work in small sections. Once a section is grouted, clean off excess grout from the tile surface by holding the rubber float at a 45-degree angle and scraping it across the tiles, still moving diagonally.
- Wait approximately 15-30 minutes for the grout to set slightly (it should be firm but not fully hardened). Then, use a damp (not soaking wet) sponge to gently wipe off any remaining grout haze from the tile surface. Rinse your sponge frequently in clean water. Be careful not to pull grout out of the joints.
- After the grout has fully cured (usually 24-72 hours), a fine haze might remain. Buff the tiles clean with a dry microfiber cloth.
- For optimal protection, especially with porous tiles or grout, consider applying a high-quality grout sealer after the grout has fully cured (check product recommendations for timing, usually 72 hours to a week).
Step 9: Adding Those Final Touches with the Mantle and Trim
The mantle often serves as a beautiful frame for your new tile work:
- If you removed the original mantle, now is the perfect time to reinstall it. Ensure it is perfectly level and securely attached using appropriate fasteners into wall studs or masonry anchors.
- Consider upgrading your mantle. You might want to paint or stain your existing mantle to complement the new tile color and your room’s decor. A new, custom-built mantle can also elevate the entire look.
- Add any decorative trim or edging around the fireplace opening or the new mantle to give a polished, finished appearance. This could include quarter-round molding or specific tile trim pieces.
- Finally, clean up any remaining dust or debris from your workspace. Step back and admire your beautiful, transformed fireplace!
For a more detailed visual tutorial, consider searching on YouTube for videos on “how to tile a fireplace.” There are many excellent resources available that can complement these written instructions.
Adding Extra Style: How to Boost Your Fireplace Area’s Aesthetic
Once your tiling project is complete, the new, sleek surface provides a perfect canvas for enhancing the entire fireplace area. Thoughtful styling can transform it from a mere feature into a captivating focal point. Here are some creative ideas to elevate your fireplace’s appeal:
1. Paint the Wall Behind the Fireplace for Dramatic Impact

A fresh coat of paint on the wall directly behind your fireplace can make it truly pop, acting as an accent wall. For a bold and sophisticated statement, consider deep, rich hues like navy blue, charcoal gray, or a lush forest green. These colors add depth and drama, making your tiled fireplace stand out. If you prefer a softer, more inviting ambiance, warm neutrals such as creamy beige, soft gray, or a muted taupe can create a cozy and serene vibe. Alternatively, introduce texture and pattern with carefully chosen wallpaper or classic shiplap paneling to add dimension and visual interest to the wall, making it a truly unique backdrop for your fireplace.
2. Add a Mantle Shelf and Decorate with Seasonal Items
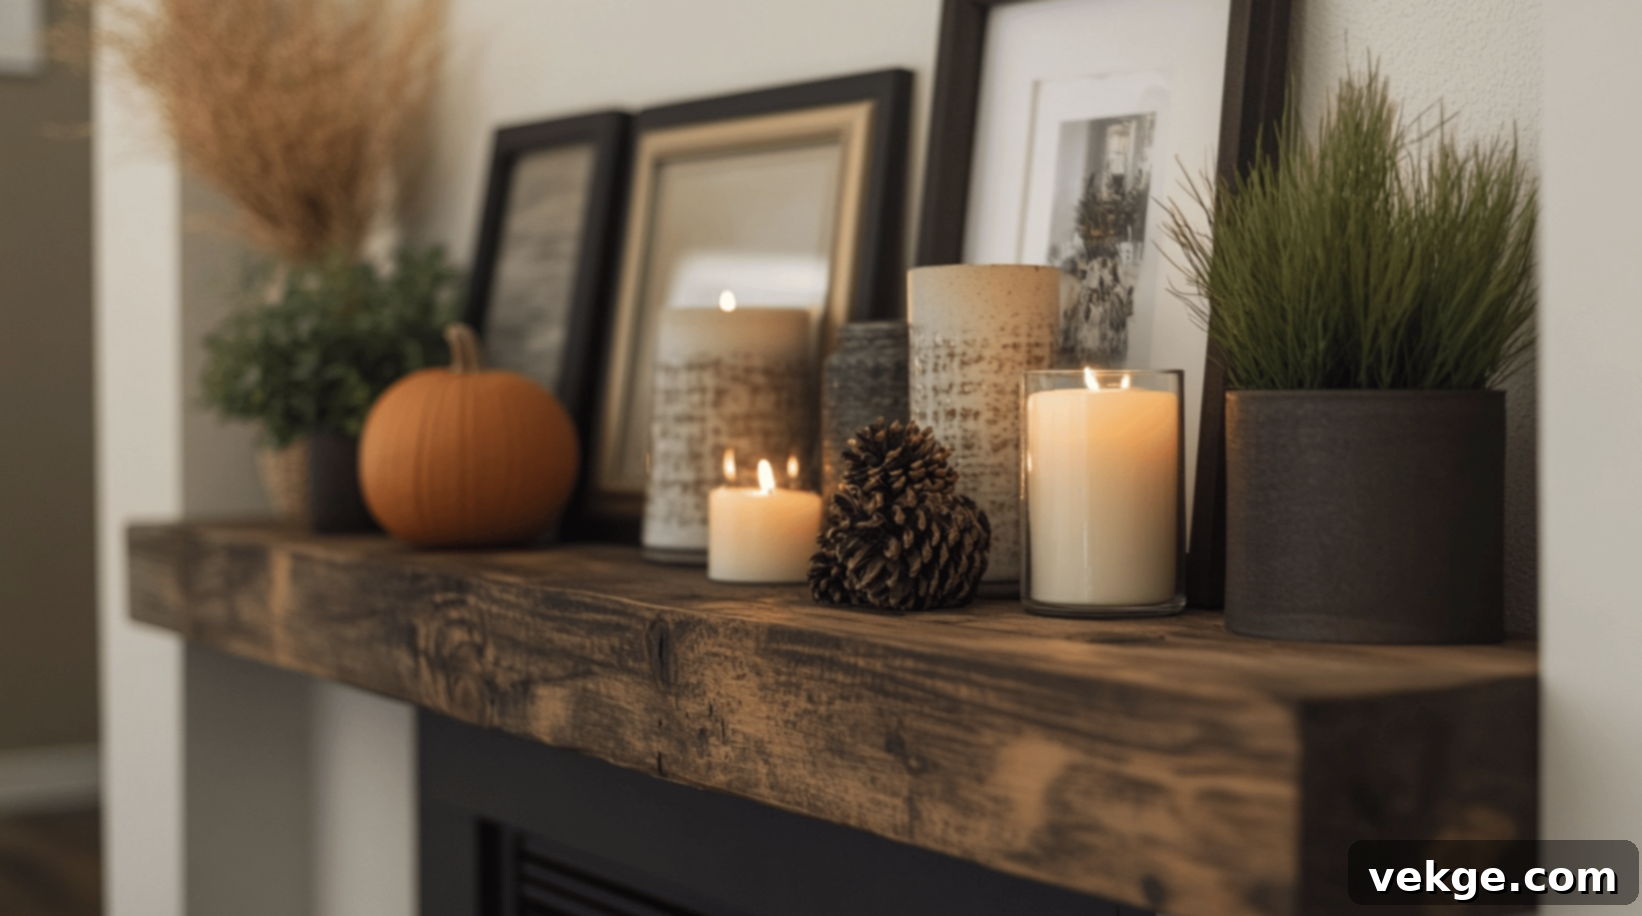
A mantle shelf is more than just a functional element; it’s a prime decorating opportunity. Even a simple wooden shelf can significantly enhance your fireplace’s presence. Decorate it with a curated collection of items: varying heights of candles for ambient lighting, small potted plants or succulents for a touch of greenery, and a selection of framed photos or artwork for personal charm. The beauty of a mantle is its versatility, allowing you to switch up your decor with the seasons. From festive holiday garlands to fresh spring blooms or autumnal gourds, seasonal items infuse your room with personality and keep the space feeling fresh and current throughout the year.
3. Place Potted Plants or Greenery Nearby to Soften the Look

Introducing plants and greenery around your fireplace is an excellent way to bring the tranquility of nature indoors and soften the potentially stark lines of brick or tile. For a grand statement, place larger, floor-standing plants like a majestic fiddle leaf fig or a resilient snake plant on either side of the fireplace, effectively framing it and drawing the eye. On the mantle itself, smaller succulents, trailing pothos, or delicate ferns can add a lush, inviting touch without overwhelming the space. The vibrant green not only offers a beautiful contrast to your tiled surface but also contributes to a healthier indoor environment.
4. Hang Artwork or a Mirror Above the Mantle for Visual Interest
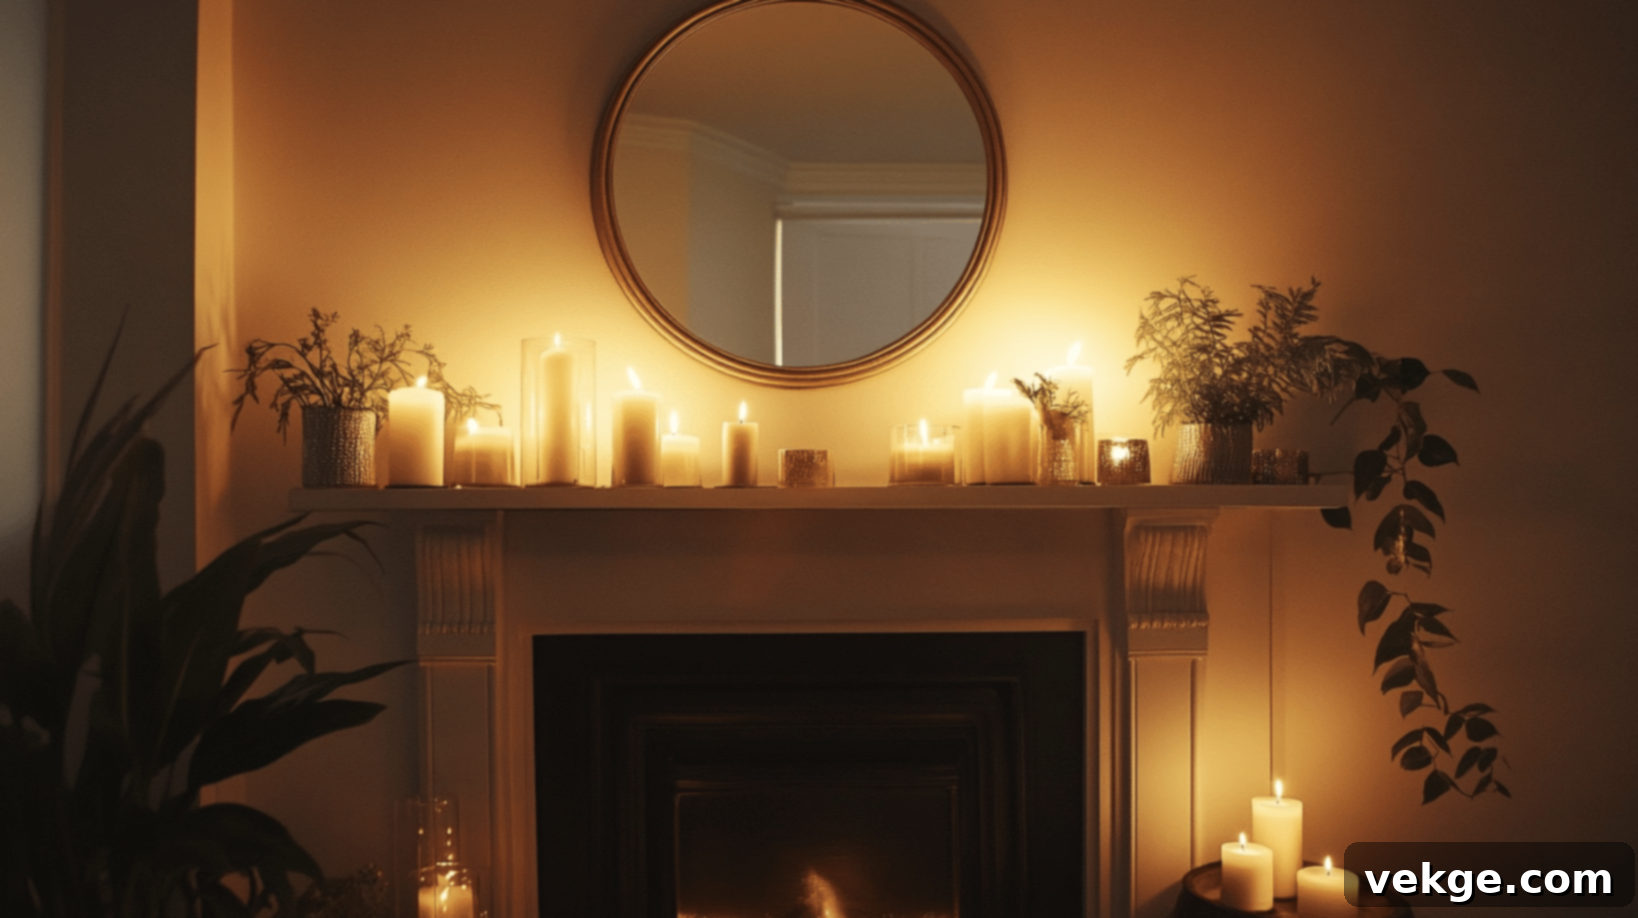
The space above the mantle is a natural focal point, perfect for showcasing a statement piece. A large, elegantly framed mirror not only adds sophistication but also cleverly reflects light, making the room feel more open and spacious. Alternatively, a striking piece of artwork can infuse your room with color, theme, and personality. Choose a piece that complements your room’s existing color scheme and style, whether it’s a vibrant abstract, a serene landscape, or a bold graphic print. For a more contemporary feel, consider a gallery wall composed of several smaller framed pieces or a unique statement clock, creating a dynamic visual display.
5. Incorporate a Cozy Hearth Rug or Floor Seating

To enhance the comfort and inviting atmosphere of your fireplace area, incorporate soft textiles. A plush hearth rug placed directly in front of the fireplace adds warmth underfoot and defines the space, making it feel more intentional and cozy. For ultimate relaxation, add floor cushions or a small pouf. These elements not only make the area more inviting for sitting by the fire but also add layers of texture and color. Select a rug and seating that harmonize with your room’s decor, picking colors and patterns that tie into your existing design scheme for a cohesive and appealing look.
6. Accent Lighting Around the Fireplace for Enhanced Ambiance

Strategic accent lighting can dramatically enhance the ambiance of your fireplace area, creating a warm and inviting glow. Install elegant sconces on either side of the fireplace to cast soft, directional light. For a more whimsical or cozy feel, drape delicate string lights along the mantle or within decorative elements. A collection of candles of various sizes and heights can also provide a flickering, intimate glow. For a truly modern touch, consider discreet LED strip lighting installed under the mantle or around the perimeter of the hearth. This can beautifully illuminate your new tile work, highlighting its texture and color, and adding a contemporary edge to the space.
7. Accessorize with Personal Touches and Functional Elements
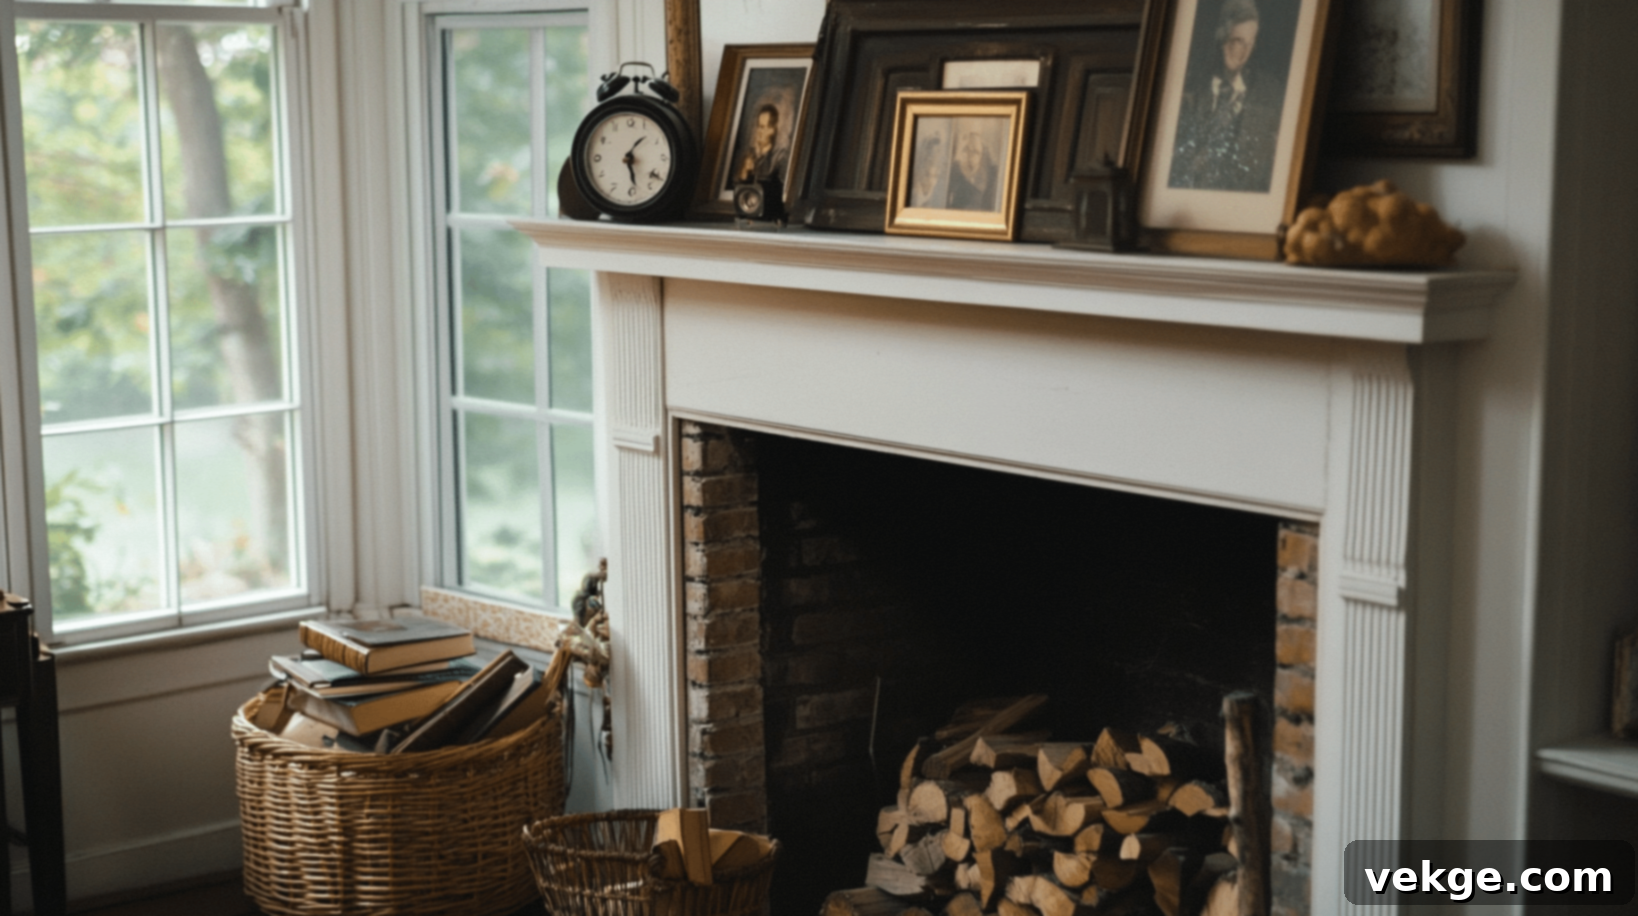
Finally, personalize your fireplace area by displaying items that truly reflect your style and interests. A curated collection of cherished books, antique clocks, or an array of family photographs arranged on the mantle can add warmth, history, and unique charm. Beyond decorative items, consider functional accessories that enhance the fireplace experience. A stylish basket filled with neatly stacked firewood adds a rustic touch and practical storage. A vintage lantern, a set of elegant fire tools, or a distinctive screen can complete the look, making the fireplace feel both operational and beautifully styled. These personal touches transform the space into a true reflection of your home’s character.
Caring for Your Newly Tiled Fireplace: Tips for Lasting Beauty
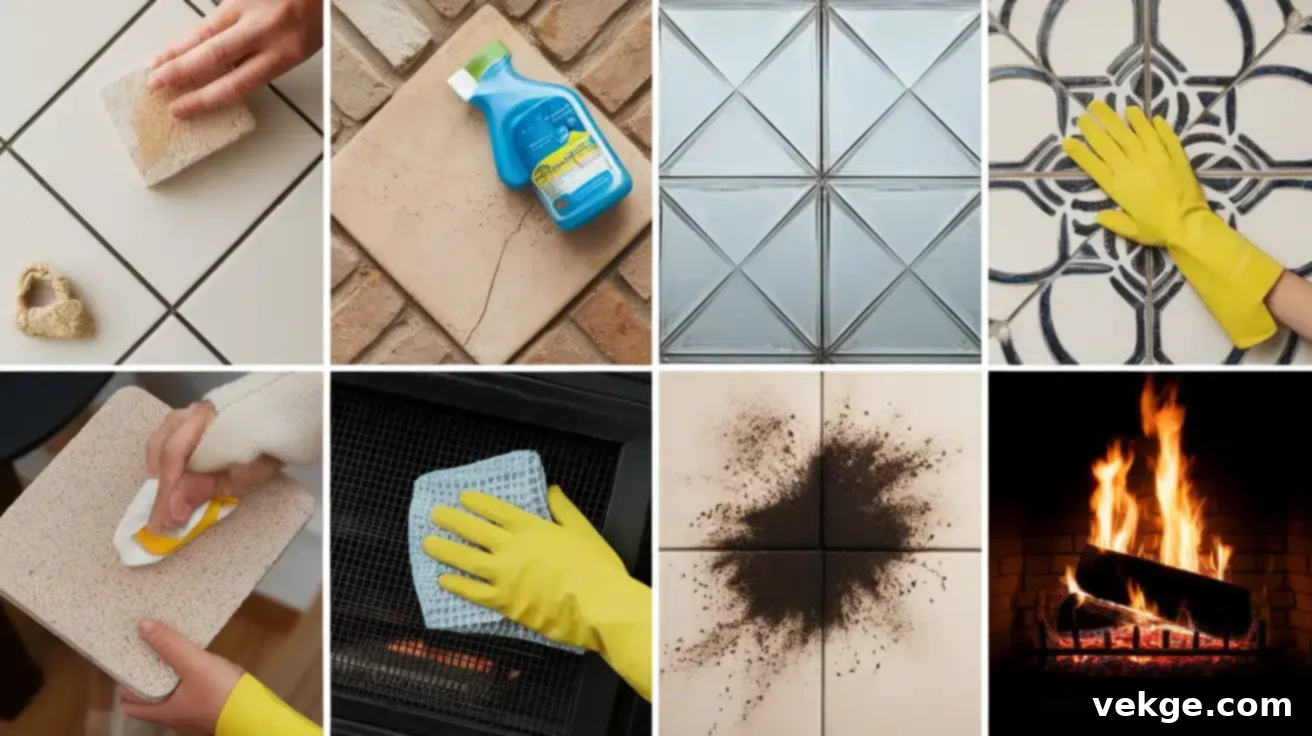
Congratulations on transforming your fireplace with beautiful new tiles! Now that your project is complete, the next step is ensuring its long-term beauty and durability. Proper care and maintenance will keep your tiled fireplace looking fresh, vibrant, and as stunning as the day it was installed. Here are essential tips to help you maintain your beautiful new focal point:
Regular Cleaning for Everyday Sparkle
Consistent, gentle cleaning is key to preventing dirt and dust build-up, which can dull your tiles over time:
- Dust Weekly: Use a soft, dry microfiber cloth, a feather duster, or a vacuum cleaner with a brush attachment to remove loose dust, cobwebs, and light debris from the tile surface and grout lines. This prevents dirt from accumulating and becoming harder to remove later.
- Gentle Washing: For deeper cleaning, prepare a solution of warm water and a small amount of mild dish soap or a pH-neutral tile cleaner. Dampen a soft cloth or sponge with this solution and gently wipe down the tiles. Avoid using excessive water, especially on grout.
- Avoid Harsh Chemicals: Steer clear of abrasive cleaners, harsh chemicals, scouring powders, and acid-based products. These can etch or discolor your tiles, strip sealants, or damage grout. Always test a new cleaner in an inconspicuous area first.
- Dry Thoroughly: After washing, use a clean, dry cloth to wipe down the tiles and remove any excess moisture. This helps prevent water spots, streaks, and potential mildew growth, especially in grout lines.
Specialized Care for Different Tile Types
Each tile material has unique characteristics, requiring specific cleaning approaches:
- Ceramic and Porcelain Tiles: These are generally very resilient and easy to clean. Most mild, pH-neutral household cleaners are safe to use. Their non-porous nature makes them resistant to stains.
- Natural Stone Tiles (Marble, Granite, Slate, Travertine): These are porous and require extra care. Always use pH-neutral, stone-specific cleaners to avoid etching, discoloration, or dulling the stone. Natural stone should also be sealed periodically (typically annually, but check with your installer or product instructions) to protect against stains and moisture.
- Glass Tiles: To achieve a streak-free shine, a simple solution of equal parts white vinegar and water works wonderfully. Wipe with a microfiber cloth and dry immediately. Avoid abrasive scrubbers that could scratch the glass surface.
- Metal Tiles: The cleaning method depends on the specific metal (e.g., copper, stainless steel, bronze). Use cleaners specifically formulated for that metal type to prevent tarnishing, discoloration, or damage. Avoid harsh acids or abrasive scrubbers.
Protecting and Maintaining Your Grout
Grout is often the most vulnerable part of your tile installation, prone to staining and discoloration:
- Apply Grout Sealer: If you haven’t already, apply a high-quality penetrating grout sealer after the initial curing period. Reapply the sealer annually, or as recommended by the product manufacturer, to create a protective barrier against moisture, dirt, and stains.
- Clean Spills Promptly: Immediately wipe up any spills, especially those from liquids like wine, coffee, or soot, to prevent them from soaking into the porous grout and causing permanent stains.
- Gentle Grout Cleaning: For routine cleaning of grout lines, use a soft-bristled brush (like an old toothbrush) with your mild cleaning solution. For stubborn stains, a paste made from baking soda and water can be gently scrubbed onto the grout, allowed to sit for a few minutes, and then rinsed clean.
Avoiding Scratches and Damage
Preventative measures can keep your tiles looking smooth and new:
- Use Soft Cleaning Tools: Always opt for soft cloths, sponges, or non-abrasive brushes for cleaning to prevent scratching the tile surface, especially with glossy or softer tile types.
- Install a Fireplace Screen: If you have a wood-burning fireplace, a sturdy fireplace screen is essential. It prevents sparks, embers, and logs from coming into direct contact with your new tiles, which could cause burns, chips, or cracks.
- Exercise Caution with Objects: Be mindful when placing items on the hearth or mantle. Avoid dragging heavy or sharp objects across the tiled surface. Use felt pads under decorative items to prevent scratches.
Dealing with Soot and Ash
If your fireplace is regularly used, soot and ash will be a common concern:
- Wipe After Each Use: Once the fireplace has completely cooled, gently wipe away any visible soot or ash residue from the tiled surfaces with a damp cloth. Regular cleaning prevents build-up.
- Tough Soot Removal: For more stubborn soot stains, create a paste using baking soda and a small amount of water. Gently apply this paste to the affected area with a soft cloth or sponge, let it sit for 5-10 minutes, then scrub lightly and rinse thoroughly with clean water.
Heat Safety Considerations
Remember, your fireplace is a heat source, so observe heat safety protocols:
- Allow Cooling: Always wait until the tiles and the fireplace structure are completely cool to the touch before attempting any cleaning. Cleaning hot surfaces can cause burns and may even damage certain cleaning products or tile sealants.
- Use Heat-Resistant Tools: If you must clean the area while it’s still warm (though not hot), use heat-resistant gloves and cleaning tools.
- Avoid Flammables: Never place anything flammable, such as excessive decor, fabrics, or chemicals, directly on or too close to the tiled fireplace area, especially when the fire is active.
By diligently following these care and maintenance tips, your beautifully updated tiled fireplace will remain a stunning and cherished focal point in your home for many years to come. Regular, gentle cleaning and proactive solutions for minor issues will keep it looking as good as new, enhancing your living space’s appeal and warmth.
Conclusion: A Transformed Hearth, A Renewed Home
As I step back and admire my newly tiled fireplace, I’m genuinely struck by the profound transformation it has brought to the entire feel of my room. What was once an outdated, tired brick structure now gleams as a modern, sophisticated focal point, a testament to the power of a thoughtful DIY project.
This journey, while presenting its fair share of challenges and requiring a good measure of patience, has been an incredibly rewarding experience. It’s taught me that with careful planning, the right tools, and a willingness to learn, even a DIY beginner can successfully tackle such a significant home improvement. The process has instilled valuable skills, from meticulously choosing the perfect tiles that complement my home’s aesthetic to precisely applying them to create a flawless finish.
Now, as I enjoy the inviting warmth of the fire, cast against the elegant backdrop of gleaming tiles, I’m reminded of a fundamental truth: our homes are ever-evolving spaces, shaped not just by professional builders but by our own efforts, creativity, and dedication. This fireplace makeover has not merely updated a single feature; it has breathed new life, character, and warmth into my entire living space, proving that a little vision and elbow grease can truly redefine comfort and style.
