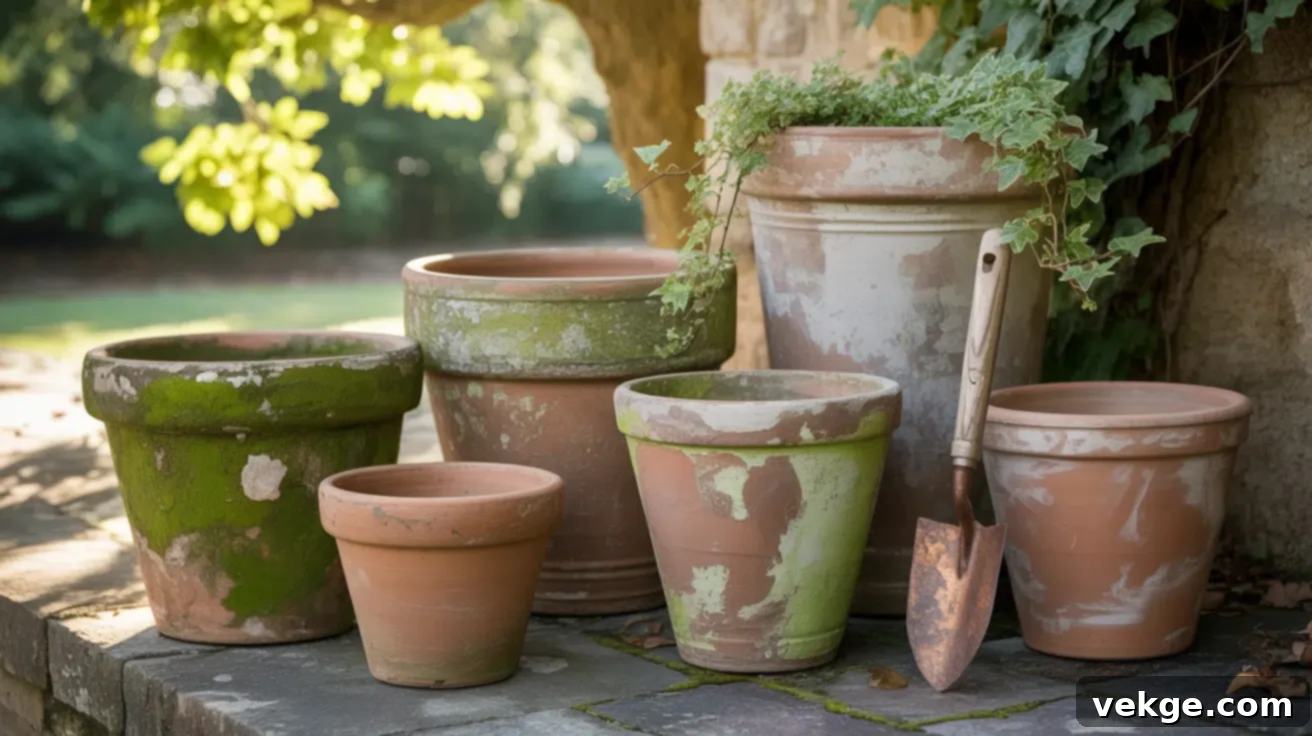
DIY: How to Age Terracotta Pots for a Beautiful Vintage Look & Weathered Charm
Terracotta pots are a timeless staple in gardens and patios, celebrated for their classic shape and earthy appeal. However, brand-new clay pots often possess a bright, pristine appearance that can feel out of place in established or naturally styled outdoor environments. Their clean, uniform look might clash with the rustic charm of aged stone, weathered wood, or antique garden features, leaving your space feeling less cohesive and naturally settled.
If you’re like many garden enthusiasts who yearn for that soft, time-worn patina and vintage character without the expense of purchasing already-aged pots, you’ve come to the right place. This comprehensive guide is designed to empower you with simple, effective, and budget-friendly methods to transform your new terracotta planters into pieces that look like they’ve graced gardens for decades.
We’ll explore several easy-to-follow techniques using common household items such as yogurt, garden lime, paint, and even ordinary dirt. You likely already have most of these materials on hand, making this a truly accessible DIY project. I’ll walk you through the entire process, from preparing your pots to applying each aging method, ensuring a durable seal, and highlighting common pitfalls to avoid. You won’t need any specialized tools or complex steps – just clear, simple instructions that guarantee a beautiful, natural-looking finish.
These proven tips will help your terracotta pots not only gain a more settled, cozy, and integrated feel within your outdoor space but also contribute to a sense of history and warmth. Choose the method or combination of methods that best suits your desired aesthetic and timeline, and let’s embark on this rewarding journey to create stunning, aged terracotta treasures!
Why Age Terracotta Pots: Enhancing Aesthetic and Functionality
Aging terracotta pots is more than just an aesthetic choice; it significantly improves both their appearance and their functional integration within garden spaces. Fresh, unblemished clay pots, while charming in their own right, often present a stark contrast with the organic textures and muted tones found in nature or alongside materials like weathered stone, rustic wood, or antique metalwork. This visual disharmony can detract from the overall ambiance of your garden.
Once aged, the surface of a terracotta pot undergoes a beautiful transformation. It becomes softer, less shiny, and acquires a subtle, varied texture that allows it to blend seamlessly into almost any outdoor environment. This textured finish isn’t just for looks; it can also effectively hide everyday marks from soil, water, and mineral deposits, making your pots appear naturally resilient and easier to maintain their charming facade.
Furthermore, some aging methods actively promote the growth of moss or algae, which adds a living, verdant layer to your pots. Beyond their undeniable beauty, these organic coatings can offer practical benefits, such as increased moisture retention in damp spots and natural cooling for plant roots. Aged pots also create a more balanced and harmonious setup when paired with other garden elements like brick patios, metal sculptures, or wooden benches, establishing a cohesive and visually rich landscape.
Opting to age new pots rather than replacing them to match existing ones offers a sustainable and cost-effective solution. It allows you to achieve that coveted, time-honored look without the added expense, environmental impact, or material use associated with buying new, artificially aged, or genuinely antique planters. It’s a mindful approach to garden design that celebrates the beauty of natural aging and personalized craftsmanship.
Essential Materials for Aging Terracotta Pots
Before diving into the exciting process of aging your terracotta pots, it’s wise to gather all your necessary tools and supplies. Having everything within reach will make the process smoother, more enjoyable, and significantly less messy. The following basic items are versatile enough to be used across most of the aging methods we’ll explore.
Basic Supplies You’ll Need
- Sponge: An indispensable tool for dabbing, wiping, and creating uneven textures, which are key to a natural, aged look. Different sponge types (natural sea sponge, synthetic kitchen sponge) can produce varying effects.
- Paintbrush: Essential for applying washes, pastes, and solutions smoothly or in textured strokes. Keep a few sizes handy for different areas of the pot.
- Mixing bowl or Old Container: Crucial for preparing your aging mixtures (lime wash, paint wash, dirt paste). An old plastic container or bucket works perfectly and is easy to clean.
- Clear Matte Sealer (Spray or Brush-on): This is vital for protecting your newly aged finish, especially for pots exposed to outdoor elements. A matte finish preserves the natural, non-shiny look.
- Protective Gloves: Absolutely necessary when working with substances like garden lime or paints to protect your hands from irritation and stains.
Optional Items for Enhanced Results and Protection
- Sandpaper (fine-grit): Excellent for distressing the surface, particularly after applying a wash, to reveal hints of the underlying terracotta and simulate natural wear and tear around edges and raised areas.
- Drop Cloth or Old Newspaper: Protect your workspace (table, patio, garage floor) from spills and splatters, making cleanup a breeze.
- Dust Mask: Highly recommended when working with powdered materials like garden lime, as inhaling fine dust can cause respiratory irritation. Safety first!
- Spray Bottle: Useful for misting pots during the moss or yogurt aging process, providing the necessary humidity for microbial growth.
- Stiff Brush: For cleaning excess dirt or salt after a specific aging method, or for light scrubbing on sealed pots during aftercare.
Best Methods to Age Terracotta Pots for a Vintage Look
Achieving a wonderfully worn and aged look on your new terracotta pots is surprisingly simple, often utilizing materials you can find right at home or at your local garden center. Each method offers a unique texture and finish, allowing you to tailor the aesthetic to your specific garden style. Carefully consider your desired outcome, the time you have available, and the overall look you want to achieve before selecting the perfect technique.
1. Using Yogurt to Grow Natural Texture and Patina
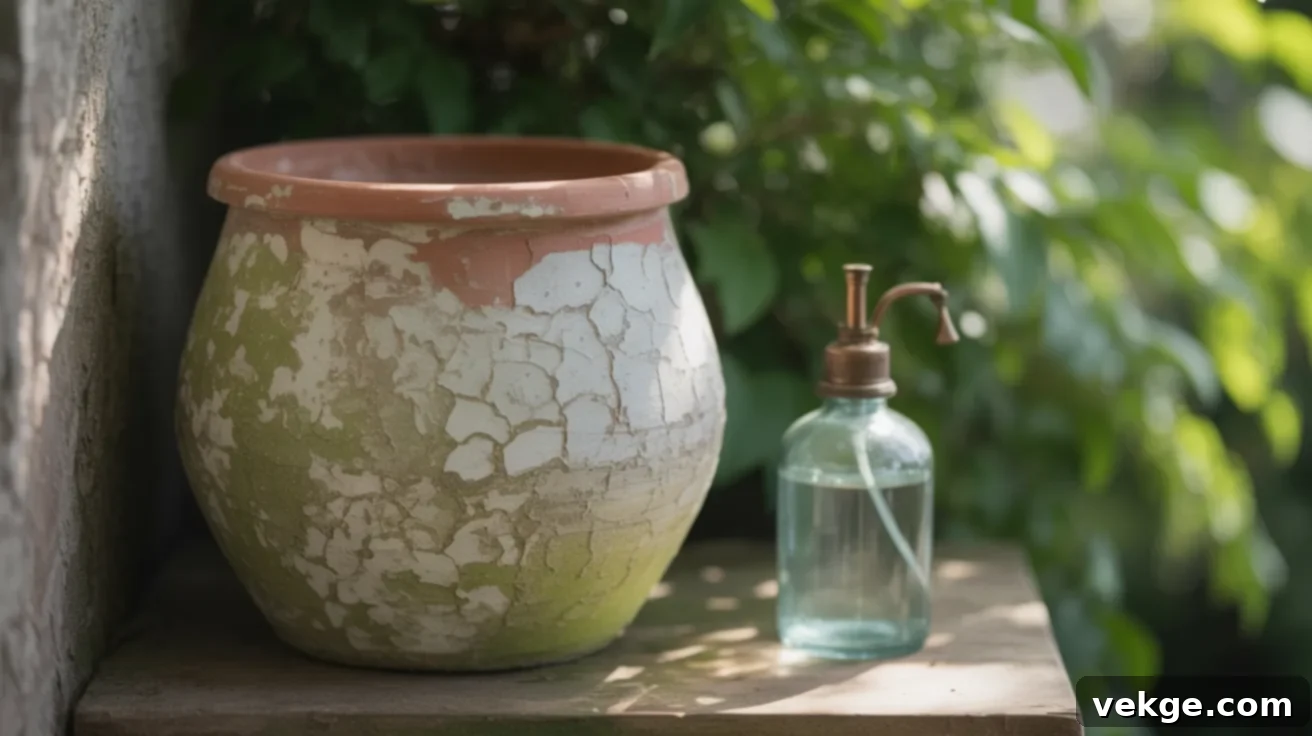
This organic method is a favorite for those seeking a genuinely natural and subtle aged appearance. It relies on the beneficial bacteria and microbes naturally present in yogurt to foster the growth of light surface textures, often resulting in soft, mossy patches or a delicate white film. Begin by generously brushing plain, unsweetened yogurt (full-fat often works best as it provides more nutrients) over the entire surface of your terracotta pot. You can apply it unevenly to create a more organic, naturally variegated effect.
Once coated, place the pot in a shaded, consistently damp spot outdoors. An area beneath dense foliage or a damp corner of your patio that doesn’t receive direct sun is ideal. Crucially, mist the pot with water daily, especially during dry weather, to maintain the humidity levels necessary for microbial growth. Patience is key here; this process takes time. In approximately two to four weeks, you should begin to observe soft spots of green (algae or nascent moss) or white (mineral deposits or bacterial growth) starting to appear, gradually developing into a beautiful, time-worn patina. The resulting finish is soft, authentic, and naturally uneven, lending your pot a truly ancient appearance.
2. Apply a Quick Lime Wash for an Instant Vintage Effect
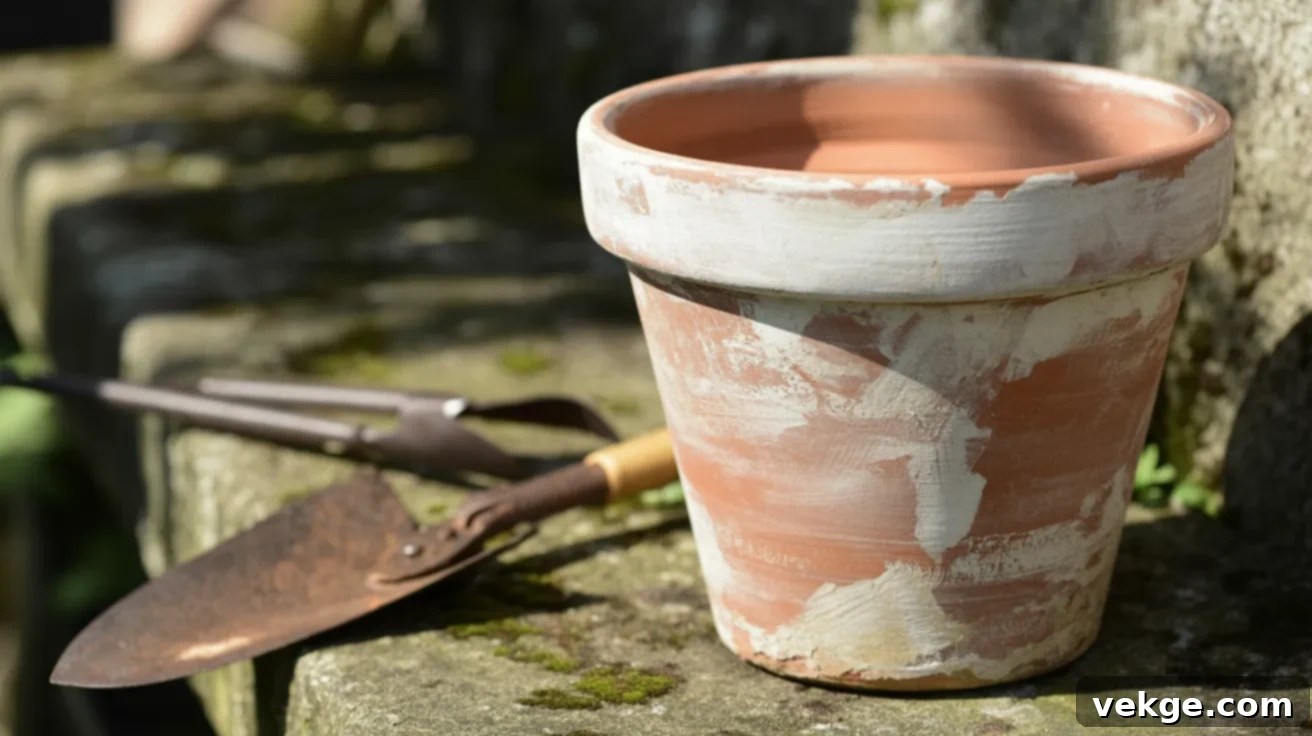
For those who desire an immediate transformation, a lime wash is one of the quickest and most effective ways to give terracotta pots that coveted vintage, chalky look. This method mimics the natural efflorescence that occurs over many years as minerals leach from the clay. To create your lime wash, mix two parts garden lime (available at garden supply stores) with one part water, stirring until you achieve a thick, smooth paste. For a thinner, more translucent wash, you can adjust the water ratio slightly.
Using a brush, apply the lime paste unevenly across the pot’s surface. Don’t aim for perfect coverage; intentional patchiness enhances the aged effect. You can dab, swirl, or brush to create varying textures. Allow the lime wash to dry completely, which usually takes just a few hours. Once dry, lightly sand specific areas, particularly around the rim, handles, or any raised design elements. This gentle sanding will expose glimpses of the natural terracotta beneath, simulating areas where natural wear would occur and adding depth to the finish. This method yields a beautiful, powdery white, antique appearance, often achievable in less than a day, making it perfect for outdoor pots that need a quick, impactful change.
3. Layer a Soft Paint Wash for Depth and Subtle Color
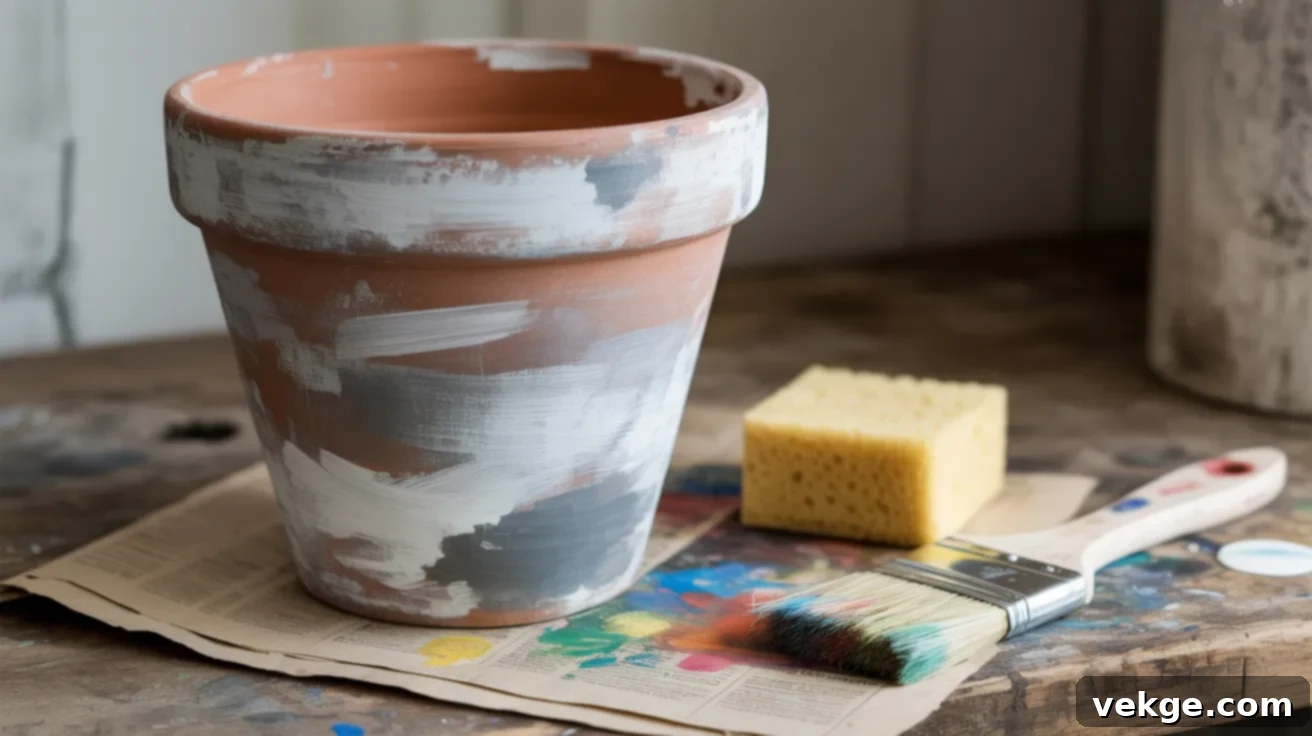
A paint wash offers immense versatility and is a simple yet highly effective way to create a soft, distressed, and beautifully aged finish. This technique allows for control over color and opacity. Start by thinning down your chosen paint: mix one part acrylic or chalk paint (chalk paint often provides a matte, vintage feel) with three parts water. You can experiment with the ratio to achieve your desired translucence – less water for a stronger coat, more for a very subtle tint.
Using a sponge or a wide, soft brush, apply the diluted paint in light, even layers. The key to a natural look is not to aim for full, opaque coverage immediately. Allow each thin layer to dry completely before adding another. This layered approach creates depth and allows the underlying terracotta to show through subtly. You can blend shades of off-white, light gray, muted green, or even a very diluted brown to add further visual interest and mimic years of weathering. Once the surface is dry and you’re satisfied with the layered effect, protect your beautiful work by sealing it with a clear matte spray. This will prevent the paint from chipping or washing away, preserving the aged look from moisture and handling.
4. Use Buttermilk and Moss for a Lush, Living Finish
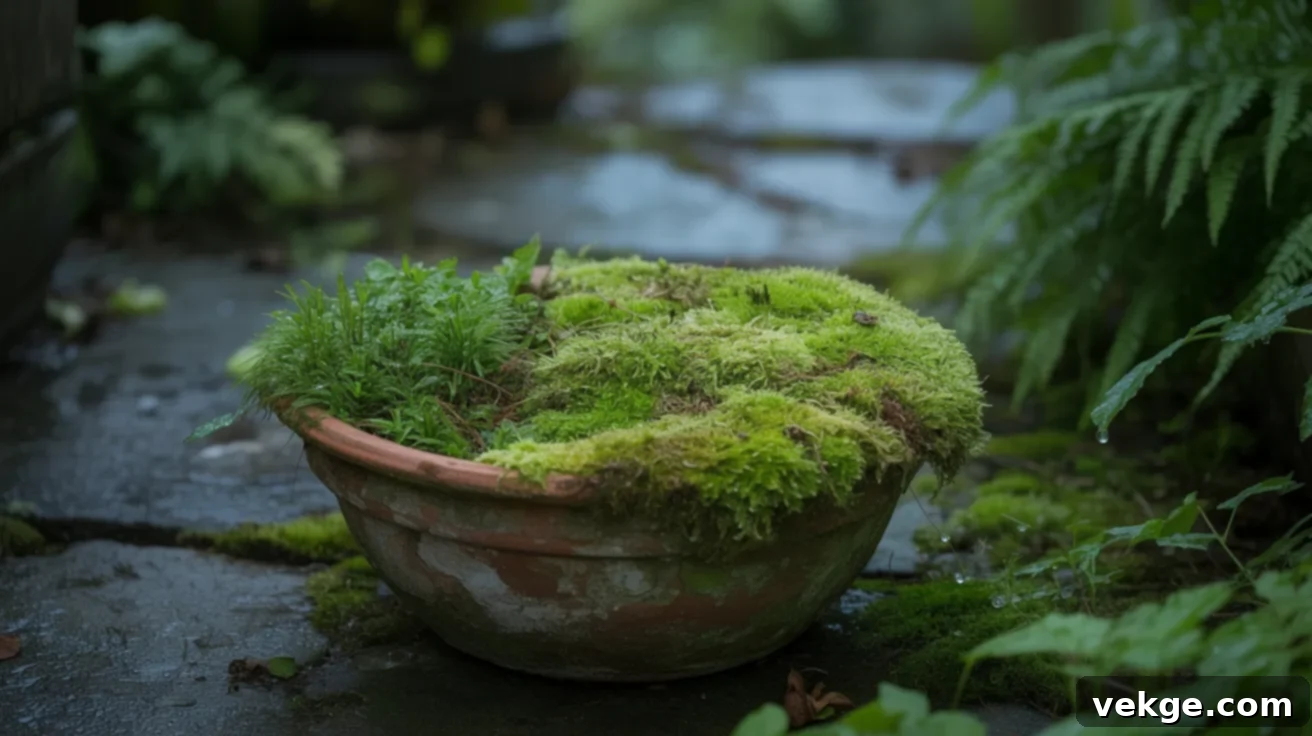
For those who dream of truly authentic, green-tinged, and living garden art, the buttermilk and moss method is ideal. This technique actively encourages actual moss to grow on the pot’s surface, creating an unparalleled organic texture that genuinely appears to have developed over centuries. Begin by collecting a handful of fresh moss from your garden, a local park (with permission!), or even purchase dried moss from a craft store. Blend this moss with approximately one cup of buttermilk in a blender until you achieve a thick, paintable slurry. The buttermilk acts as a nutrient-rich adhesive, providing the perfect environment for moss spores to take root.
Using a sponge or a wide brush, apply the moss mixture liberally to the outside of your terracotta pot. You can focus on areas where moss would naturally grow, such as shaded crevices or the base of the pot. After application, place the pot in a consistently damp, deeply shaded area of your garden. Crucially, mist the pot daily with water to maintain high humidity levels, which are essential for moss growth. In two to three weeks, with proper care and environmental conditions, you should start to see vibrant green moss emerging. This method is most effective in warm, humid climates where moss thrives naturally. The result is a stunning, green, living texture that truly brings an ancient, enchanted feel to your garden decor.
5. Rub in a Dirt and Salt Paste for a Rough, Weathered Texture
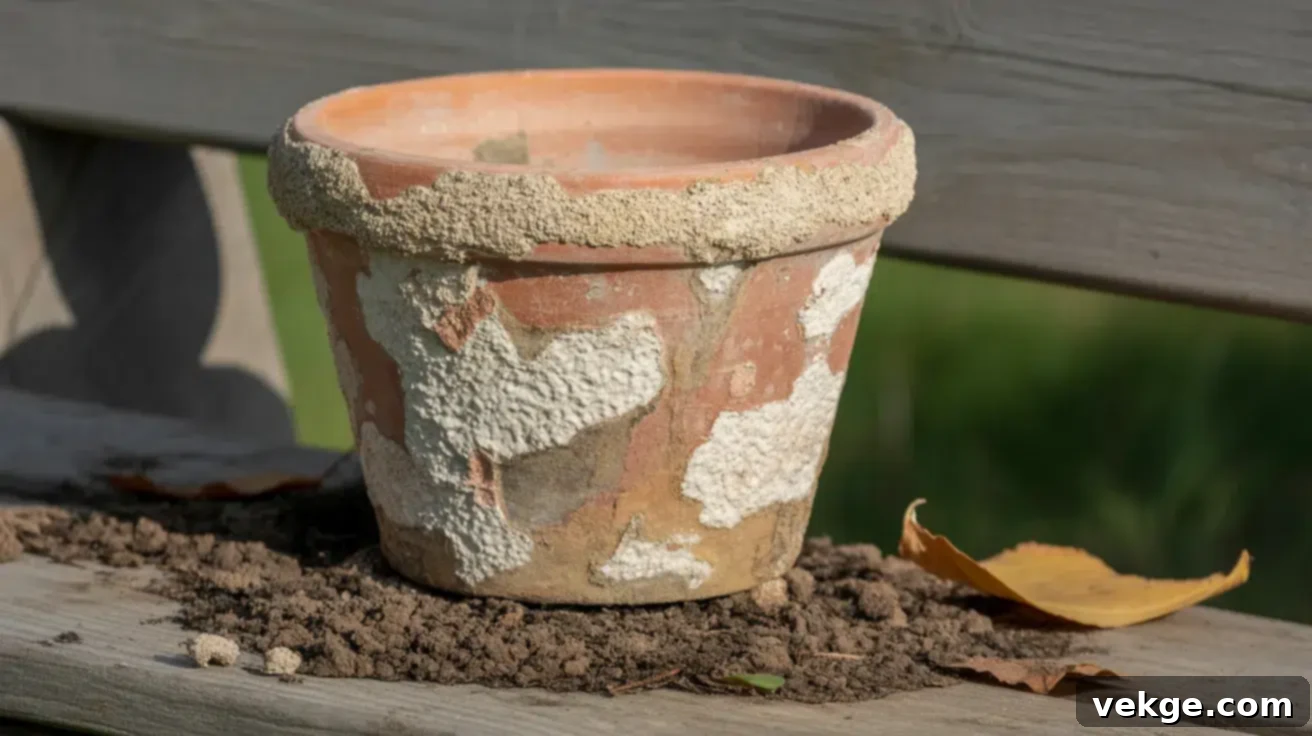
If your goal is a deeply rough, grimy, and undeniably weathered texture, a paste made from garden dirt and salt is an excellent choice. This method effectively mimics the accumulation of soil, minerals, and natural erosion over time, giving your pot an authentically neglected yet beautiful look. To create this rustic concoction, combine a generous amount of garden soil (the finer, the better, for a paste-like consistency), a tablespoon or two of coarse salt (like Epsom salt or rock salt, which can create subtle crystalline effects), and just a small amount of water. Mix thoroughly until you achieve a thick, mud-like consistency that is easy to spread.
Using your hands (wearing gloves, of course!) or a stiff brush, rub the paste vigorously and unevenly across random areas of the pot. Don’t strive for perfection; the more irregular the application, the more natural the weathered effect will appear. You can build up thicker patches in some areas and leave others lighter. Once applied, let the pot sit in a sunny or breezy spot outdoors until it is completely dry. The drying process will often cause the paste to shrink and crack slightly, enhancing the aged look. Once dry, use a stiff brush to gently brush off any loose material, leaving behind a rough, subtly stained, and naturally dirty surface. The pot will instantly exude a time-worn, earthy, and perfectly weathered feel, as if it has been enduring the elements for years.
Expert Tips on Aging Terracotta for an Old-World Feel
Achieving a truly convincing old-world feel on your terracotta pots goes beyond simply applying a single layer of material. The nuances in your application technique, combined with a bit of patience and an artistic eye, can dramatically elevate the final look. With just a few simple tools and an understanding of how natural aging occurs, you can bring out authentic texture, create soft, organic patterns, and infuse your planters with character that looks genuinely worn-in, without excessive effort or time.
Utilize Sponges for Dabbing and Textural Variation
For a soft, beautifully uneven, and authentically aged finish, ditch the precise brush strokes and embrace the versatility of a sponge. When applying paint washes, lime washes, or even yogurt mixtures, using a sponge allows you to dab, blot, and lightly tap the material onto the surface. This technique inherently breaks up the color, prevents sharp, artificial-looking streaks, and creates a mottled, irregular texture that mimics years of natural weathering.
Different types of sponges offer various effects: a natural sea sponge will create a very organic, porous pattern, while a synthetic kitchen sponge can provide more uniform dabs. The sponge gives you superior control over where the mixture goes and helps prevent excessive buildup in any single spot. Remember, you don’t need to cover every millimeter perfectly. Instead, focus on gently tapping and blotting until the texture and color distribution feel balanced and naturally worn, allowing some of the original terracotta to peek through for added realism.
Mastering the Art of Layering Paint Washes for Depth
Don’t limit yourself to a single layer, especially when working with paint washes. The secret to a truly deep, complex, and aged appearance lies in building up thin layers slowly and deliberately. Begin with a very thin wash of your chosen base color (perhaps a diluted off-white or light gray), allowing it to dry completely. Once dry, observe how it looks and then add subsequent thin layers, focusing on areas where you want more opacity or a slightly different hue.
This layering technique allows you to subtly blend in complementary shades, such as soft grays, muted whites, dusty greens, or even a hint of brownish-black in crevices, depending on the specific “aged” look you’re aiming for. By allowing each layer to dry thoroughly in between applications, you prevent the colors from muddling and instead create a harmonious, multi-tonal surface. With this patience and layering, your pot will develop significantly more depth and character, genuinely appearing as if it has been exposed to the elements and slowly mellowing outdoors for a very long time.
Strategic Sanding for Realistic Age Lines and Wear
Once your chosen aging treatment has fully dried and set, it’s time to introduce the most convincing element of natural wear: strategic distressing with sandpaper. Grab a piece of fine-grit sandpaper (150-220 grit works well for subtle abrasion) and focus your efforts on the areas of the pot that would naturally experience the most wear and tear over time. These typically include the rim, any raised handles, decorative motifs, or sharp edges.
You don’t need to press hard or sand vigorously. The goal is to lightly abrade the surface just enough to gently break up the applied finish and allow hints of the underlying natural terracotta clay to show through. This technique creates “age lines” and worn spots that look incredibly authentic, simulating years of handling, bumps, and exposure to sun and rain. It makes the pot look genuinely “used” in the best possible way, as if it has been lovingly tended in a garden for decades. This simple, final step is an easy yet profoundly impactful way to complete your aged terracotta look, giving it that perfect touch of vintage charm.
Common Mistakes to Avoid When Aging Terracotta Pots
While the process of aging terracotta pots is relatively forgiving, being aware of common errors can significantly impact the final outcome. Avoiding these pitfalls will help you achieve a cleaner, more natural, and longer-lasting aged finish that truly enhances your garden’s aesthetic. Learning from these potential mistakes ensures your efforts result in beautiful, authentic-looking planters.
- Applying Thick Paint or Lime Layers: One of the most frequent mistakes is applying aging mediums too heavily. Thick layers of paint or lime tend to dry unevenly, leading to unsightly blotches, peeling, cracking, or an artificial, caked-on appearance. Instead, always opt for thin, translucent coats. Allow each layer to dry completely before adding another, gradually building up the desired effect. This slow and steady approach ensures a softer, more natural, and durable finish that mimics genuine weathering.
- Exposing Yogurt or Moss-Covered Pots to Direct Sunlight: When using organic methods like yogurt or buttermilk and moss, direct, intense sunlight is the enemy. Strong sun can cause the beneficial bacteria in yogurt to spoil and develop an unpleasant odor, or it can quickly dry out and kill the moss spores, preventing any growth. To ensure healthy microbial activity and successful moss development, always keep these pots in a consistently cool, damp, and shaded area. Regular misting is also crucial to maintain the necessary humidity for these living textures to thrive.
- Skipping the Crucial Sealing Step: Neglecting to seal your aged terracotta pot, particularly if it’s destined for outdoor use, is a major oversight. Without a protective barrier, paint washes can quickly fade, chip, or flake off due to exposure to rain, UV rays, and general weathering. Similarly, lime washes can erode, and even natural patinas might not last as long. Always finish your project with a clear, matte exterior-grade spray sealer. This vital step locks in your hard work, protects the aged surface from moisture and wear, and ensures the beautiful vintage look endures through all seasons.
- Impatience with Organic Methods: The most beautiful organic patinas, like those created with yogurt or moss, require time and patience. Expecting immediate results will only lead to disappointment. These are natural processes that depend on environmental factors and microbial growth. Give them the time they need, and resist the urge to constantly check or manipulate them. Consistency in misting and maintaining the right shaded, damp environment will yield the best results over a few weeks.
- Using Non-Water-Soluble or Glossy Sealers: Ensure your sealer is clear, matte, and designed for outdoor use. A glossy sealer will instantly ruin the natural, weathered aesthetic you’ve worked so hard to create, making the pot look artificially shiny. Also, using sealers not intended for terracotta or outdoor conditions might not adhere properly or offer adequate protection, leading to premature deterioration of your aged finish.
Sealing and Aftercare for Long-Lasting Aged Terracotta Pots
Once you’ve successfully transformed your new terracotta pots into beautifully aged treasures, the final step – proper sealing and thoughtful aftercare – is crucial for preserving their unique finishes. This attention to detail will ensure that your aged creations resist the elements, maintain their charm, and last for many years, especially when exposed to the rigors of outdoor environments. A durable seal protects against water damage, UV degradation, and general wear and tear, allowing you to enjoy your vintage planters for seasons to come.
- Choose the Right Sealer and Application Conditions: Always use a clear, matte, exterior-grade sealer specifically designed for porous materials or outdoor use. Avoid sealing during damp or rainy days, or in extremely high humidity. Excess moisture in the air or within the pot itself can slow down the drying process, trap moisture, and potentially lead to an uneven, cloudy, or milky finish as the sealer cures. A dry, temperate day with good air circulation is ideal for application.
- Always Perform a Patch Test: Before applying the sealer to the entire pot, spray or brush a small amount onto an inconspicuous area. This allows you to check how the sealer reacts with your specific aging finish, especially if you’ve used homemade concoctions. It helps ensure there are no adverse reactions, discoloration, or unwanted sheen before committing to the whole pot.
- Layer Thin Coats of Sealer: Instead of applying one thick, heavy coat, spray or brush the sealer in several light, even bursts. Thin layers dry more quickly, provide better adhesion, and offer greater control during application, significantly reducing the risk of drips, streaks, or an uneven build-up that could detract from your aged look. Allow each layer to dry according to the manufacturer’s instructions before applying the next.
- Winterize Outdoor Pots: While sealing offers protection, terracotta is still susceptible to freeze-thaw cycles. During harsh cold weather or periods of repeated freezing and thawing, it’s best to store outdoor pots in a dry, covered spot, such as a shed, garage, or unheated porch. This prevents water from seeping into the clay and expanding when frozen, which can cause cracking, flaking, or even shattering of the pot.
- Gentle Cleaning for Sealed Pots: To clean sealed pots, use a soft brush or a damp cloth. Avoid harsh chemicals, abrasive scrubbers, or vigorous scrubbing, as these can wear down the protective sealer and potentially alter or remove the carefully crafted aged surface. Gentle cleaning is sufficient to remove surface dirt without damaging the finish.
- Elevate Pots for Better Drainage and Airflow: Raise pots slightly off the soil, grass, or patio surface using ‘pot feet’ or small blocks. This simple step significantly improves air circulation around the base, reduces trapped moisture, and helps prevent the bottom of the pot from staying perpetually wet. This not only aids in drainage for the plant but also keeps the base dry, reducing the likelihood of mildew or undesirable staining that could compromise the aged finish.
- Rotate Outdoor Pots Periodically: If your pots are in a location that receives uneven sunlight exposure, turn them every now and then. Consistent, prolonged sun exposure on one side can lead to uneven fading or discoloration of your aged finish. Rotating the pots helps ensure a more uniform appearance over time, preserving the integrity of your hard work.
Final Thoughts on Mastering the Art of Aged Terracotta
Congratulations! Now that you’ve explored these various techniques and insights on how to age terracotta pots, you’re fully equipped to infuse depth, personality, and a timeless character into your plain clay planters. Each method we’ve discussed—from the subtle, living layers created by yogurt and moss to the quick, chalky finishes of lime wash, the artistic depth of paint washes, and the rugged texture of dirt and salt—offers a unique pathway to achieving a truly distinct and beautiful surface effect.
Remember that the beauty of aging terracotta lies in its imperfections and the story it tells. With careful preparation, the right application techniques, and the crucial step of proper sealing, your newly aged look will stand resilient against the sun and rain, maintaining its charm through the seasons. Beyond mere appearance, aging pots can also offer practical benefits, such as subtly regulating moisture for your plants and providing a degree of insulation for delicate roots.
Don’t hesitate to experiment with different finishes, combine methods, and discover what truly speaks to your personal garden style. Each pot you age will become a unique piece of art, contributing to a cohesive, inviting, and historically rich outdoor space. For more creative ideas and outdoor care tips, we encourage you to browse our other garden DIY guides and discover what exciting projects you can embark on next!
