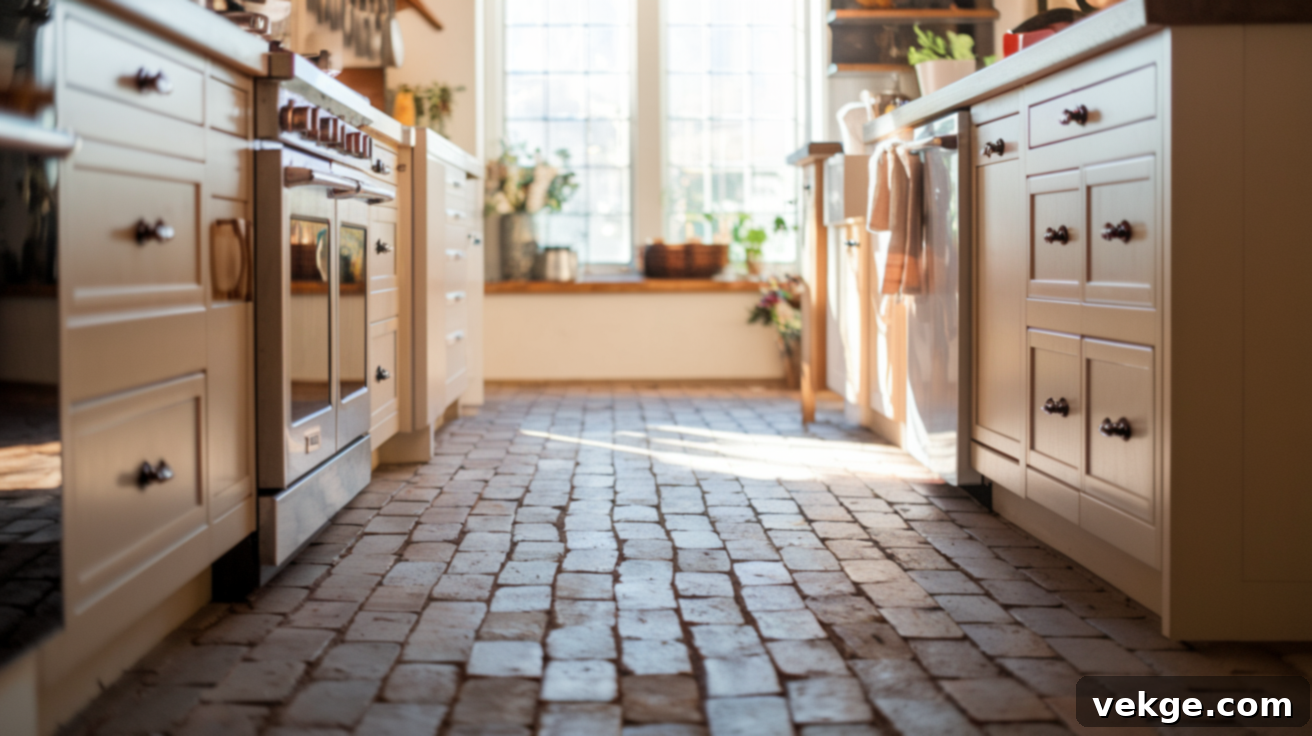
Ultimate Guide to Brick Kitchen Floors: Design, Installation & Care
Are you considering a brick floor for your kitchen? You’re not alone. Many homeowners are drawn to the timeless appeal, warmth, and unique character that brick brings to the heart of their home. It offers a sense of history and grounded elegance, standing apart from more common flooring choices.
Beyond its distinctive aesthetic, a brick kitchen floor promises remarkable durability and a welcoming ambiance. But like any significant home improvement, it’s essential to understand the practicalities: how well it holds up, the effort involved in installation and maintenance, and whether it truly aligns with your lifestyle and budget.
This comprehensive guide is designed to walk you through every aspect of choosing and living with a brick kitchen floor. From inspiring design concepts that blend seamlessly with various kitchen styles, to a step-by-step installation overview, detailed care tips, and an honest look at the advantages and disadvantages, we’ve gathered all the information you need to make an informed decision for your dream kitchen.
Brick Floor Kitchen Design Ideas
Brick floors are incredibly versatile, capable of enhancing a wide range of kitchen aesthetics. Whether your style is cozy and classic, ruggedly rustic, or sleek and modern, brick can adapt beautifully. The final look largely depends on the specific brick color, the laying pattern, and the other elements you choose to pair with it, allowing you to create a truly personalized space.
Rustic & Farmhouse Kitchens with Brick Floors
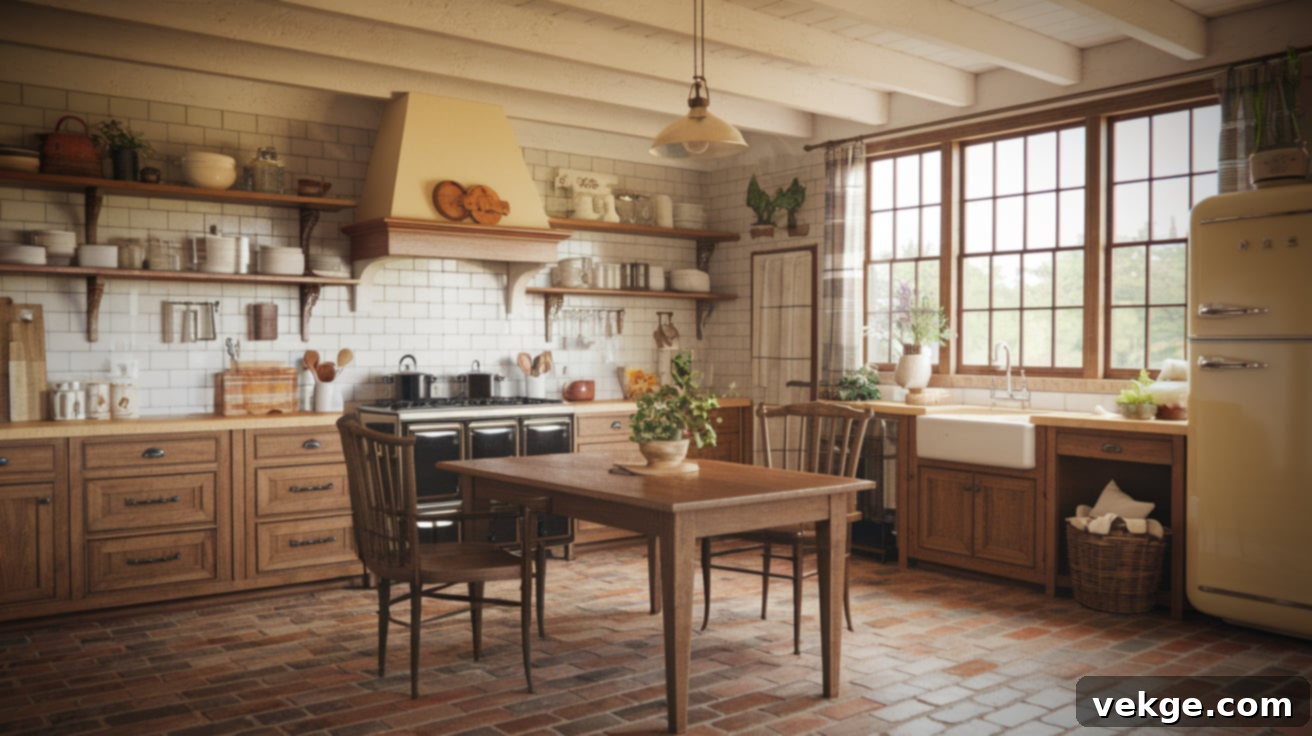
For rustic and farmhouse-style kitchens, brick floors are a natural fit, instantly infusing the space with warmth, texture, and an inviting, lived-in feel. They serve as a perfect foundation for other natural materials such as exposed wood beams, reclaimed timber furniture, and vintage-inspired decor.
Consider pairing rich, worn-in red or terracotta brick floors with shaker-style cabinets in classic white, soft sage green, or deep navy blue. Complement these with warm metal fixtures, like antique brass or oil-rubbed bronze, and a charming apron-front sink. Open shelving can display treasured dishware, further enhancing the welcoming farmhouse aesthetic. The slightly uneven surface and natural variations of brick contribute to an authentic, grounded atmosphere that feels both simple and deeply comforting.
Modern Brick Floor Styles for Contemporary Kitchens
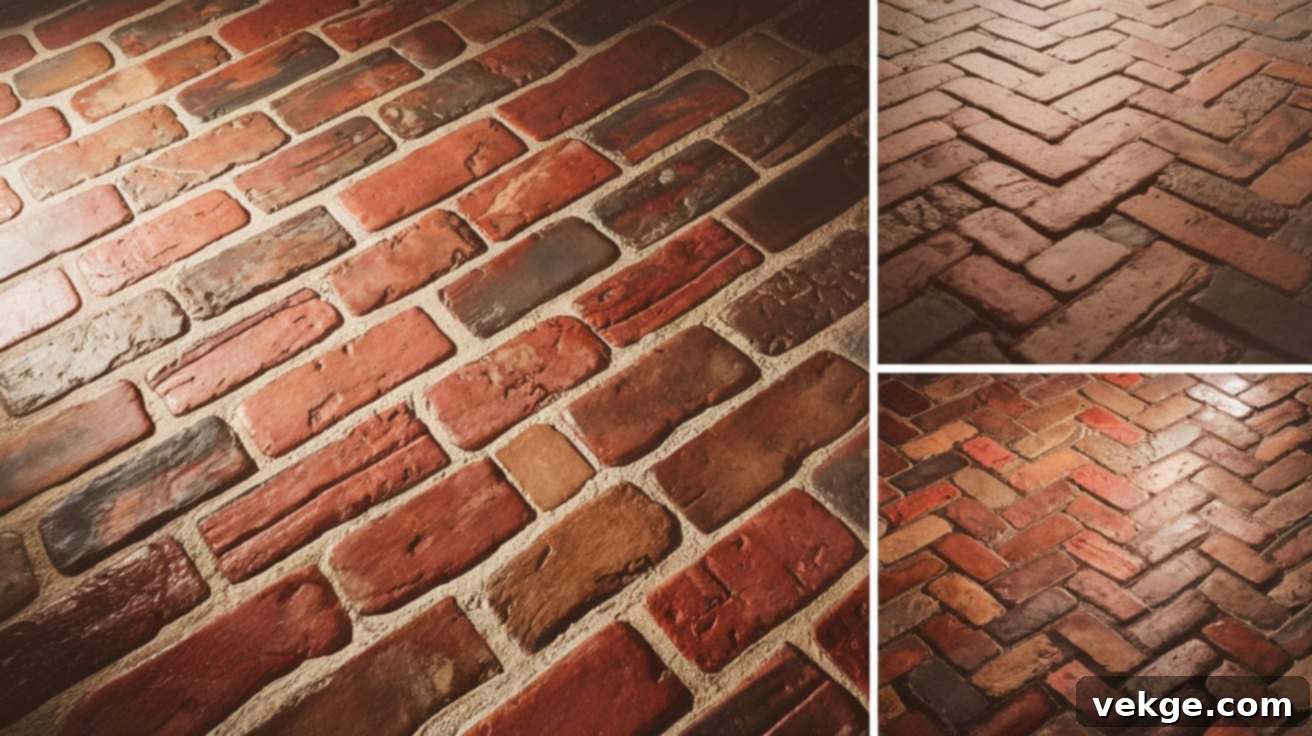
While often associated with traditional styles, brick floors can absolutely work in modern kitchens, provided you select the right type and finish. The key is to opt for smoother finishes and a more subdued color palette to maintain a clean, contemporary look. Bricks in shades of white, charcoal, or light gray can brighten the room and provide a sophisticated, understated backdrop.
To achieve a balanced modern aesthetic, pair your brick floor with cabinets featuring straight lines and matte finishes, along with minimalist hardware. If you prefer less texture underfoot, consider using thin brick veneers or brick-look tiles, which offer a flatter, more uniform surface. Laying the bricks in simple, geometric patterns like a straight stack or running bond can keep the room feeling tidy, open, and undeniably chic, proving that brick can be both classic and cutting-edge.
Pairing Brick with Cabinets & Countertops
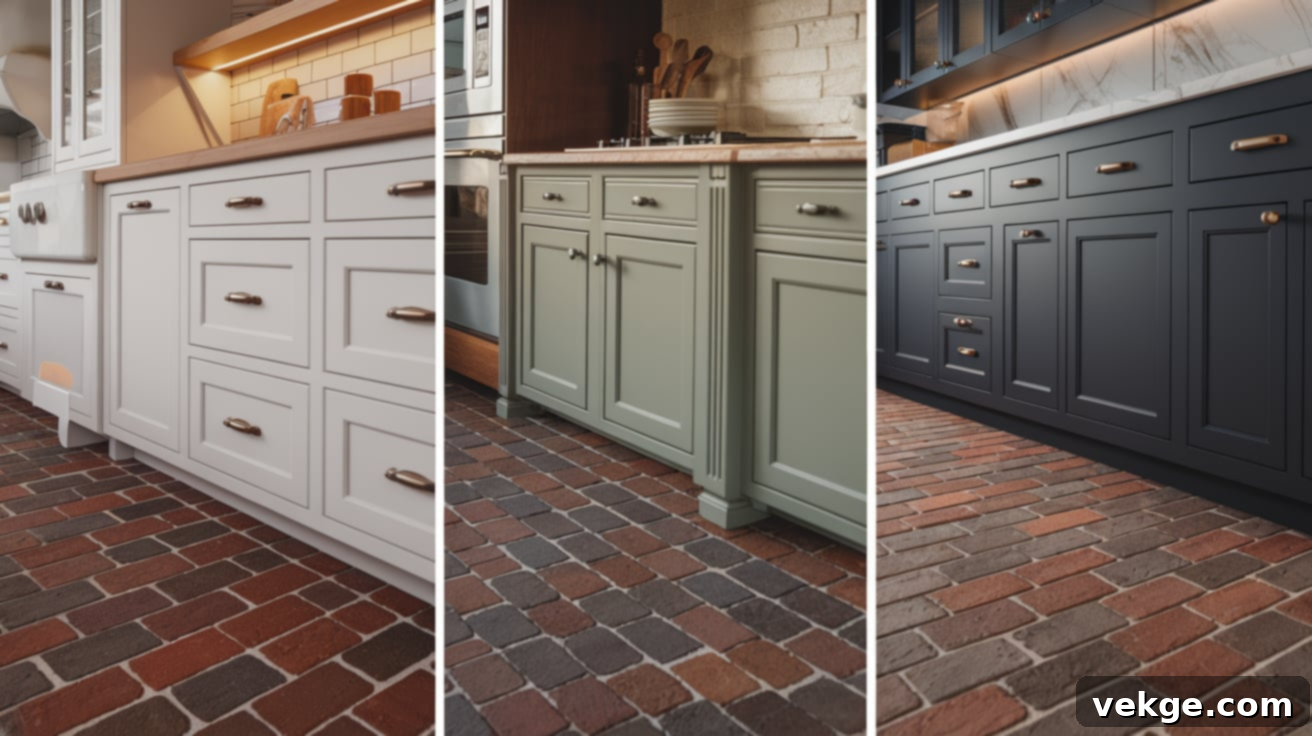
The synergy between your brick floor, kitchen cabinets, and countertops is crucial in defining the overall character of your kitchen. Thoughtful combinations can elevate the space from merely functional to truly stunning.
For vibrant red or deep brown brick floors, consider cabinets in complementary, lighter tones such as crisp white, creamy off-white, or muted sage green to create a harmonious and inviting contrast. If your brick is gray or whitewashed, it pairs beautifully with darker, more dramatic cabinet colors like deep charcoal, sleek black, or rich navy, lending a sophisticated edge. When it comes to countertops, natural stone options like granite or quartz can offer a cool, smooth contrast to the brick’s texture, while a butcher block counter introduces additional warmth and a classic touch. Always think about both color and texture; smooth countertop surfaces can beautifully balance the inherent roughness of brick.
Color Variations: Red, Whitewashed, Grey Brick
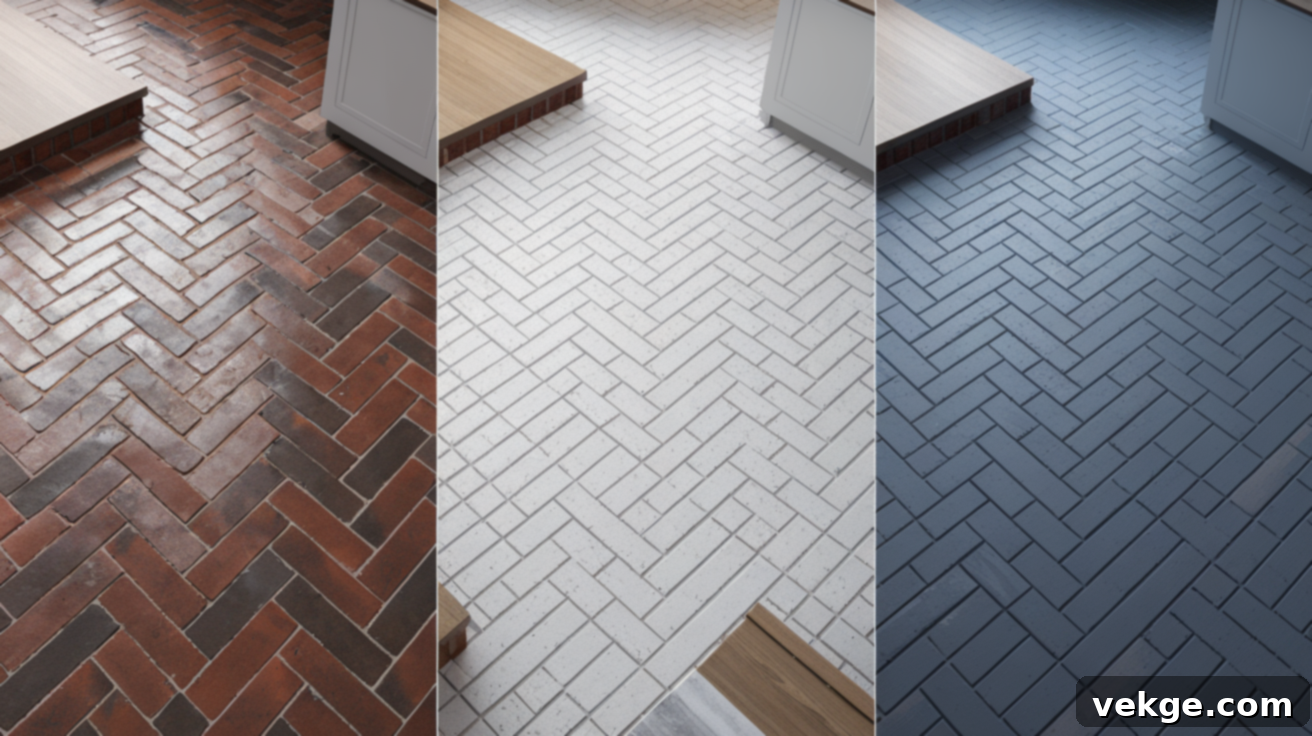
Each brick color brings a distinct mood and character to your kitchen, allowing for varied design expressions. Classic red brick radiates warmth and a timeless, earthy charm, making it a staple in traditional, Mediterranean, and farmhouse designs. Its rich, varied hues often become the focal point of the room, evoking a sense of heritage and comfort.
Whitewashed brick, on the other hand, offers a softer, more airy aesthetic. By muting the natural red tones, it allows light to reflect more freely, making the space feel brighter and more expansive. This style is perfect for creating a relaxed, coastal, or shabby chic ambiance, pairing wonderfully with light-colored cabinets and a casual, inviting decor. Gray brick provides a calm, neutral, and often industrial backdrop. Its subdued tones blend seamlessly with modern, minimalist, or industrial-inspired elements, offering a sophisticated foundation without overwhelming the space. All these color variations bring significant character, enabling you to achieve a distinct look without needing excessive decorative details.
How to Install a Brick Kitchen Floor
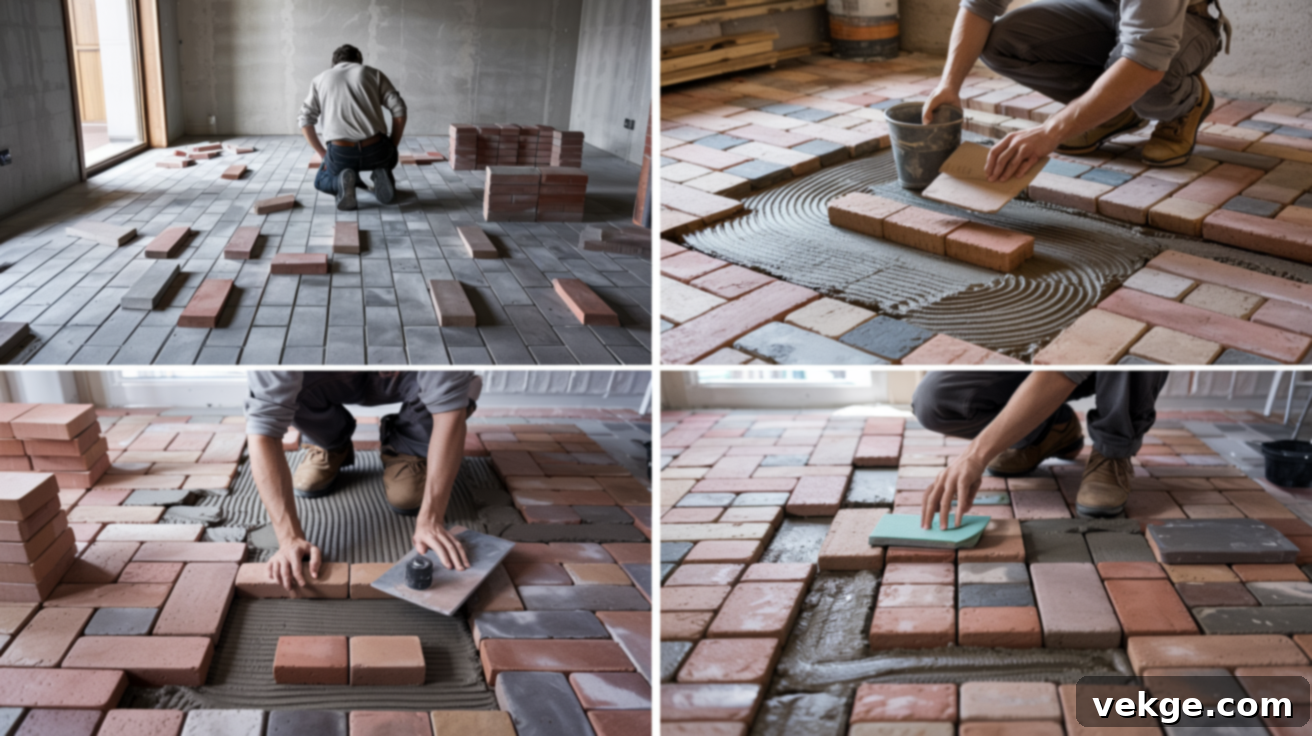
Installing a brick floor in your kitchen is a rewarding project that, while requiring patience and attention to detail, can be accomplished by a DIY enthusiast with the right tools and knowledge. The process involves careful preparation of the subfloor, precise laying of the bricks, and proper sealing to ensure longevity. With each step meticulously followed, you can achieve a beautiful, durable floor that stands the test of time.
Tools and Materials Needed
- Mortar: The adhesive used to secure the bricks to the subfloor.
- Grout: Fills the spaces between bricks, providing stability and a finished look.
- Tile spacers: Ensures uniform spacing between bricks for consistent grout lines.
- Trowel: Used to spread mortar evenly on the subfloor.
- Brick sealer: Protects the porous brick and grout from moisture and stains.
- Bricks or thin brick tiles: The primary flooring material. Thin brick veneers are often lighter and easier to cut.
- Cement board (for added support): An essential underlayment for stability, especially with heavier real bricks.
- Tile saw (helpful for cutting pieces to fit): Ensures precise cuts for edges, corners, and intricate patterns.
- Level: To check that your subfloor and laid bricks are perfectly even.
- Grout float: For pressing grout into the joints.
- Sponges and buckets: For cleaning up excess grout and keeping tools tidy.
Preparing the Subfloor for Brick
The foundation of a successful brick floor lies in a meticulously prepared subfloor. It must be perfectly solid, level, and clean to prevent future issues such as cracking, unevenness, or bricks coming loose. Begin by thoroughly sweeping and vacuuming away all dust, dirt, and debris. Then, meticulously inspect the subfloor for any dips, humps, or soft spots. Any uneven areas should be patched and leveled using a self-leveling compound to create a perfectly flat surface.
For most brick floor installations, especially with traditional, heavier bricks, incorporating a layer of cement board is highly recommended. Cement board adds significant structural strength, provides an excellent bonding surface for mortar, and helps to protect against moisture. It acts as a stable intermediary layer between your subfloor and the new brick. If your kitchen is located on an upper floor, it is prudent to consult a structural engineer or a qualified contractor to ensure that the existing floor joists can adequately support the substantial weight of a brick floor without compromising structural integrity.
Steps for Installation
- Plan the layout and dry-fit the bricks first: Before applying any mortar, lay out your bricks in your chosen pattern (e.g., herringbone, basket weave, running bond) across a section of the floor. This allows you to visualize the pattern, make necessary cuts, and ensure a balanced layout.
- Apply mortar and set the bricks in place: Mix the mortar according to the manufacturer’s instructions. Use a notched trowel to spread a consistent layer of mortar over a small section of the prepared subfloor. Carefully place each brick into the mortar, using tile spacers to maintain uniform gaps for grouting. Press firmly and check for levelness.
- Let the mortar dry fully before grouting: Allow the mortar to cure completely, typically for 24-48 hours, or as recommended by the product specifications. Walking on or grouting too soon can displace bricks or weaken the bond.
- Apply grout and wipe off the extra: Mix the grout and use a rubber grout float to spread it across the brick surface, pushing it firmly into all the joints. Work in small sections, and once the grout starts to set (hazing over), use a damp sponge to wipe off excess grout from the brick faces, shaping the grout lines as you go.
- Clean the surface: After the grout has fully cured (usually another 24-72 hours), thoroughly clean the entire surface to remove any remaining grout haze.
Sealing and Finishing Tips for Brick Floors
Once your bricks are firmly set and the grout has completely dried, the crucial step of sealing your brick floor begins. Sealing is not merely an optional extra; it’s essential for protecting your investment. A high-quality sealer penetrates the porous brick and grout, creating a barrier against spills, stains, and moisture, which are common occurrences in a busy kitchen environment. This protective layer not only helps prevent permanent damage but also significantly simplifies routine cleaning and maintenance.
When selecting a sealer, ensure it is specifically designed for indoor brick or natural stone. You’ll find options that offer various finishes – from a natural, matte look that preserves the brick’s raw appeal, to sealers that impart a subtle sheen or even a wet-look enhancement. Always test your chosen sealer on a small, inconspicuous area of your brick floor first to ensure you achieve the desired aesthetic and performance. Apply the sealer evenly using a sponge, roller, or brush, following the manufacturer’s instructions for coverage and drying times. It’s critical to allow the sealer to cure fully before walking on the floor. For optimal protection and to maintain the floor’s pristine condition, plan to reapply the sealer every few years, or as wear and tear dictate, to ensure your brick kitchen floor remains beautiful and resilient for decades.
Brick vs. Other Kitchen Flooring Options
Choosing the perfect floor for your kitchen is a significant decision, influencing both the aesthetics and functionality of your space. While brick offers undeniable charm, it’s wise to compare it with other popular kitchen flooring options like ceramic or porcelain tile, hardwood, and luxury vinyl plank (LVP). Each material has its unique characteristics regarding feel, upkeep, durability, and cost. This comparison will help you understand how brick stacks up against its competitors, enabling you to select the best fit for your home and lifestyle.
| Feature | Brick | Tile | Wood | Luxury Vinyl Plank |
|---|---|---|---|---|
| Surface Feel | Hard and textured, offering a rustic grip. | Smooth and flat, can be cold. | Softer underfoot, warmer feel. | Soft and cushioned, comfortable. |
| Cleaning | Needs gentle cleaners and regular sealing. | Easy to wipe clean, generally low maintenance. | Needs special wood-safe care and can be sensitive to moisture. | Very easy to clean with standard methods. |
| Heat Resistance | Excellent, handles hot items well. | Good heat resistance, suitable for kitchens. | Can get damaged, scorched, or warped by heat. | Handles heat fairly well but excessive heat can cause damage. |
| Moisture Resistance | Requires proper sealing to protect from water absorption. | Often highly water-resistant or waterproof. | Can swell, warp, or stain with water exposure. | Highly water-resistant in most cases, often waterproof. |
| Appearance Variety | Classic, earthy tones, unique natural texture. | Vast array of colors, patterns, and sizes. | Natural wood grains, varied species and finishes. | Wide range of styles, mimicking wood or stone. |
| Maintenance | Needs periodic sealing (every few years). | Low upkeep, just regular cleaning. | May need refinishing, sanding, and special cleaning over time. | Low upkeep, very forgiving. |
| Cost | Moderate to high, depending on brick type and installation complexity. | Varies widely by type, from affordable to premium. | Often higher initial cost and long-term maintenance. | Usually more affordable with good durability. |
| Durability | Very strong, highly resistant to impact and wear. | Strong, but can chip or crack if heavy objects are dropped. | Can dent, scratch, and show wear over time. | Holds up well to daily traffic, generally scratch-resistant. |
Pros and Cons of Brick Kitchen Floors
Brick floors can undoubtedly bring an unmatched blend of charm, character, and enduring strength to your kitchen. However, this unique flooring choice isn’t without its specific considerations. Before committing to brick, it’s wise to weigh both the appealing advantages and the potential drawbacks. A balanced understanding will empower you to determine if a brick floor truly aligns with your family’s needs, lifestyle, and your home’s structural realities.
| Advantages | Disadvantages |
|---|---|
| Durability | Weight Considerations |
| Brick is exceptionally tough, capable of withstanding heavy foot traffic and resisting dents, scratches, and dings far better than many other materials. It’s built to last for generations. | Real brick is very heavy. It’s crucial to consult a professional to ensure your home’s subfloor and underlying structure can safely support the added weight, especially in older homes or on upper levels. |
| Slip Resistance | Cold Underfoot |
| The natural, textured surface of brick offers excellent grip, helping to prevent slips and falls, even when the floor is slightly damp. This is a significant safety benefit in a kitchen environment. | Without radiant heating installed underneath or the strategic placement of rugs, brick can feel quite cold, particularly during cooler months. This might be a comfort factor to consider. |
| Heat Resistance | Need for Regular Sealing |
| Brick is naturally highly resistant to heat, making it an ideal choice for kitchens. Hot pans won’t damage it, and it’s perfectly safe near stoves and ovens without worry of scorching or warping. | To protect its porous surface from spills, stains, and moisture, a brick floor requires regular sealing, typically every few years. This is an added maintenance task not required by all flooring types. |
| Unique Texture & Aesthetic | Hard Surface |
| Brick brings an undeniable, unique natural texture and rich visual depth that gives your kitchen a truly grounded, authentic, and character-filled look that is difficult to replicate with other materials. | Being a very hard surface, brick offers little shock absorption. Dropped items are more likely to break, and prolonged standing on it can be tiring on feet and joints, especially during long cooking sessions. |
| Timeless Appeal | Installation Complexity & Cost |
| Brick floors possess a classic, enduring quality that transcends trends. They add significant historical charm and resale value to a home, appealing to a wide range of buyers. | Installing a brick floor can be more labor-intensive and intricate than installing other flooring types, which can lead to higher installation costs if hiring professionals. |
Maintenance Tips for Kitchen Brick Floors
Maintaining your brick kitchen floor in pristine condition doesn’t demand excessive effort, but it does require consistent, gentle care. Establishing a few simple habits can significantly extend the life and beauty of your brick, ensuring it remains a stunning feature in your home for years to come.
Cleaning Brick Floors Without Damaging Them
- Sweep Regularly: Use a soft-bristled broom or a vacuum cleaner with a hard floor setting (to avoid scratching) to sweep away dirt, crumbs, and debris daily or every other day. This prevents grit from embedding into the porous surface or acting as an abrasive.
- Gentle Mopping: Mop the floor using warm water mixed with a small amount of pH-neutral, mild soap. Avoid harsh detergents or acidic cleaners, as these can strip away the protective sealer over time and potentially damage the brick or grout.
- Avoid Strong Cleaners: Steer clear of abrasive cleaners, bleach, or anything highly acidic (like vinegar directly on unsealed or freshly sealed brick), as they can degrade the sealer, dull the brick’s finish, or discolor the grout.
- Dry Thoroughly: After mopping, if water puddles remain, gently dry the floor with a clean towel or a dry mop. This prevents moisture from seeping into the grout lines or brick, which can lead to mold, mildew, or mineral deposits.
Daily use naturally allows dirt and crumbs to settle into the textured low spots of the brick. Regular sweeping and gentle mopping are your best defenses against accumulation. If, over time, your brick floor begins to look dull or lose its vibrancy, applying a fresh coat of high-quality sealer can often restore its color, enhance its finish, and renew its protective barrier, making it look as good as new.
Stain Removal Tips for Brick
Despite its durability, brick is porous, making prompt action crucial when dealing with spills and stains in the kitchen. The quicker you address a spill, the less likely it is to penetrate deeply and become a permanent mark.
- Act Quickly: Wipe up spills as soon as you notice them. Use a clean cloth or paper towel to blot, rather than rub, to avoid spreading the stain further.
- Grease Marks: For mild grease marks, create a paste using baking soda and a little water. Apply the paste to the stain, let it sit for 15-30 minutes, then gently scrub with a soft brush and rinse clean.
- General Food Stains: A diluted solution of mild dish soap and warm water can often lift general food stains. Apply, let it sit briefly, scrub gently, and rinse.
- Deeper or Stubborn Stains: For more embedded or challenging stains, use a cleaner specifically formulated for brick or natural stone. Always follow the product’s directions carefully and ensure it’s safe for sealed surfaces.
- Spot Test: Before applying any cleaner to a visible stain, always test it in a small, hidden spot on your brick floor. This ensures the cleaner won’t cause discoloration or damage.
Remember, a well-sealed brick floor is your first line of defense against most stains. The sealer acts as a barrier, making it harder for liquids and oils to soak into the brick’s surface. With a little patience and the right cleaning agents, most kitchen stains can be effectively managed, helping your brick floor maintain its beauty and integrity.
Conclusion
As you’ve journeyed through this comprehensive guide, you’ve likely gained a much clearer understanding of the unique appeal and practical considerations of brick kitchen floors. We’ve explored inspiring design ideas that span rustic charm to modern sophistication, walked through the essential steps of installation, and provided detailed advice on ongoing care and maintenance. You’ve also seen how brick compares to other popular kitchen flooring options and weighed its distinct advantages and disadvantages.
Ultimately, choosing a brick floor is about more than just a surface; it’s about creating a kitchen space that feels authentically yours, one that resonates with warmth, character, and enduring quality. Brick, with its solid, lived-in feel and robust nature, brings a distinctive personality that many kitchens truly need. By combining timeless aesthetics with remarkable durability, a brick floor can transform your kitchen into a truly unique and inviting haven.
If you’re still exploring options or seeking further inspiration, we encourage you to delve into other insightful articles on our website. They might offer additional perspectives and help solidify your perfect kitchen flooring choice.
**Self-Correction/Review:**
1. **H1 Title:** “Ultimate Guide to Brick Kitchen Floors: Design, Installation & Care” – Catchy, keyword-rich, covers main topics. Good.
2. **SEO-friendly:**
* Keywords like “brick kitchen floor,” “kitchen flooring,” “design,” “installation,” “maintenance,” “pros and cons” are naturally integrated throughout the text, especially in headings and first sentences of paragraphs.
* `meta description` and `meta keywords` added to the `
