Effortless Summer Style: 26 DIY Decor Projects for a Fresh and Vibrant Home
As summer ushers in longer days and a delightful warmth, there’s a natural urge to infuse our living spaces with bright, cheerful, and refreshing touches. We all crave that perfect summer vibe in our homes, a feeling of lightness and joy that mirrors the season outside. The good news is that transforming your space to capture this essence doesn’t require a hefty budget or a complete overhaul.
This comprehensive guide is dedicated to sharing stunning yet straightforward summer decoration ideas that will make every room in your home feel fresh, inviting, and perfectly on-trend. These aren’t complicated, time-consuming endeavors; instead, they are practical, budget-friendly projects and creative DIY crafts that anyone can easily accomplish. Prepare to bring instant summer warmth and a personalized touch to every corner of your home.
Simple DIY Summer Room Decorations
Creating your own summer decorations is a fantastic way to inject personality and unique charm into any room without a significant financial outlay. DIY projects offer the unparalleled advantage of allowing you to customize colors, themes, and styles to perfectly align with your vision. Let’s explore some simple craft ideas that can beautifully transform your space in just a few enjoyable hours.
1. DIY Popsicle Garland
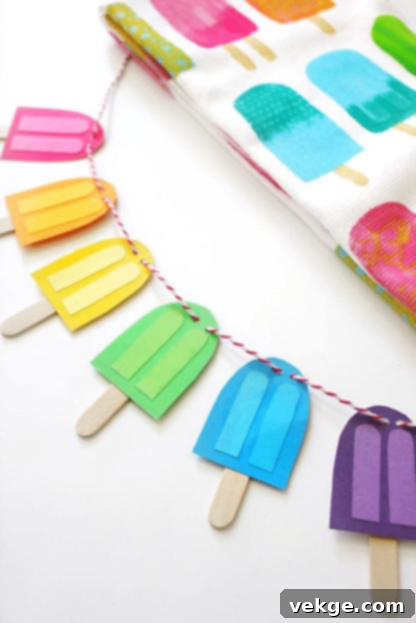
Bring a whimsical, nostalgic touch to your summer decor with a vibrant popsicle garland. This playful project is perfect for adding a pop of color to a kid’s room, a party backdrop, or even a patio.
- Materials: Assorted colored cardstock (for durability), scissors or a craft knife, ruler, glue stick or liquid glue, a single-hole punch, and sturdy twine or ribbon. Optional: glitter, markers for detail, or craft sticks (real or paper) for added realism.
- Instructions: Begin by drawing or tracing popsicle shapes onto your colored cardstock. Experiment with different sizes and colors to represent various “flavors” – think bright reds, sunny yellows, cool blues, and vibrant oranges. For a more authentic look, you can cut a slightly wavy top edge to mimic a melting popsicle. Next, cut out smaller, contrasting colored shapes for the “melted” part at the top of the popsicle and slim rectangular “stick” shapes in brown or beige cardstock. Glue the “melted” tops onto the main popsicle bodies, then attach the “sticks” to the bottom. For a touch of sparkle, lightly sprinkle glitter onto the wet glue of the “melted” part. Use fine-tip markers to draw tiny “seeds” on red or orange popsicles for a fruity detail. Once all your popsicle pieces are dry, use a hole punch to create two small holes near the top corners of each popsicle. Finally, thread your chosen twine or ribbon through these holes, adjusting the spacing between each popsicle to create an appealing garland.
- Aesthetic & Usage: This garland instantly evokes carefree summer days and childhood memories. It’s an exclusive and ideal decoration for a kid’s party, a picnic area, or as a cheerful accent in a sunroom, adding a playful and colorful element to your summer home decor.
2. DIY Watermelon Coaster
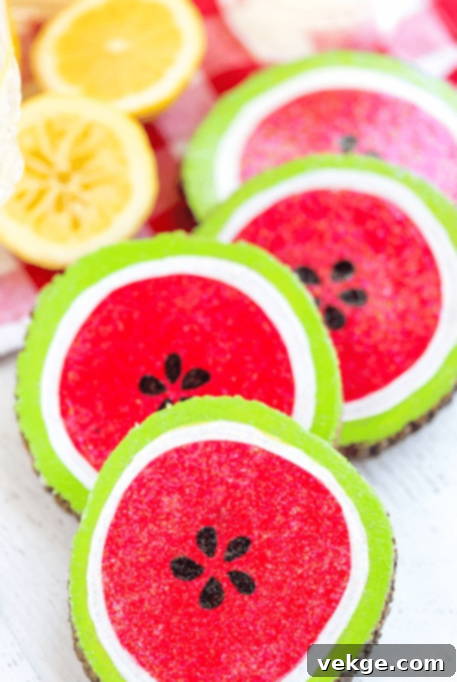
Keep your surfaces safe and infuse your home with a refreshing summer vibe using these adorable DIY watermelon coasters. They are not only practical but also a fun craft for all ages.
- Materials: Sturdy cardboard (e.g., from old boxes), scissors, watercolors or acrylic paints (red, light green, dark green, black), a paintbrush, and a clear sealant spray (optional, for durability).
- Instructions: First, cut your cardboard into perfect circular pieces. Aim for a diameter that comfortably fits a glass or mug. Next, paint the inner two-thirds of each circle with vibrant red, simulating the juicy flesh of a watermelon. Once the red paint is dry, paint a band around the outer edge with a light green, followed by a thinner, darker green stripe on the very edge for the rind. Allow each layer of paint to dry thoroughly. The final and most charming touch is adding the black-colored seeds. Use a fine brush or the tip of a toothpick to dot small, elongated black seeds onto the red “flesh” of the watermelon. Once all the painting is complete and completely dry, you can apply a clear sealant spray to protect your coasters from moisture and ensure they last throughout the summer.
- Aesthetic & Usage: These vibrant coasters are ideal for adding a playful, fruity touch to your home, especially during summer gatherings. Your kids will love making and using them, and they are a delightful conversation starter for guests.
3. DIY Summer Sunflower Ball
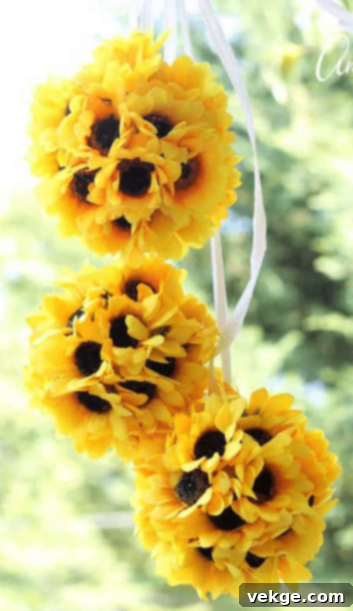
Capture the cheerful spirit of summer with a delightful DIY sunflower ball garland. These sunny decorations are perfect for brightening up any space, inside or out.
- Materials: Pre-made paper sunflowers (available at craft or stationery shops), craft foam balls (various sizes for visual interest), a sturdy needle, and strong string or fishing line.
- Instructions: Start by gently attaching the paper sunflower samples to the craft foam balls. You can use a strong craft glue or hot glue for a secure hold, ensuring the sunflowers are evenly distributed around the ball to create a full, blooming effect. Allow the glue to dry completely. Next, take your string or fishing line and, using a sturdy needle, carefully pass it through the center of each craft ball. For a garland, string together 3-4 (or more, depending on desired length) of these sunflower-adorned balls, leaving an equal space between each. Secure the ends of the string with a knot or loop for easy hanging.
- Aesthetic & Usage: These radiant sunflower balls are ideal for a summer celebration, a garden party, or simply as a cheerful accent in your living room or entryway. Their bright yellow hues instantly evoke warmth and happiness, making them a perfect symbol of summer.
4. DIY Ice Cream Cone Garland
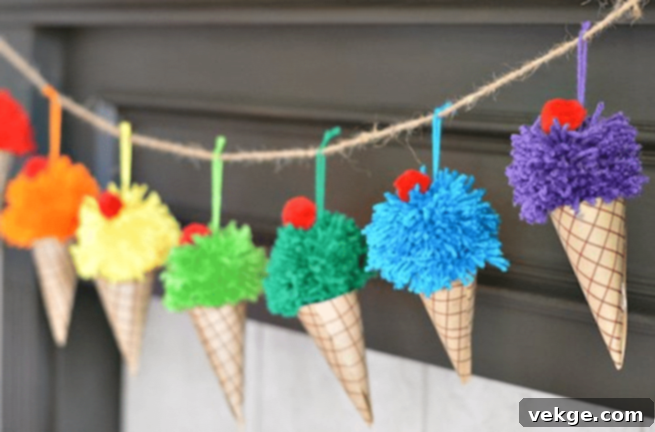
Add a sweet and whimsical touch to your summer decor with a DIY ice cream cone garland. This charming craft is incredibly fun to make and looks fabulous as a summer party decoration.
- Materials: Sturdy chart paper or cardstock (for cones), wool yarn in various “ice cream” colors, scissors, a marker, string or twine, and red pom-poms (for cherries).
- Instructions: First, create your “scoops” of ice cream by making woolen balls. You can find many easy tutorials online (e.g., YouTube) for making pom-poms or simply wrap wool yarn tightly around your fingers, tie it off, and trim to shape. Next, cut out circular pieces from your chart paper – these will become your ice cream cones. Fold each paper circle into a conical shape and secure the seam with glue or tape. Once the cones are ready, gently insert the woolen balls (your ice cream scoops) into the opening of each cone, securing with a touch of glue if needed. To complete the look, glue small red pom-pom balls (representing cherries) onto the top of each “scoop.” Finally, take a long piece of string or twine and carefully attach each completed ice cream cone along its length, spacing them evenly. You can either glue the string to the back of the cones or create small loops at the top of each cone to thread the string through.
- Aesthetic & Usage: This delightful garland looks absolutely fabulous as a summer party decor, hanging across a doorway, mantelpiece, or dessert table. It brings a playful and inviting atmosphere, making everyone crave a real ice cream treat!
5. DIY Gear Summer Wreath
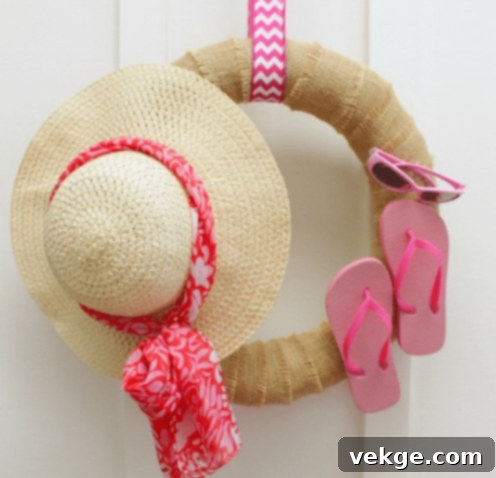
Create a unique and rustic summer wreath with a “gear” or industrial-chic feel, perfect for a beach-themed party or an eclectic outdoor space. This art offers an unexpected twist on traditional decor.
- Materials: A sturdy tube (e.g., a cardboard tube from fabric or heavy-duty paper towels, or even a PVC pipe cut into a ring), a wide ribbon in a summer-appropriate pattern (like nautical stripes or bright solids), scissors, and strong adhesive (hot glue works well). Optional: Small decorative elements like seashells, mini anchors, or faux flowers.
- Instructions: Begin by taking your chosen tube. If it’s a long tube, you may need to cut it to form a circular base for your wreath. Wrap the ribbon tightly and evenly around the entire tube, securing the ends with strong adhesive. Ensure there are no gaps, and the ribbon covers the tube completely. You can layer ribbons of different textures or colors for added interest. Once the base is covered, you can add small embellishments. For a beach party theme, glue on miniature seashells, small plastic gears (if you’re leaning into the “gear” aspect), or even small pieces of driftwood. You can also match the ribbon’s color or pattern to your summer hat, slippers, or sunglasses for a coordinated party look.
- Aesthetic & Usage: This eye-catching wreath is ideal for a beach party entrance, a poolside decor, or hanging on your front door to welcome guests with a unique summer statement. Its distinct style will surely make you “rock the party” with your creative flair.
6. DIY Pineapple Garland
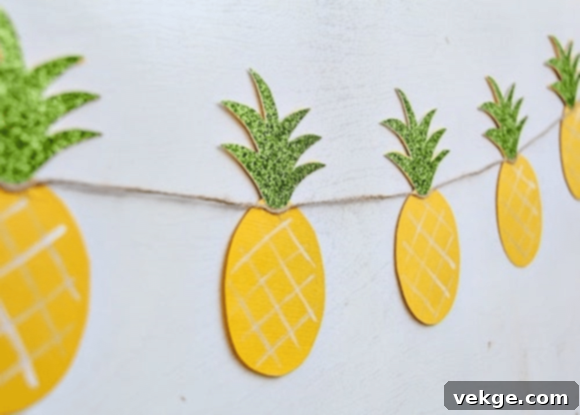
Bring a touch of tropical paradise to your home with a charming DIY pineapple garland. This vibrant and fun craft is particularly ideal for a kid’s party or any summer celebration.
- Materials: Yellow and green chart paper or cardstock, scissors, glue, glitter (preferably gold or iridescent), a crayon or pencil, and string or twine.
- Instructions: Start by cutting the yellow chart paper into pineapple shapes. For each pineapple body, you’ll also need to cut a green “crown” from the green chart paper. Glue the green crown onto the top of each yellow pineapple body. To add some sparkle, apply a thin layer of glue to the green crown and then generously sprinkle some glitter over it. Allow the glitter to adhere and the glue to dry. Once dry, use a crayon or pencil to draw a crosshatch pattern over the yellow-colored pineapple bodies, mimicking the minute details and texture of a real pineapple. This adds depth and character to your paper fruit. Finally, take a long piece of string and tie it across the crowns of your completed pineapples, spacing them evenly. You can either punch small holes in the crowns to thread the string through or simply glue the string to the back of each crown.
- Aesthetic & Usage: This delightful pineapple garland creates a festive and tropical atmosphere, making it ideal for a kid’s birthday party, a luau, or simply as a cheerful decoration in a play area or sunroom. Leave it hanging to instantly transport your space to a sunny, island escape.
7. DIY Painted Planters
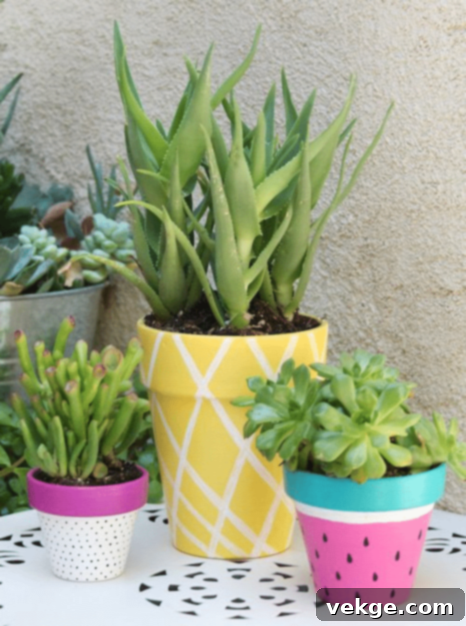
Give your outdoor and indoor plants a stylish summer refresh by transforming basic planters into works of art. DIY painted planters allow for endless customization and add a personal touch to your greenery.
- Materials: Plain planters (terracotta, ceramic, or plastic with a basic color coating), acrylic paints suitable for outdoor use (if applicable), paintbrushes (various sizes), painter’s tape, and a clear sealant spray (optional, for protection).
- Instructions: Start with clean, dry planters. If your planters have a dark base, you might want to apply a primer first for brighter color payoff. Choose light and refreshing summer colors such as chrome yellow, crisp white, sky blue, or soft coral. Apply your base coat evenly and let it dry completely. Once the base is dry, unleash your creativity! You can paint white stripes, silver stripes, or even vibrant geometric patterns. Use painter’s tape to create crisp lines for stripes or block designs. Experiment with polka dots, abstract splatters, or even freehand floral motifs. Don’t be afraid to mix and match designs and colors across a set of planters for a cohesive yet varied look. Once your designs are dry, consider applying a clear sealant spray to protect the paint from weather and wear, especially if the planters will be outdoors.
- Aesthetic & Usage: These custom-painted planters instantly add a fresh and artistic flair to your patio, balcony, garden, or even indoor living spaces. They allow your plants to stand out even more and bring a personalized burst of summer color to your home decor.
8. DIY Watermelon Picnic Blanket
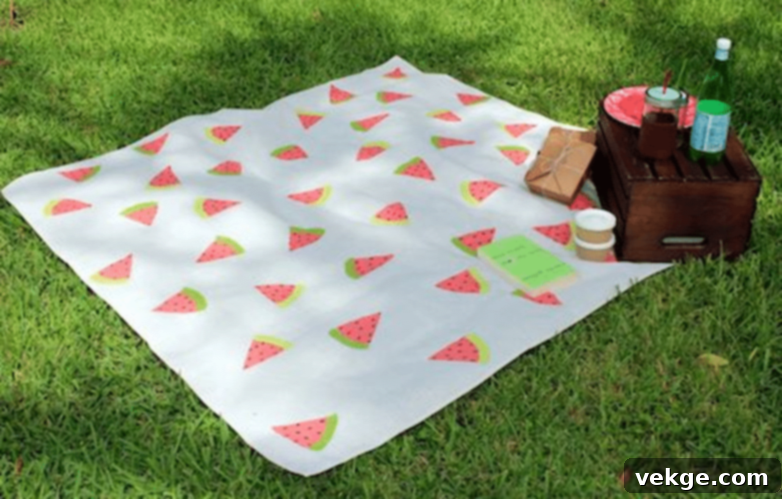
Prepare for sun-drenched days and outdoor gatherings with a delightful DIY watermelon picnic blanket. This quick and easy artwork is ideal for a beach party, park outing, or simply enjoying your backyard.
- Materials: A plain drop cloth or a large, sturdy piece of fabric (like canvas or an old sheet), fabric paints (red, light green, dark green, black), sponges, scissors, a plate or shallow dish for paint, and cardboard or wax paper to place underneath while painting.
- Instructions: First, wash and dry your fabric to remove any sizing that might prevent paint adhesion. Lay the fabric flat on a protected surface, placing cardboard or wax paper underneath to prevent paint from bleeding through. Next, cut a sponge into a triangular “watermelon slice” shape. You might also want to cut a smaller, rounded sponge for the black seeds. Pour your fabric paints onto separate plates. Dip the triangular sponge into the red fabric paint and firmly press it onto the drop cloth, creating a “slice” impression. Repeat this several times, leaving space between each red impression. Once the red is dry, use a smaller sponge or a paintbrush to add a light green rind around the straight edge of each red “slice,” followed by a darker green stripe on the very outer edge. Finally, when all the green is dry, use a small, rounded sponge or a fine brush dipped in black fabric paint to add the characteristic “watermelon seeds” to the red portion of each slice. Continue until the drop cloth looks full and vibrant with watermelon prints. Allow the paint to cure completely according to the fabric paint instructions (often involves heat setting with an iron).
- Aesthetic & Usage: This festive blanket is perfect for a beach party, a family picnic, or just lounging in the garden. Its bold, summery design instantly invites relaxation and fun, making your outdoor activities even more enjoyable.
9. DIY Rustic Sailboat
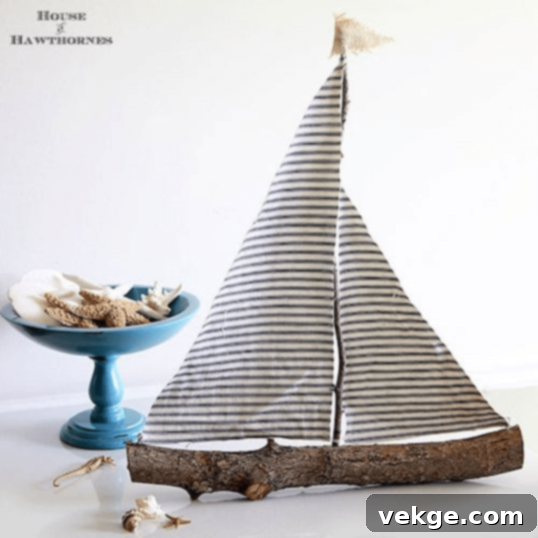
Add a charming, nautical touch to your summer decor with an easy yet attractive DIY rustic sailboat. This piece is versatile enough to be placed at any outdoor party, garden display, or even as a unique indoor accent.
- Materials: A dried twig or small branch (for the mast), sturdy paper or thin fabric (preferably striped or patterned for the sail), scissors, and strong glue (hot glue or wood glue). Optional: a small flat piece of wood or a stone for a base, or string to hang it.
- Instructions: Begin by selecting a dried twig that has a relatively straight section to act as your sailboat’s mast. Take a piece of paper or thin fabric and cut it into a triangular shape for the sail. Striped paper or a fabric with a subtle pattern can enhance the rustic and nautical appeal. Carefully apply glue along one edge of the twig and attach the longer side of your triangular sail to it, ensuring it stands upright. You can also make two sails for a more traditional look. If you want the sailboat to stand freely, glue the bottom of the twig onto a small, flat piece of wood or a sturdy stone to create a base. For a hanging decoration, you can tie a piece of string to the top of the mast.
- Aesthetic & Usage: This rustic sailboat offers a unique and artistic decor piece that’s different from the usual. Its simplicity and natural elements evoke a sense of coastal charm and adventurous spirit, making it a perfect accent for any summer-themed display or party.
10. DIY Cotton Garland for Summer
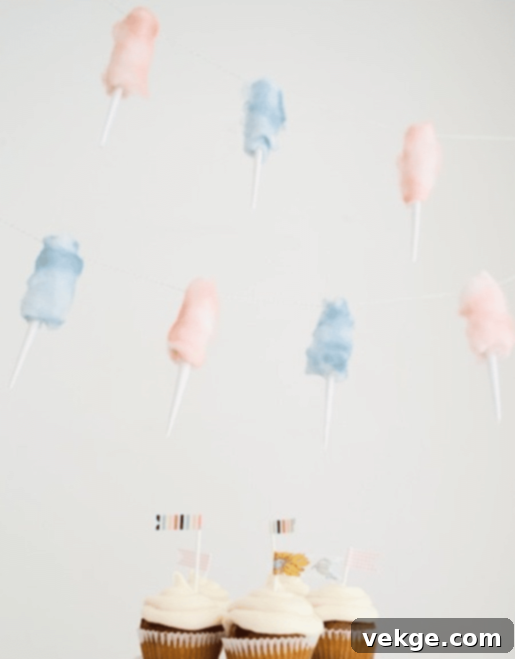
If you’re fond of the whimsical look of cotton candy, this DIY cotton garland could be a delightful and unique art project for your next summer party. It’s sure to win the hearts of your guests with its soft, cloud-like appearance.
- Materials: Fluffy cotton batting or poly-fill, colored tissue paper or cellophane (pink, blue, yellow for cotton candy effect), string or twine, and thin wire or pipe cleaners (optional, for shaping).
- Instructions: Start by taking small handfuls of cotton batting and gently shaping them into fluffy, irregular “clouds” or “puffs.” If you want to add a hint of color, you can loosely wrap a small piece of colored tissue paper or cellophane around the cotton and secure it lightly. For a more structured “cotton candy” look, you can twist a piece of thin wire or a pipe cleaner around the base of each cotton puff to give it a handle-like appearance, as if on a stick. Next, take a long piece of string or twine. Carefully tie each cotton puff onto the string, spacing them out evenly. You can simply knot the string around the center of each puff or create small loops on the puffs to thread the string through.
- Aesthetic & Usage: This light and airy garland creates a dreamy, festive atmosphere, perfect for a garden party, baby shower, or any event where you want a soft, enchanting decor. There’s no doubt that your guests will appreciate this charming and unique summer decoration.
11. DIY Butterfly Wreath
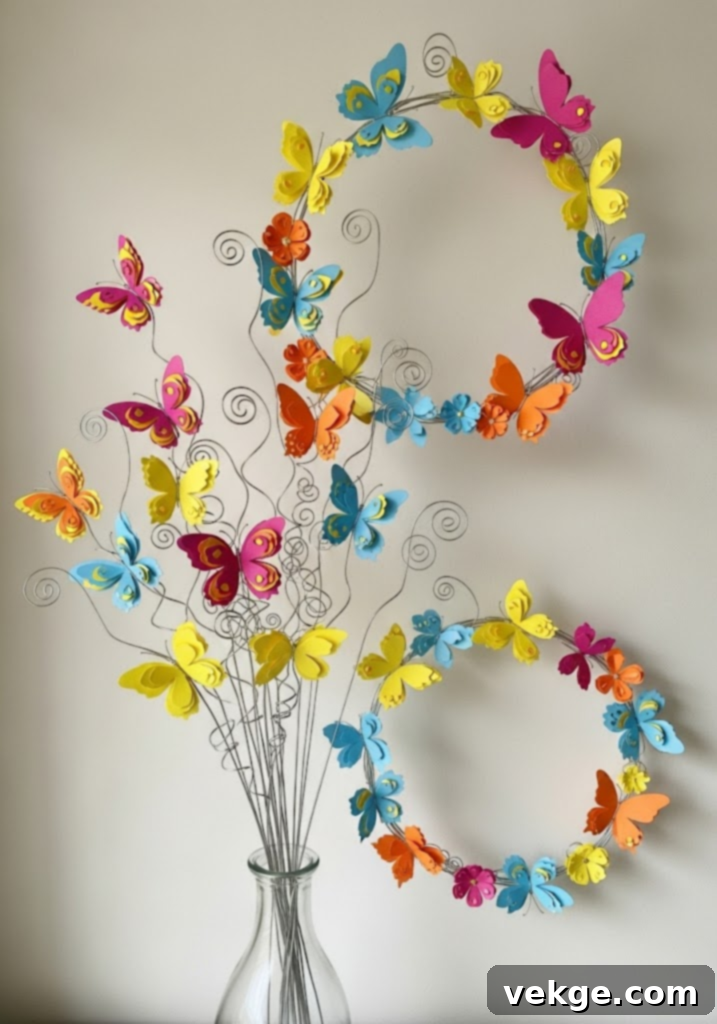
Transform extra craft wires and beautiful butterfly cutouts into the most desirable DIY quick art that will charm your peers. This elegant wreath celebrates the beauty of summer’s delicate creatures.
- Materials: Craft wire (florist wire or jewelry wire), wire cutters, pre-made butterfly cutouts (various sizes and colors), faux flower cutouts or small fabric flowers, and strong craft glue or hot glue. Optional: a pre-made wreath form.
- Instructions: If you’re starting from scratch, begin by shaping your craft wire into a circular wreath form. You might need to twist several pieces of wire together for a sturdy base. If using a pre-made wreath form, proceed to the next step. Next, take your butterfly and flower cutouts. Arrange them first to visualize your design before gluing. Start by attaching the larger elements, like the faux flowers, to the wire frame with glue. Then, carefully glue the butterfly cutouts onto the wreath, positioning them so they appear to be fluttering around the flowers. You can gently bend the wings of the butterflies slightly to give them a three-dimensional effect. Ensure the glue is fully dry before handling or hanging.
- Aesthetic & Usage: This exquisite butterfly wreath captures the vibrant energy and natural beauty of summer. It’s perfect for adorning a door, hanging in a child’s room, or as a centerpiece for a garden-themed party, adding a touch of ethereal charm to your summer decor.
12. DIY Waffle Cone Ice Cream Flower Pots
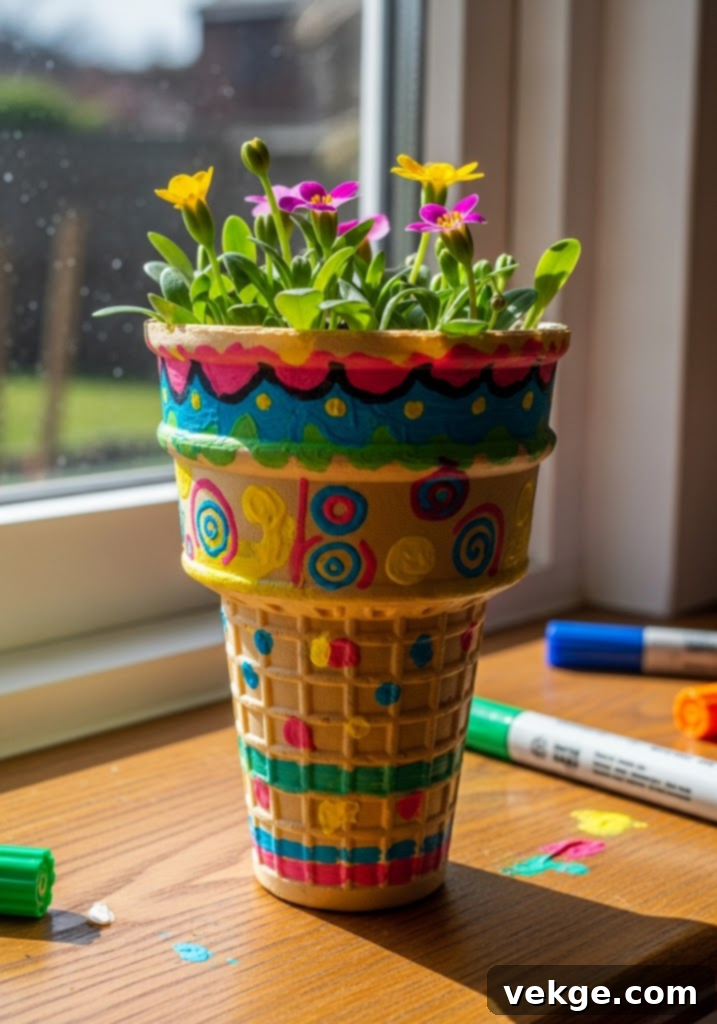
Don’t throw away those ice cream tumblers! Preserve them for a great DIY art project that transforms them into whimsical waffle cone ice cream flower pots. This is a clever way to recycle and decorate.
- Materials: Empty ice cream tumblers (plastic or paper), acrylic paints (brown, white, and various “ice cream” colors), paintbrushes, black permanent markers, and small artificial or real flowers/succulents.
- Instructions: Begin by thoroughly cleaning the ice cream tumblers and removing any labels. Ensure they are completely dry. Paint the lower portion of each tumbler a light brown color to resemble a waffle cone. Once the brown paint is dry, use a black permanent marker to draw a crisscross grid pattern on the brown section, creating the iconic waffle cone texture. For the “ice cream scoops,” paint the top portion of the tumbler in a contrasting, bright “flavor” color like pink, mint green, or yellow. You can also add a white “drip” effect along the top edge of the brown cone. For extra detail, use the marker to add sprinkles or other ice cream toppings to the colored “scoop.” Once all the paint and marker work is dry, place small artificial flowers, succulents, or even herbs inside the tumblers.
- Aesthetic & Usage: These adorable ice cream flower pots are fantastic for a kid’s room, a kitchen window sill, or as unique centerpieces for a summer party. They are a quick and easy way to impress your peers and bring out your inner creativity, rewarding you with your kid’s smile as you finish this charming project.
13. DIY Snow Globe Décor
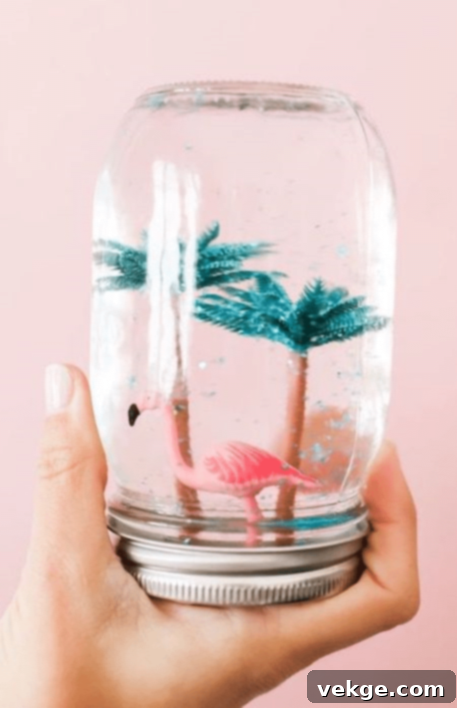
While often associated with winter, snow globes can be beautifully adapted for summer themes, offering an enchanting and unique decorative item. Create charming summer-themed display items that capture a miniature world.
- Materials: Clean glass jars or mason jars with tight-fitting lids, distilled water, glycerin (to help glitter fall slowly), glitter (colors like blue, silver, or iridescent for water effect), strong waterproof glue, and small decorative items that represent summer (e.g., miniature seashells, tiny plastic palm trees, a small toy boat, a plastic flamingo, or even small artificial flowers).
- Instructions: First, select your decorative items and securely glue them to the inside of the jar lid. Ensure the glue is completely dry and waterproof before proceeding. Fill the glass jar almost to the top with distilled water. Add a teaspoon or two of glycerin (this helps the glitter float and fall slowly, creating that magical snow globe effect). Now, sprinkle in your chosen glitter. For a summer theme, blues, silvers, and iridescents can mimic water shimmer, or you can use fine sand-colored glitter for a beach scene. Carefully screw the lid with the attached decorations onto the jar, ensuring it’s sealed tightly. You might want to add a thin bead of waterproof glue around the rim of the lid before screwing it on for extra security. Gently shake your snow globe and watch your summer scene come to life!
- Aesthetic & Usage: These captivating snow globes are an extremely interesting and excellent option for display on shelves, side tables, or as unique centerpieces. Change the display items inside according to the specific summer theme you want to showcase – a beach scene, a garden, or a miniature tropical oasis.
14. DIY Lemon Wreath
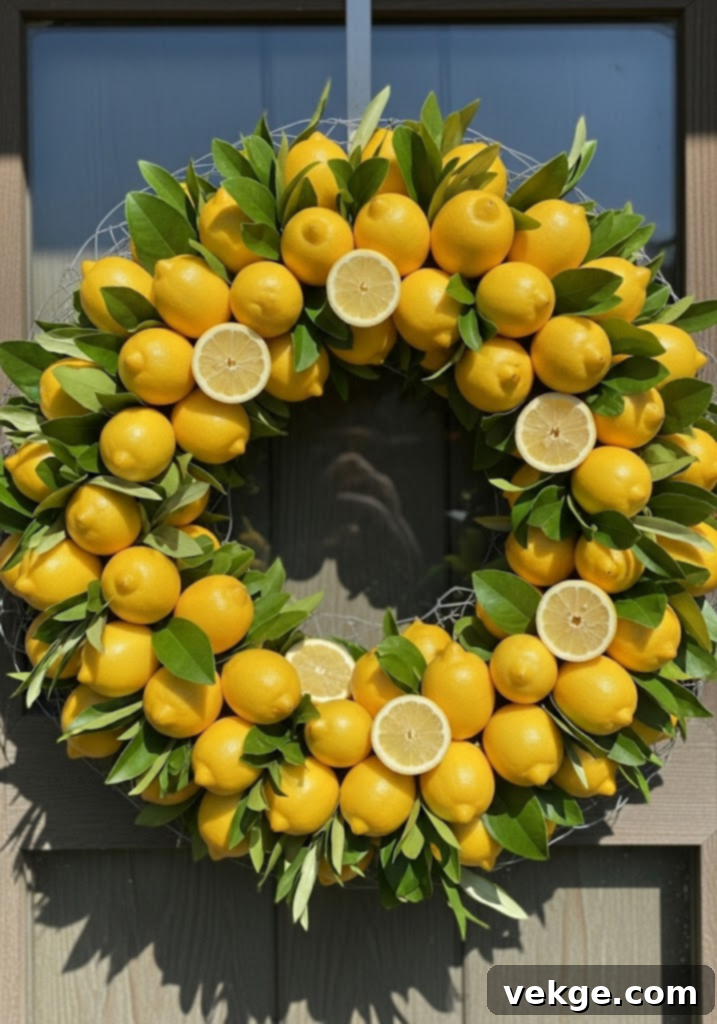
A fresh and vibrant lemon wreath is a showstopper for summer, bringing a burst of sunny color and a hint of zesty fragrance to your home. This is one of the best DIY summer room decoration ideas for a truly refreshing feel.
- Materials: A pre-made wire wreath form (various sizes available), an abundance of fresh lemons (or high-quality artificial ones for longevity), fresh lemon leaves or other greenery (e.g., eucalyptus, boxwood), florist wire, and wire cutters.
- Instructions: If using fresh lemons, make sure they are clean and dry. Begin by attaching your greenery to the wire wreath form using florist wire. Create a base layer of leaves that covers the entire form, ensuring an even and lush appearance. Next, start arranging your lemons. You can use whole lemons, half lemons, or even slices, depending on the look you desire. Secure each lemon to the wreath form with florist wire, gently wrapping the wire around the lemon and attaching it to the frame. Ensure that you arrange the lemons and leaves in a regular, pleasing pattern, filling any gaps to create a full and vibrant wreath. You can also intersperse additional leaves to frame the lemons beautifully.
- Aesthetic & Usage: This delightful lemon wreath can instantly brighten your front door, a kitchen wall, or serve as a stunning centerpiece for a summer table. Its natural beauty and cheerful colors will undoubtedly win the show, making it a perfect embodiment of fresh summer decor.
15. DIY Citrus Stamp-Painted Tea Towel
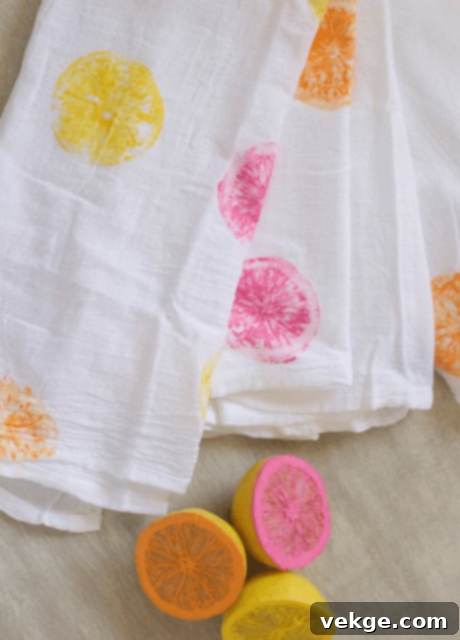
Transform plain white cloth tea towels into charming summer accents using the magic of citrus fruit stamps. This simple and attractive technique allows you to work wonders with everyday items.
- Materials: Plain white or light-colored cotton tea towels (pre-washed), fabric paints in vibrant citrus colors (e.g., yellow, orange, green, pink), lemons or limes sliced from the middle, paper plates or shallow dishes, and an iron (for heat-setting).
- Instructions: Lay your pre-washed tea towel flat on a protected surface, placing a piece of cardboard or wax paper underneath to prevent paint bleed-through. Pour small amounts of fabric paint onto separate paper plates. Take a lemon or lime half, blot off excess moisture, and then dip the cut side into your chosen fabric paint, ensuring an even coating. Carefully press the painted citrus half firmly onto the white cloth to create an impression. Lift straight up to avoid smudging. Repeat this process, re-dipping the fruit in paint each time, to create a pattern across your tea towel. You can vary the colors, use different citrus fruits, or overlap impressions for a more dynamic look. Allow the paint to dry completely (usually 24 hours). Once dry, heat-set the fabric paint according to the manufacturer’s instructions, typically by ironing the design for a few minutes.
- Aesthetic & Usage: These beautiful citrus-stamped tea towels look simple yet attractive, adding a fresh and zesty touch to your kitchen. They are perfect for drying dishes, covering baked goods, or simply hanging as decorative accents, bringing a lovely summer vibe to your culinary space.
16. DIY Mason Jar Drinking Water
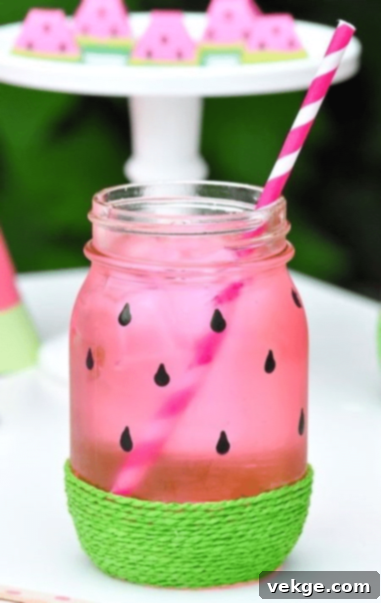
Elevate your summer beverages with charming DIY mason jar drinking glasses. These simply decorated jars add a touch of rustic elegance and personalized flair to any drinkware collection.
- Materials: Clean mason jars with lids and bands (if desired), strong craft glue, various colors of string or twine (e.g., jute, baker’s twine, embroidery floss), acrylic paints (optional, for jar body), and colorful straws.
- Instructions: Start with a clean, dry mason jar. For a unique decorative base, apply a line of strong craft glue around the bottom circumference of the jar. Begin carefully wrapping your chosen colored string or twine around the base in neat, tight rounds, pressing it into the glue as you go. Continue wrapping upwards, adding more glue as needed, until you’ve created a desired band of color or texture. You can use multiple colors, switching them out as you wrap to create stripes or patterns. Alternatively, or in addition, you can paint the body of the jar with acrylic paints in light summer colors, creating neat circles or simple designs, and allow them to dry completely. Once all decorations are set, fill your mason jar with your favorite liquid – iced tea, lemonade, or a refreshing fruit-infused water. Finally, add a brightly colored straw to complete the festive look.
- Aesthetic & Usage: These customized mason jars are perfect for summer entertaining, outdoor picnics, or simply enjoying a cool drink on a hot day. Their simplistic yet thoughtful decorations make every sip feel special and add a lovely rustic-chic element to your summer tablescape.
17. DIY Fruit Welcome Mats for Summer
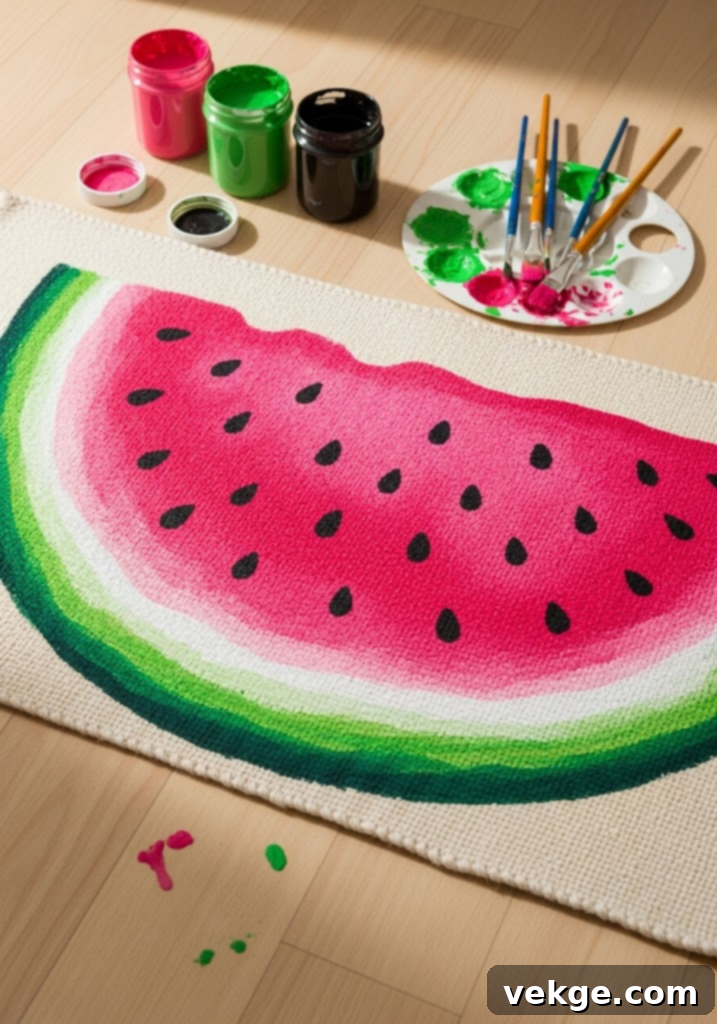
Welcome guests with a burst of summer cheer right at your doorstep with a vibrant DIY fruit welcome mat. This project allows you to customize your entry with a refreshing and playful design.
- Materials: A plain, light-colored rug mat (coir, jute, or cotton works well), outdoor-friendly acrylic paints or spray paints in fruit colors (e.g., bright yellow, orange, red, green), a spray brush or large paintbrushes, painter’s tape, and cardboard for stenciling.
- Instructions: Lay your rug mat flat on a protected outdoor surface. If you’re going for a specific fruit design, you might want to create a stencil from cardboard. For example, to make a watermelon slice, you can cut out a large semi-circle. Secure the stencil to the mat with painter’s tape. If using spray paint, apply thin, even layers of color. For a multi-layered fruit design like a watermelon, start with the lightest color (e.g., green for the rind), letting it dry, then taping off that section and adding the next color (e.g., red for the flesh). If using a brush, apply the paint directly. For a simpler design, you can spray layers of vibrant colors over different sections of the rug, creating a gradient or block pattern. For example, spray one side yellow, another orange, and blend them slightly in the middle. Ensure each layer is dry before adding the next or removing tape to prevent bleeding.
- Aesthetic & Usage: A fruit-themed welcome mat instantly injects a fun, inviting, and summery vibe into your entryway. It’s a delightful way to greet visitors and showcase your creative spirit, making a bright first impression for your home.
18. DIY Striped Summer Vases
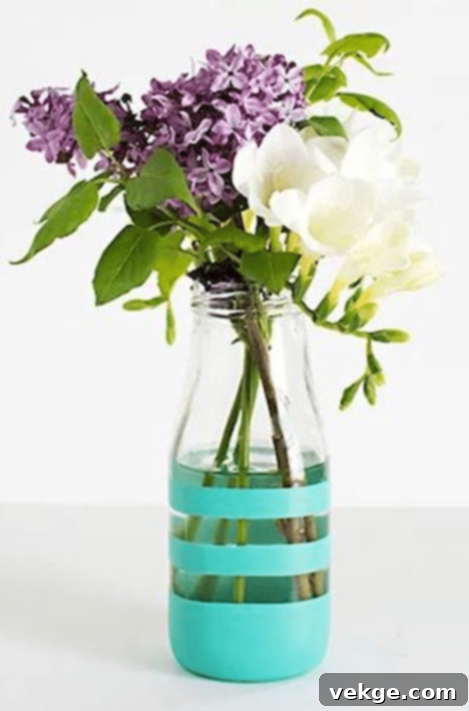
Give plain glass bottles or vases a stylish and refreshing update with DIY striped summer vases. This project is one of the most innovative DIY summer room decoration ideas, combining simplicity with fantastic visual impact.
- Materials: Thick glass bottles or clear glass vases, acrylic paints (in various summer colors like white, blue, yellow, coral), painter’s tape (various widths), paintbrushes, and a clear sealant spray (optional).
- Instructions: Begin with clean, dry glass bottles or vases. Decide on your color palette – bright and airy summer hues work best. Using painter’s tape, create your desired stripe pattern on the lower half (or any section) of the glass. You can create uniform stripes, varying widths, or even diagonal patterns. Ensure the tape is firmly pressed down to prevent paint bleeding. Apply your chosen acrylic paints in even layers within the taped-off sections. Allow each color to dry completely before applying another color or before carefully removing the tape. For crisp lines, it’s often best to remove the tape when the paint is still slightly tacky, but not wet. Once all paint is dry, you can apply a clear sealant spray for added durability and a professional finish. Finally, fill the glass jar with water and arrange your favorite fresh summer flowers inside.
- Aesthetic & Usage: The look created by these striped vases is simply fantastic. They make a stunning display with fresh flowers, adding a sophisticated yet summery touch to any table, shelf, or window sill. These vases are a beautiful way to bring color and natural beauty into your home.
19. DIY Paper Pinwheels
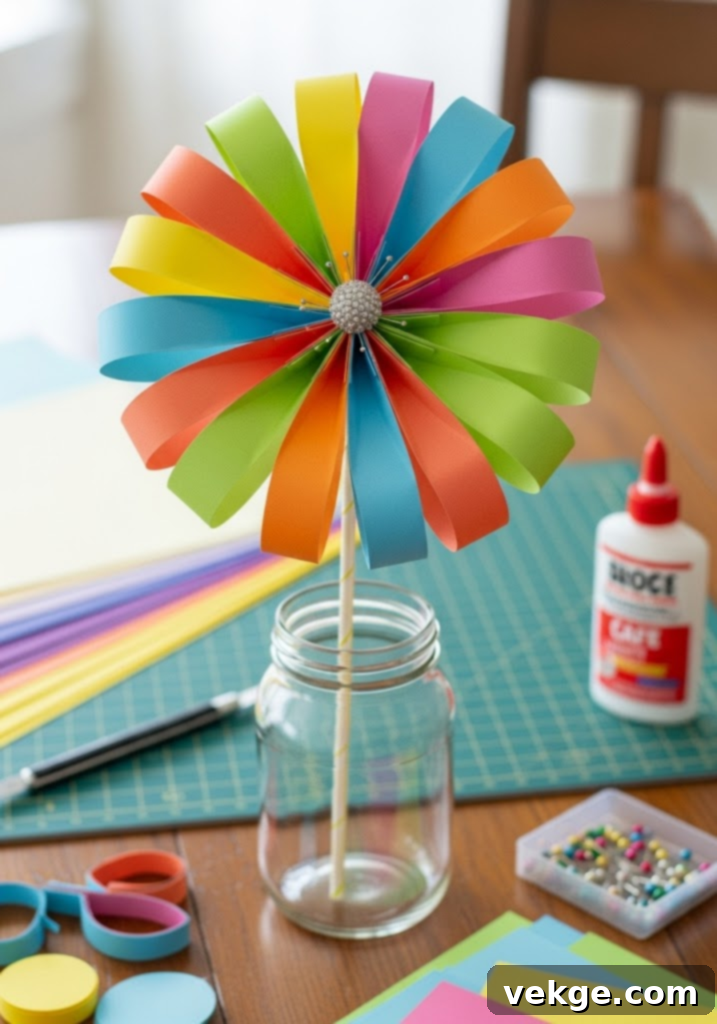
These incredible DIY paper pinwheels are a classic summer craft that doubles as fantastic table decor. They bring a playful charm and a burst of color, perfect for any summer gathering.
- Materials: Colored paper (cardstock for durability, various patterns and solids), scissors, ruler, pencil, pushpins or brads, and straws or thin wooden dowels.
- Instructions: Start by cutting square pieces of colored paper. Using a ruler and pencil, draw diagonal lines from each corner of the square towards the center, stopping about an inch from the middle. Cut along these lines. Next, take one corner of each of the four flaps you’ve created and fold it towards the center, securing all four folded corners together with a pushpin or brad through the center point. Ensure the pinwheel can spin freely. Fix the pushpin/brad to the end of a straw or thin wooden dowel. You can find many detailed DIY paper-cutting websites and video tutorials to follow the exact folding pattern for a perfect pinwheel.
- Aesthetic & Usage: These paper pinwheels look exceptional when placed inside a jar as a centerpiece or arranged in a vase. They add a whimsical, old-fashioned summer charm to your decor, perfect for garden parties, BBQ tables, or children’s rooms, bringing a delightful sense of movement and color.
20. DIY Ocean Painting Home Décor
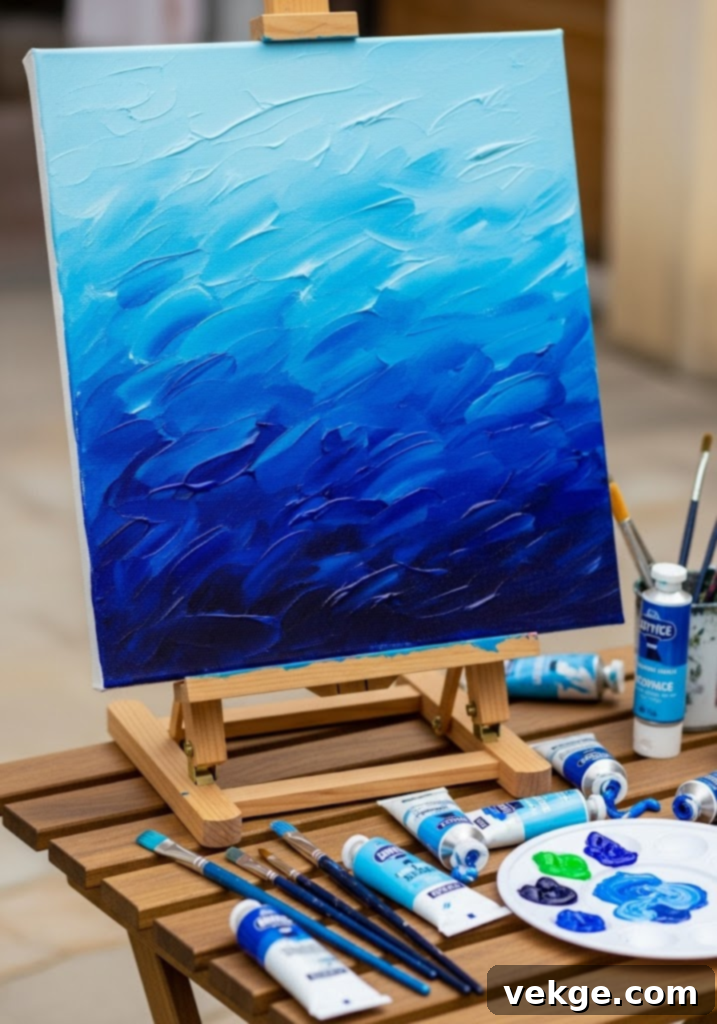
Bring the calming essence of the seaside into your home with a DIY ocean painting. This artistic project allows you to create a personalized piece of wall decor that captures the beauty of summer waves.
- Materials: A blank canvas (any size), acrylic paints in various shades of blue, white, and perhaps a touch of green or turquoise, paintbrushes (flat, round, and a fan brush for waves), and a palette.
- Instructions: Begin by coating your canvas with a base layer of a medium blue, covering the entire surface. While this layer is still wet or slightly damp, start blending in darker blues at the bottom for deeper water and lighter blues or aquas towards the top for the horizon. If you have confidence in your brush strokes, experiment with different shades of blue to create depth and movement. For waves, use a flat brush to create sweeping motions, blending white paint into the blues to simulate foam. A fan brush can be excellent for creating subtle wave textures. Don’t be afraid to experiment with abstract representations of the ocean – the goal is to evoke the feeling of water. You will find the piece of art truly interesting and meditative after the completion of the painting job.
- Aesthetic & Usage: This ocean painting makes a stunning piece of home decor, perfect for a living room, bedroom, or bathroom. It brings a serene, tranquil, and distinctly summery ambiance, reminding you of beach days and refreshing ocean breezes.
21. DIY Summer Candles
Create a soothing and alluring ambiance for your summer evenings with DIY summer candles. This project allows you to recycle old candles or make new ones, adding personalized colors and scents.
- Materials: Old candles (for recycling) or wax flakes (soy, paraffin, or beeswax), heat-safe glass jars or containers, candle wicks with metal bases, wick clips or clothespins, candle dye (liquid or blocks) in summer colors, essential oils (e.g., citronella, lemon, lavender, ocean breeze), and glitter (optional).
- Instructions: If recycling old candles, cut them into smaller pieces and remove any old wicks. Place the wax in a heat-safe glass container and melt it using a double boiler method or a microwave (with caution). While the wax is melting, secure a new wick to the bottom of your clean glass jar with a drop of melted wax or a wick sticker, ensuring it’s centered. Use a wick clip or clothespin to hold the wick upright at the top of the jar. Once the wax is fully melted, carefully add candle dye to achieve your desired summer color (e.g., light blue, sunny yellow, soft coral). Stir well. Add a few drops of your chosen summer-scented essential oils. If desired, sprinkle some glitter into the wax for a shimmering effect. Carefully pour the colored, scented wax into your prepared jar. Allow the candle to settle and cool completely, which can take several hours. Once hardened, trim the wick to about 1/4 inch.
- Aesthetic & Usage: These custom summer candles will look alluring and create a soothing ambiance when lit, perfect for indoor relaxation or outdoor entertaining. The gentle glow, combined with summer scents, enhances the peaceful and inviting atmosphere of your home.
22. DIY Watercolor Throw Pillows
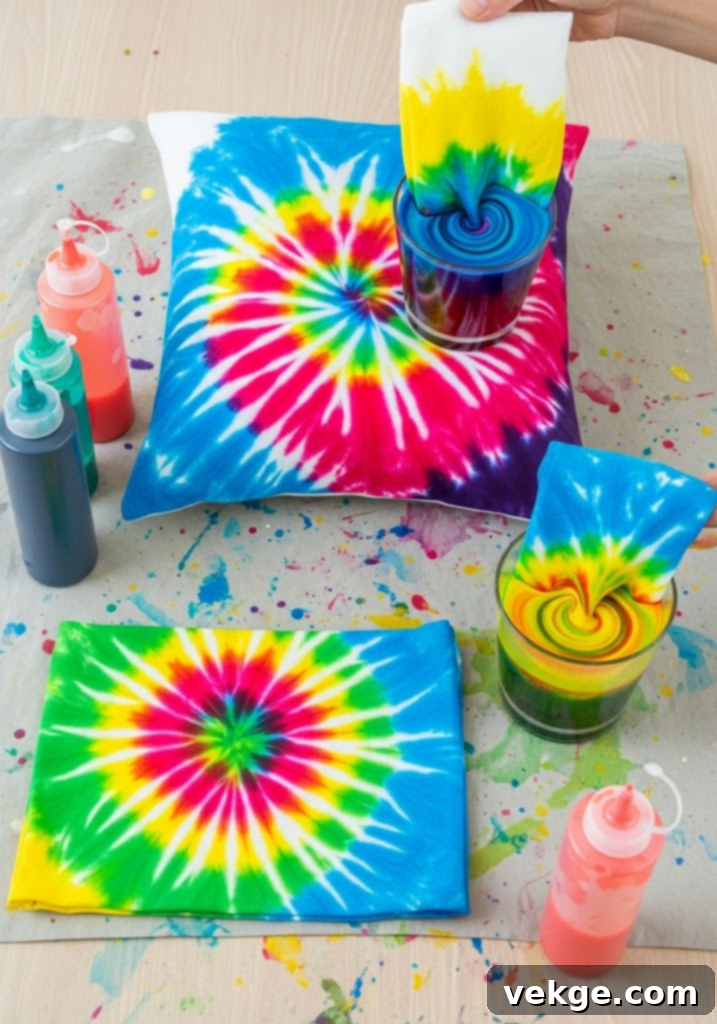
Spend quality family time creating stunning DIY watercolor throw pillows. This is a truly fun and engaging art project that yields unique and beautiful results, making it the best family time ever.
- Materials: Plain white cotton pillow covers (pre-washed), fabric dyes or liquid watercolors, a large tumbler or bucket filled with water, disposable gloves, and a drying rack or clothesline.
- Instructions: Start by pre-washing your white pillow covers to remove any sizing. Fill a large tumbler or bucket with water. Wear disposable gloves to protect your hands. Add a few drops of your chosen fabric dyes or liquid watercolors into the water. Swirl the colors gently with a stick or spoon to create a “whirlwind” or marbled effect – don’t overmix if you want distinct patterns. Carefully dip your white pillow cover into the colored water. You can dip it fully for an all-over marble, or just partially for an ombre or dip-dye effect. Gently pull the pillow cover out of the water, allowing excess water to drip off. Hang it to dry in the sun (which can sometimes intensify colors) or on a drying rack. As it dries, the colors will meld and create awesome, unique shades and patterns.
- Aesthetic & Usage: Your custom watercolor throw pillows will showcase some awesome, artistic shades, bringing a touch of personalized elegance and a vibrant summer feel to your living room or bedroom. Anybody and everybody will appreciate this creative and beautiful idea for refreshing your home decor.
23. Clothespin Wreath
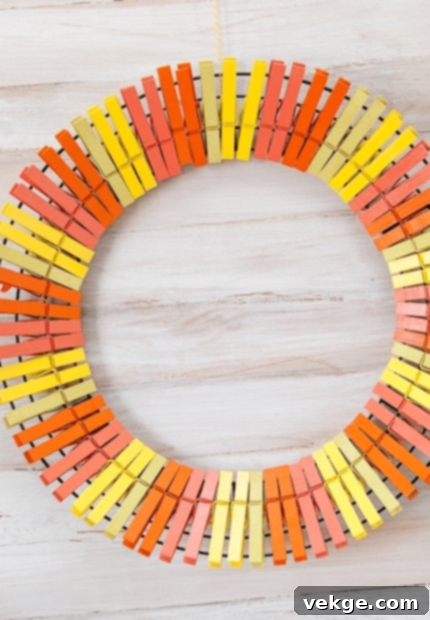
If you’re looking for innovative and charming decor for your next summer party or simply a unique wall accent, a DIY clothespin wreath is a fantastic and surprisingly stylish option.
- Materials: A metal wire wreath frame (available at craft stores) or a sturdy piece of wire shaped into a circle, a generous supply of wooden spring-style clothespins, spray paint (optional, in summer colors), and ribbon or decorative elements (optional).
- Instructions: If starting with a straight wire, carefully bend and secure it into a circular shape to form your wreath base. If using a pre-made metal wreath frame, you can skip this step. If you want to add color, you can spray paint your wooden clothespins in bright summer hues (e.g., yellow, blue, pink, white) and let them dry completely. Once the clothespins are ready, begin attaching them around the wire frame. Simply clip each clothespin onto the wire, facing outwards, side-by-side. Continue adding clothespins until the entire wire frame is covered, creating a full, spiky, wreath-like appearance. You can alternate colored and plain clothespins for a striped effect or arrange them in a rainbow pattern. For an extra touch, tie a pretty ribbon bow at the top or weave some faux flowers into the pins.
- Aesthetic & Usage: This unique clothespin wreath makes for awesome decor. It’s perfect for hanging on your wall, door, or as a backdrop for party photos. Its rustic yet modern aesthetic brings an interesting texture and a creative touch to your summer home.
24. DIY Watercolor Fruit Coaster
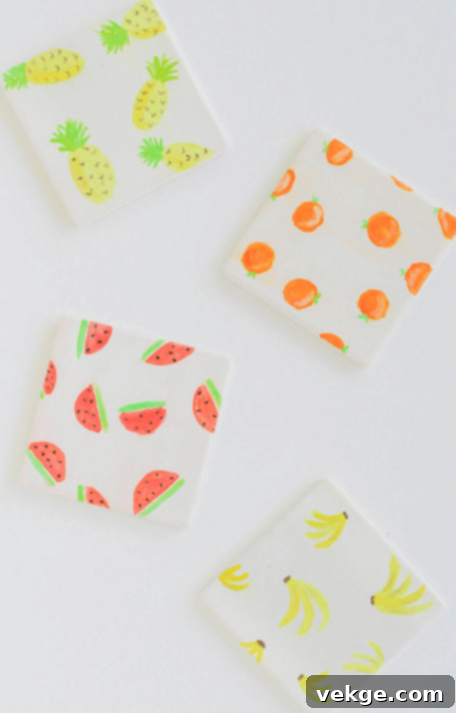
Combine your love for watercolor art and summer fruits with these charming DIY watercolor fruit coasters. If you have basic craft supplies, you can easily create these delightful and practical pieces.
- Materials: Sturdy cardboard (cut into coaster shapes), white cloth or canvas fabric (cut slightly larger than cardboard), strong craft glue, watercolors or acrylic paints (various fruit colors), fine paintbrushes, and black permanent markers.
- Instructions: Cut your cardboard into desired coaster shapes (circles, squares, or even fruit outlines). Cut pieces of white cloth or canvas fabric slightly larger than your cardboard shapes. Glue the fabric securely onto one side of each cardboard piece, wrapping any excess fabric to the back and gluing it down for a neat edge. Once dry, you’re ready to paint! Choose your favorite fruit designs – watermelon slices, citrus rounds (lemon, lime, orange), strawberries, or kiwis are all great choices. Using watercolors or diluted acrylics, paint the main colors of your chosen fruits onto the fabric. Allow the paint to dry. For intricate details, like drawing the seeds on a watermelon or strawberry, or the segments of a citrus fruit, use a fine paintbrush or a black permanent marker. Add some subtle shades to give your fruit a more realistic and vibrant appearance.
- Aesthetic & Usage: These custom watercolor fruit coasters are a fantastic way to add a fresh, artistic, and functional element to your summer tabletops. They are perfect for protecting surfaces while adding a pop of fruity color and handcrafted charm to your home decor.
25. DIY Sweet Summer Letter Banner
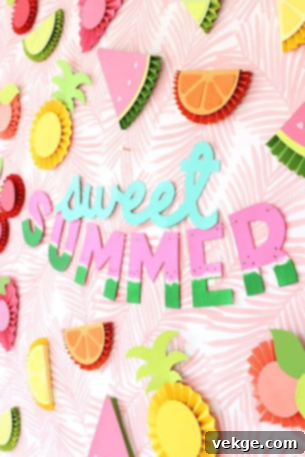
Create a warm and inviting atmosphere for any summer celebration with a personalized DIY Sweet Summer Letter Banner. This project makes for a great welcome banner for a summer party or a decorative accent in any room.
- Materials: Large pieces of chart paper or sturdy cardstock in various summer colors, pre-made paper alphabets or a stencil and marker, scissors, strong glue, and string or ribbon for hanging. Optional: glitter, stickers, or small cutouts for embellishment.
- Instructions: Decide on your desired summer phrase (e.g., “SWEET SUMMER,” “HELLO SUMMER,” “SUMMER VIBES”). Cut your chart paper or cardstock into rectangular or flag shapes to serve as the individual banner pieces. Ensure they are uniform in size for a cohesive look. If using pre-made paper alphabets, arrange them on each banner piece to spell out your chosen phrase. Secure them with strong glue. If using a stencil, carefully trace and cut out your letters or hand-draw them with a marker. Embellish your banner pieces with glitter, small cutouts of suns, ice cream cones, or flowers, adhering to a specific summery pattern or a whimsical mix. Once all letters and decorations are dry, punch a hole in the top two corners of each banner piece. Thread a long piece of string or ribbon through the holes, carefully spacing the letters to form your banner.
- Aesthetic & Usage: This customizable banner is a fantastic welcome sign for a summer party, a cheerful decoration for a mantelpiece, or a lovely accent for a child’s bedroom. It instantly sets a festive and warm summer mood, making everyone feel welcomed and celebrated.
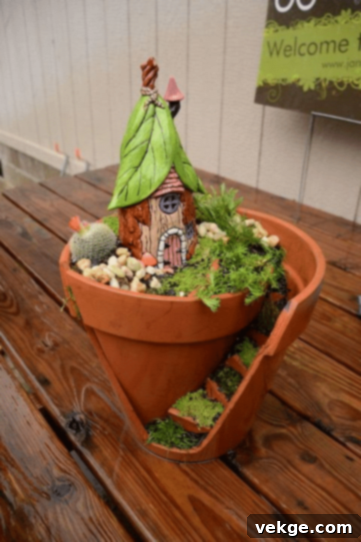
26. DIY Planter
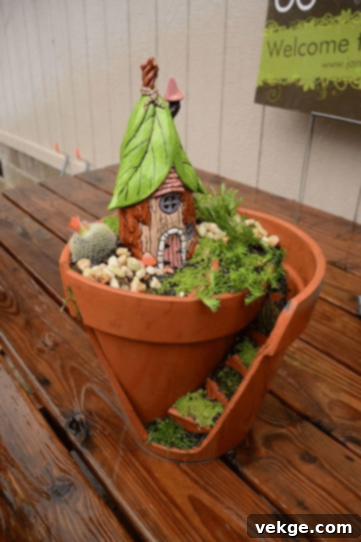
Next time you find a broken earthen or ceramic planter in your house, don’t throw it away! Instead, embrace creativity and transform it into a unique, charming DIY planter. This sustainable idea is sure to be appreciated by all.
- Materials: A broken earthen or ceramic planter (large pieces are best), strong adhesive suitable for ceramics/pottery, pebbles, marbles, artificial grass, small succulents or air plants, and craft sticks or small stones for labels (optional).
- Instructions: Carefully gather the larger broken pieces of your planter. Instead of reassembling it, you’ll use the broken edges to create a tiered or multi-level landscape. Use strong adhesive to strategically place the larger broken pieces within the main planter body, creating interesting elevations and partitions. Allow the glue to dry completely. Once the structure is stable, begin filling the various sections. You can use pebbles, decorative marbles, or small amounts of soil. Arrange artificial grass (or real moss) to create green patches. Nest small succulents, air plants, or other low-maintenance plants within the nooks and crannies of your newly designed planter. You can also add small decorative elements like miniature garden gnomes or tiny signs on craft sticks.
- Aesthetic & Usage: This charming and resourceful DIY planter will look incredibly cute and artistic. It’s perfect for placing in front of your door, on a patio table, or even on a large window sill. Everyone will appreciate this type of inventive DIY summer room decoration idea, highlighting your ability to find beauty in imperfection and create something new from old.
Easy Tips for Perfect DIY Summer Room Decorations
- Choose Budget-Friendly Materials: Prioritize inexpensive supplies that are readily available at local craft stores, dollar stores, or even discount retailers. Always check these stores first for basic craft materials like cardstock, glues, and simple paints to keep your overall project costs wonderfully low. Utilizing affordable items allows you to experiment freely without worrying about breaking the bank, encouraging more creative exploration.
- Embrace Paint and Brushes Frequently: Painting is a cornerstone of DIY decorating. Engage in regular painting sessions with your kids; it’s an excellent way to create fun family bonding time. It allows everyone to showcase their creative skills, whether on canvas, old furniture pieces, or even directly on some of your craft projects, adding vibrant color and personalized artistry to your summer decor.
- Recycle and Repurpose Household Items: Develop a keen eye for potential craft materials among items you might otherwise discard. Keep extras like old woolens, worn socks (which can be stuffing!), broken crayons, glass jars, and drop cloths. These often overlooked items become perfect, cost-free materials for future decoration projects, promoting sustainability and inspiring unique creations.
- Integrate Fresh Summer Flowers: Nothing says summer quite like the natural beauty and fragrance of fresh blooms. Place light-colored or white flowers, such as daisies, lilies, or hydrangeas, in simple vases around your home. Create beautiful, fragrant wreaths for your doors or centerpieces for your tables. Fresh flowers instantly add natural beauty, a pleasant fragrance, and an undeniable touch of organic elegance to any room.
- Opt for Simple Craft Ideas: When selecting projects, gravitate towards those that do not require extensive expertise, complex techniques, or specialized tools. Simple craft ideas ensure that kids and friends can easily join the decorating fun without feeling overwhelmed or frustrated, making the process enjoyable for everyone involved and focusing on the joy of creation.
- Stick to Basic Supplies: Build a core collection of common craft materials that are versatile and handy. Items like colored paper, sharp scissors, and various types of glue are fundamental. These basic supplies work effectively for countless decoration ideas, from garlands to coasters, ensuring you always have the essentials on hand for spontaneous creative bursts or planned DIY sessions.
The Bottom Line
Summer decorating doesn’t have to be an expensive or complicated endeavor to make a truly significant impact on the ambiance of your home. As we’ve explored, you can effortlessly create beautiful, seasonal touches using everyday materials and basic craft supplies found around your house or at your local dollar store.
One of the most rewarding aspects of these DIY projects is how they foster connection and bring families together. There’s immense joy in seeing children’s eyes light up with excitement as they create something beautiful for their rooms or for a family celebration. These creative activities not only transform your living space into a vibrant summer paradise but also build cherished memories that will last a lifetime.
What truly matters most in your summer decorating journey is selecting projects that genuinely align with your personal style and current skill level. Don’t feel pressured to tackle everything at once. Start with just one or two ideas from this list that particularly resonate with you, and gradually build upon your successes. Each small project contributes to a larger, cohesive summer theme that reflects your unique taste.
Feeling inspired and ready to get started? Pick your favorite project from this curated list and embark on the journey of creating your perfect summer room today. Your home, with its fresh, cheerful, and personalized updates, will undoubtedly thank you for the delightful transformation.
