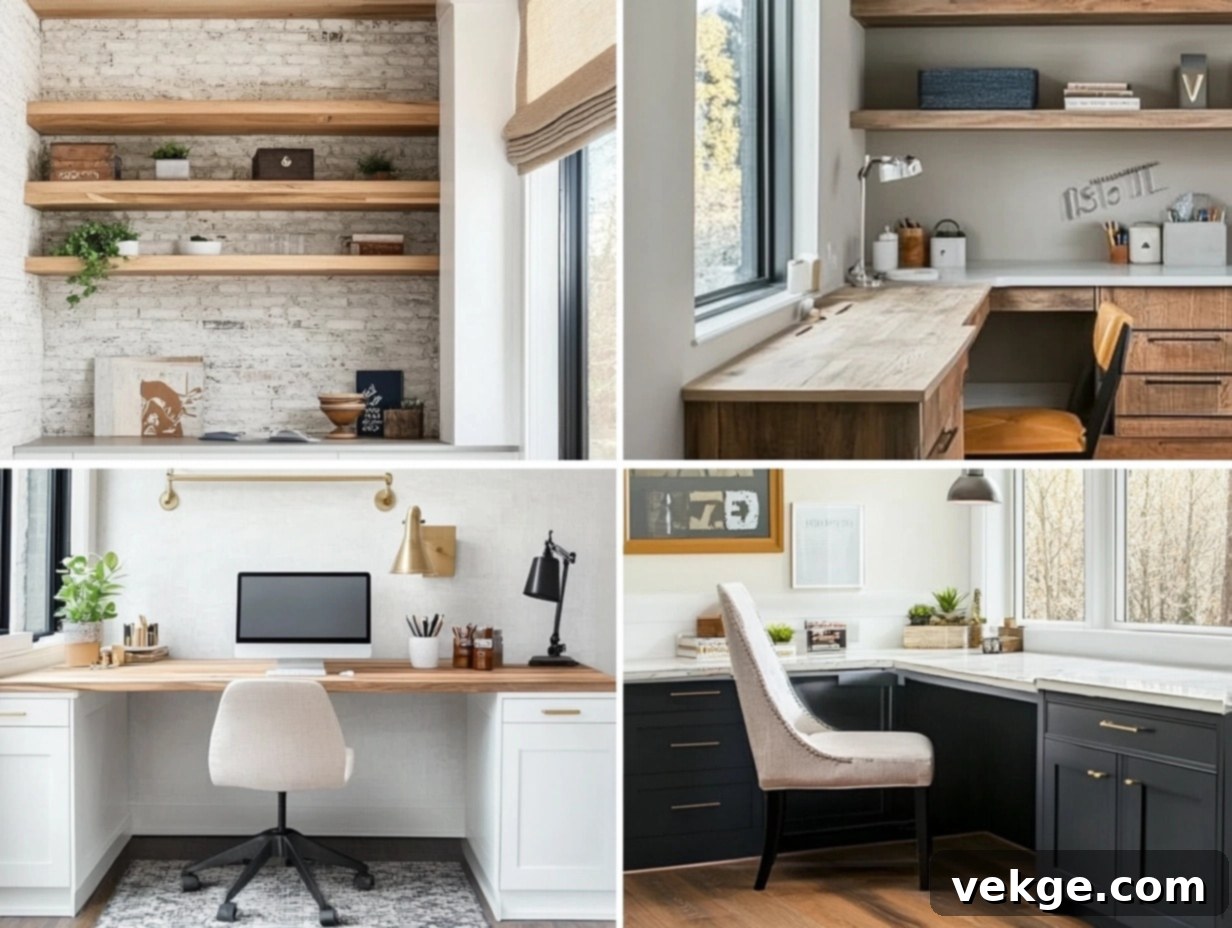
Transform Your Home: 25 Innovative Built-In Desk Ideas for Ultimate Productivity & Style
In today’s dynamic world, where working from home, studying, and pursuing creative hobbies often take center stage, a well-designed workspace is more crucial than ever. A built-in desk offers an exceptional solution, seamlessly blending functionality with sophisticated style. Unlike freestanding desks that can often feel clunky or out of place, built-in designs are custom-tailored to your space, maximizing efficiency and creating a cohesive aesthetic.
Imagine transforming an overlooked corner, an awkward nook, or an entire wall into a highly efficient and visually appealing work zone. Built-in desks are renowned for their incredible space-saving capabilities and unparalleled customization options. Whether your home aesthetic leans towards minimalist modernism, rustic charm, or classic elegance, there’s a built-in desk design that can perfectly complement your existing decor and meet your specific needs.
From sleek, floating designs that create an illusion of space to expansive U-shaped workstations designed for intense multitasking, the possibilities are virtually limitless. This comprehensive guide will explore 25 innovative built-in desk ideas, providing inspiration and practical insights to help you craft the perfect workstation. Get ready to elevate your productivity, enhance your comfort, and inject a significant dose of style into your home with a bespoke built-in desk.
Creative Ideas for a Built-In Desk to Enhance Any Space
1. Minimalist Wall-Mounted Desk
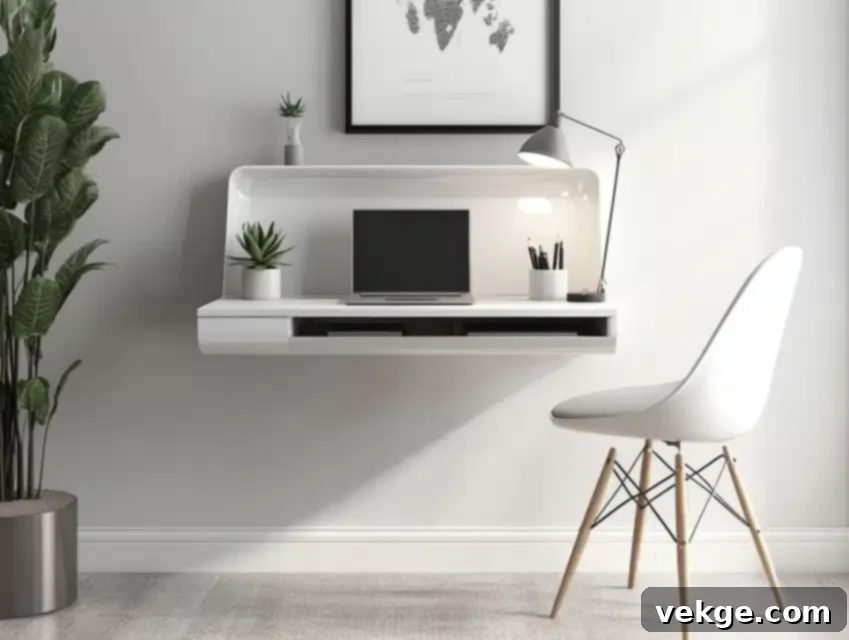
The minimalist wall-mounted desk is the epitome of streamlined efficiency. This design creates a highly functional workspace without sacrificing precious floor space, making it an excellent choice for compact apartments, bedrooms, or hallways. Featuring a sleek, floating surface directly attached to the wall, these desks often incorporate ingenious hidden storage compartments or discreet drawers, maintaining a clean and clutter-free aesthetic. It’s a favorite among those who appreciate clean lines, modern design, and a workspace that feels light and airy. Pairing it with a simple, ergonomic chair and minimal decorative elements can create a chic, contemporary vibe that exudes effortless sophistication.
DIY Steps:
- Measure your desired wall space to accurately determine the dimensions for your desk.
- Cut a sturdy wooden board to the chosen size and thoroughly sand it for a smooth, refined finish.
- Attach robust metal brackets to the wall, ensuring they are perfectly level and securely anchored.
- Mount the prepared wooden board onto the brackets using appropriate screws, verifying its stability.
- Apply a coat of paint or stain that harmonizes with your room’s existing decor.
- Consider installing optional storage features, such as hidden compartments or a small, shallow drawer directly beneath the desk surface, for a truly integrated look.
2. Desk with Floating Shelves
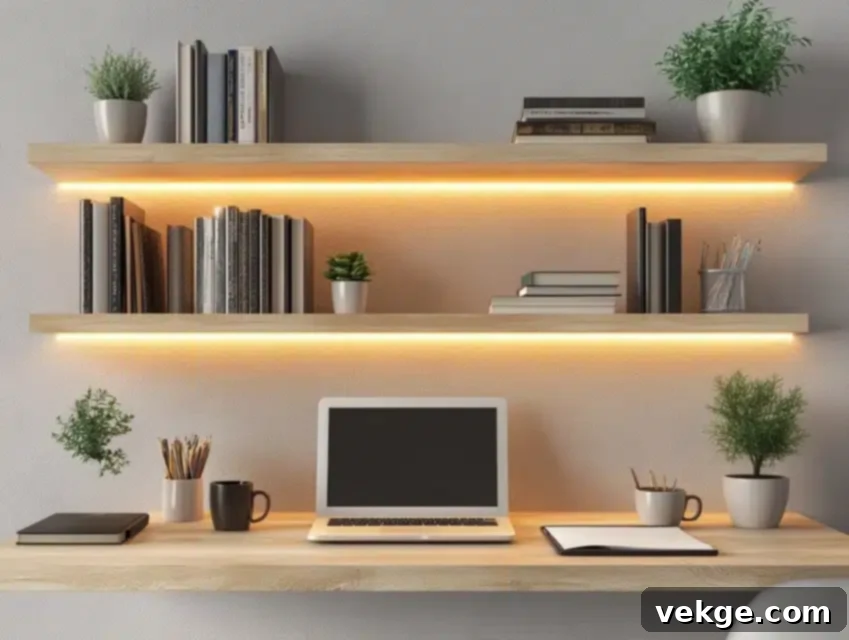
Integrating a built-in desk with coordinating floating shelves above it introduces a dynamic vertical storage solution that dramatically enhances space efficiency. This configuration is particularly effective in smaller rooms, studio apartments, or home offices where maximizing every inch is paramount. The shelves offer versatile space for organizing books, showcasing personal decor items, or even housing small indoor plants, adding a touch of personalization and warmth. The beauty of this design lies in its adaptability; you can install as many shelves as your wall permits, keeping all your essentials within easy reach while maintaining a stylish, uncluttered aesthetic. This design makes the space feel more open and less confined, truly a clever use of vertical real estate.
DIY Steps:
- Choose a robust board for the desk and complementary wood for your floating shelves.
- Install sturdy brackets for the desk at a height that allows for comfortable working.
- Securely fasten the desk board onto the brackets using appropriate screws.
- Mount additional, equally sturdy brackets above the desk to support the floating shelves.
- Position and secure the shelves, ensuring they are evenly spaced and perfectly level.
- Personalize the space by decorating with books, plants, or essential office supplies.
3. Corner Built-In Desk
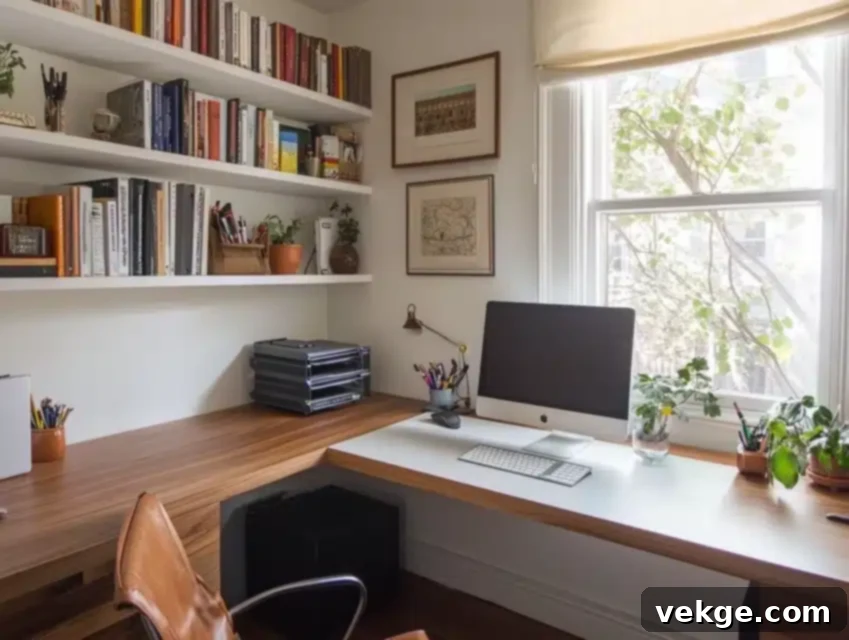
Corners in a room are frequently underutilized, yet they possess immense potential for functional transformation. An L-shaped custom built-in desk expertly harnesses this overlooked space, rendering it exceptionally functional. This intelligent design maximizes surface area by providing two expansive working surfaces, making it an optimal choice for individuals who multitask extensively or require ample room for multiple devices, monitors, or creative projects. Corner desks are particularly effective in converting awkward nooks into highly productive, cozy, and private work zones. They are an indispensable solution for home offices or shared living areas where optimizing every square inch is a priority. For a truly complete and organized setup, consider adding integrated shelves or storage units both above and below the desk, ensuring a seamless fit into the corner and enhancing overall utility.
DIY Steps:
- Accurately measure the corner space and determine the precise dimensions for each leg of the L-shaped desk.
- Cut two sturdy wooden boards to match these measurements and sand them diligently for a smooth finish.
- Attach robust brackets or support frames to the walls, ensuring they are perfectly level and firmly secured.
- Mount the prepared boards onto the brackets to meticulously form the L-shape, checking for alignment.
- Apply a fresh coat of paint or stain that beautifully complements your room’s existing decor.
- Install optional shelving or integrated storage units above the desk to significantly enhance its functionality and organizational capacity.
4. Window-Facing Desk

There’s an undeniable allure and natural inspiration that comes with placing a built-in desk directly beneath a window. This strategic positioning floods your workspace with abundant natural light, creating an uplifting and energizing environment that is ideal for working, studying, or engaging in creative pursuits. The expansive view outside can also serve as a refreshing visual break, offering a calming effect that can significantly boost productivity and foster creativity. To optimize this setup, consider adding adjustable curtains or blinds to control sunlight intensity as needed. Keeping the desk surface minimal allows the captivating outdoor view to remain the focal point, enhancing focus and minimizing distractions.
DIY Steps:
- Precisely measure the width of the window area to determine the optimal size for your desk.
- Cut a wooden board to perfectly fit the space and meticulously sand it to achieve a smooth and refined surface.
- Attach sturdy brackets or supportive legs to the underside of the board for reliable stability.
- Carefully position and securely fasten the desk against the wall, directly beneath the window.
- Paint or stain the desk to beautifully complement the room’s overarching decor scheme.
- Complete the setup by adding a comfortable chair and minimal decor, ensuring the area remains uncluttered and conducive to focused work.
5. Rustic Wooden Desk
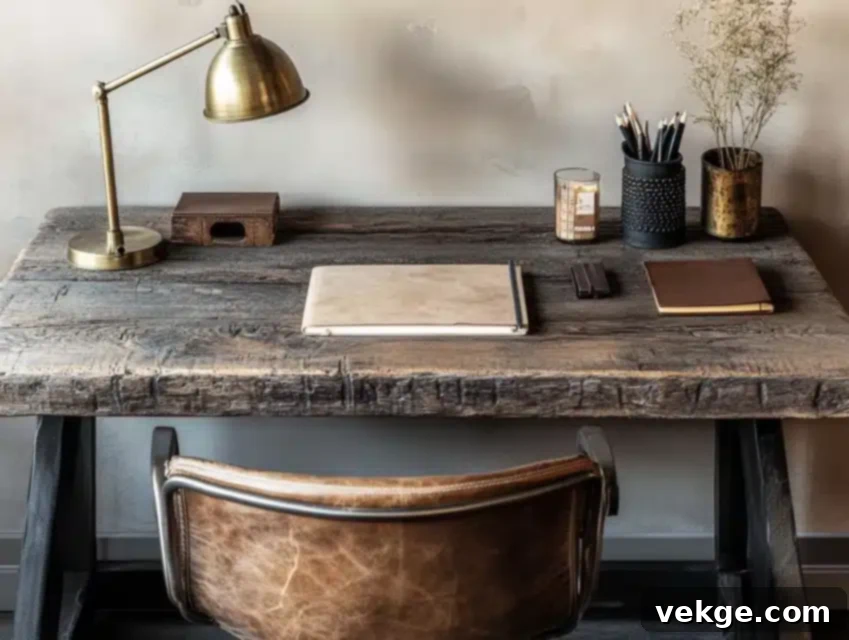
A rustic wooden desk, especially one crafted from reclaimed wood, instantly infuses any room with profound warmth, character, and a sense of history. This design is an ideal choice for those who are drawn to earthy tones, natural textures, and a charming, organic aesthetic. Each piece of reclaimed wood possesses its own unique story, visible in its distinct grain patterns, natural imperfections, and rich patina, making every rustic desk a one-of-a-kind statement piece. These desks are not only visually appealing but also remarkably sturdy and timeless, pairing beautifully with both contemporary and traditional interior styles. To further enhance its authentic rustic appeal, consider incorporating metal accents, such as wrought-iron supports, or vintage hardware, transforming it into a standout feature in your space.
DIY Steps:
- Carefully source reclaimed wood, ensuring it is clean, structurally sound, and free from any significant damage.
- Measure and precisely cut the wood to your desired desk dimensions, considering both length and depth.
- Thoroughly sand the wood to eliminate rough edges and splinters, while deliberately preserving its natural, textured character.
- Assemble the desk using robust screws or strong wood glue, reinforcing key joints with metal brackets if additional stability is required.
- Apply a protective finish, such as a clear sealant or wax, to safeguard the wood’s inherent character and enhance its durability.
- Integrate metal hardware or vintage-inspired accents, such as industrial-style legs or old-fashioned drawer pulls, for an undeniably authentic rustic touch.
6. Built-In Desk with Cabinets
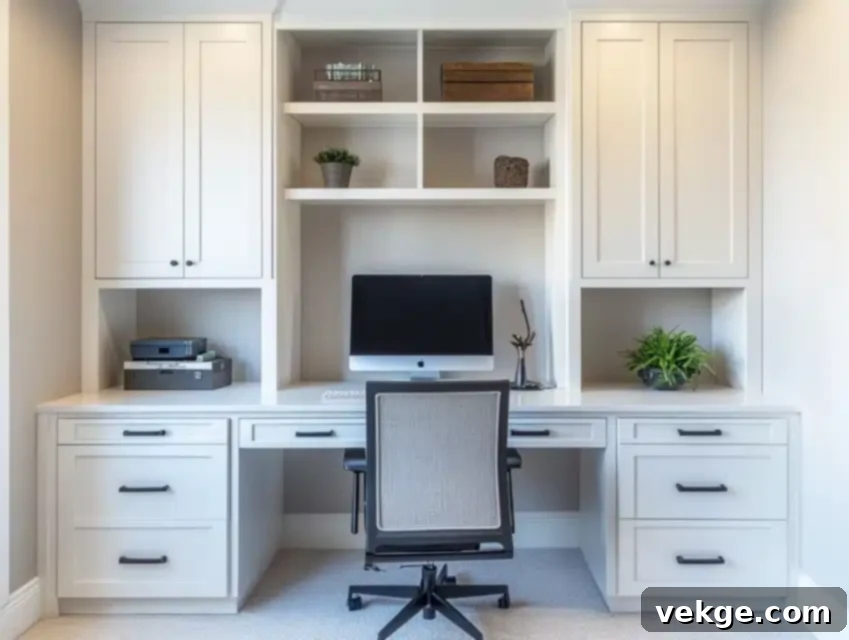
A built-in desk intelligently integrated with custom cabinets represents the pinnacle of combining refined style with practical storage, making it an indispensable asset for maintaining a meticulously organized workspace. By incorporating cabinets both above and below the desk surface, this design provides an abundance of discreet storage for files, essential office supplies, and personal items, culminating in a seamless, polished, and exceptionally tidy appearance. This type of setup is particularly transformative for productivity, as everything needed is conveniently within arm’s reach, minimizing interruptions and maximizing focus. Furthermore, the cohesive design elevates the room’s overall aesthetics, offering a sophisticated and custom-made feel that freestanding units simply cannot replicate.
DIY Steps:
- Measure the available wall space precisely to determine the optimal dimensions for both the desk and the accompanying cabinets.
- Construct or acquire pre-fabricated cabinet units that perfectly fit your determined dimensions and design aesthetic.
- Securely fasten the cabinets to the wall, carefully leaving the appropriate clearance and space in between them for the desk surface.
- Install the desk board, ensuring it is perfectly level, structurally sound, and adequately supported by the adjacent cabinet units.
- Apply a uniform coat of paint or stain to the entire unit (desk and cabinets) for a truly cohesive and integrated appearance.
- Enhance functionality and style by adding elegant handles, knobs, or other hardware to the cabinet doors and drawers for effortless access and a refined finish.
7. Nook Desk
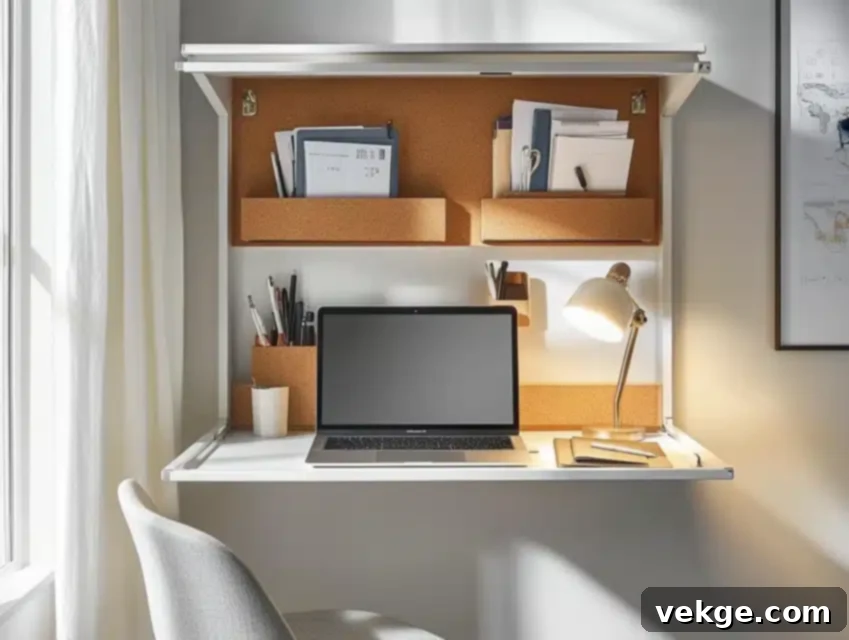
A nook desk is an ingenious design solution that masterfully transforms small, often overlooked alcoves or existing niches into remarkably functional and inviting workspaces. This approach is particularly effective for compact homes, apartments, or any living situation where maximizing every available inch is critical. It turns previously awkward and unused spaces into cozy, private work zones that integrate seamlessly and beautifully with the room’s overall design scheme. The inherent compactness of a nook desk makes it ideal for highly focused tasks, minimizing distractions and creating an intimate working environment. For enhanced practicality and organization, consider adding custom built-in shelves above or below the desk, further optimizing this small but mighty space. It truly showcases how a touch of creativity can imbue even the tiniest areas with significant purpose and utility.
DIY Steps:
- Precisely measure the dimensions of the alcove or niche to determine the perfect size for your desk surface.
- Cut a wooden board to fit the nook flawlessly, and meticulously sand it for a smooth, refined finish.
- Install robust brackets or reliable supports along the interior walls of the niche, designed to securely hold the desk board.
- Securely fasten the desk board onto the installed brackets, ensuring it is perfectly level and stable.
- Consider adding integrated shelves or a compact drawer unit either above or below the desk for valuable additional storage.
- Conclude by applying a fresh coat of paint or stain to match the room’s decor, and personalize the space with a comfortable chair and carefully chosen decor items.
8. Desk with Chalkboard Backdrop

Incorporating a chalkboard wall directly behind your built-in desk introduces a delightful blend of functionality and creative expression into your workspace. This feature is remarkably practical for quickly jotting down notes, important reminders, daily to-do lists, or even indulging in a bit of creative doodling during short breaks. A chalkboard backdrop not only serves as an efficient organizational tool but can also act as a dynamic conversation starter, adding a unique and playful element to your office. It’s particularly well-suited for children’s study areas, creative studios, or home offices where brainstorming and frequent updates are common. Pair it with a simple, understated desk to ensure the vibrant and interactive chalkboard feature remains the focal point, inspiring continuous engagement and ideation.
DIY Steps:
- Select a high-quality chalkboard paint color and meticulously prepare the wall area directly behind where your desk will be situated.
- Apply multiple, thin coats of chalkboard paint, allowing each layer to dry completely and thoroughly between applications for a durable finish.
- Install your custom built-in desk using a sturdy wooden board and robust wall-mounted brackets for secure support.
- Decorate the desk surface minimally, ensuring the chalkboard remains easily accessible and prominent.
- Stock up on a variety of colorful chalks, erasers, and perhaps a small chalk holder for convenience in jotting notes, reminders, or creating art.
- Maintain the chalkboard’s appearance by regularly wiping it down with a damp cloth to keep it clean and ready for new ideas.
9. Library-Inspired Desk
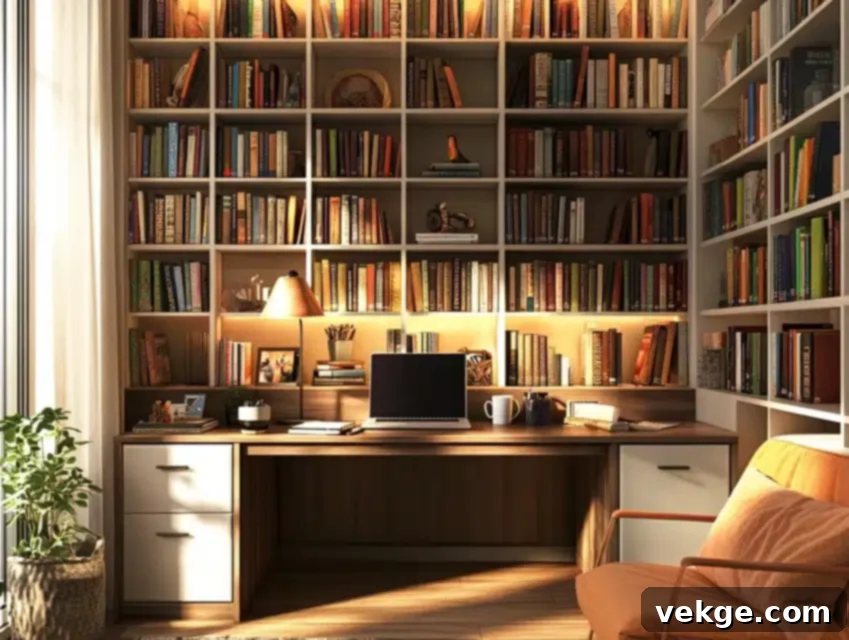
A library-inspired desk, thoughtfully enveloped by towering, custom floor-to-ceiling bookshelves, cultivates an exceptionally studious, elegant, and intellectually stimulating workspace. This design is a dream come true for avid readers and academics who desire to have their treasured literary collections and reference materials literally within arm’s reach. This setup not only brings a profound scholarly charm to any room but also masterfully maximizes storage capacity, transforming an entire wall into a functional and aesthetic display. The built-in desk naturally becomes the distinguished centerpiece, with the symmetrical bookshelves elegantly framing the workspace, creating an inviting and inspiring atmosphere. By adding a supremely comfortable, ergonomic chair and strategically placed, warm lighting, you effectively create the ultimate sanctuary for deep focus, extensive research, and boundless creativity.
DIY Steps:
- Accurately measure the wall space to meticulously plan the precise placement of both the bookshelves and the central desk area.
- Install custom floor-to-ceiling bookshelves on either side of the designated desk area, ensuring they are perfectly aligned and securely anchored.
- Cut a robust wooden board to precisely fit the span between the installed bookshelves, forming the primary desk surface.
- Securely fasten the desk board using strong brackets or by mounting it directly onto the sturdy shelving units for integrated support.
- Apply a cohesive paint or stain finish to the entire setup (desk and bookshelves) to achieve a unified and polished aesthetic.
- Thoughtfully arrange books, decorative items, and essential office supplies to personalize the space, curating a cozy and intellectually stimulating atmosphere that invites long hours of focused work.
10. Two-Person Workspace
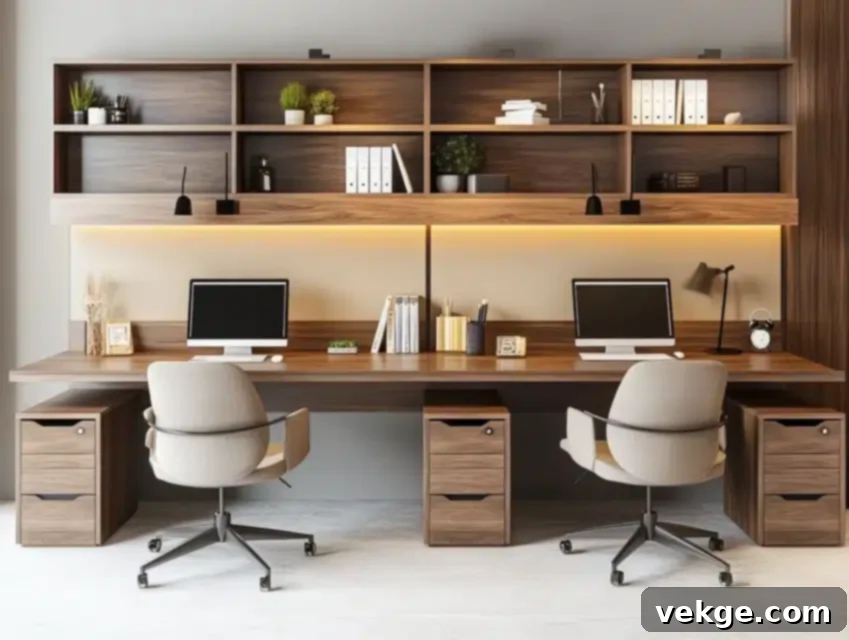
A two-person workspace, featuring an extended built-in desk, is the ultimate solution for shared offices, collaborative projects, or family members who frequently work side-by-side. This intelligent design incorporates a generously long desk surface, providing ample room for two individuals to comfortably sit and work with their own dedicated space and personal storage areas. It’s a highly effective strategy for maximizing a larger wall or an entire room, fostering a sense of shared purpose while ensuring both users remain comfortable, productive, and unconstrained. This collaborative setup enhances workflow and promotes a harmonious working environment without making either user feel cramped or encroached upon, truly optimizing the available space for dual productivity.
DIY Steps:
- Measure the entire length of the chosen wall to precisely determine the maximum possible size for the expansive desk.
- Cut a single, extra-long wooden board or two seamlessly joined separate boards to comfortably accommodate two distinct workstations.
- Install robust brackets, sturdy legs, or integrated cabinets at regular intervals along the wall to provide ample support for the lengthy desk and potentially offer additional storage.
- Securely mount the desk board, meticulously ensuring it is perfectly level and stable across its entire length.
- Consider adding subtle dividers or individual storage compartments, such as drawer units or personal cubbies, to facilitate personal organization and maintain distinct work zones.
- Complete the setup with matching ergonomic chairs and harmonious decor, creating a cohesive, comfortable, and highly functional workspace for two.
11. Floating Desk with Drawers
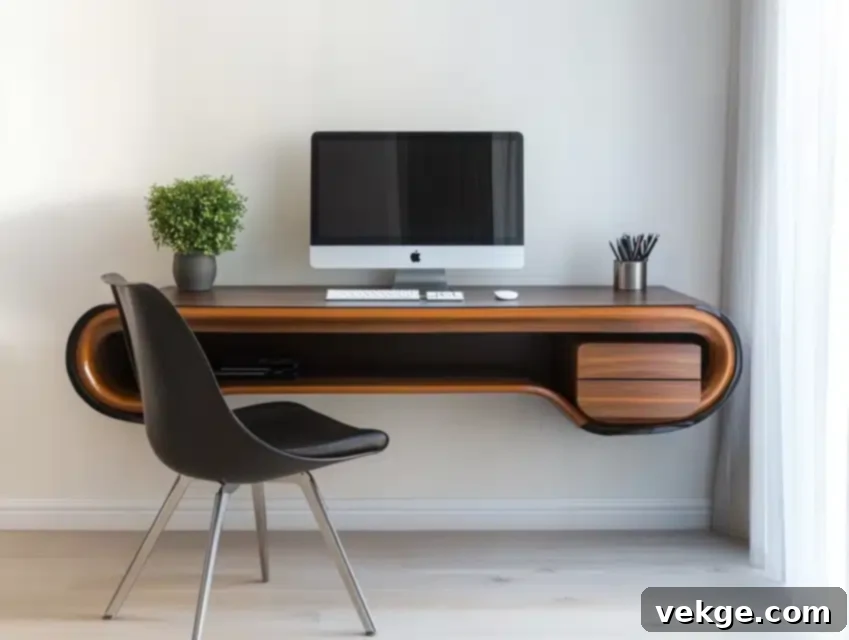
A floating desk ingeniously equipped with built-in drawers masterfully marries sophisticated style with essential functionality. This design creates an exceptionally clean, minimalist aesthetic by eliminating bulky legs and supports, thereby giving the entire workspace a sleek, airy, and expansive feel. The integrated drawers are a brilliant feature, offering discreet, hidden storage for vital essentials like stationery, charging cables, or small gadgets, effectively keeping the desk surface impeccably clutter-free. This makes it an outstanding choice for compact rooms, hallways, or any area where floor space is at a premium and a seamless look is desired. It’s a remarkably smart and chic option for contemporary, modern, or even transitional interiors, providing both utility and an uncluttered visual appeal.
DIY Steps:
- Accurately measure the chosen wall space to determine the precise dimensions for the floating desk.
- Cut a robust wooden board to serve as the main desk surface, and smaller, carefully sized panels for the integrated drawers.
- Meticulously assemble and attach the drawers directly underneath the desk board, utilizing smooth-gliding rails or sturdy brackets for easy operation.
- Secure the entire desk unit to the wall using heavy-duty, hidden brackets, ensuring it is perfectly level and firmly anchored for safety and stability.
- Apply a fresh coat of paint or stain to the desk and drawer fronts to perfectly match or complement the room’s existing decor.
- Add elegant drawer handles or sleek knobs for effortless access, and then thoughtfully style the desk with an appropriate chair and complementary accessories.
12. Compact Closet Desk
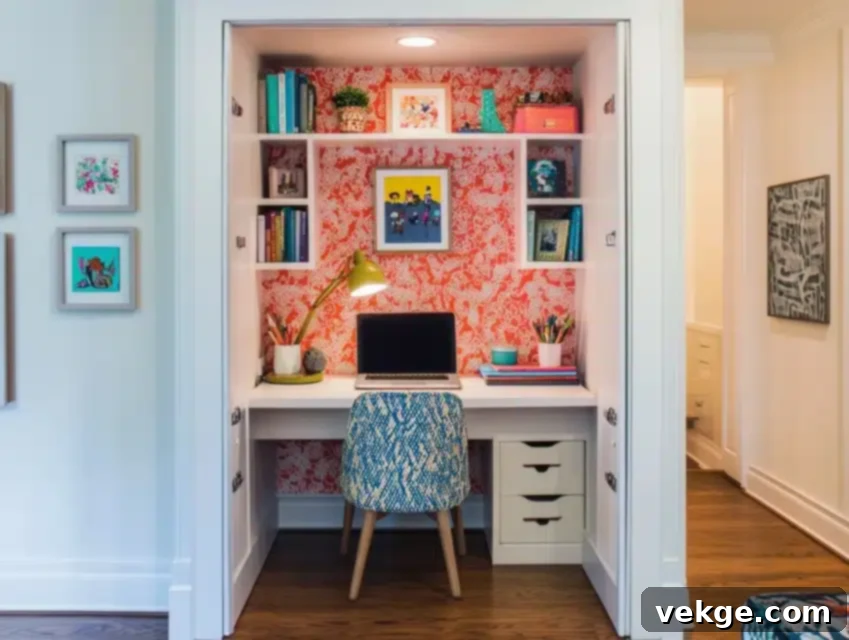
A compact closet desk is a truly ingenious and highly efficient method for transforming an otherwise unused or underutilized closet into a fully functional and discreet workspace. This brilliant solution is especially perfect for small homes, studio apartments, or any living situation where space is a precious commodity. It provides a private, dedicated work area that can be neatly tucked away and hidden from view simply by closing the closet doors when not in use, maintaining a tidy and uncluttered living space. Enhancing this setup with integrated shelves, sufficient lighting, and a comfortable chair can transform a formerly mundane closet into an inspiring and creative hub, demonstrating remarkable foresight in home design.
DIY Steps:
- Completely empty the closet and meticulously measure its interior dimensions to determine the ideal size for your desk.
- Cut a sturdy wooden board to precisely fit the width of the closet and diligently sand it to achieve a smooth finish.
- Install robust brackets or secure support battens along the interior walls of the closet to firmly hold the desk board in place.
- Strategically add shelves above the desk, leveraging vertical space for additional storage and organization of office supplies or books.
- Install a small, bright light fixture or energy-efficient LED strip lighting within the closet to ensure proper illumination of your workspace.
- Complete the transformation with a comfortable, space-appropriate chair and personalized decor, making the hidden space inviting and conducive to productivity.
13. Modern Built-In Desk with LED Lighting
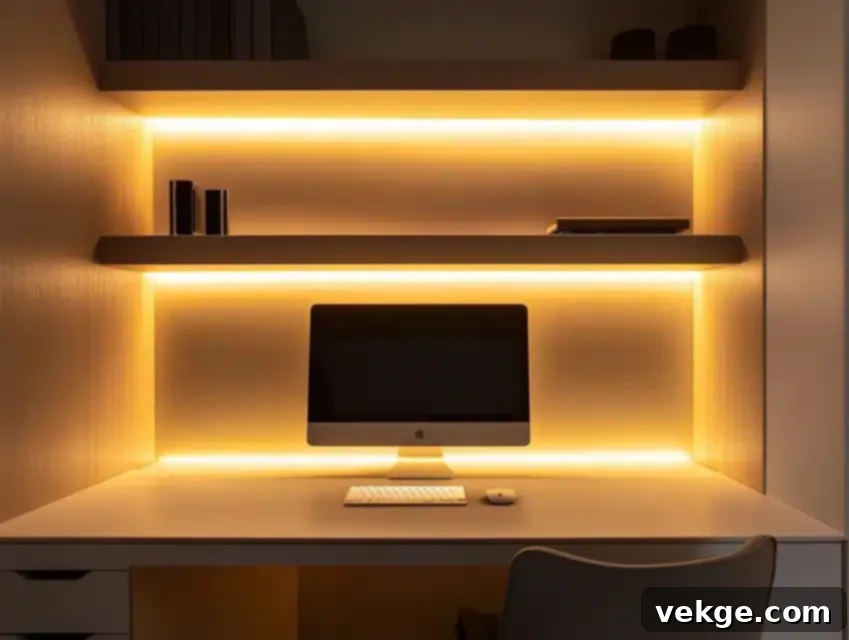
A modern built-in desk enhanced with integrated LED lighting instantly imparts a futuristic, polished, and exceptionally chic vibe to any workspace. Strategically installed LED strip lights, whether placed subtly under shelves, along the perimeter of the desk, or within recessed channels, cast a soft, ambient glow that is both highly functional for task lighting and wonderfully stylish for creating atmosphere. This design has the power to elevate even the simplest desk setup, achieving a high-end, bespoke look with surprisingly minimal effort. It is ideally suited for late-night work sessions, where proper illumination is key, or simply for adding a contemporary ambiance to your room. To complete this sophisticated aesthetic, pair it with sleek, minimalist furniture and subtle metallic accents, ensuring a cohesive and utterly refined design.
DIY Steps:
- Precisely measure and cut the desk board to flawlessly fit the desired space, ensuring a custom look.
- Install robust brackets or reliable supports to securely mount the desk to the wall, verifying its stability.
- Attach coordinating shelves above the desk, not only for storage but also as an ideal surface for additional LED strip light installation.
- Carefully place and secure LED strip lights underneath the shelves or along the distinct edges of the desk for optimal illumination and visual effect.
- Connect the LED strips to a nearby power source or opt for a convenient rechargeable battery-powered solution for flexibility.
- Paint or stain the desk and shelves in a contemporary finish, then accessorize with chic, modern decor to reinforce the sophisticated aesthetic.
14. Custom Desk with Filing Drawers
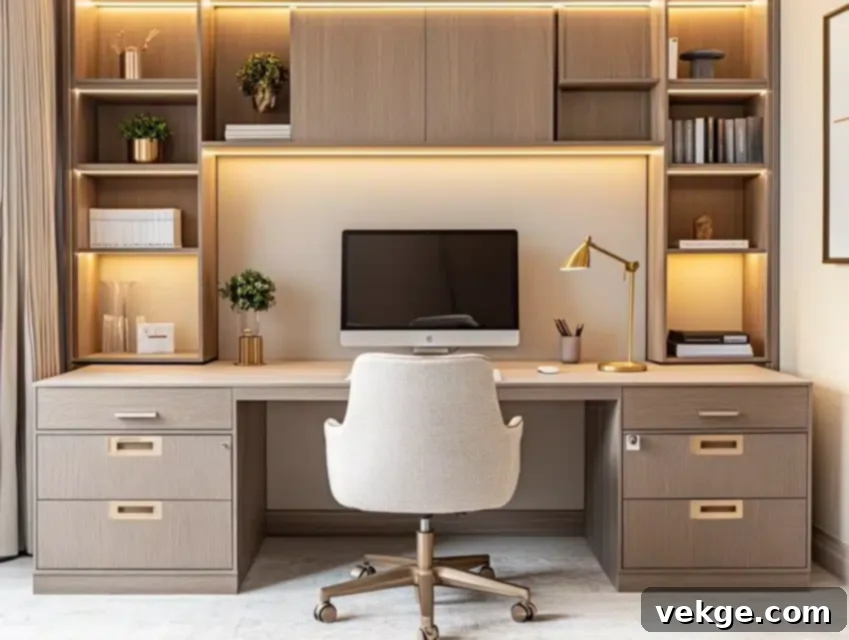
A custom-built desk featuring integrated filing drawers is an indispensable asset for anyone requiring meticulous organization within their workspace. This design offers a highly practical solution for professionals, students, or home users who frequently manage significant amounts of paperwork, multiple projects, or extensive documentation. The inclusion of dedicated filing drawers is a game-changer for keeping documents sorted, categorized, and easily accessible, eliminating desktop clutter and enhancing efficiency. This timeless and inherently efficient design performs exceptionally well in a variety of settings, from bustling corporate offices to serene home study areas, providing both structure and a polished aesthetic that supports a highly productive workflow.
DIY Steps:
- Measure the available space and meticulously plan the ideal size for both the main desk surface and the integrated filing drawers.
- Carefully cut wooden boards for the desk surface and construct the precise compartments for the filing drawers.
- Assemble the filing drawers, utilizing high-quality, pre-made slides to ensure exceptionally smooth and effortless operation.
- Securely attach the assembled drawers directly underneath the desk or seamlessly integrate them to the side for convenient, easy access.
- Mount the desk securely onto robust brackets or sturdy legs, meticulously ensuring it is perfectly level and stable.
- Apply a uniform coat of paint or stain, and affix elegant handles for the drawers to flawlessly complete the organized and professional aesthetic.
15. Desk with Hidden Charging Station
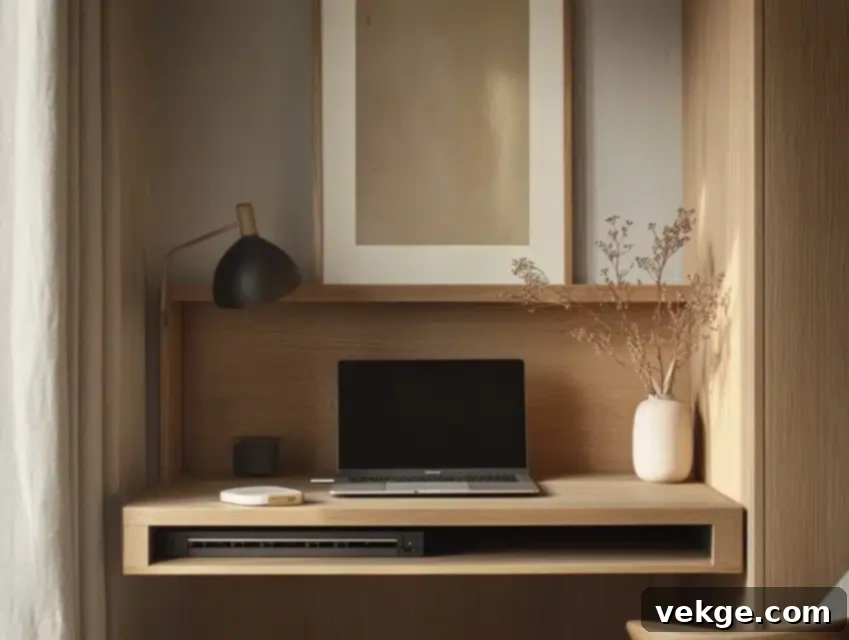
A built-in desk ingeniously designed with a hidden charging station represents the ultimate solution for keeping technological clutter completely at bay. This innovative design masterfully conceals unsightly cables, power strips, and various charging adapters, resulting in an impeccably clean, organized, and aesthetically pleasing workspace. This feature is an absolute game-changer for anyone dealing with multiple electronic devices, offering a seamless way to charge smartphones, tablets, laptops, and other gadgets without a tangled mess of cords. The hidden charging station not only elevates the desk’s functionality but also adds a subtle touch of modern sophistication, making it an ideal choice for tech-savvy individuals or anyone desiring a truly minimalist and efficient digital environment.
DIY Steps:
- Measure and precisely cut a wooden board to serve as the main desk surface.
- Carefully create a dedicated compartment directly underneath the desk, designed for discreetly storing cables, power strips, and charging bricks.
- Drill inconspicuous, strategically placed holes in the desk surface, allowing charging cables to pass through neatly and easily to your devices.
- Install the desk securely using robust brackets or stable legs for unwavering support.
- Position a power strip inside the hidden compartment and connect it to a nearby wall outlet, ensuring all cables are neatly managed.
- Apply a coat of paint or stain to the desk to complement your decor, and then accessorize thoughtfully to personalize your optimized workspace.
16. Industrial-Style Desk
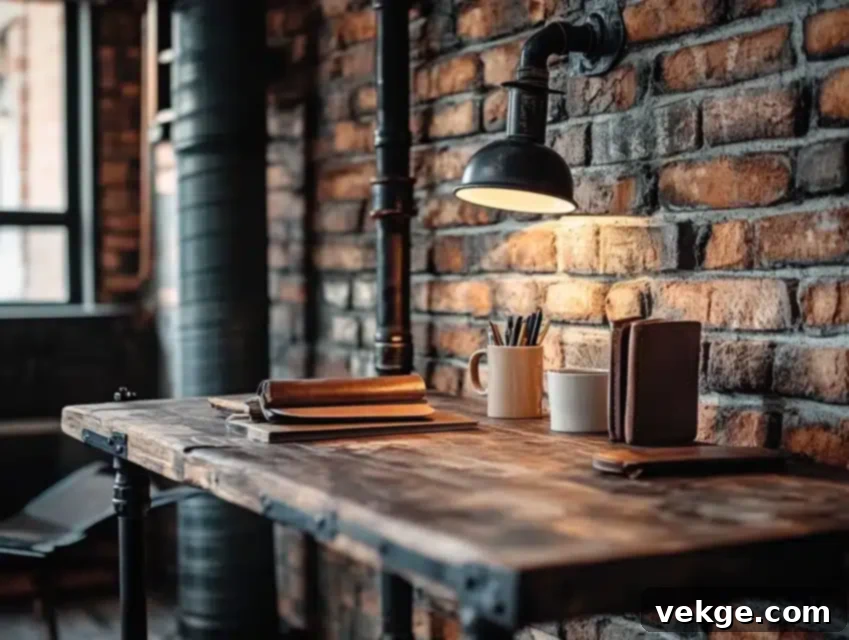
An industrial-style built-in desk powerfully blends raw materials like distressed wood and robust metal, delivering a bold, edgy, and inherently urban aesthetic. This design is exceptionally well-suited for lofts, modern apartments, or any contemporary space that embraces a rugged, utilitarian charm. The balance between practicality and a unique, somewhat unpolished character is what makes this style so appealing. Exposed metal brackets, pipes, or sturdy steel supports not only provide exceptional durability and structural integrity but also contribute significantly to its distinctive visual appeal. The natural warmth of a wooden surface cleverly softens the overall appearance, creating a harmonious contrast. To complete a cohesive industrial design, pair it with elements like exposed brick, industrial pendant lighting, or other metal accents, truly making it a focal point of urban sophistication.
DIY Steps:
- Select a thick, character-rich wooden board for the desk surface, and sand it carefully to achieve a smooth yet authentically textured finish.
- Attach heavy-duty metal brackets or industrial-style piping to the wall, ensuring they are robust enough to securely support the desk.
- Mount the prepared wooden board onto the brackets, meticulously verifying it is perfectly level and firmly anchored.
- Enhance the authentic industrial look by adding decorative metal hardware or exposed, oversized screws.
- Apply a durable protective finish to the wood, such as a clear polyurethane sealant, to preserve its natural texture and rich color for years to come.
- Complete the setup with complementary industrial-style decor, such as metal cage lamps, wire baskets, or vintage-inspired office accessories.
17. Built-In Desk Under the Stairs
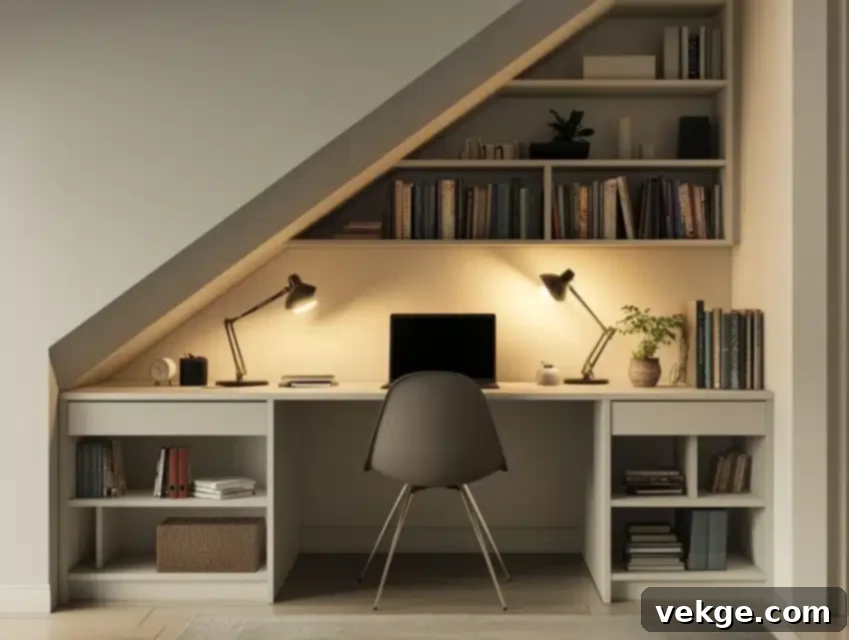
A built-in desk cleverly installed under the stairs is an exceptionally intelligent and creative method for repurposing an often-neglected space. This design transforms an awkward, sloped area into a remarkably cozy, private, and highly functional workstation. It’s a brilliant space-saving solution, especially in homes where every square foot counts, providing a dedicated office nook without encroaching on primary living areas. By adding custom shelves or compact cabinets within the stairwell, storage capabilities are significantly enhanced, while the distinctive sloped ceiling lends a unique architectural charm, creating an intimate and inviting nook perfectly suited for focused tasks, reading, or creative work. This transformation highlights how even unconventional spaces can become incredibly purposeful.
DIY Steps:
- Meticulously measure the unique dimensions of the space under the stairs to precisely determine the ideal size and shape for your desk.
- Cut a wooden board to perfectly fit the contours of the area, and thoroughly sand it to achieve a smooth and refined finish.
- Install robust brackets or secure support battens directly onto the wall to firmly hold the desk board in place, accounting for the sloped ceiling.
- Integrate shelves or small cabinets into the available areas underneath the stairs for valuable additional storage and organization.
- Apply a fresh coat of paint or stain to the desk and shelving, ensuring they seamlessly match or beautifully complement the surrounding decor.
- Thoughtfully style the desk with a comfortable, space-efficient chair and personal accessories to make this distinctive nook inviting and inspiring.
18. White Built-In Desk with Shiplap Wall
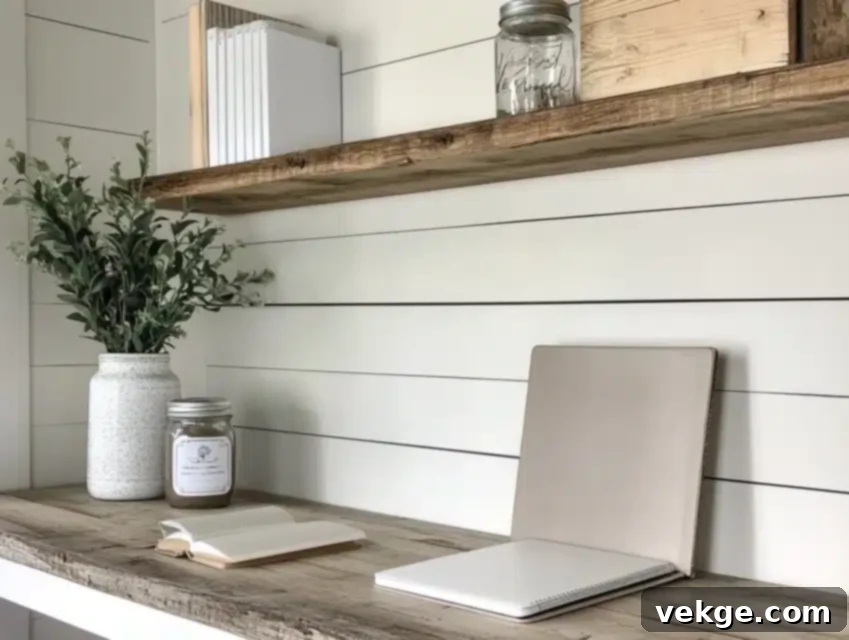
A pristine white built-in desk, when thoughtfully paired with a classic shiplap accent wall, instantly infuses any workspace with irresistible farmhouse charm and a sense of serene comfort. The clean, bright aesthetic created by this combination establishes a warm, inviting, and remarkably inspiring atmosphere that is ideal for both productive work and moments of relaxation. The shiplap panels add a beautiful layer of subtle texture and architectural interest to the wall, enhancing the depth of the space, while the crisp white desk ensures the area remains light, airy, and visually expansive. This design becomes a striking centerpiece in a home office, embodying a timeless appeal that balances rustic elegance with modern simplicity.
DIY Steps:
- Measure and precisely cut a sturdy wooden board for the desk surface, then sand it meticulously for an exceptionally smooth finish.
- Install individual shiplap panels onto the wall directly behind the desk, using either finishing nails or a strong adhesive for a secure fit.
- Securely fasten the built-in desk to the wall using robust brackets or supportive legs, ensuring it is perfectly level and stable.
- Apply a fresh coat of white paint to both the desk and the shiplap, or choose a complementary soft neutral color for a harmonious look.
- Consider adding small, decorative shelves or charming decor items above the desk to further enhance the farmhouse-inspired aesthetic.
- Complete the cozy and inviting ambiance with rustic or minimalist accessories, such as a vintage-style lamp or woven storage baskets.
19. Mid-Century Modern Desk
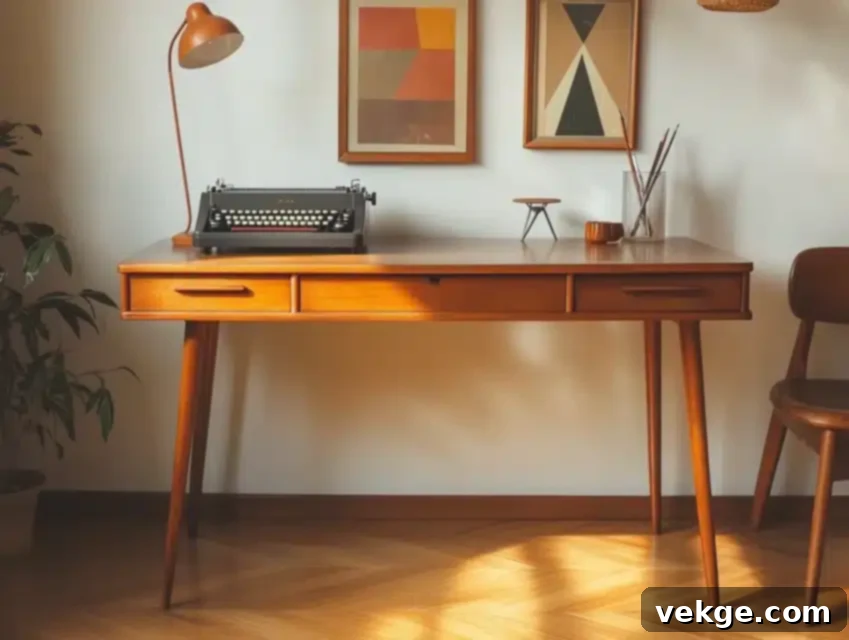
A built-in desk crafted in the distinctive Mid-Century Modern style offers a sophisticated blend of clean lines, organic shapes, and a timeless aesthetic that continues to captivate. Characterized by its unpretentious design and emphasis on functionality, this style seamlessly integrates into both contemporary and vintage interiors, showcasing its remarkable versatility. The beauty of Mid-Century Modern lies in its commitment to aesthetics without ever compromising usability. Typically featuring rich wood tones like walnut, teak, or oak, often paired with sleek, tapered legs or subtle minimalist supports, these desks exude an understated elegance. To perfectly complete this iconic look, complement your desk with retro-inspired accessories, a statement chair with clean lines, or geometric decor, creating a cohesive and stylish blast from the past that remains utterly relevant today.
DIY Steps:
- Choose a high-quality wooden board with a characteristic rich tone, such as walnut or teak, for the desk surface.
- Precisely cut and meticulously sand the board to your desired size and smoothness, defining its elegant form.
- Attach iconic tapered wooden legs to the underside of the desk using sturdy mounting plates, ensuring stability and authentic style.
- Apply a clear protective finish, such as satin polyurethane, to beautifully enhance the natural wood grain and provide lasting durability.
- For enhanced functionality, consider installing a slim, integrated drawer or a subtle storage compartment directly beneath the desk surface.
- Decorate thoughtfully with quintessential Mid-Century Modern accents, such as a vintage-inspired lamp, geometric artwork, or classic ceramic pieces.
20. U-Shaped Workspace
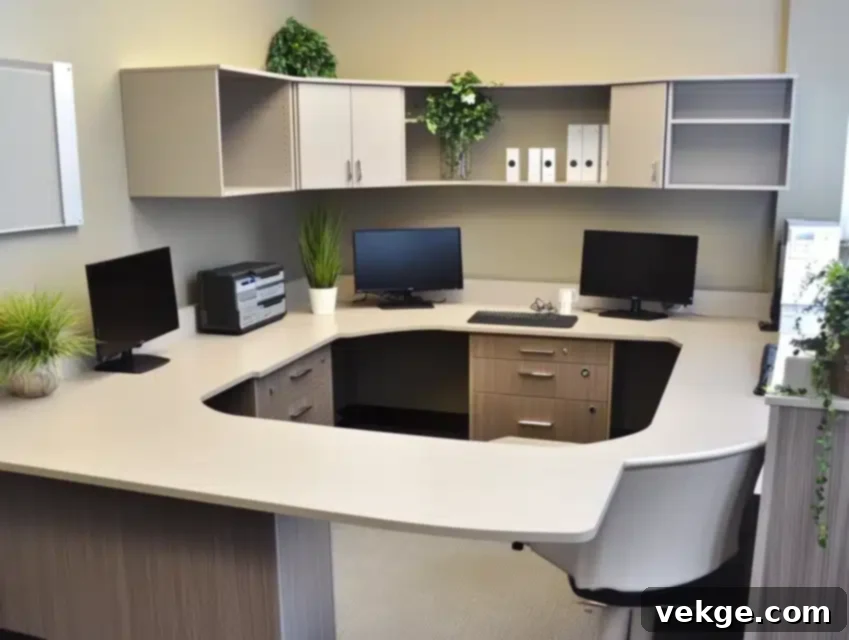
A U-shaped built-in workspace is the ultimate configuration for serious multitaskers, creative professionals, or anyone who demands an expansive surface area and abundant storage. This impressive design strategically surrounds you with a continuous desk surface on three sides, effectively creating a dedicated, immersive zone for intensive work, sprawling hobbies, or large-scale projects. This layout excels at transforming even large home offices into exceptionally efficient, organized, and self-contained environments, ensuring that everything you need is literally within arm’s reach. It’s an unparalleled choice for individuals juggling multiple monitors, diverse projects, or extensive research, offering an ergonomic and highly functional setup that minimizes movement and maximizes focus.
DIY Steps:
- Meticulously measure and precisely outline the U-shape configuration based on your room’s specific dimensions and desired workflow.
- Cut three robust wooden boards to form each distinct side of the U, and diligently sand them for an impeccably smooth finish.
- Install sturdy brackets, supportive legs, or integrated cabinet units at the base of the designated area to provide comprehensive support for the desk boards.
- Securely fasten each board to the brackets or supports, ensuring they are perfectly level and impeccably aligned to form a seamless U-shape.
- Integrate built-in drawers, filing cabinets, or shelving units into the design for valuable additional storage and organizational capacity.
- Apply a unifying paint or stain finish to the entire desk structure to match your room’s decor, and add a supremely comfortable, task-oriented chair to complete the professional setup.
21. Desk with Glass Top
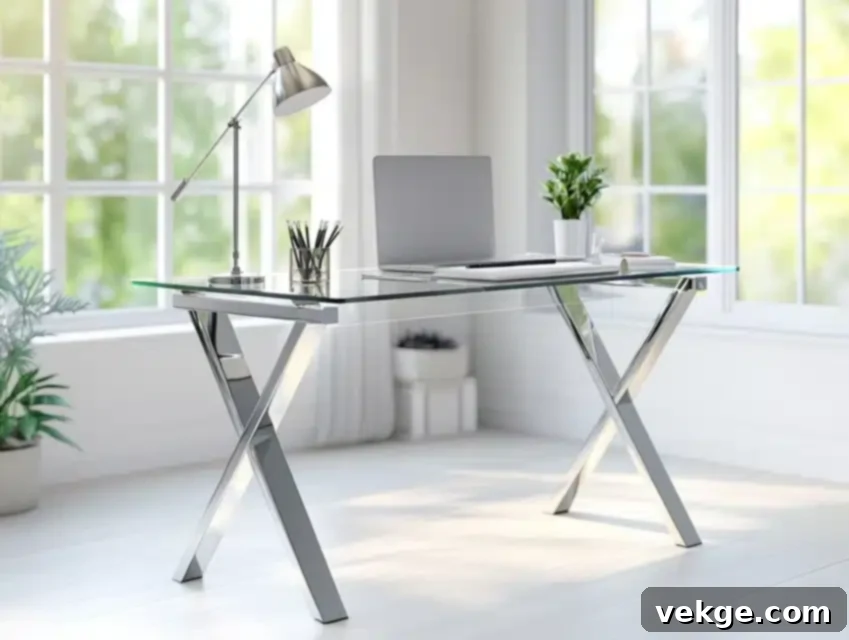
A built-in desk topped with a sleek glass surface instantly introduces a refined, contemporary touch to any workspace. The transparent nature of the glass creates an open, light, and airy feel, making it an excellent design choice for smaller rooms or areas where you want to maintain an uncluttered visual flow. This modern approach often makes the room feel more expansive and sophisticated. When paired with complementary metal or wooden supports, the glass top provides a striking contrast, highlighting the desk’s elegant structure while ensuring robust durability. The reflective quality of the glass can also bounce light around the room, further enhancing its brightness and inviting atmosphere.
DIY Steps:
- Choose a high-quality tempered glass sheet, custom-cut to your precise desired desk size, ensuring safety and a perfect fit.
- Select a sturdy and stylish base, such as polished metal legs, minimalist wooden supports, or even a built-in cabinet structure, to reliably hold the glass top.
- Securely attach the glass top to the chosen base using discreet non-slip pads, specialized adhesive brackets, or subtle fasteners, ensuring it remains stable.
- Implement smart cable management solutions beneath the glass surface or through designated openings to maintain an impeccably tidy and professional workspace.
- Place minimal, carefully chosen decor items or essential accessories on the glass surface to preserve its pristine, clean, and spacious look.
- Ensure proper, ambient lighting is installed to gracefully highlight the inherent transparency and elegant simplicity of the glass-top desk, enhancing its visual appeal.
22. Built-In Desk with Corkboard Panel
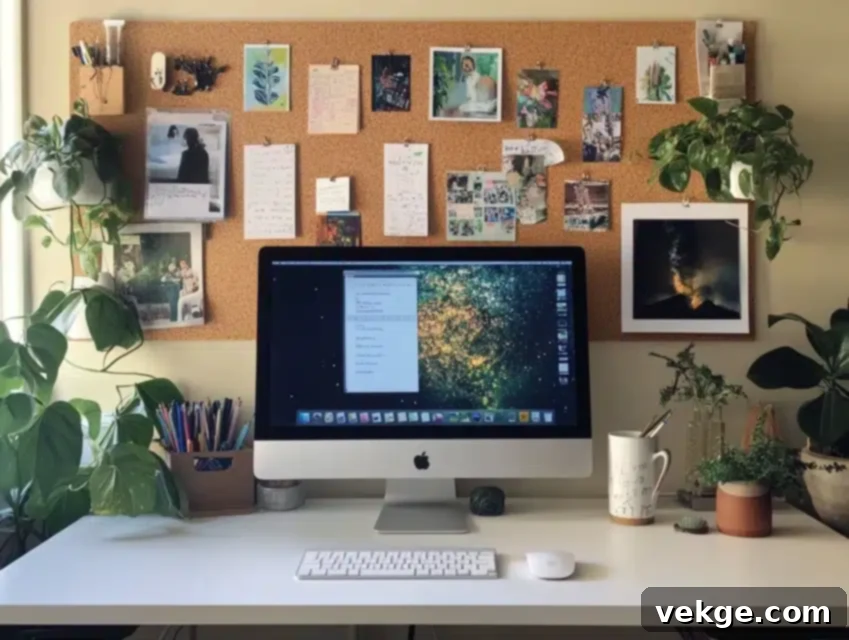
Integrating a functional corkboard panel directly above your built-in desk introduces a dynamic element that is both highly practical and wonderfully engaging. This feature is ideal for pinning important notes, cherished photos, essential reminders, or even inspiring quotes, helping you stay meticulously organized while injecting personal character and creativity into your workspace. A corkboard serves as an interactive backdrop, perfect for brainstorming sessions, tracking progress on projects, or simply showcasing your personality. It keeps your desk surface clear of clutter while ensuring vital information and visual inspiration are always prominently displayed and easily accessible, making your desk area dynamic and stimulating.
DIY Steps:
- Measure the specific wall space above your desk to ensure the corkboard panel fits perfectly and proportionally.
- Purchase a high-quality corkboard sheet or individual cork tiles and cut them to your exact desired size if necessary.
- Securely attach the corkboard to the wall using a strong adhesive, discreet mounting screws, or a combination of both for lasting stability.
- Construct and meticulously install the built-in desk directly below the corkboard, utilizing a sturdy wooden board and reliable wall brackets.
- Apply a coordinating paint or stain to the desk to beautifully complement the corkboard and your surrounding room decor.
- Pin photos, notes, to-do lists, or various decorative items to personalize the space, making it a truly inspiring and efficient command center.
23. Fold-Down Desk
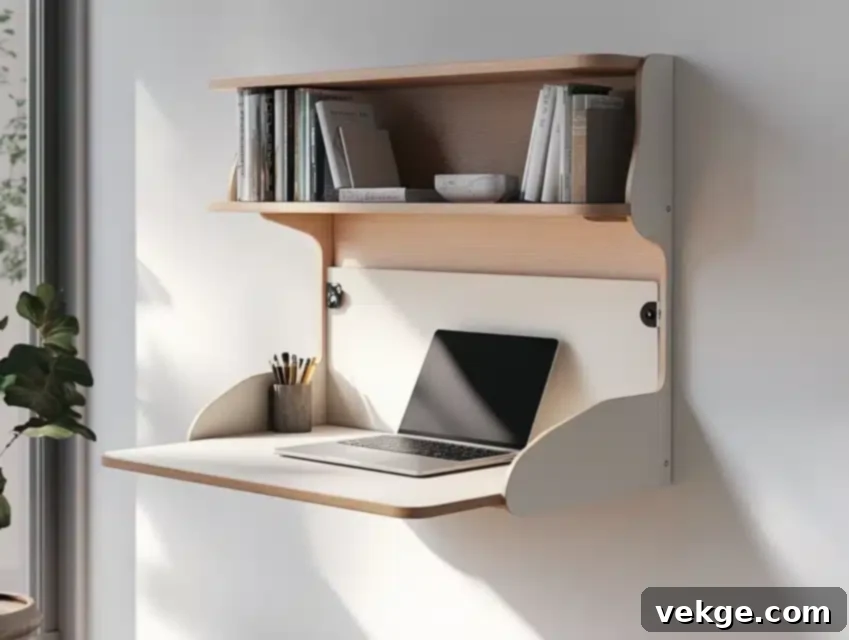
A fold-down desk is an incredibly clever and highly effective space-saving solution, particularly for small homes, studio apartments, or multifunctional rooms where flexibility is key. When not actively in use, this ingenious desk design folds neatly upwards and flat against the wall, instantly freeing up valuable floor area for other activities or simply maintaining a minimalist, uncluttered appearance. It functions brilliantly as a discreet, hidden office, allowing you to quickly set up a productive workspace when needed and then effortlessly reclaim your living space. This design is perfect for individuals who require a functional workspace that doesn’t permanently dominate the room but is readily available and stylishly integrated when called upon for tasks.
DIY Steps:
- Measure the available wall space and carefully decide on the optimal size for your fold-down desk to maximize utility without overwhelming the room.
- Cut a durable wooden board for the desk surface and diligently sand it to achieve a smooth and refined finish.
- Attach sturdy, heavy-duty hinges to one long edge of the desk board, ensuring they are positioned correctly for smooth folding action.
- Mount the desk to the wall, making certain it folds up and down effortlessly and securely, with no binding or wobbling.
- Install a reliable support mechanism, such as robust folding legs, collapsible wall-mounted brackets, or a hidden pneumatic system, to support the desk when open.
- Paint or stain the desk to complement your room’s decor, and add a small, ergonomic handle or knob for easy folding and unfolding.
24. Desk with Bold Accent Wall
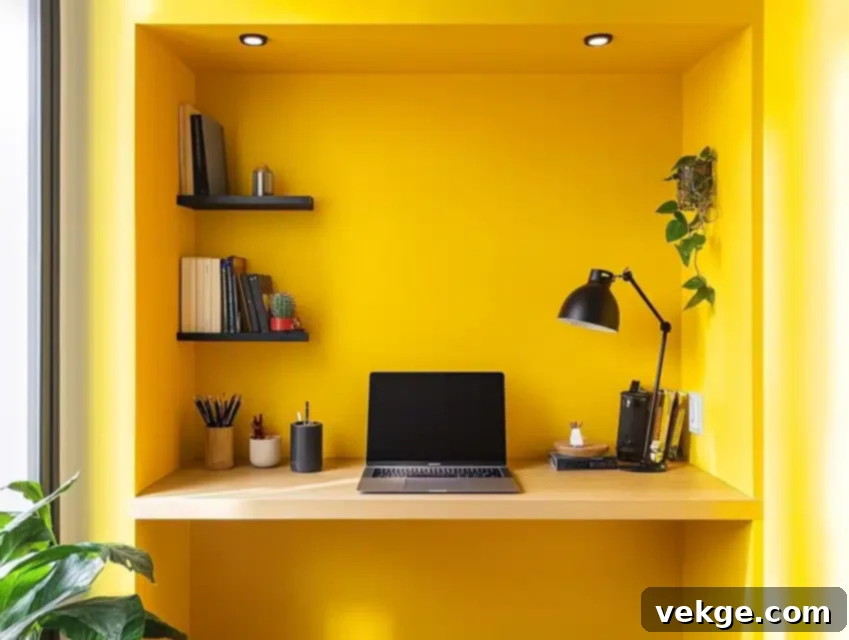
A built-in desk paired with a vibrant or boldly designed accent wall transforms your workspace from a mere functional area into a captivating statement feature within your home. Whether achieved through a striking paint color, an intricate patterned wallpaper, or rich textured panels, this backdrop immediately draws the eye, infusing the room with personality, energy, and a sense of creative flair. This setup has an incredible ability to invigorate home offices, inspiring greater creativity, focus, and a more enjoyable work experience. Furthermore, the accent wall cleverly defines and creates a visually distinct area, making your desk feel like its own dedicated and immersive space, even within larger open-plan or shared rooms, providing a subtle but effective boundary for concentration.
DIY Steps:
- Thoughtfully select a bold paint color, a captivating wallpaper pattern, or distinctive textured panels for your chosen accent wall.
- Meticulously prepare the wall by thoroughly cleaning it, repairing any imperfections, and applying a suitable primer if necessary.
- Apply the paint or carefully install the wallpaper/panels, ensuring even coverage and precise alignment for a professional finish.
- Construct and securely install the built-in desk using a sturdy wooden board and robust wall-mounted brackets, ensuring it complements the accent wall.
- Keep decor on the desk surface minimal and understated, allowing the powerful impact of the accent wall to remain the undisputed focal point.
- Integrate complementary lighting, such as adjustable task lamps or wall sconces, to beautifully highlight the vibrant background and enhance the overall ambiance.
25. Custom Desk with Built-In Monitor Shelf
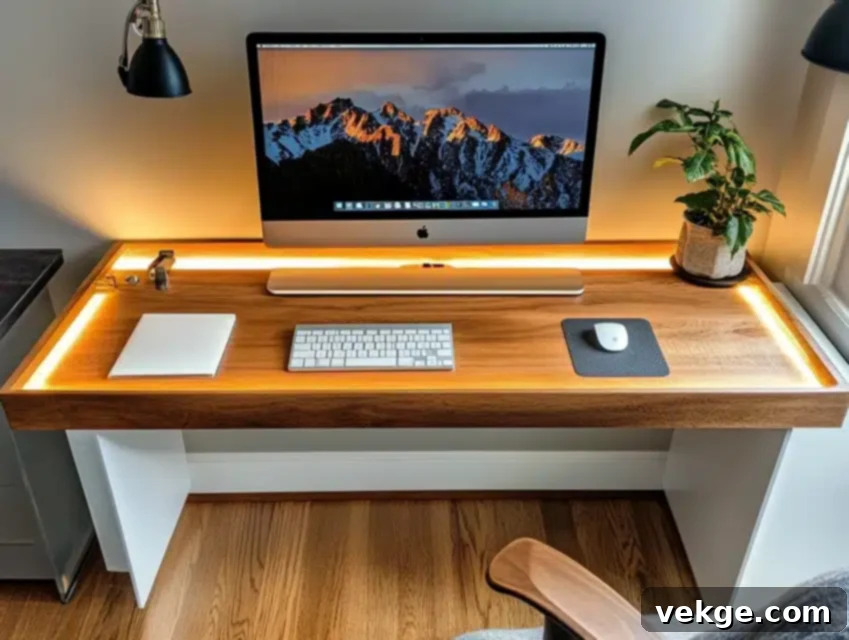
A custom-built desk featuring an integrated monitor shelf is a highly ergonomic and intelligent design choice that significantly improves posture, reduces eye and neck strain, and effectively eliminates desktop clutter. The raised shelf positions your monitor at an optimal eye level, promoting healthier working habits during long hours at the computer. Crucially, this feature simultaneously frees up valuable space on the main desk surface for other essential items like keyboards, notebooks, or decorative elements. It’s a remarkably practical and thoughtful addition for anyone who spends considerable time in front of screens, especially those working with multiple devices, providing a streamlined, comfortable, and highly organized workspace that supports sustained productivity and well-being.
DIY Steps:
- Measure and precisely cut a wooden board for the main desk surface and a slightly smaller board to create the monitor shelf.
- Carefully attach the monitor shelf to the main desk using small, sturdy brackets or integrated wooden supports, ensuring it is at a comfortable viewing height.
- Install the entire desk unit securely onto robust wall brackets or stable legs, meticulously verifying it is perfectly level.
- Apply a cohesive paint or stain finish to both the desk and the integrated monitor shelf for a unified and professional aesthetic.
- Place your monitor on the ergonomically raised shelf, then organize your keyboard, mouse, and other devices neatly underneath or around it.
- Implement smart cable management solutions, such as grommets or hidden channels, to keep the workspace impeccably tidy and entirely clutter-free, enhancing both aesthetics and functionality.
Conclusion
Creating a built-in desk extends far beyond simply adding a functional surface; it’s about making a profound transformation that enhances your living space and makes it uniquely your own. With these 25 innovative ideas, you’ll discover a bespoke design to perfectly fit every home and lifestyle, from the most compact apartment requiring ingenious space-saving solutions to the most expansive office demanding a commanding presence. Whether your preference leans towards the sleek simplicity of a floating desk, the rustic charm of reclaimed wood, or the unparalleled practicality of integrated storage and filing systems, these designs offer the blueprint for achieving a workspace that is both exceptionally beautiful and remarkably efficient. So, take the inspiration from these diverse concepts, roll up your sleeves, and embark on the rewarding journey of designing your dream built-in desk today. After all, your workspace should not only support your tasks but also be as inspiring and invigorating as your work itself!
Frequently Asked Questions About Built-In Desks
How Do I Decide Which Built-In Desk Style Is Right for Me?
The best way to choose a built-in desk style is to thoroughly assess your available space, personal workflow, and specific needs. If you are working in a small room or a multi-functional area, space-saving options like a minimalist floating desk or a clever fold-down desk can be ideal, as they optimize floor area. For larger rooms or if you require extensive surface space and storage, consider an expansive U-shaped desk or a design with ample integrated cabinets and shelves. Your aesthetic preferences also play a crucial role—select a style that genuinely complements your room’s existing decor, whether it’s a rustic wooden desk for a cozy, natural vibe, a sleek modern design with LED lighting, or a classic library-inspired setup for an elegant scholarly feel. Visualizing the desk in your space and considering how you typically work will guide you to the perfect choice.
Are Built-In Desks Expensive to Install?
The cost of installing a built-in desk can vary significantly depending on several factors, including the complexity of the design, the materials chosen, and whether you opt for a DIY approach or hire a professional. DIY options, such as constructing a simple floating desk or converting an existing closet into a desk, can be quite budget-friendly, especially if you possess basic carpentry skills and already own the necessary tools and materials. Conversely, hiring a professional carpenter or custom cabinet maker for intricate designs with bespoke features like integrated cabinets, specialized finishes, or custom LED lighting will naturally incur a higher cost. While professional installation generally ensures a high-quality, tailored finish and perfect integration, there are many accessible DIY options that can deliver excellent results without breaking the bank.
Can a Built-In Desk Be Removed or Relocated?
The ease of removing or relocating a built-in desk largely depends on its specific installation method and the degree to which it is integrated into the room’s structure. Most built-in desks, particularly those secured with visible brackets, screws, or modular components, can indeed be carefully dismantled. This process might involve patching and repainting walls where the desk was attached. However, designs that are more heavily integrated into the wall structure, such as those built as part of custom cabinetry or permanent architectural fixtures, may require more significant effort, potentially involving minor demolition and more extensive repairs to the surrounding walls. If you anticipate a future need to relocate or remove your desk, it is advisable to consider modular built-in desks or designs that utilize less permanent mounting solutions, which are typically much easier to disassemble and move without extensive renovation.
