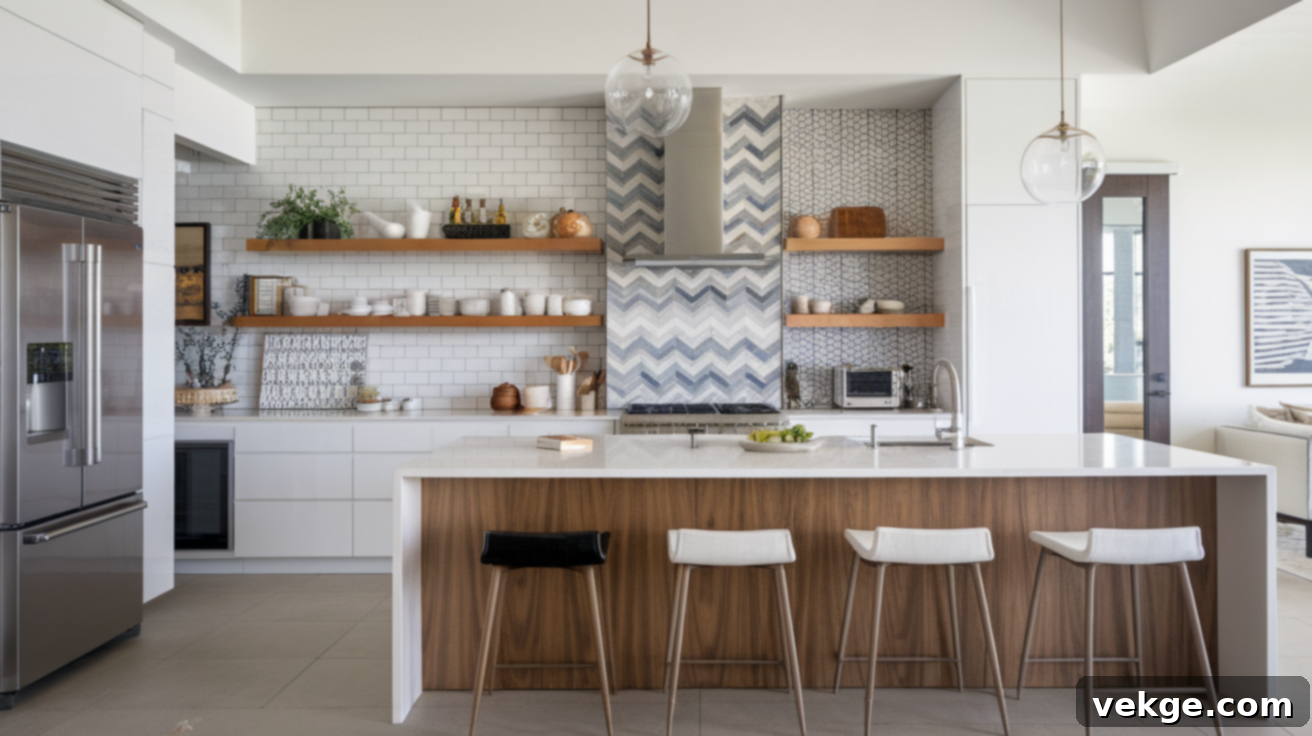
Elevate Your Kitchen: The Ultimate Guide to Stunning Backsplash Tile Patterns & Design Ideas
Your kitchen backsplash is far more than just a protective wall covering. It’s a prime opportunity to infuse personality into your home, express your unique style, and significantly enhance the aesthetic and functional appeal of your cooking space. The right tile pattern can completely redefine the look and feel of your kitchen, transforming a plain wall into a captivating focal point that draws the eye and sparks conversation.
From the timeless charm of classic subway tile layouts to the dynamic allure of bold geometric designs, today’s kitchen backsplash options offer an unprecedented array of choices to make a lasting impression. Whether you’re aiming for a subtle backdrop or a dramatic statement piece, there’s a tile pattern perfectly suited to your vision and lifestyle.
In this comprehensive guide, we’ll journey through the most popular and inspiring kitchen backsplash tile patterns, delve into the nuances of choosing the ideal materials for your specific needs, and share expert tips for both professional-grade installation and hassle-free maintenance. If you’re planning a full-scale kitchen renovation or simply seeking a impactful weekend update, prepare to discover your perfect backsplash pattern and unlock the full potential of your kitchen design.
What Is a Kitchen Backsplash and Why Is It Essential?
Choosing the right tile pattern for your kitchen wall can dramatically alter the entire ambiance and functionality of your space. A well-selected design not only brings warmth, character, and visual cohesion to your cooking area but also serves a vital practical purpose.
A kitchen backsplash is the protective and decorative wall covering typically installed above your countertops and behind your stove. Its primary role is twofold: first, it acts as a crucial barrier, shielding your walls from splashes of water, food, grease, and other cooking-related debris that can cause damage and stains over time. Second, and equally important in modern home design, it adds significant visual interest and acts as a key design element, tying together various components of your kitchen like cabinetry, countertops, and flooring.
Historically, backsplashes were purely functional, often simple and utilitarian. However, in contemporary kitchen design across all styles – from minimalist modern to rustic farmhouse – this functional wall area has evolved into a prominent artistic statement, offering endless possibilities for personalization and style expression. It’s an investment that protects your home and significantly elevates its appeal.
Why Is Tile the Top Choice for Kitchen Backsplashes?
Tiles consistently remain the preferred material for kitchen backsplashes, and for very compelling reasons. Their inherent qualities make them perfectly suited to the demands of a busy kitchen environment. Tiles are exceptionally durable, designed to withstand daily wear and tear, and can effortlessly tolerate the heat from cooking, persistent moisture, and various cleaning products without sustaining damage or losing their aesthetic appeal.
The versatility of tiles is unmatched. They are available in an astonishing array of colors, sizes, shapes, textures, and finishes, ensuring there’s a perfect match for any kitchen style, whether you envision a traditional, transitional, contemporary, or avant-garde look. Furthermore, most tile surfaces are remarkably low-maintenance; a simple wipe-down with regular household cleaners is usually sufficient to keep them looking pristine and new for many years.
This powerful combination of toughness, exceptional aesthetics, and easy care makes tiles the ideal and most practical choice for enhancing the walls of any kitchen. They offer a long-lasting, hygienic, and beautiful solution that continues to deliver value and style.
How to Choose the Right Tile Pattern for Your Kitchen Design
Finding the perfect tile pattern for your kitchen involves much more than simply selecting a design that catches your eye. The right pattern has the power to influence how large or small your kitchen feels, to highlight specific areas like the cooking zone, or to harmoniously tie together your entire kitchen design scheme. A thoughtful choice can transform your kitchen from functional to fabulous.
Key Factors to Consider When Selecting Tile Patterns
Several critical elements should guide your decision-making process to ensure your chosen backsplash pattern perfectly complements your kitchen:
- Kitchen Size and Layout: The dimensions of your kitchen play a crucial role. In smaller kitchens, simpler patterns with fewer, cleaner grout lines (like vertical stack or smaller subway tiles) can make the space feel less crowded and more open. For larger kitchens, more intricate and visually dynamic patterns, such as herringbone or elaborate mosaics, can add depth, interest, and prevent the space from feeling too vast or empty.
- Overall Kitchen Style: Consider the existing aesthetic of your kitchen. Is it sleek and modern, cozy and farmhouse, or elegant and traditional? Classic patterns like subway or brick bond naturally suit traditional and transitional kitchens, while geometric or stacked patterns often align better with contemporary or industrial designs.
- Color Palette: Color choice is paramount. Light-colored tiles can significantly brighten up a kitchen that lacks natural light or feels dark, creating an airy and expansive feel. Conversely, darker tiles can introduce warmth, sophistication, and a sense of grounding to bright, open spaces. Ensure the tile color complements your cabinetry, countertops, and flooring for a cohesive look.
- Grout Color: Often overlooked, the contrast between your tiles and grout can either subtly enhance the pattern or make it a prominent design feature. A grout color that closely matches the tile creates a unified, seamless look, while a contrasting grout color (e.g., dark grout with light tiles) will highlight the individual tiles and the pattern itself, adding a graphic element.
- Tile Texture and Finish: Texture adds another layer of sophistication. Smooth, glossy tiles reflect light beautifully, making a kitchen appear brighter and are generally easier to wipe clean. Textured tiles, with their raised patterns or matte finishes, add depth and dimension, and can be more forgiving in terms of hiding water spots or minor imperfections, though they might require a bit more thorough cleaning.
- Budget Considerations: Tile patterns can vary significantly in cost, not just due to the material itself, but also the complexity of the installation. More intricate patterns often require more precise cuts and labor, increasing overall project costs.
- Maintenance Requirements: Think about your lifestyle. Some materials and patterns (e.g., highly textured tiles, unsealed natural stone) require more diligent cleaning and maintenance than others (e.g., smooth porcelain, glass).
How to Master Mixing and Matching Tile Patterns
Mixing different tile patterns can create a truly bespoke and visually stunning kitchen, but it requires a delicate touch to avoid a cluttered or chaotic appearance. The key to successful pattern mixing is consistency in at least one element. You might use the same tile material or color in different arrangements, or combine different tiles that share a common color family or finish.
For instance, a popular and effective approach is to use a simpler, continuous pattern like a classic subway tile for the majority of the backsplash area. Then, introduce a more intricate or eye-catching mosaic, herringbone, or chevron pattern specifically behind the stove or sink area to create a distinct focal point. This draws attention to a key zone without overwhelming the entire space. When combining patterns, try to limit yourself to a maximum of two or three distinct patterns to maintain visual harmony and elegance.
Always consider the overall style of your kitchen. Traditional kitchens often beautifully accommodate classic patterns and subtle combinations. In contrast, modern or eclectic kitchens might be better suited for experimenting with bold geometric patterns and contrasting textures. The goal is to create a dynamic interplay that enhances, rather than detracts from, your kitchen’s unique character.
Inspiring Kitchen Backsplash Tile Patterns to Transform Your Design
Ready to infuse your kitchen with style and personality? Here’s a curated collection of eye-catching backsplash tile patterns, complete with descriptions and design tips, to help you create a kitchen that truly stands out while perfectly aligning with your personal aesthetic.
1. Subway Tile
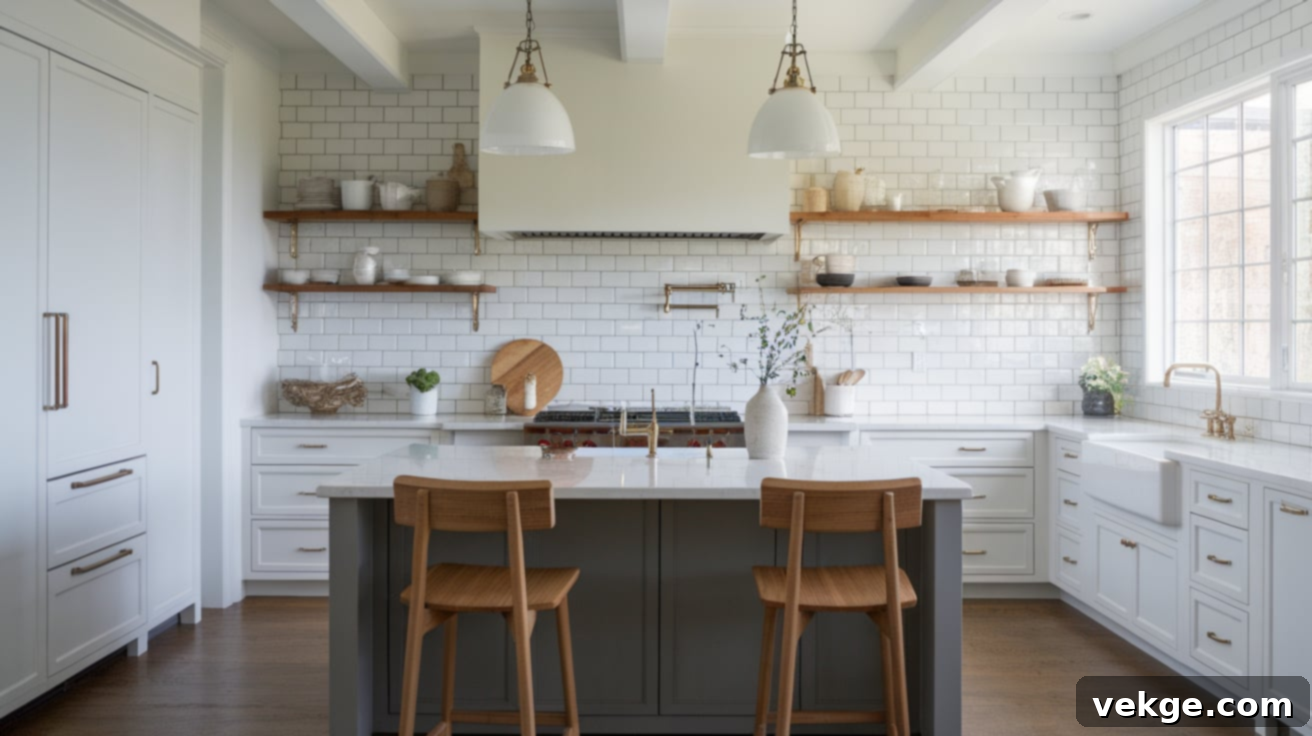
This time-tested and universally loved option adds clean lines, a sense of order, and an undeniable touch of classic sophistication to any kitchen. Its simple, rectangular shape offers incredible versatility, allowing you to create many different looks—from a traditional brick-lay to a modern stacked arrangement. Subway tiles work seamlessly in both contemporary and old-fashioned kitchen designs, making them a safe yet stylish choice.
Beyond their aesthetic appeal, subway tiles are exceptionally budget-friendly and widely available in countless colors, sizes, and finishes (glossy, matte, beveled). This makes them one of the most adaptable and accessible options for homeowners seeking both value and timeless style.
2. Herringbone
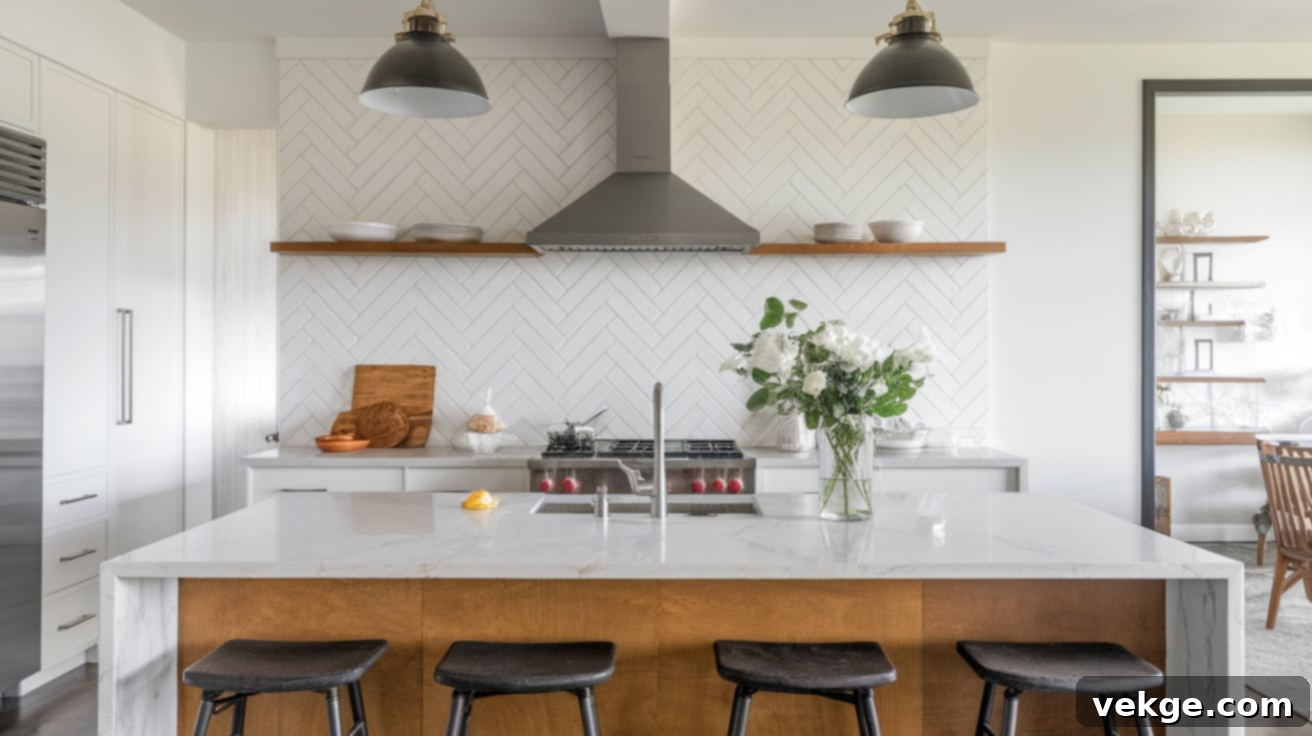
The herringbone pattern, characterized by its distinctive zigzag arrangement, creates a dynamic and visually engaging effect on your kitchen wall. The angled placement of the tiles draws the eye along the pattern, adding a sophisticated flair and a sense of movement that works beautifully in both classic and updated kitchen spaces. It’s an excellent choice for adding texture and dimension without being overly busy.
This elegant pattern can be created with various tile sizes, from long, narrow planks to smaller, more traditional subway tiles, allowing you to choose between a subtle, textural backdrop or a more noticeable, striking design depending on your preference and the scale of your kitchen.
3. Chevron
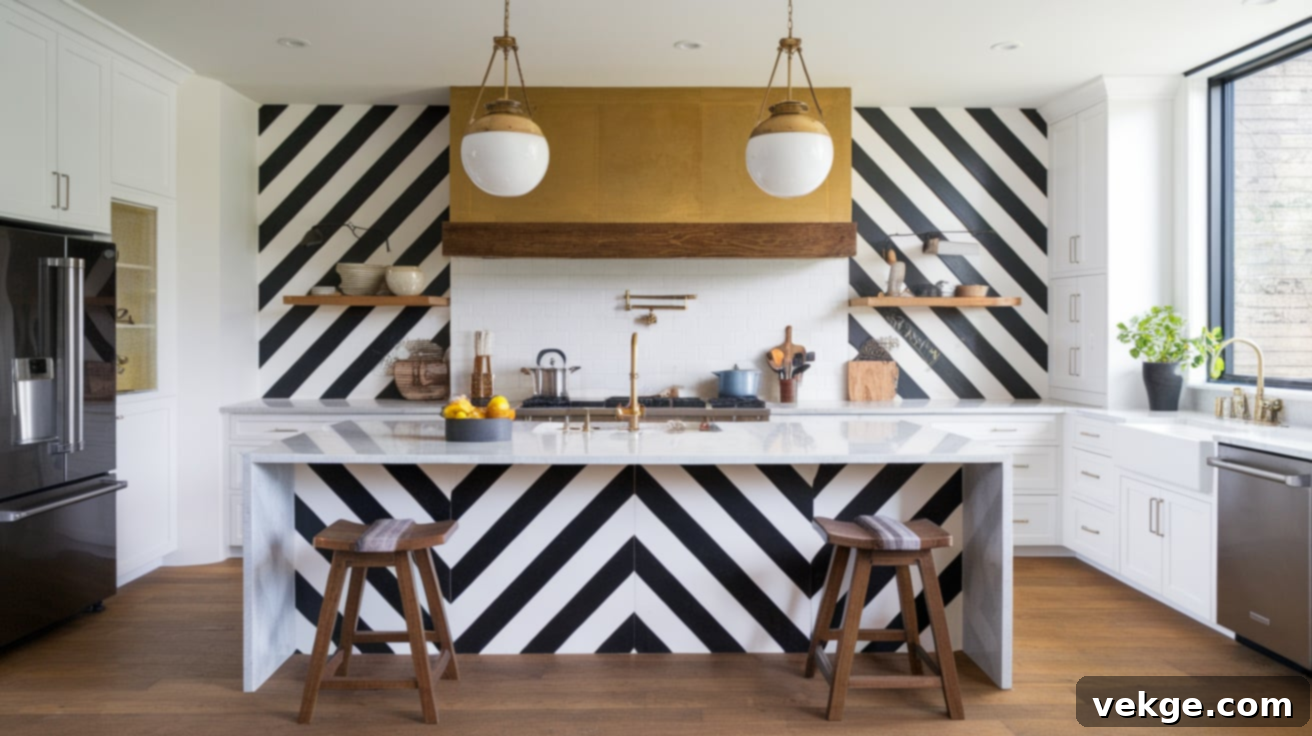
While often confused with herringbone, the chevron pattern offers a distinctly bolder and more modern aesthetic. Its crisp V-shaped design is formed by tiles cut at an angle, creating sharp, continuous points that form a clear zigzag line across your backsplash. This precise arrangement provides a contemporary and updated feel to your kitchen, exuding a sense of deliberate design.
The chevron pattern works especially well as a dramatic focal point behind a range, a large sink area, or an open shelving display. It adds a powerful sense of direction and movement to your kitchen walls, making it ideal for those seeking a stylish and impactful statement.
4. Basket Weave
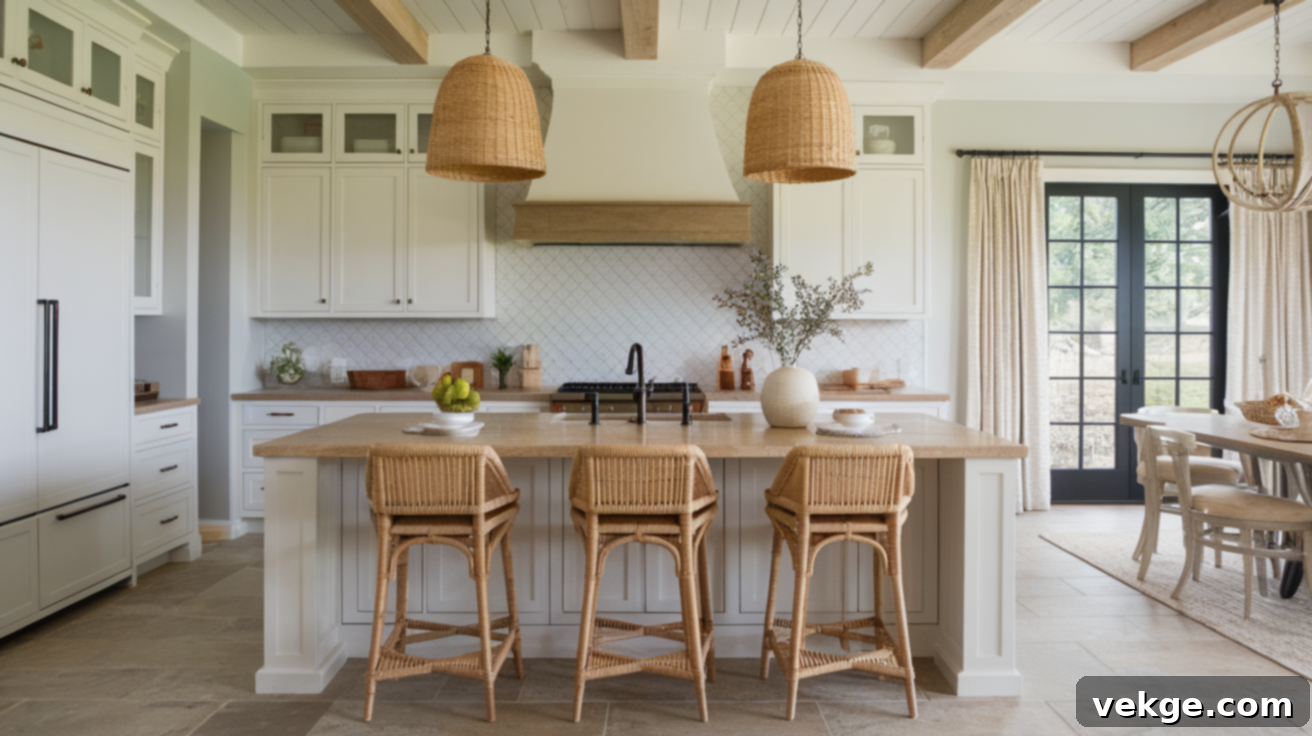
True to its name, the basket weave pattern charmingly resembles woven fabric, lending your kitchen a warm, inviting, and wonderfully textural look. This intricate yet understated “over-under” effect creates a subtle sense of depth and dimension, making it particularly well-suited for kitchens with a rustic, country, or traditionally classic style. It evokes a handcrafted, artisanal feel that enhances cozy environments.
The basket weave is typically created using rectangular tiles arranged in pairs, where one pair is oriented horizontally and the next vertically, forming an interlocking pattern. This arrangement adds rich visual texture without appearing too busy, offering a refined twist on simpler layouts.
5. Brick Bond
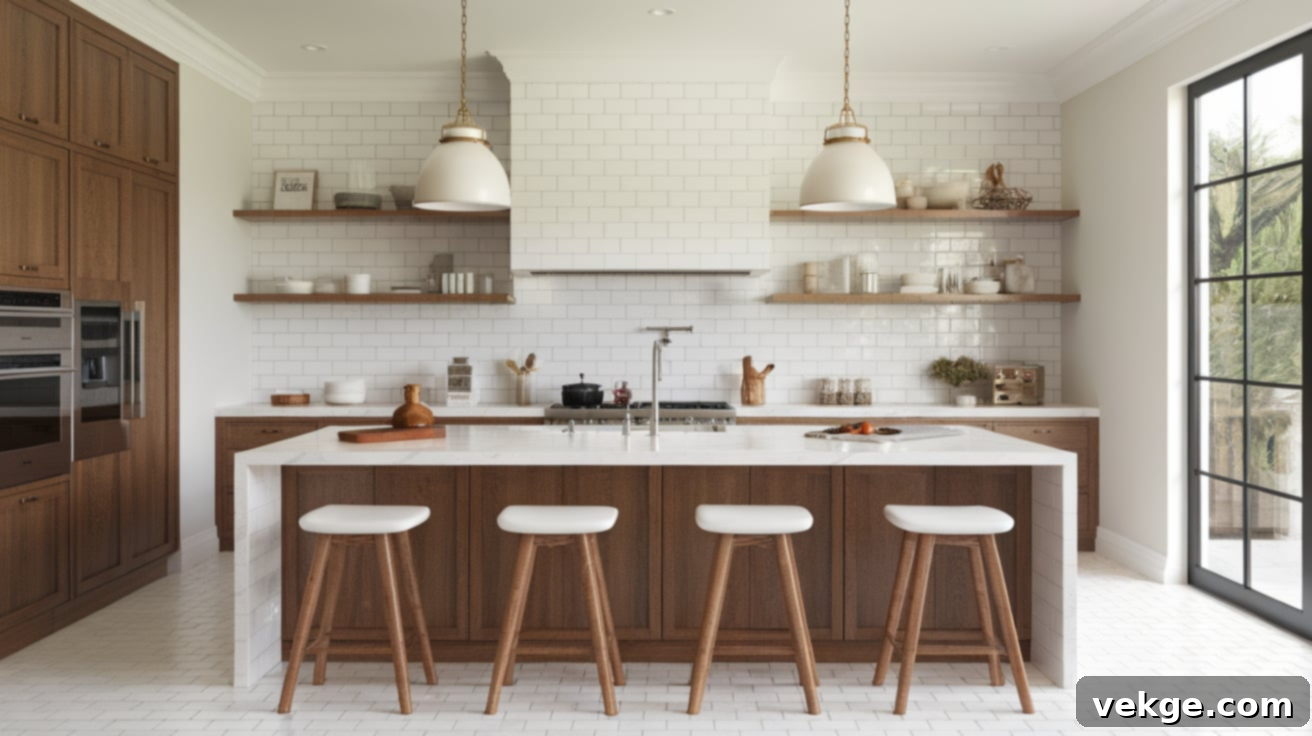
The brick bond layout, often used with rectangular or subway tiles, mimics the classic appearance of a traditional brick wall, with each successive row offset by half a tile. It is one of the most common, universally appealing, and relatively easy-to-install patterns, giving your kitchen a timeless, sturdy, and always-in-style look that provides a sense of familiar comfort.
While the standard half-tile offset is most popular, you can create interesting variations by offsetting tiles by one-third or one-quarter of their length. This subtle adjustment can alter the rhythm of the pattern, allowing for further customization while retaining the classic brick bond aesthetic.
6. Vertical Stacked Tiles
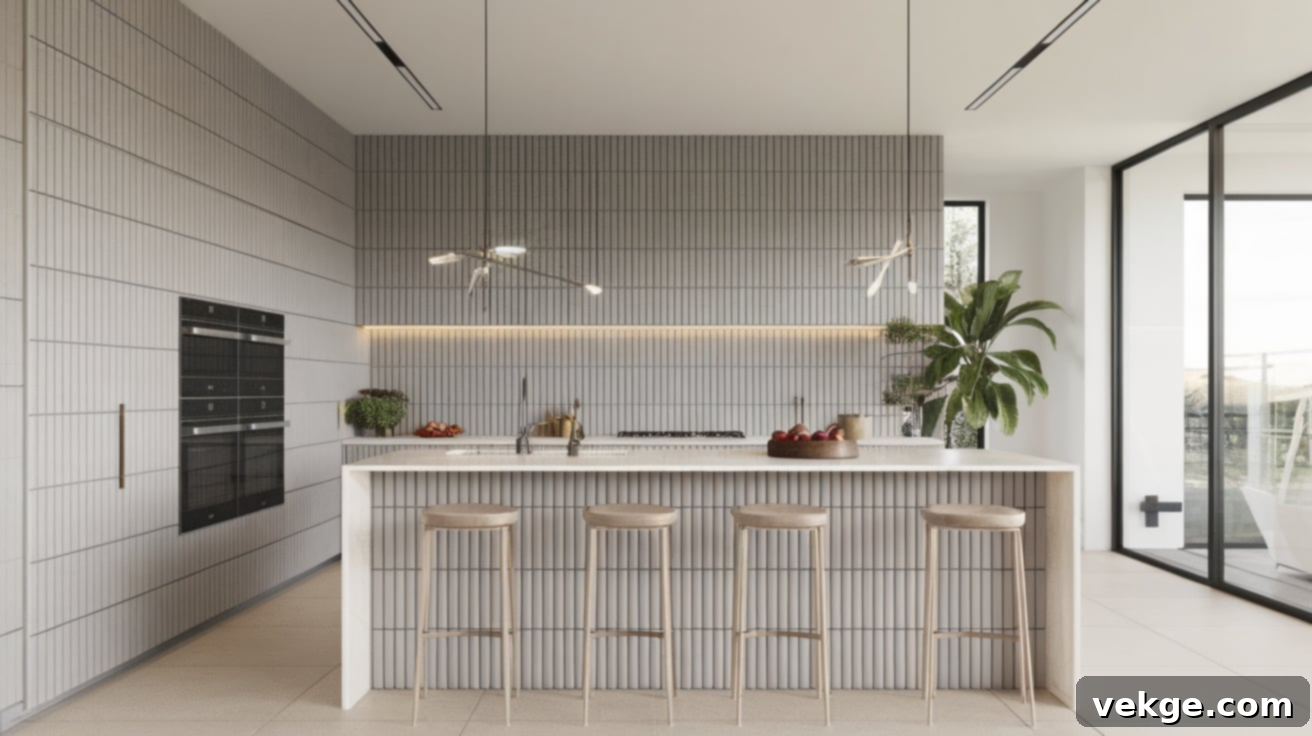
A minimalist and contemporary approach, the vertical stacked tile pattern involves placing tiles in perfectly aligned, straight columns rather than the more common horizontal rows. This simple yet impactful twist on traditional layouts can dramatically influence the perception of space, making your kitchen feel taller and more expansive. It offers a clean, modern, and intentionally planned look that is particularly effective in smaller spaces or kitchens with lower ceilings where you want to create the illusion of added height.
This arrangement works exceptionally well with rectangular tiles and can be used with both light and dark grout to either blend seamlessly or highlight the grid-like precision of the pattern.
7. Diagonal Pattern
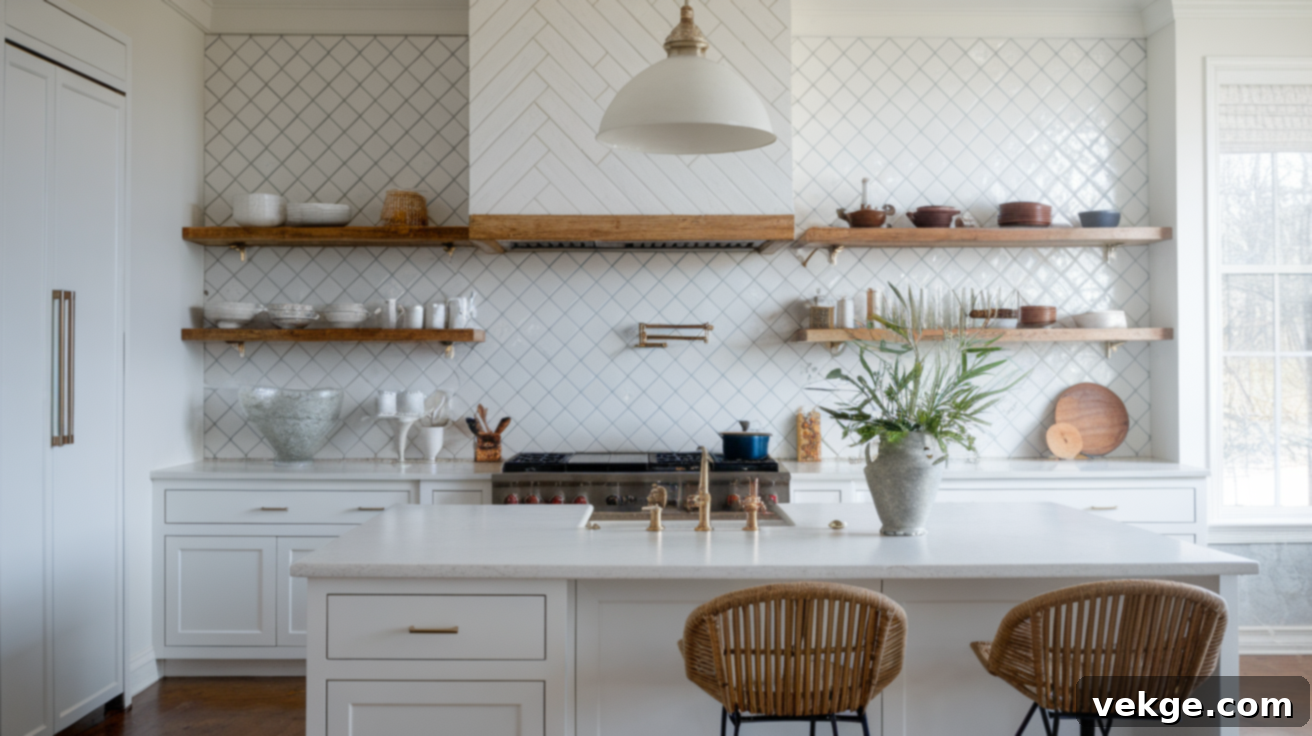
Setting square tiles at a 45-degree angle creates a dynamic and visually engaging diagonal pattern. This arrangement introduces a strong sense of movement and can remarkably make smaller kitchens feel larger and more open by directing the eye across the space. It adds visual interest without being overly busy or complex, making it a sophisticated choice for many kitchen styles.
The diagonal placement works effectively with almost any tile shape and can transform standard rectangular tiles into something more unique and less ordinary, especially when combined with a contrasting grout that emphasizes the angled lines.
8. Hexagon
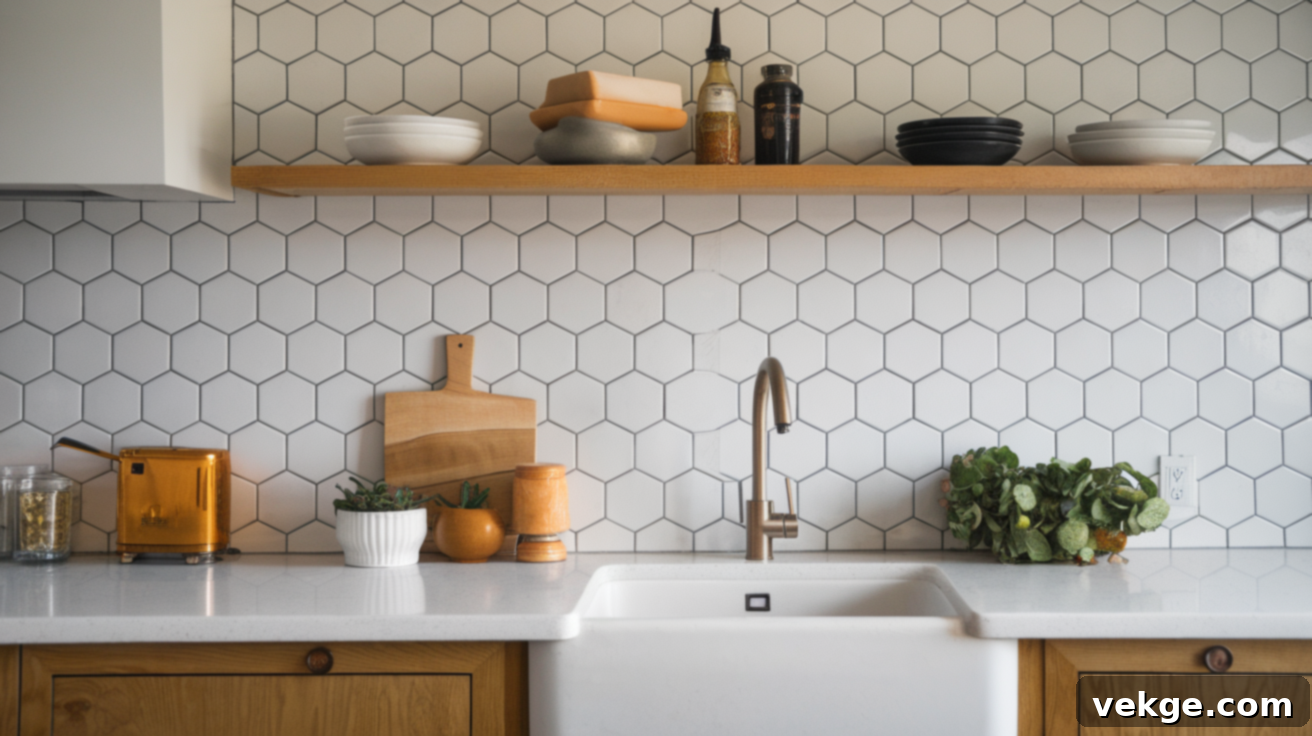
Hexagon tiles, with their distinctive six-sided shape, create a captivating honeycomb effect that immediately catches the eye. The unusual and organic geometry of these tiles adds a fresh, modern, and often playful touch to your kitchen, complementing a wide range of design styles from contemporary minimalist to eclectic vintage. They offer a refreshing departure from traditional square or rectangular formats.
Hexagon tiles are available in various sizes, ranging from tiny, intricate mosaics to larger, bold statement pieces. This versatility allows you to create either subtle textures, especially with a matching grout, or striking, high-contrast patterns that make a definitive design statement, depending on your chosen scale and color palette.
9. Mosaic Tiles
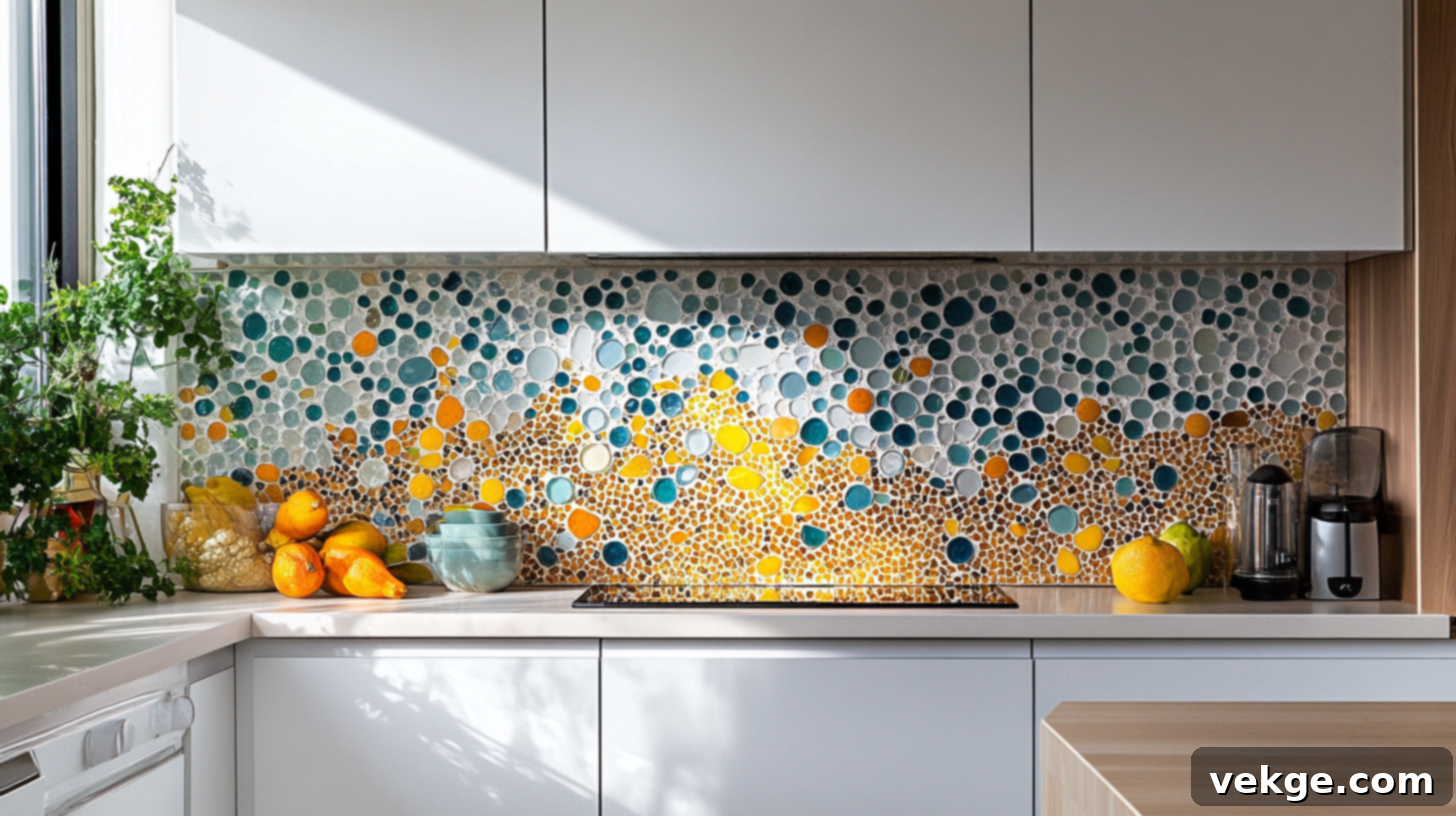
Mosaic tiles consist of tiny pieces of tile, often pre-mounted on mesh sheets, that come together to create stunning, intricate patterns, images, or gradients on your backsplash. Available in an incredible array of materials such as glass, ceramic, natural stone, metal, and shell, mosaics allow you to experiment with vibrant color, varied texture, and complex designs in ways that larger, single tiles simply cannot. Their small scale lends itself to incredible detail.
They work wonderfully for creating breathtaking focal points, adding artistic touches to specific areas of your kitchen like a decorative panel behind the range, or for introducing a luxurious shimmer or a rich, earthy texture to your space.
10. Fish Scale
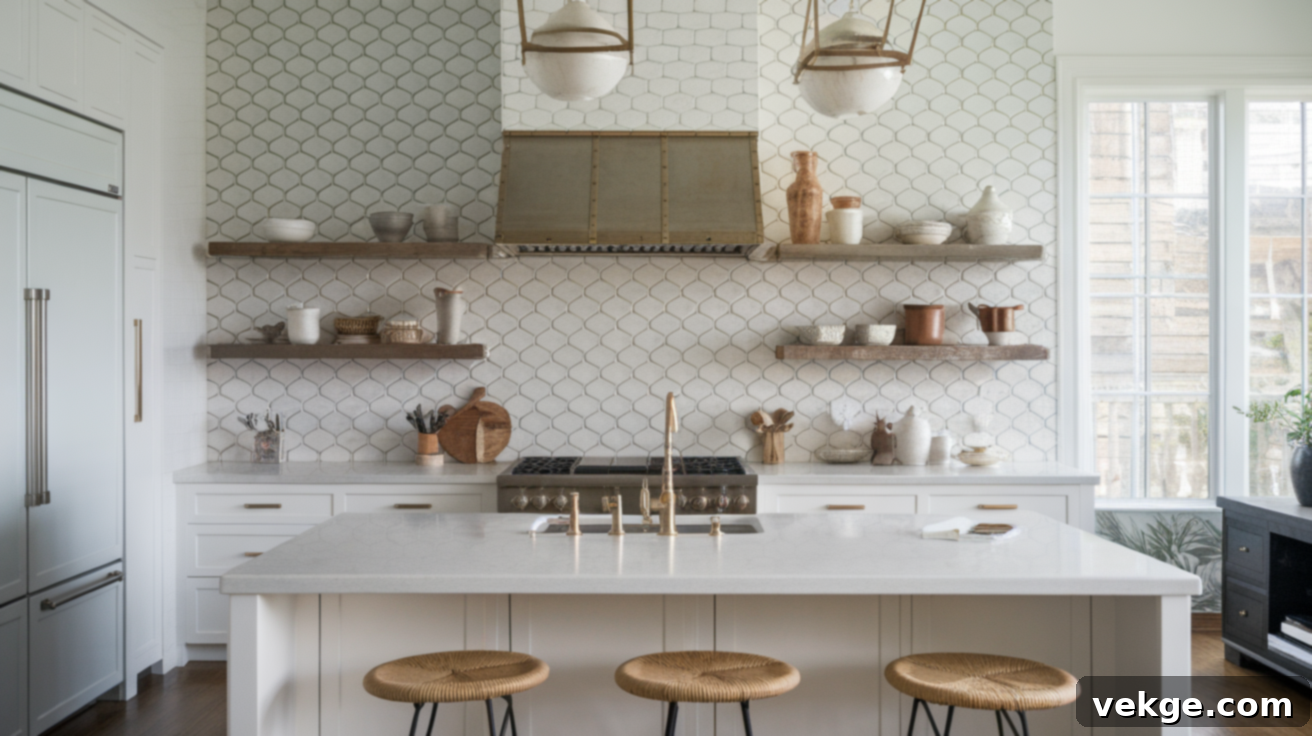
Also known affectionately as mermaid or scallop tiles, this captivating pattern utilizes uniquely curved tiles that are arranged to overlap, beautifully resembling the scales of a fish or the gentle undulations of ocean waves. The distinctive and organic shape creates a wonderful sense of movement and fluidity in your kitchen, making it an ideal choice for homes near water, coastal-inspired designs, or for those seeking a truly unique and whimsical aesthetic that gracefully moves beyond standard square and rectangular tiles.
Fish scale tiles come in various colors and finishes, allowing you to evoke anything from a serene aquatic feel with blues and greens to a bold, artistic statement with metallic or high-gloss finishes.
11. Checkerboard
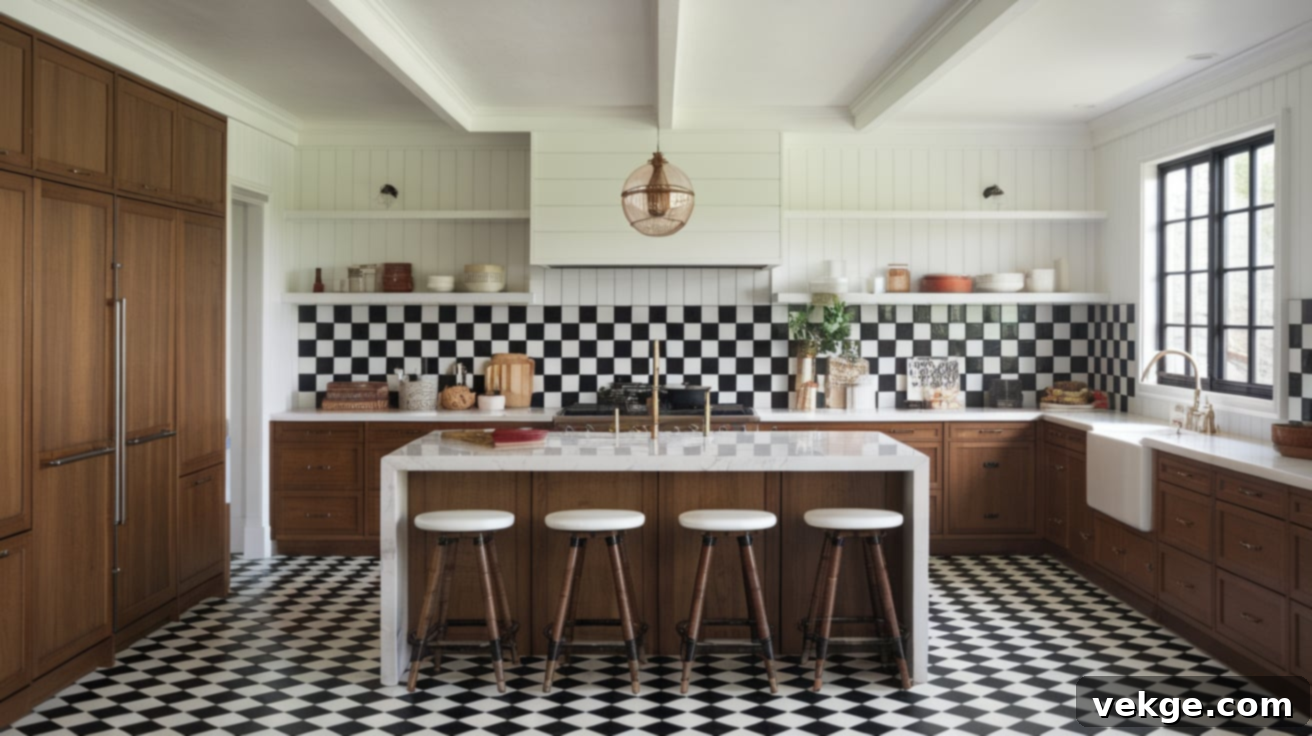
The checkerboard is a timeless and instantly recognizable classic design that alternates between two contrasting colors—most traditionally black and white—to create a graphic, bold, and endlessly stylish pattern. This iconic layout works exceptionally well in vintage-inspired kitchens, adding a retro diner charm, but it can also feel remarkably fresh and modern when utilized with unexpected color combinations, varying tile sizes, or materials with different finishes like matte and gloss tiles.
It’s a versatile pattern that offers both simplicity and visual punch, capable of being either a playful accent or a sophisticated backdrop depending on the colors and materials chosen.
12. Diamond Shape
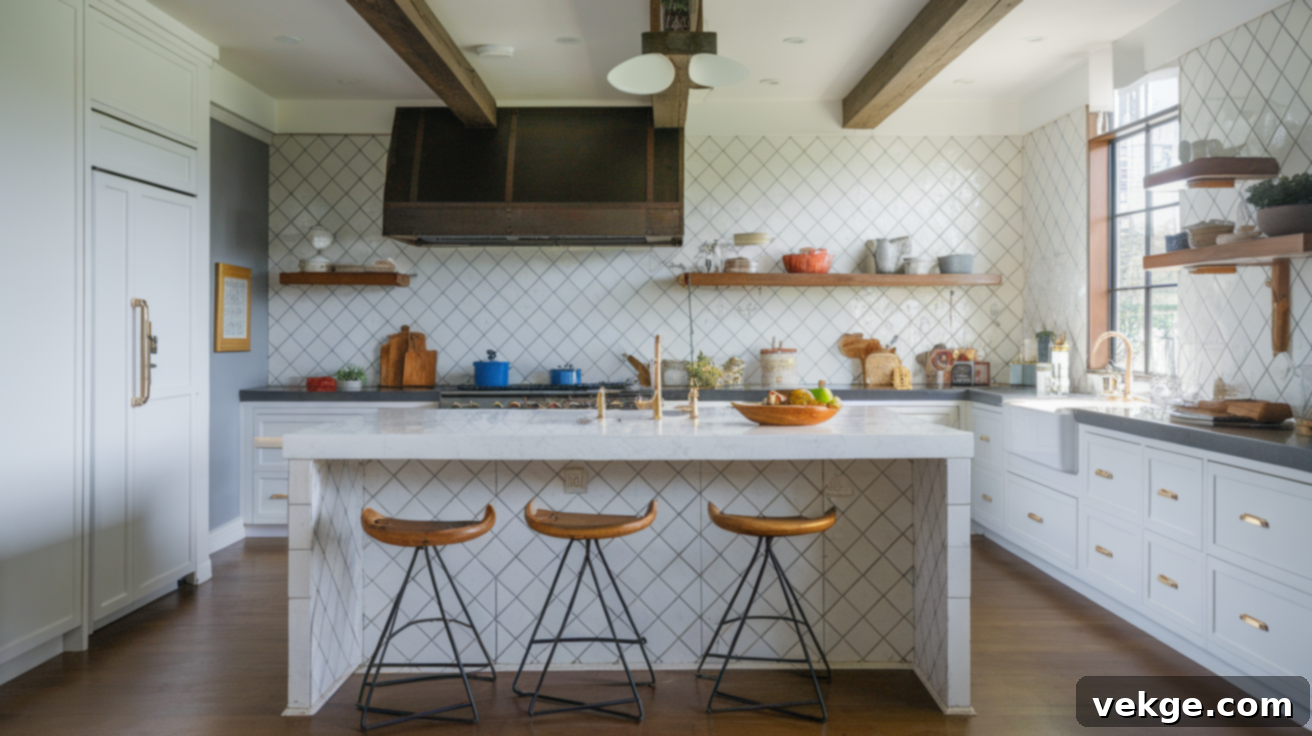
Achieved by simply rotating standard square tiles 45 degrees, the diamond pattern instantly creates a dynamic, energetic, and visually intriguing effect in your kitchen. This clever arrangement has the benefit of making spaces feel larger and more open by drawing the eye diagonally across the wall, while simultaneously adding an unexpected touch of sophisticated style that elevates the entire room.
Diamond patterns work especially well with small to medium-sized tiles in solid colors, where the repetitive pattern can truly shine. They can be subtly elegant with tone-on-tone colors or strikingly bold with high contrast, adding a geometric flair that complements both traditional and modern designs.
13. Moroccan Style
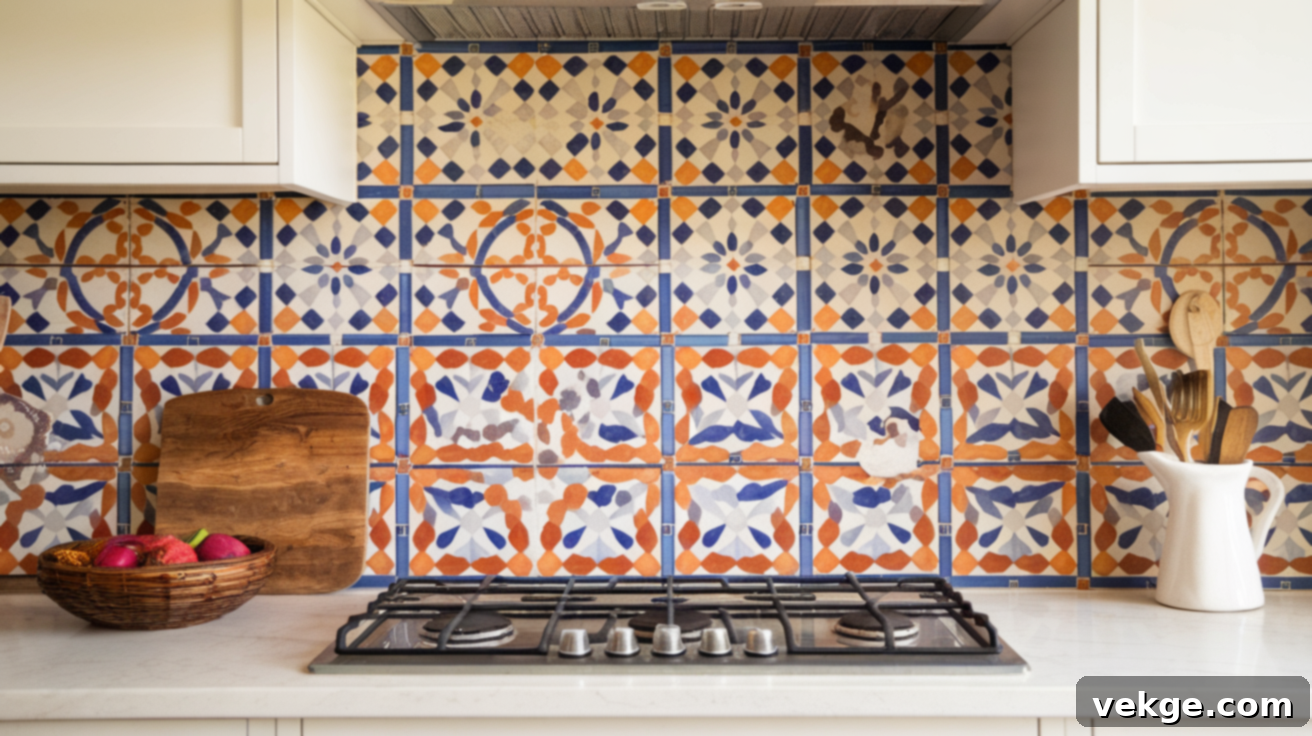
Moroccan tiles are celebrated for their intricate geometric patterns, often featuring starbursts, interweaving lines, and arabesques, combined with a rich palette of bold color combinations inspired by the vibrant artistry and cultural heritage of North African design. With their complex designs, artisanal craftsmanship, and deep historical roots, Moroccan tiles instantly create an unforgettable focal point and a talking point in your kitchen. They infuse a unique warmth, profound character, and exotic charm that simple, solid-colored tiles cannot possibly match.
These tiles are perfect for adding a sense of worldly adventure and luxurious texture to your culinary space, making every meal preparation feel like an escape to a distant, enchanting land.
14. Cement Tiles
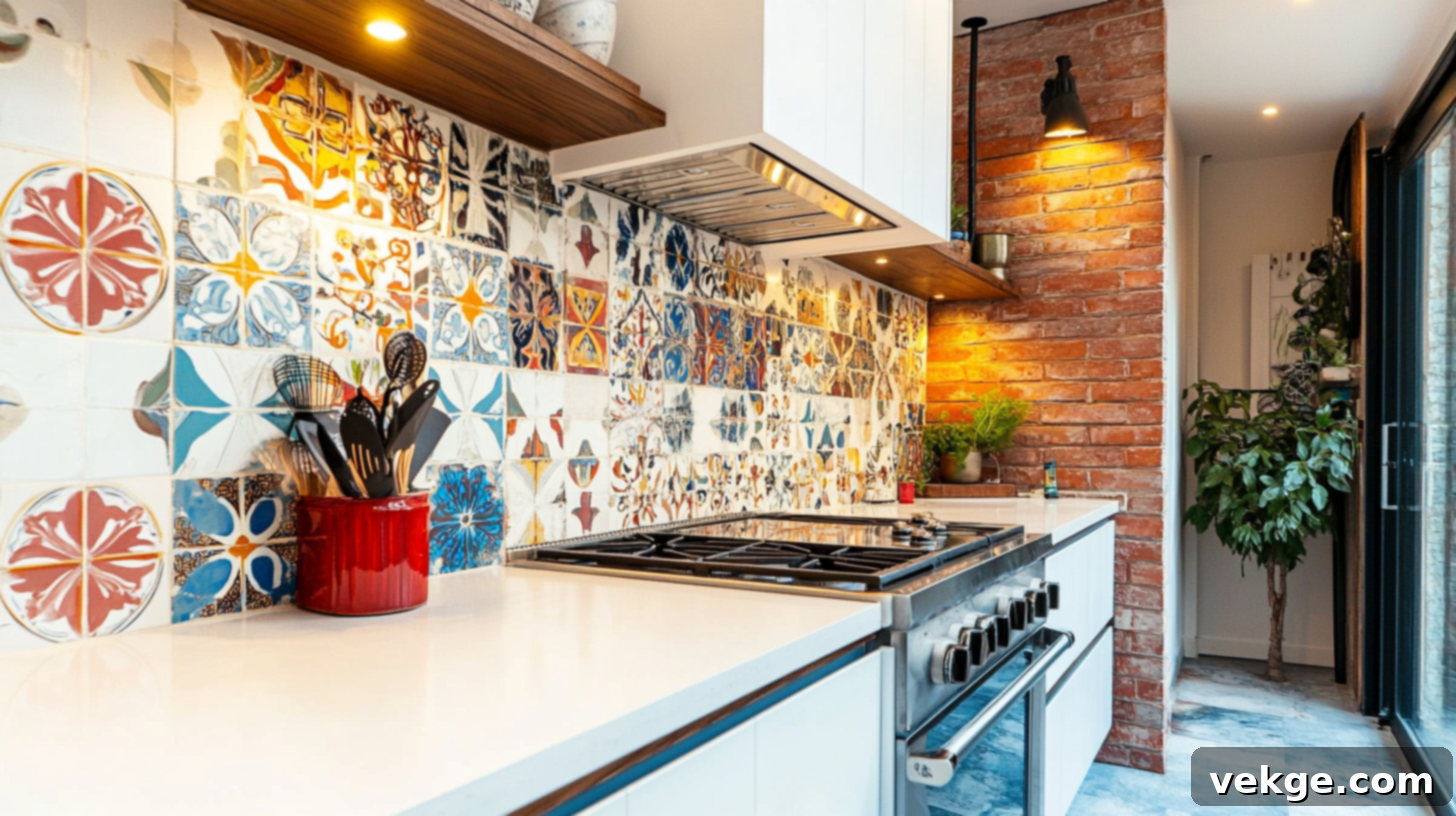
Cement tiles, distinctively known for their matte finish, tactile surface, and exquisitely hand-painted or inlaid designs, bring an unparalleled sense of character, artisanal beauty, and old-world charm to kitchen spaces. Unlike ceramic tiles where patterns are typically glazed on the surface, the intricate designs in cement tiles are created using colored cement poured into molds, resulting in a pattern that permeates the tile itself.
This process results in a slightly textured surface that develops a beautiful, lived-in patina over time with regular use and proper care, adding to their unique appeal. They are perfect for achieving a vintage, rustic, or bohemian aesthetic and offer incredible durability.
15. Glass Tiles
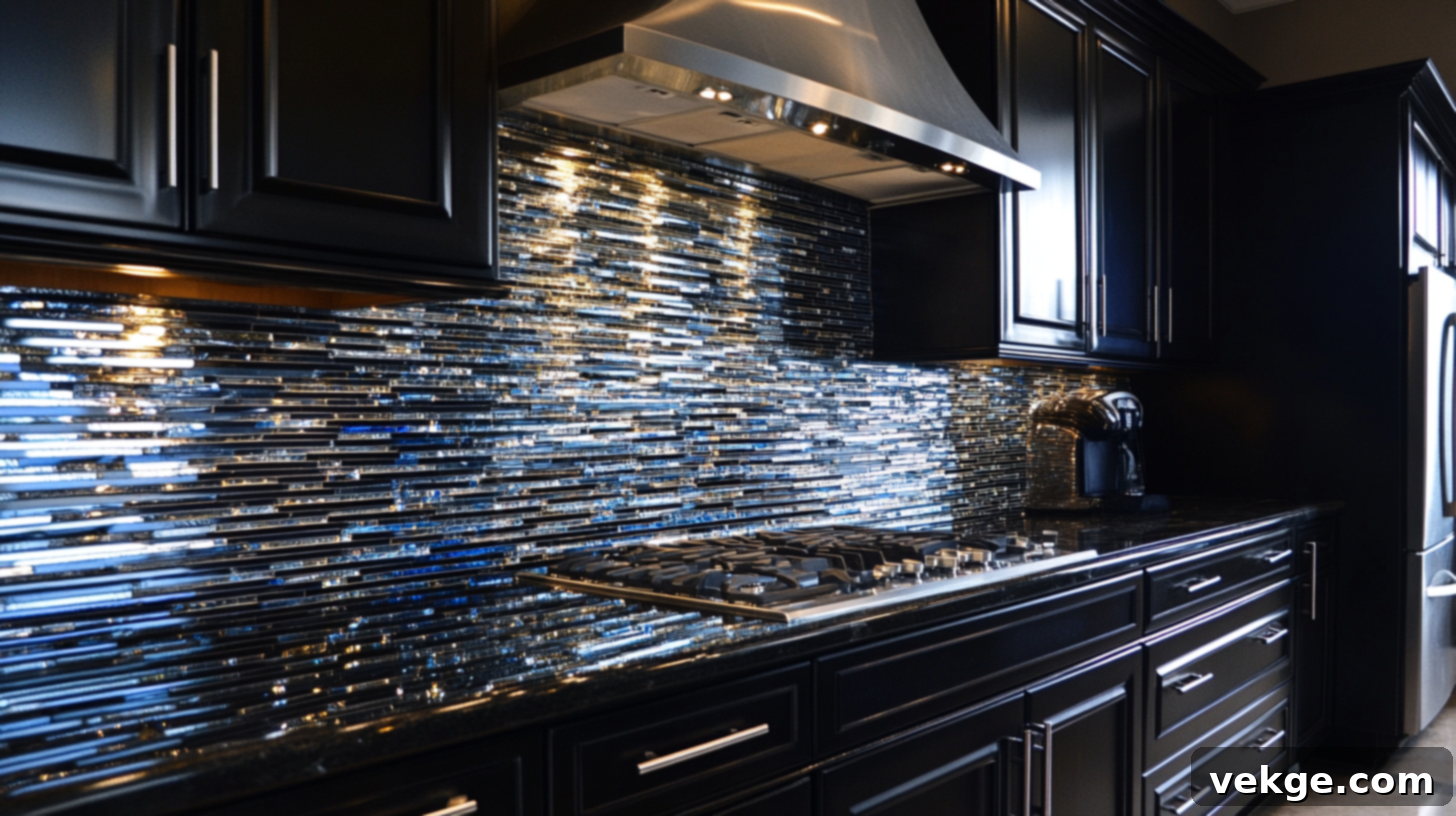
Glass tiles are renowned for their smooth, luminous, and often translucent surface that reflects light beautifully. This quality makes them an exceptional choice for brightening dark kitchens or making smaller spaces feel significantly larger and more open. Their reflective nature adds remarkable depth and a sense of luxury to your space, creating a shimmering effect that changes with the light throughout the day.
Available in an expansive spectrum of colors, from soft, ethereal pastels to vibrant, jewel-toned hues, glass tiles can cater to any design vision. Crucially, they are non-porous, making them exceptionally easy to clean and maintain, resisting stains and moisture with effortless elegance.
16. Peel and Stick Tiles
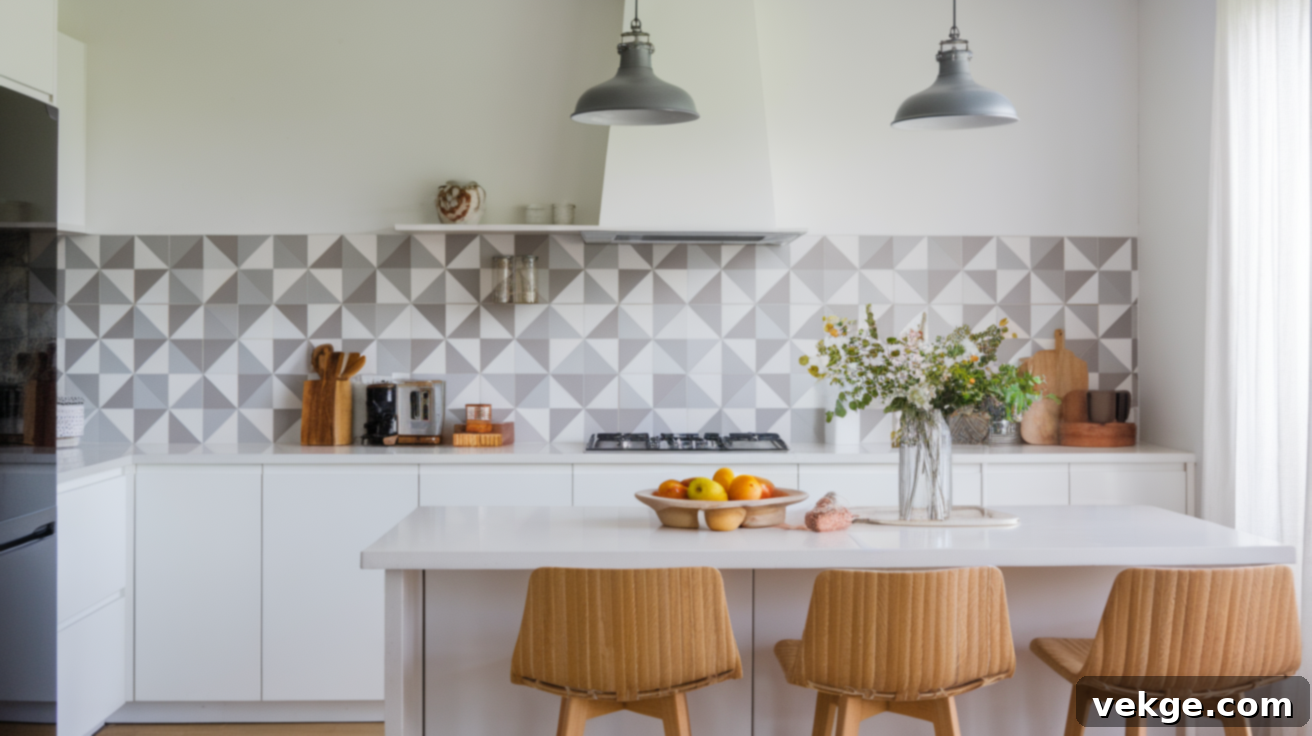
Peel and stick tiles, with their convenient self-adhesive backing, offer an incredibly easy, mess-free, and budget-friendly way to update your kitchen backsplash without the commitment or complexity of traditional tiling. They are an ideal solution for renters who desire a stylish upgrade, homeowners seeking a temporary refresh, or DIY enthusiasts looking for a quick and impactful project.
Modern versions of peel and stick tiles have come a long way in terms of realism and durability. They can mimic the appearance of ceramic, glass, natural stone, and even metallic tiles with surprising accuracy, often at a mere fraction of the cost. They are perfect for adding a pop of color or a new pattern with minimal effort.
17. Stone Tiles
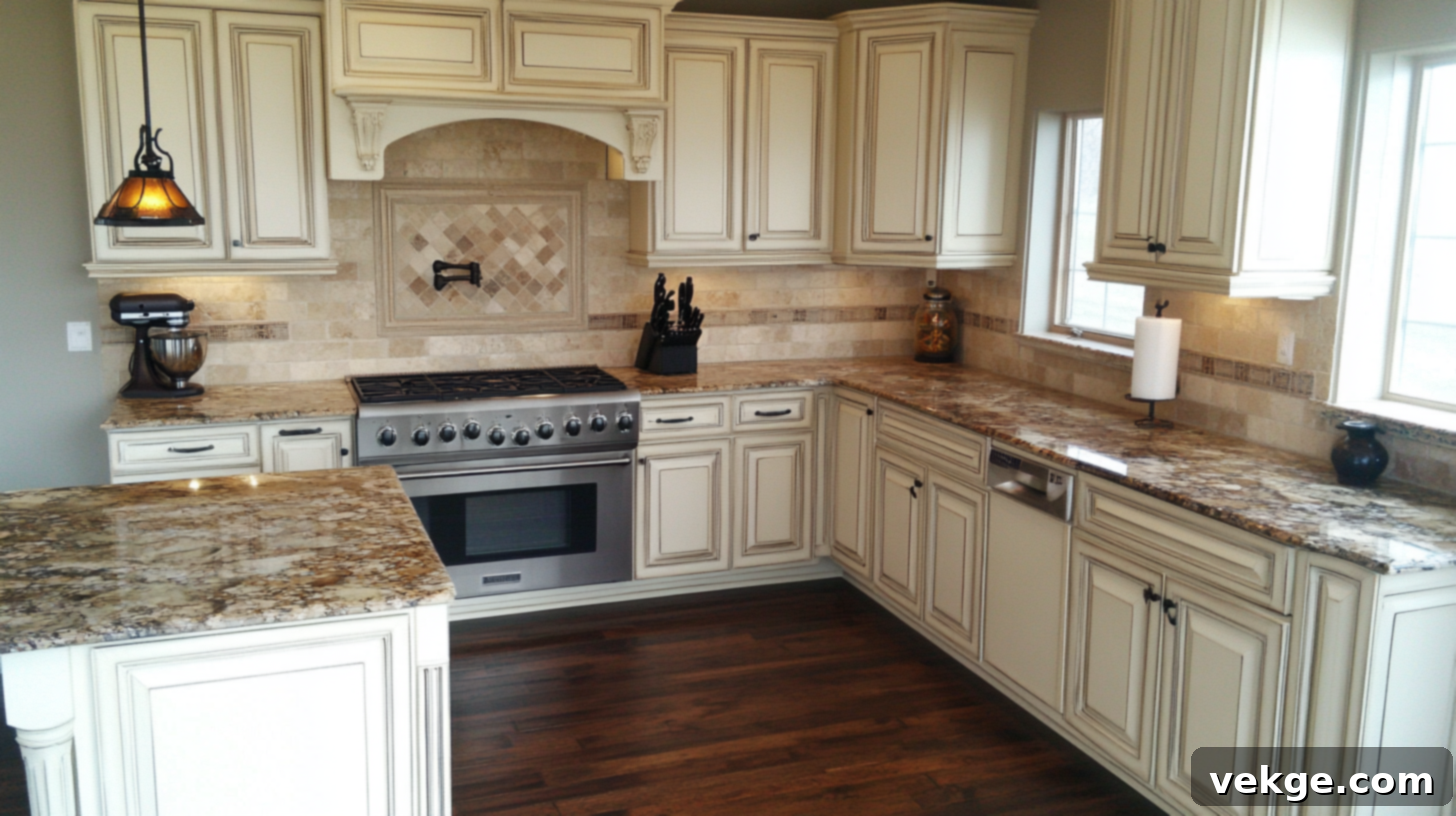
Natural stone tiles, including exquisite materials like marble, granite, travertine, slate, and limestone, bring unparalleled elegance, unique patterns, and rich, organic colors to your kitchen walls. The inherent beauty of natural stone lies in its natural variations—no two stone tiles are ever exactly alike, ensuring your backsplash boasts a one-of-a-kind look that cannot be perfectly replicated. This uniqueness adds immense character and a sense of bespoke luxury.
While natural stone tiles often require more careful maintenance, including regular sealing to prevent staining and etching, many homeowners deeply appreciate the profound natural beauty, tactile depth, and earthy sophistication that stone brings to their culinary space, making the extra care a worthwhile investment.
18. Wood Look Tiles
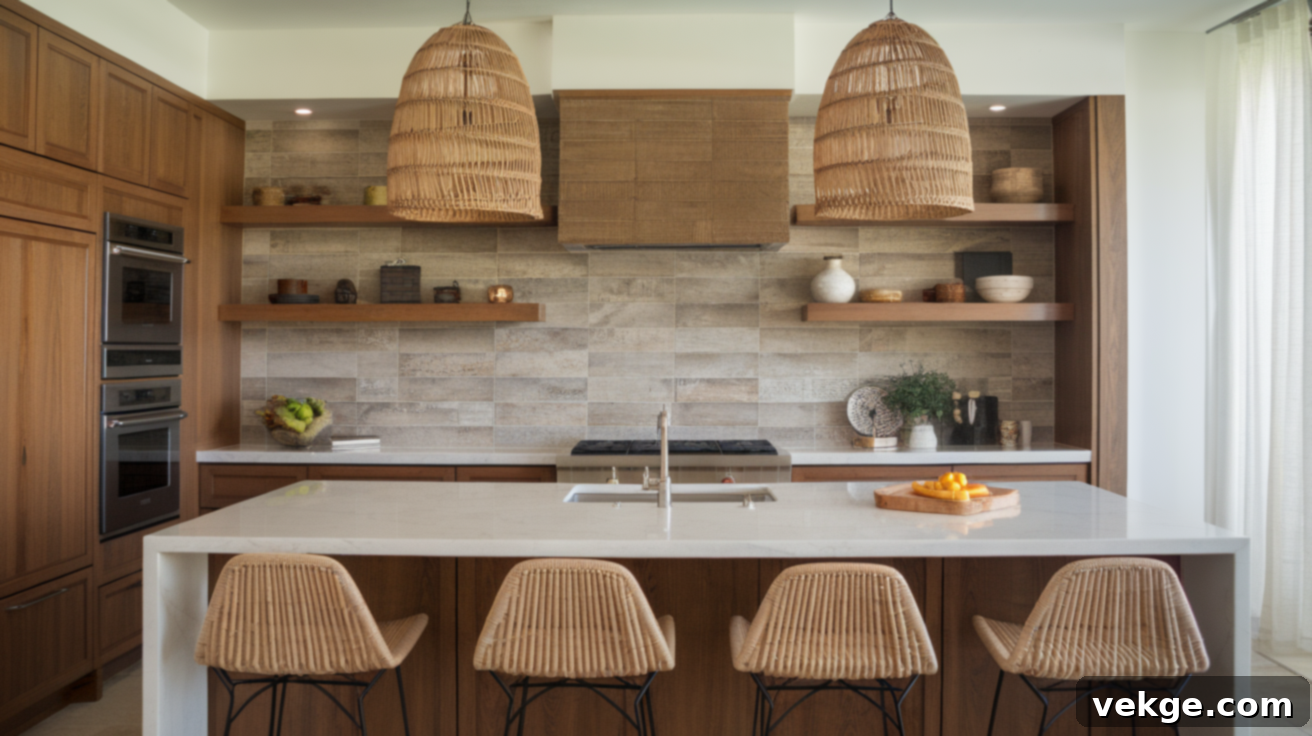
Wood look tiles are ceramic or porcelain tiles meticulously engineered and designed to closely resemble real wood planks, complete with realistic grain patterns, knots, and textures. The significant advantage these tiles offer for kitchen use is their vastly improved water resistance and durability compared to actual wood, which is generally not recommended for backsplashes due to moisture and fire risks.
They allow you to achieve the warm, inviting, and natural aesthetic of wood without any of the associated maintenance concerns like warping, swelling, or water damage. Available in a wide variety of grain patterns, colors, and ‘wood types,’ these tiles work exceptionally well in farmhouse, rustic, transitional, or even modern kitchen designs where you desire a touch of organic warmth.
19. Textured Tiles
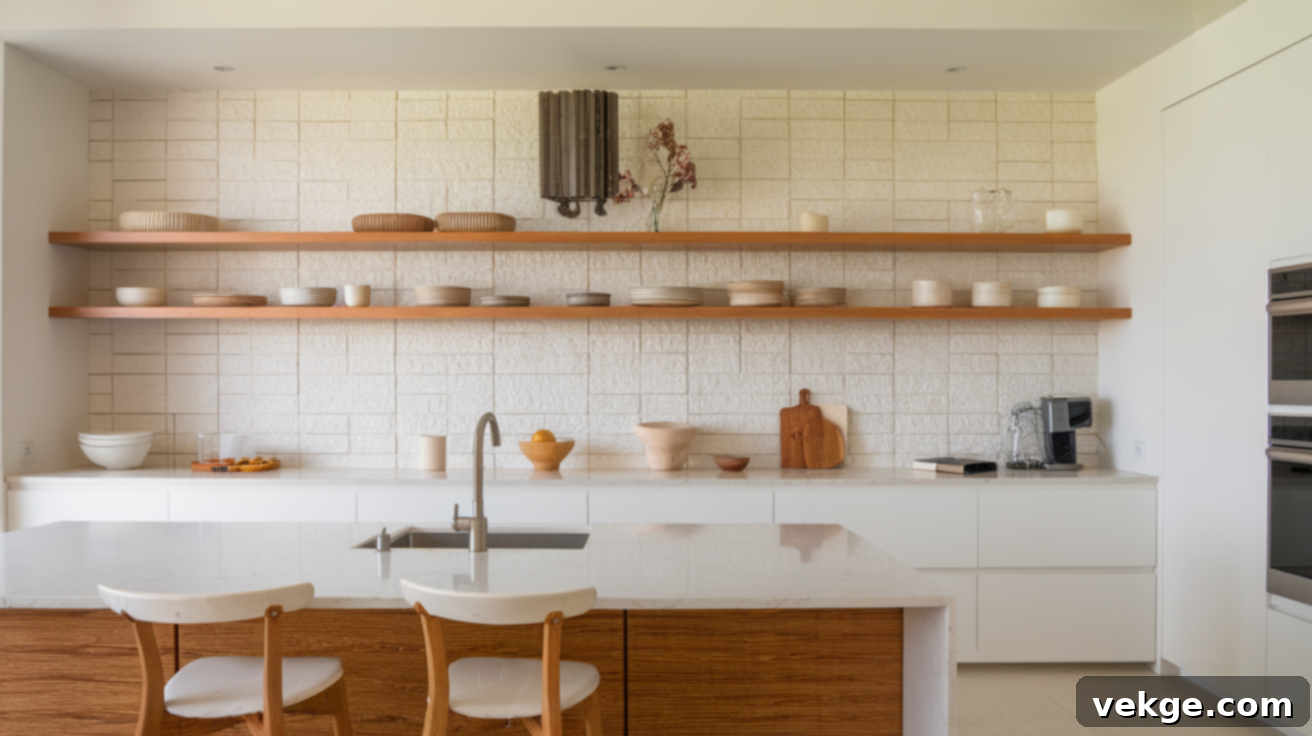
Textured tiles, featuring raised patterns, subtle ripples, or dramatic 3D effects, introduce an extraordinary tactile and visual dimension to your kitchen walls. Unlike flat, smooth tiles, these surfaces actively interact with light, creating a dynamic play of shadows and highlights that changes throughout the day as lighting conditions shift. This constant visual evolution adds a profound sense of interest and depth, preventing your backsplash from ever feeling static.
They are particularly perfect for adding subtle yet impactful detail to monochromatic color schemes, where the texture itself becomes the star. Textured tiles can transform a simple wall into a work of art, adding sophistication and a unique focal point.
20. Brushed Metal Tiles
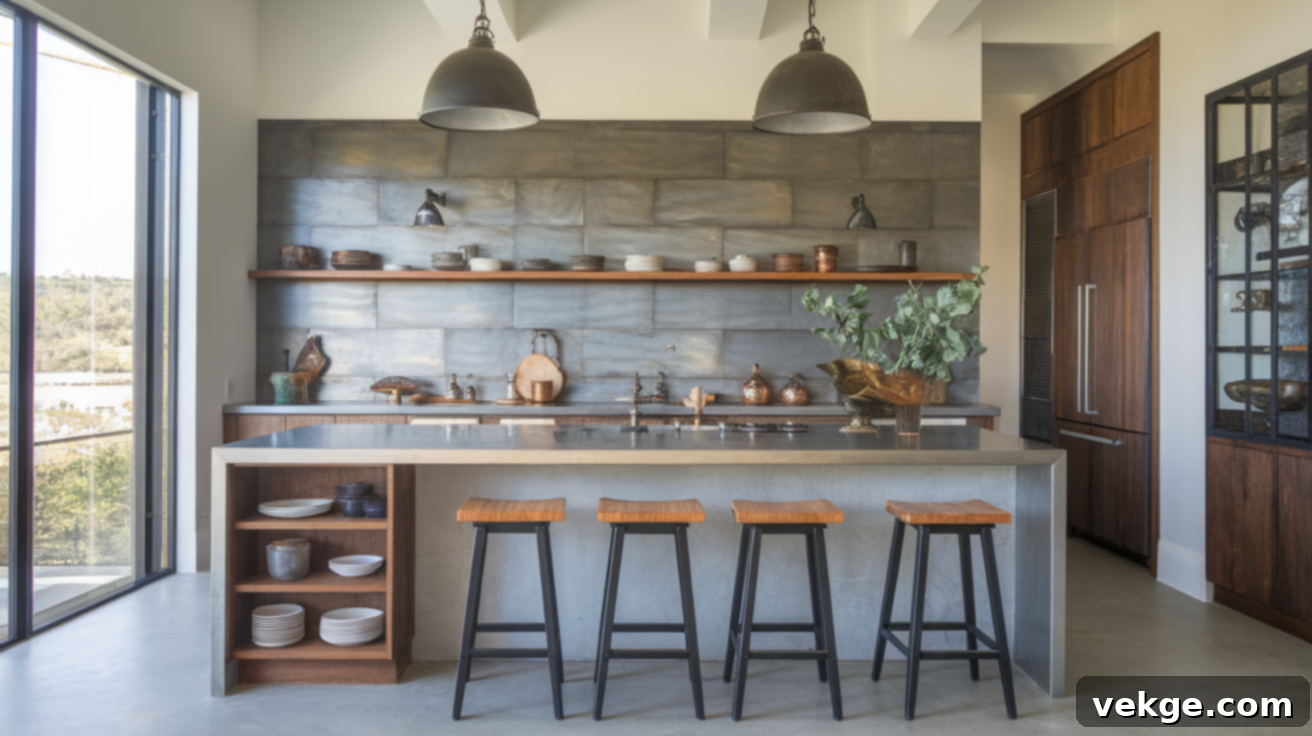
Crafted from various metals such as stainless steel, aluminum, or copper and finished with a distinct brushed texture, these tiles introduce a sleek, industrial, and distinctly modern look to your kitchen. Their metallic sheen and subtle texture exude contemporary sophistication and pair beautifully with modern appliances and minimalist cabinetry, creating a cohesive and polished aesthetic.
Brushed metal tiles can also help make smaller kitchens feel more open and airy due to their reflective qualities. Furthermore, the metal surface is highly heat-resistant, making it an exceptionally practical and stylish choice for installations directly behind the range, where heat exposure is highest.
21. Subway with Bold Grout
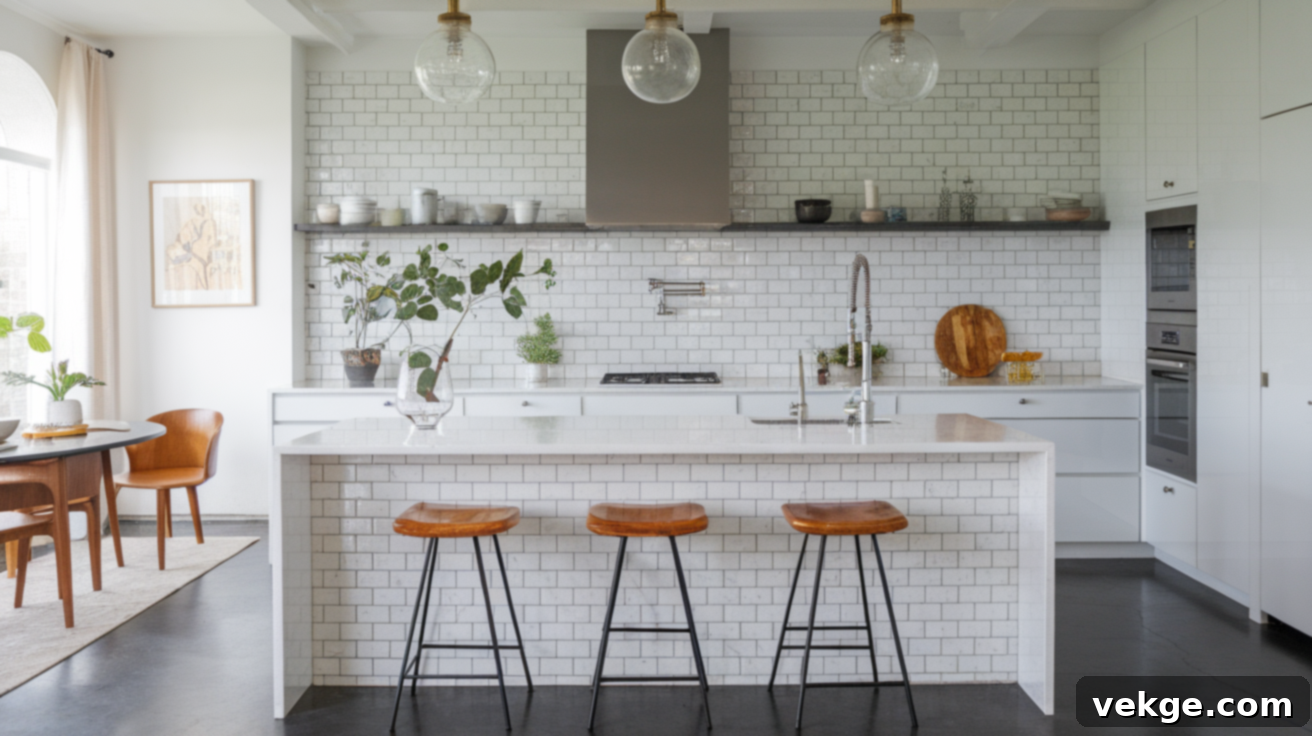
This contemporary and impactful twist on the classic subway tile features a high-contrast pairing of dark grout (often black, charcoal gray, or even navy blue) with white or light-colored tiles. The bold grout lines immediately draw attention, making the underlying tile pattern strikingly stand out and adding a strong graphic interest to an otherwise simple and familiar design. It transforms the subway tile from a background element into a deliberate design statement.
Beyond its aesthetic appeal, a darker grout is also highly practical as it inherently shows less staining and discoloration over time compared to lighter grouts, making maintenance a bit easier in a busy kitchen environment.
Tile Materials and Their Lasting Impact on Design & Durability
The material you select for your kitchen backsplash tiles is a foundational decision that significantly affects not only their visual appeal but also their long-term performance, durability, and maintenance requirements within your kitchen environment.
Ceramic vs. Porcelain vs. Glass Tiles: Understanding the Differences
- Ceramic Tiles: These are among the most popular and budget-friendly tile options, crafted from clay that’s fired at high temperatures in a kiln. Ceramic tiles offer an expansive variety of colors, styles, and decorative patterns. While they perform well for most kitchen backsplashes, they are generally softer than porcelain and thus more prone to chipping if subjected to heavy impact. Their ease of cutting and installation makes them an excellent choice for DIY enthusiasts looking for a manageable project.
- Porcelain Tiles: Similar in composition to ceramic, porcelain tiles are made from a more refined clay mixture and fired at even higher temperatures, resulting in a denser, harder, and significantly less porous material. This enhanced density makes porcelain highly resistant to moisture, stains, and wear, which is particularly beneficial in a kitchen setting. While typically more expensive than ceramic, and more challenging to cut due to their hardness, their superior durability and longevity often justify the investment.
- Glass Tiles: Offering a bright, reflective, and often translucent surface, glass tiles are exceptional at making kitchens feel larger, brighter, and more luxurious. They do not absorb stains and are incredibly easy to wipe clean, though their highly reflective nature can sometimes make water spots or streaks more visible. Glass tiles tend to be more expensive than ceramic options and often require professional installation or specialized cutting tools to prevent cracking. Their inherent shine adds unparalleled modern elegance.
Natural Stone vs. Synthetic Tiles: A Balance of Beauty and Practicality
- Natural Stone Tiles: Materials such as marble, granite, travertine, slate, and limestone offer unmatched natural beauty, bringing unique patterns, veining, and rich textures that synthetic tiles can only mimic. Each piece of natural stone is one-of-a-kind, creating a luxurious and bespoke feel in your kitchen. However, most natural stone tiles are porous and require regular sealing (typically annually) to prevent staining from food and liquids. They are also generally more expensive and demand more delicate cleaning methods than manufactured tiles.
- Synthetic Tiles: This category primarily includes ceramic and porcelain tiles, which are manufactured products. They offer more consistent coloring, patterns, and sizes compared to natural stone. Synthetic tiles typically require less maintenance, do not usually need sealing (unless the grout does), and are generally more cost-effective. Modern manufacturing techniques have become incredibly advanced, allowing for the creation of synthetic tiles that convincingly replicate the appearance of natural materials while providing superior stain, water, and scratch resistance, making them a highly practical and durable choice for busy kitchens.
Steps for Installation of Kitchen Backsplash Tile Patterns: Your DIY Guide
Embarking on a backsplash installation project can seem daunting, but with careful planning, the right tools, and a dose of patience, many homeowners find this to be a rewarding DIY project they can successfully tackle. Here’s a detailed step-by-step guide:
1. Gather Your Materials and Tools: Before you begin, ensure you have every item necessary. This includes your chosen tiles, thin-set mortar or mastic adhesive, grout, tile spacers, a measuring tape, a level, a notched trowel, a grout float, sponges, buckets, and essential safety gear (gloves, safety glasses, and potentially a dust mask).
2. Prepare the Surface: Safety first! Turn off the power to any electrical outlets or switches in the area you’ll be tiling. Carefully remove all switch plates and outlet covers. Thoroughly clean the wall surface to remove any grease, dirt, or debris. Repair any existing damage, fill holes, and ensure the wall is smooth, dry, and structurally sound for optimal adhesion.
3. Plan Your Layout: This is a crucial step for a professional finish. Measure your backsplash area and mark the center point, both horizontally and vertically. It’s highly recommended to perform a “dry run” by laying out your tiles on the countertop below the backsplash area (or on a piece of cardboard). This allows you to visualize the pattern, determine where cuts will be needed (aiming for larger, more consistent cuts rather than tiny slivers at edges), and ensure symmetry.
4. Apply Adhesive: Using your notched trowel, spread a thin, even layer of mortar or mastic adhesive onto a small section of the wall (start with about 2-3 square feet – enough area that you can tile before the adhesive starts to set). Hold the trowel at a 45-degree angle to create consistent ridges in the adhesive. Avoid applying too much adhesive at once, especially when learning.
5. Place the Tiles: Begin placing your tiles firmly into the adhesive, starting from your designated center mark and working your way outwards. Gently press each tile into place with a slight twisting motion to ensure good contact. Use tile spacers between each tile to maintain perfectly even grout gaps throughout your pattern. Immediately wipe away any excess adhesive that squeezes out from between the tiles using a damp sponge, as it’s much harder to remove once dry.
6. Cut Tiles as Needed: For tiles that require cutting to fit edges, corners, or around outlets, measure meticulously. Use a manual tile cutter for simple, straight cuts. For more complex shapes, curves, or cuts around outlets, a wet saw is often necessary. Always wear appropriate safety gear, including eye protection, when cutting tiles.
7. Allow Adhesive to Dry: Once all tiles are placed, remove the tile spacers. Allow the adhesive to cure completely according to the product manufacturer’s instructions. This typically takes 24 hours but can vary based on humidity and product type. Do not proceed to grouting until the adhesive is fully dry.
8. Apply Grout: Mix your grout according to the package directions to achieve a consistent, paste-like consistency. Using a rubber grout float, press the grout firmly into the spaces between the tiles, holding the float at a 45-degree angle and working diagonally across the tiles. Ensure all grout lines are completely filled. After a short setting time (check package for specifics), use a damp sponge to carefully wipe away excess grout from the tile surfaces, rinsing the sponge frequently.
9. Clean and Seal: Once the grout has cured (again, refer to product instructions, usually 24-72 hours), thoroughly clean the tile surface to remove any remaining grout haze. For natural stone tiles or certain grout types, apply a suitable sealer to protect against stains and moisture. Re-sealing is often recommended annually.
10. Reinstall Fixtures: Finally, once everything is dry and clean, carefully replace all outlet covers and switch plates. Restore power to the area, and step back to admire your beautiful new kitchen backsplash!
Tip for Beginners: If you’re new to tiling, starting with a simpler pattern like a classic brick bond or a straight stacked layout will make the installation process much more manageable. More complex patterns such as herringbone, chevron, or basket weave demand greater precision in cutting and layout, and might be better left to experienced DIYers or professional tile setters.
Essential Backsplash Maintenance Tips for Lasting Beauty
Even the most stunning kitchen backsplash can lose its charm and brilliance if not properly maintained. Regular cleaning and diligent care are paramount to keeping your tiles looking fresh, preserving their original beauty, and extending their lifespan for many years to come.
- Regular Wiping: Make it a habit to wipe down your backsplash regularly with a soft cloth or sponge and a mild, non-abrasive household cleaner. This prevents the buildup of cooking grease, food splatter, and grime, which can become much harder to remove if left to set.
- Material-Specific Cleaners: Always use cleaners appropriate for your tile material. Avoid using harsh, acidic, or abrasive cleaners containing bleach or ammonia on natural stone tiles, as these can permanently damage, etch, or dull their delicate surface.
- pH-Neutral for Stone: For natural stone tiles, specifically use a pH-neutral cleaner to ensure the surface is not harmed.
- Glass Tile Care: Clean glass tiles with standard glass cleaner for a sparkling, streak-free shine.
- Address Spills Promptly: Immediately clean up any spills, especially acidic substances like lemon juice, vinegar, or wine, as these can quickly stain grout or etch sensitive stone surfaces if not addressed right away.
- Seal Natural Stone Annually: To maintain their resistance to stains and moisture, re-seal natural stone tiles once a year, or as recommended by the manufacturer.
For Grout Maintenance:
- Seal Grout Lines: After initial installation, seal your grout lines, particularly in high-traffic or high-moisture areas, and reapply the sealer annually to prevent discoloration and moisture penetration.
- Baking Soda Paste for Stains: For stubborn stains on grout, create a paste using baking soda and water. Apply it to the stain, let it sit for 10-15 minutes, then scrub gently with a soft brush and rinse.
- Grout Pens: Consider using a grout pen to touch up discolored or faded areas, which can refresh the look of your backsplash without the need for a full re-grouting.
- Steam Cleaners: For a deep clean without harsh chemicals, a steam cleaner can be highly effective at lifting dirt and grime from grout lines.
- Vinegar & Water Solution: For regular cleaning of ceramic or porcelain tile grout (avoid on natural stone!), mix equal parts white vinegar and warm water. Spray onto grout, let sit for a few minutes, then scrub and rinse.
- Inspect for Cracks: Regularly inspect grout lines for any signs of cracking or crumbling. Repair these promptly to prevent moisture from seeping behind the tiles and causing more extensive damage.
Conclusion: Your Kitchen’s Transformation Awaits
With such an extensive array of kitchen backsplash tile patterns and materials to choose from, you now possess a wealth of knowledge and plenty of inspiring ideas to match your personal style and enhance the practicality of your culinary space. Take the time to consider which patterns truly caught your eye and how their unique characteristics might best integrate into your own kitchen’s design aesthetic.
Whether you’re embarking on an ambitious full-scale kitchen renovation or simply seeking a quick, impactful weekend update, the diverse designs and practical advice shared in this guide can confidently help you get started. Remember, even seemingly simple updates like a new backsplash have the power to make an enormous difference, dramatically altering the entire feel and value of your home.
Don’t hesitate to bookmark this comprehensive list for future reference or share it with a friend who’s contemplating a kitchen refresh. Your dream kitchen, with its perfect backsplash, is well within reach!
Ready for even more home improvement inspiration and practical guidance? Explore our other blogs for fresh design tips, innovative project ideas, and detailed step-by-step guides to bring all your home transformation visions to life.
