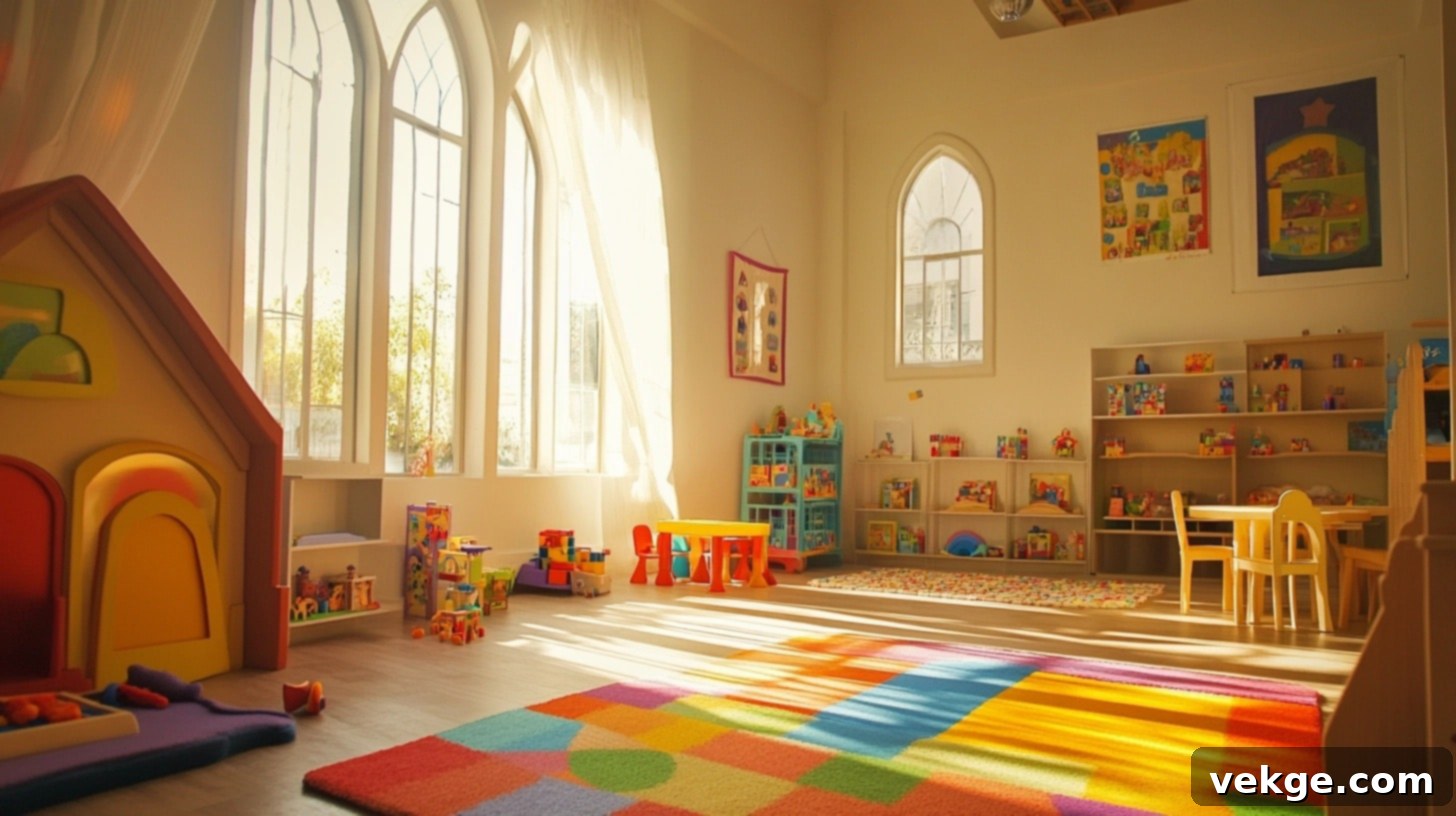
The Ultimate Guide to Creating a Budget-Friendly & Fun Playroom for Kids
Creating a vibrant and engaging playroom for your children doesn’t have to break the bank. With a little creativity, smart planning, and a focus on practical solutions, you can transform any space into a magical hub where kids can play, learn, and grow without overspending. This comprehensive guide will walk you through innovative, budget-friendly strategies to design an inspiring play area that fosters imagination and keeps your little ones happy.
From maximizing small spaces with clever storage to exciting DIY projects and educational zones, we’ll cover everything you need to know. Our goal is to empower you to make the most of what you have, incorporate cost-effective ideas, and ensure the playroom is both safe and comfortable for children of all ages. Get ready to turn that spare room or corner into a beloved sanctuary for play, proving that an amazing kids’ play space is achievable on any budget.
Strategic Planning for Your Affordable Playroom
Before you even think about buying a single item, thoughtful planning is essential for a budget-friendly playroom. Strategic foresight helps you allocate your resources wisely, focusing on essentials and avoiding unnecessary expenses. This section covers crucial initial steps to lay a solid foundation for your kids’ new favorite room.
Assessing Your Playroom Space
- Measure Accurately: Begin by precisely measuring the room’s length, width, and ceiling height. This helps in visualizing furniture placement and understanding potential for vertical storage.
- Identify Storage Opportunities: Scan the room for hidden storage potential, such as empty corners, under-window spaces, or often-unused wall sections that could house shelves or hooks.
- Note Natural Light: Observe how natural light enters the room throughout the day. Bright spots are perfect for reading nooks or art stations, while darker corners might suit quiet play or imaginative dens.
- Locate Power Outlets: Mark all existing power outlet locations, considering any future needs for lamps, charging stations, or electronic toys. This ensures safety and practical usage.
- Map Doors and Windows: Clearly mark the swing of doors and placement of windows to ensure these areas remain clear and functional, preventing obstructions and ensuring safety.
Setting a Realistic Budget
- Prioritize Essential Items: Start by listing non-negotiable items such as basic, safe storage solutions and essential child-proofing measures. These should be your initial financial focus.
- Allocate for Low-Cost Elements: Set aside a specific portion of your budget for affordable organizational tools like clear bins, colorful baskets, and simple wall hooks that significantly aid tidiness.
- Explore Second-Hand Treasures: Make it a habit to visit discount stores, thrift shops, and online marketplaces. You can often find high-quality, pre-loved items like furniture, toys, or craft supplies at a fraction of the cost.
- Track Your Spending Diligently: Maintain a simple record of all expenditures, whether in a notebook or a digital app. This helps you stay within your budget and identifies areas where you might be overspending.
- Account for Future Additions: Always keep a small contingency fund. Kids’ interests evolve rapidly, and having a reserve allows for future additions or modifications without re-stretching your main budget.
Involving Your Children in the Design Process
Engaging your kids in the playroom’s design not only makes them feel valued but also ensures the space truly reflects their interests and needs. This collaborative approach fosters a sense of ownership and excitement.
- Discover Their Favorite Activities: Directly ask your children about their preferred play activities. Do they love building, drawing, reading, or imaginative play? Their answers will guide functional zone creation.
- Offer Color Choices: Present a limited selection of budget-friendly color options for walls or accents. Letting them pick within your parameters makes them feel in control without compromising your budget.
- Share Playroom Inspiration: Show them simple images of playrooms and note their reactions. This helps you understand what visual elements or themes appeal to them most.
- Collaborative Toy Sorting: Involve them in sorting their existing toys. This helps them understand the need for storage and allows you to declutter, keeping only beloved and relevant items.
- Engage in DIY Projects: Let them participate in simple DIY tasks, like decorating storage boxes, choosing the placement for their favorite items, or even painting. Their involvement adds a personal touch.
Creative Solutions for Small Playroom Spaces
Even the smallest room can become a dynamic play haven with smart design. The key is to think vertically, embrace multi-functional items, and ensure easy access and tidiness. These budget-friendly strategies are perfect for making every inch count.
Maximizing Space with Vertical Storage
Don’t let your walls go unused! Vertical storage is a game-changer for small spaces, keeping floors clear and toys accessible.
- Install Versatile Shelving: Mount simple floating shelves at varying heights. Place lower shelves within children’s reach for daily-used toys and books, reserving higher shelves for less frequently accessed items or display.
- Utilize Pegboards: A pegboard offers incredible flexibility. Hang baskets, hooks, and small shelves for art supplies, light toys, and even dress-up accessories. Its reconfigurability means it can adapt as needs change.
- Opt for Clear Storage Containers: Use inexpensive clear plastic containers on shelves. They allow kids (and parents) to easily see what’s inside, promoting independent cleanup and play. Labeling adds another layer of organization.
- Leverage Command Hooks: These damage-free hooks are perfect for hanging lightweight items like dress-up clothes, backpacks, or even small toy bags directly on walls or inside cabinet doors.
Embracing Foldable & Flexible Play Areas
Small playrooms thrive on flexibility. Items that can be easily stored away free up valuable floor space for other activities.
- Wall-Mounted Fold-Down Tables: Install a fold-down table that attaches to the wall. It provides a sturdy surface for crafts or homework and can be folded flat when not in use. Pair with floor cushions for comfortable, storable seating.
- Pop-Up Play Structures: Invest in pop-up play tents, tunnels, or ball pits. These provide immediate fun and imaginative play opportunities but can be collapsed and stored flat in seconds, perfect for spontaneous play sessions.
- Roll-Up Play Mats: Large, durable play mats with printed roads, towns, or designs offer a soft, engaging surface for floor play. When playtime is over, they can be rolled up and tucked away under a bed or in a closet.
Multi-Functional Playroom Furniture
Choose furniture that serves more than one purpose to get the most value and save space.
- Storage Benches and Ottomans: A bench with a lift-top lid provides both comfortable seating and ample hidden storage for toys, books, or blankets.
- Cube Organizers as Dividers: Modular cube organizers are incredibly versatile. They can hold toys, books, and craft supplies while also acting as room dividers to create distinct play zones within a larger space.
- Side Tables with Built-in Storage: Look for side tables that incorporate baskets or cubbies underneath. These offer quick and accessible storage for items that need to be tidied away fast.
- Bean Bags with Storage: Some bean bags come with zippers, allowing them to be stuffed with soft items like stuffed animals or extra blankets, providing comfy seating and clever storage simultaneously.
20 Ingenious Budget-Friendly Playroom Ideas
Here’s a collection of creative and affordable ideas to spark joy and learning in your children’s playroom, each designed to be kind to your wallet.
1. Chalkboard Wall: An Infinite Canvas
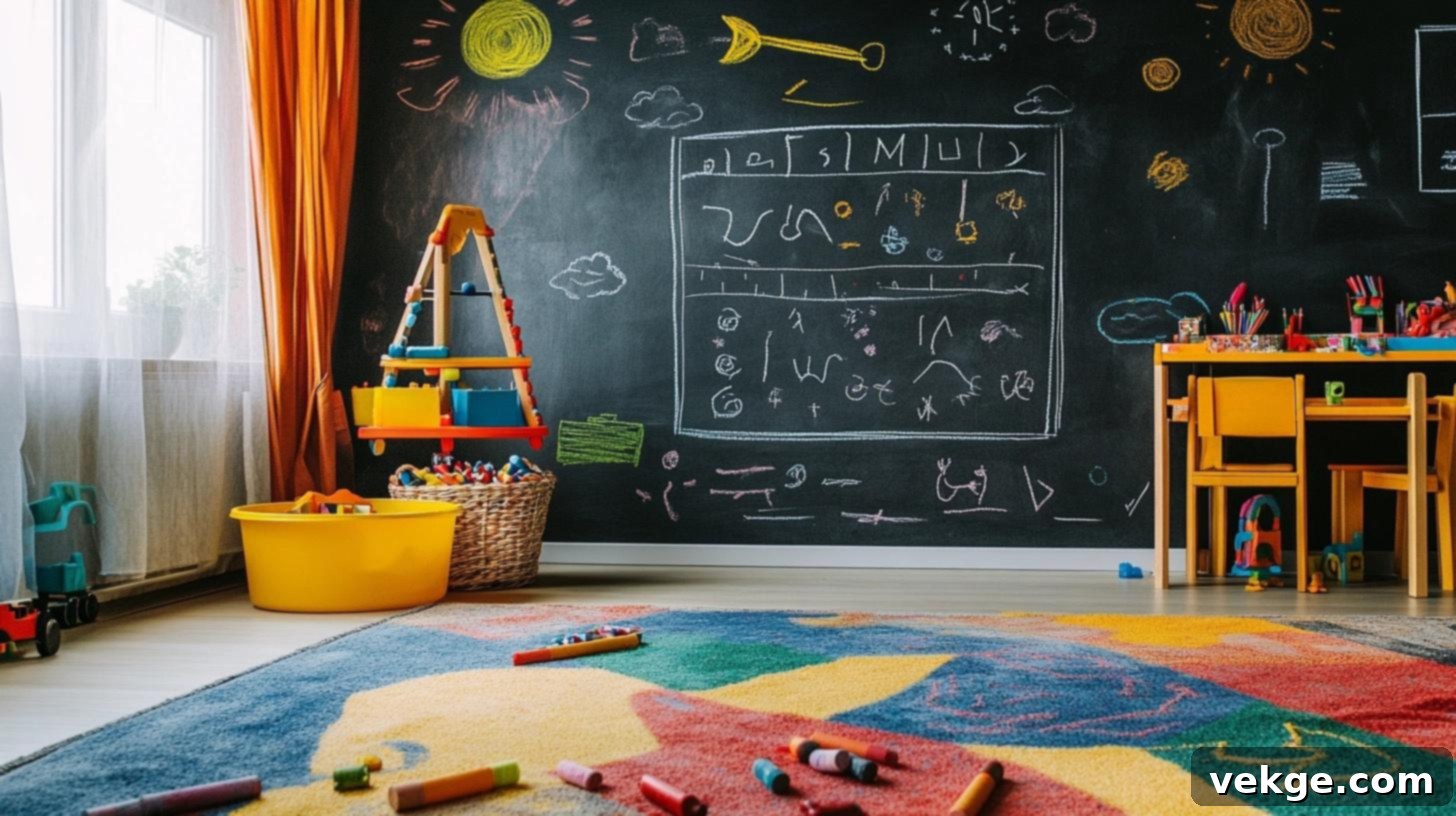
Transform a section of any wall into a giant, reusable canvas with chalkboard paint. This simple addition encourages boundless artistic expression, drawing, and even practicing letters and numbers. It’s an interactive feature that grows with your child, providing endless hours of creative fun.
Setup Tips:
- Ensure the wall surface is clean, dry, and smooth before painting.
- Apply 2-3 thin, even coats of chalkboard paint for best coverage and durability.
- Allow adequate drying time (at least 24 hours) between coats and before use.
- “Season” the entire surface by rubbing the side of a chalk stick over it, then wiping clean.
Key Features:
- Highly cost-effective, typically under $20 for a can of paint.
- Incredibly easy to clean with just a damp cloth, making messes minimal.
- Promotes fine motor skills, creativity, and early literacy/numeracy.
- Adaptable to any room size, from a small accent wall to a large feature wall.
- Longevity: A well-maintained chalkboard wall lasts for years, offering consistent value.
2. Cozy Floor Cushions: Versatile Comfort
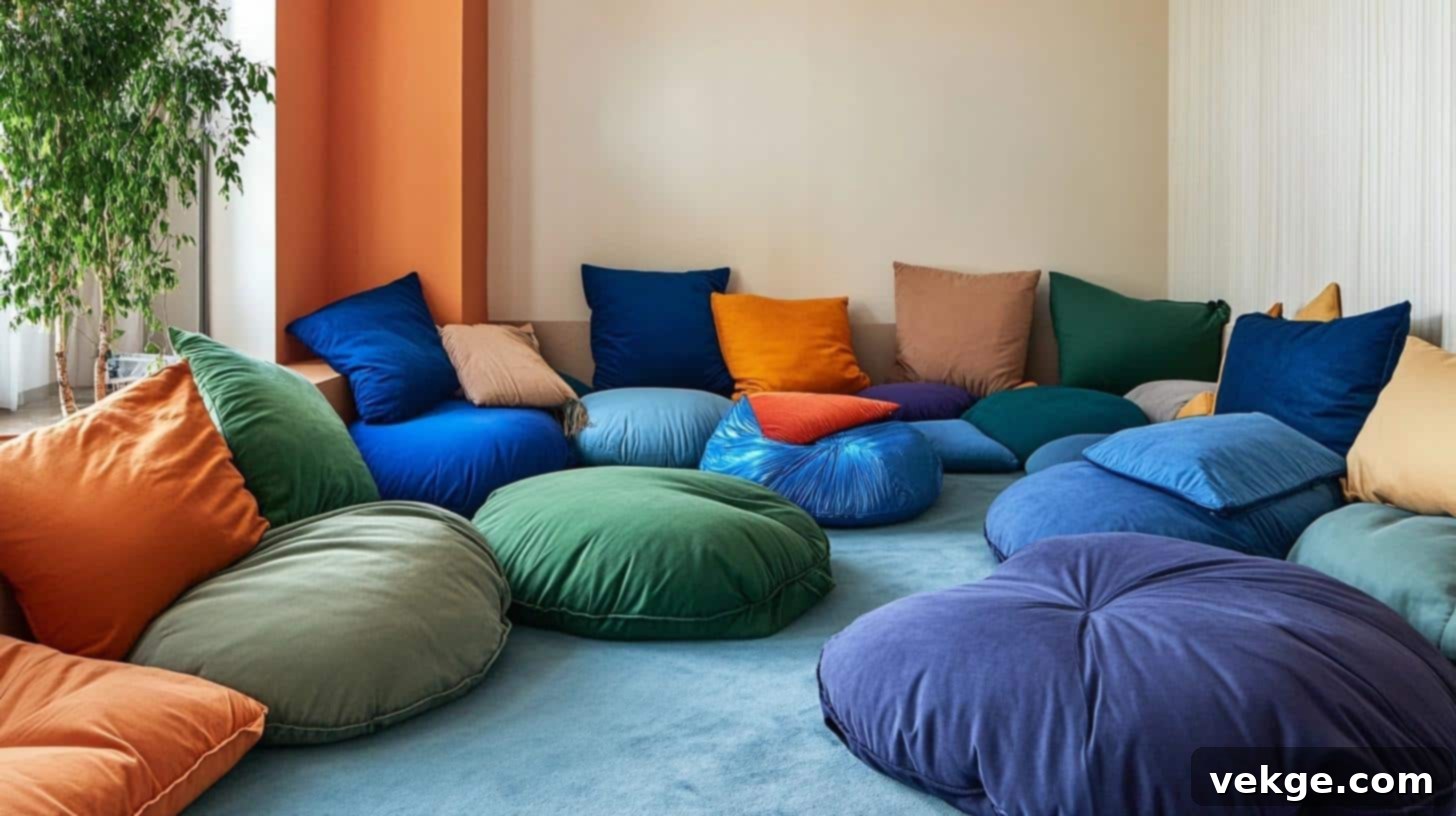
Create inviting, comfortable seating using large floor cushions covered in vibrant, washable fabrics. These are perfect for reading, engaging in board games, or simply relaxing. Their stackable nature makes them ideal for small spaces, easily stored away when not in use.
Setup Tips:
- Utilize dense foam padding or repurposed old pillows for filling to ensure durability.
- Select tough, durable, and easily washable fabric covers to withstand daily play.
- Consider making cushions in various sizes and shapes to add visual interest and flexibility.
- Add simple fabric handles for easy transport and rearrangement by kids.
Key Features:
- Low maintenance: Covers can be removed and washed effortlessly.
- High flexibility: Easily moved and reconfigured for different activities.
- Space-saving: Can be stacked or tucked into corners when not actively used.
- Kid-friendly: Offers a soft, safe, and comfortable spot for floor-level play.
- Cost-saving: Can be made from upcycled materials or discount store foam/fabric.
3. DIY Play Tent: A Private Retreat
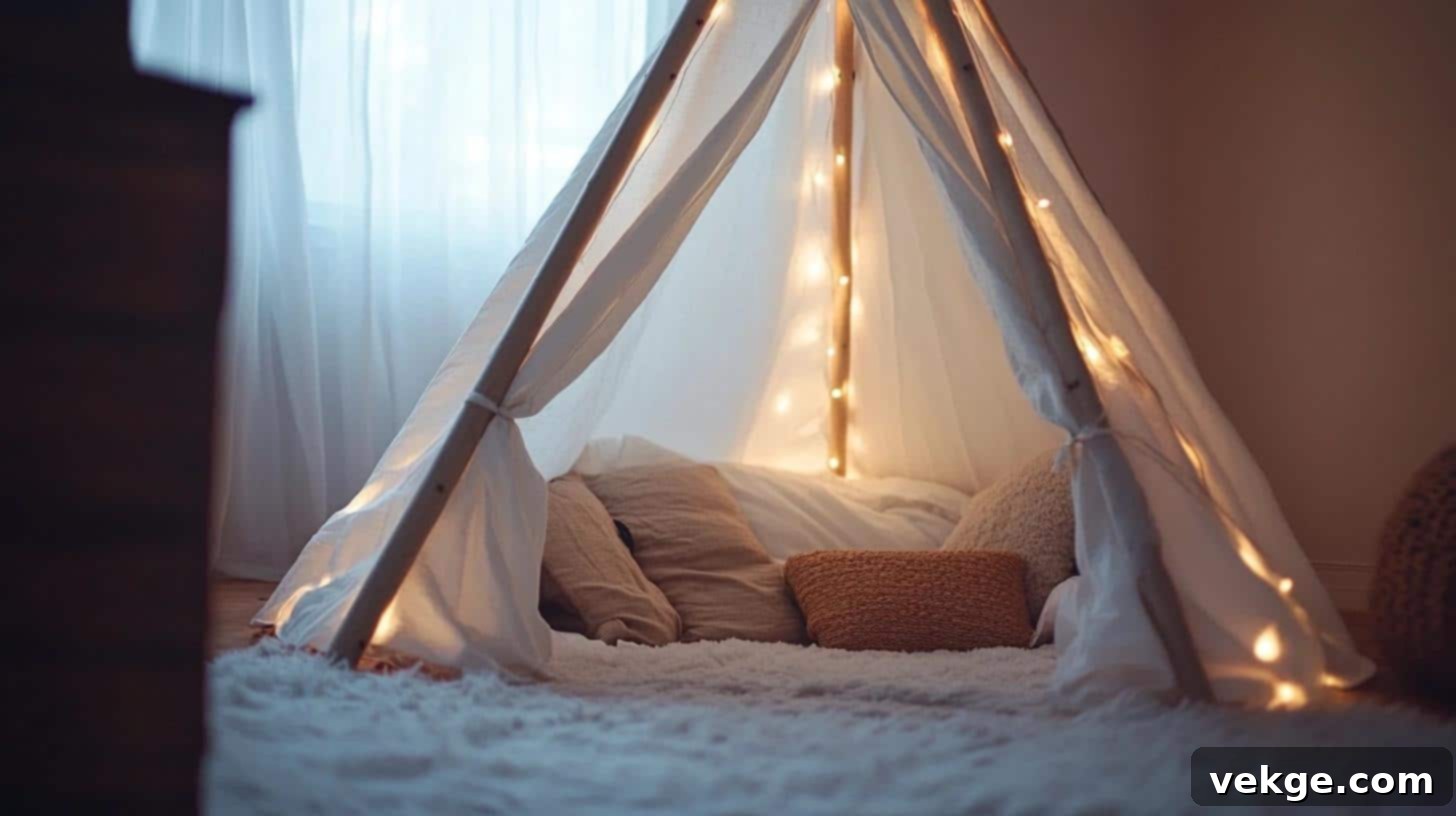
Construct a charming and cozy play tent using readily available materials like PVC pipes or bamboo sticks and an old bedsheet or cotton fabric. This personal hideaway provides a special spot for imaginative play, quiet reading, or just a moment of calm. It’s a fantastic project that can be customized to match any playroom theme.
Setup Tips:
- Cut PVC pipes or bamboo sticks to a suitable height for the tent frame.
- Secure all joints firmly with connectors or strong rope to ensure stability.
- Choose a light, breathable, and safe fabric for the cover (e.g., cotton sheets).
- Add a soft blanket or small mat inside for enhanced comfort and warmth.
Key Features:
- Portable: Easy to move to different rooms or even outdoors.
- Space-efficient: Can be disassembled for storage if space is limited.
- Washable: Fabric covers can be easily cleaned, maintaining hygiene.
- Quick assembly: Most DIY tent designs are simple to put together.
- Cost-effective: Materials often total under $30, far less than store-bought options.
4. Interactive Magnet Wall: Learning Through Play
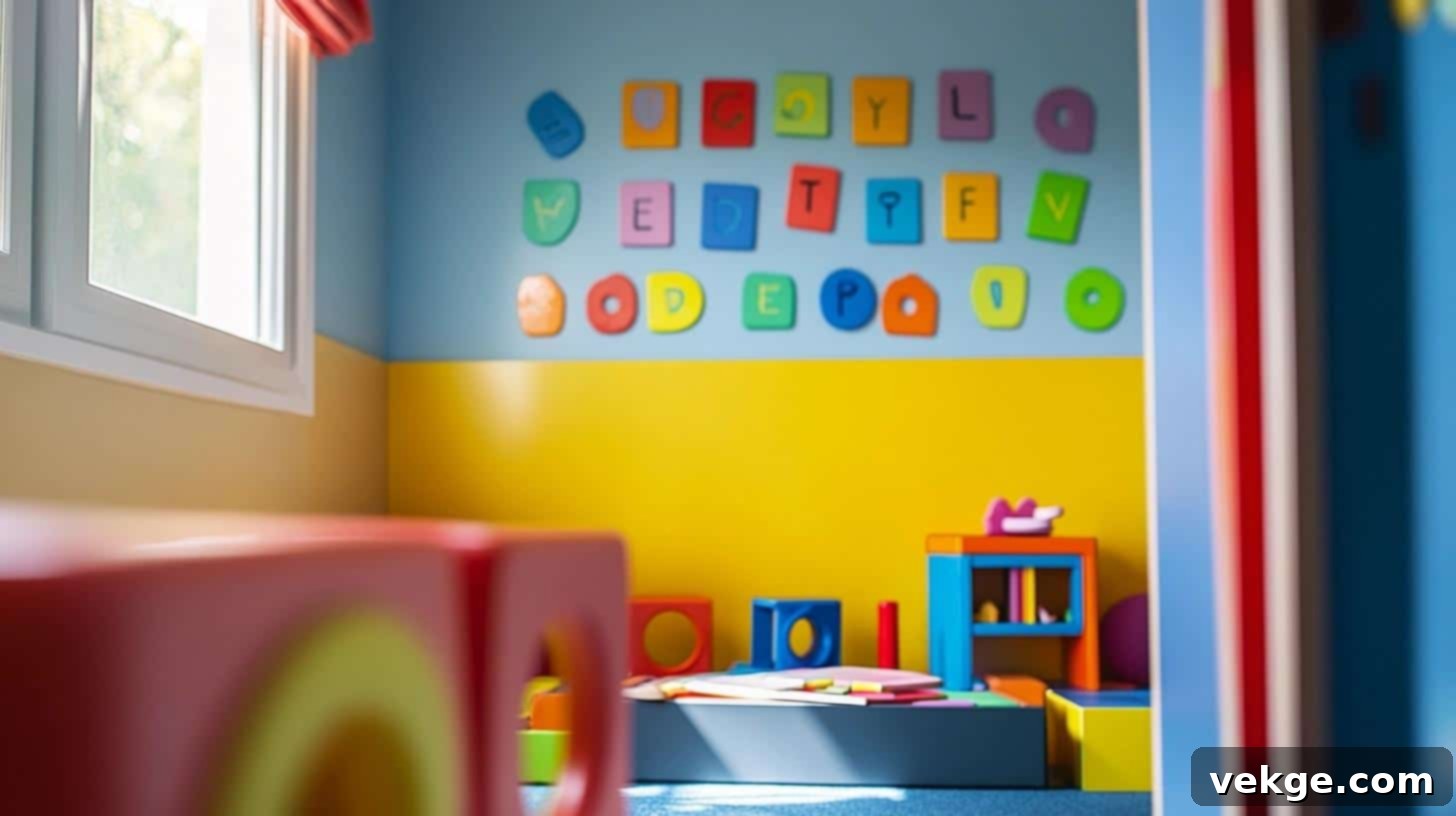
Install a metal sheet or use magnetic paint on a wall section to create an interactive learning and play surface. Kids can explore with magnetic letters, numbers, shapes, and puzzles, making learning tactile and fun. It’s an engaging way to introduce educational concepts and encourages fine motor skill development.
Setup Tips:
- Secure the metal sheet firmly to the wall using screws or strong adhesive.
- Ensure all sharp edges are rounded or covered with trim for safety.
- Paint the metal sheet to complement your room’s decor, or leave it industrial-chic.
- Always test the strength of your magnets to ensure they hold securely.
Key Features:
- Educational: Promotes early learning in a hands-on, playful manner.
- Dynamic: Easily updated with new magnetic sets to keep interest high.
- Tidy: All pieces stick to the wall, minimizing floor clutter.
- Versatile: Supports multiple activities from spelling to shape recognition.
- Budget-friendly: Sheet metal from hardware stores can be surprisingly affordable ($15-20).
5. Indoor Swing: Active Fun Indoors
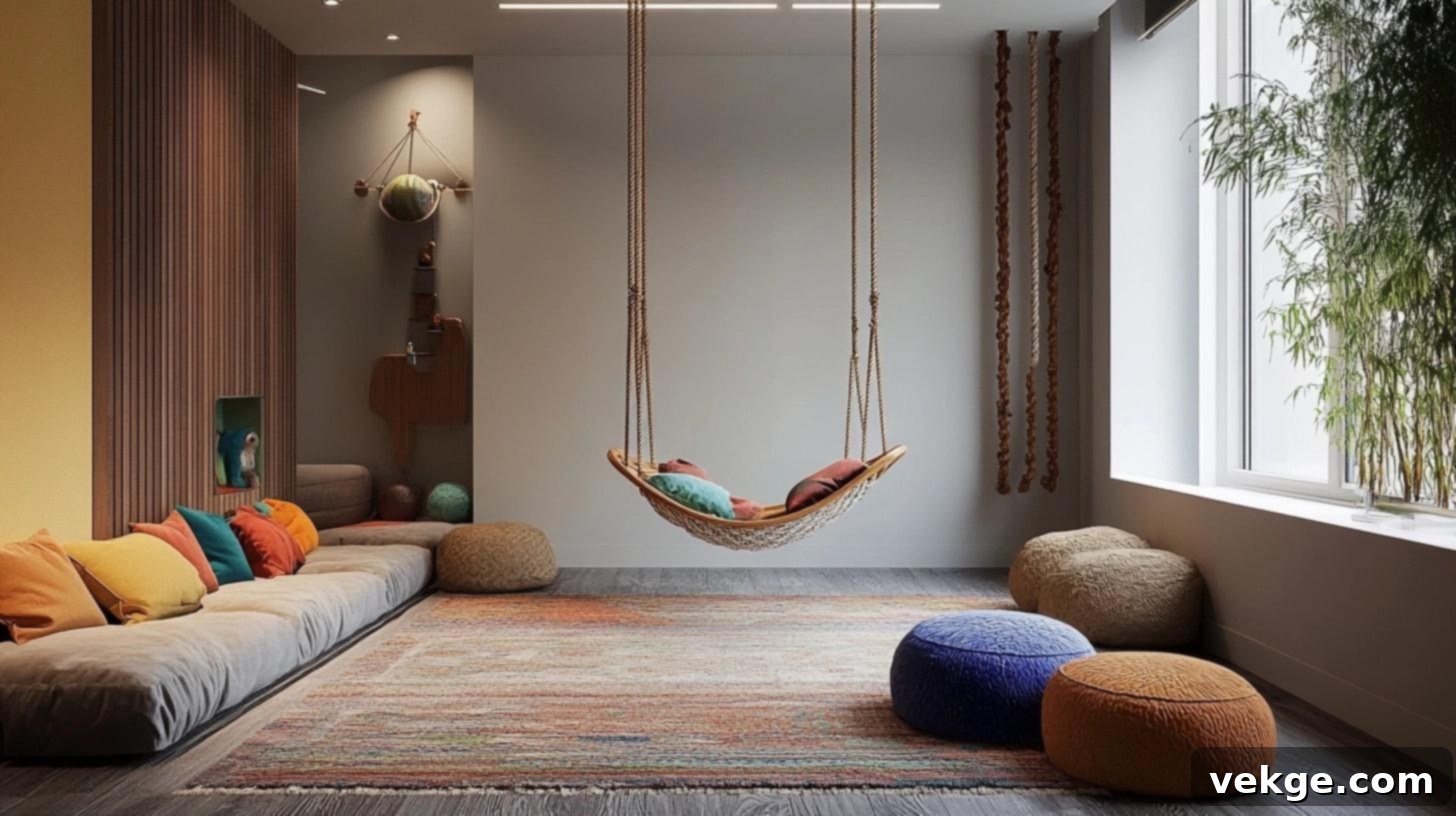
Introduce an element of active play with a simple indoor rope swing or fabric seat. Swings provide excellent sensory input, help with balance, and offer a fantastic energy release, especially on rainy days. Ensure proper installation and safety checks are paramount.
Setup Tips:
- Crucially, locate sturdy ceiling joists for secure installation of hardware.
- Use high-quality, weight-rated hardware specifically designed for swings.
- Thoroughly test the weight capacity before allowing children to use it.
- Place a soft mat or rug underneath the swing for added safety during play.
Key Features:
- Promotes physical activity and gross motor skills indoors.
- Requires minimal floor space, making it suitable for many rooms.
- Adjustable height allows it to grow with your child.
- Provides a fun and safe way for kids to expend energy.
- Affordable: Basic rope swing sets can start around $25.
6. Creative Storage Bins: Organized Play
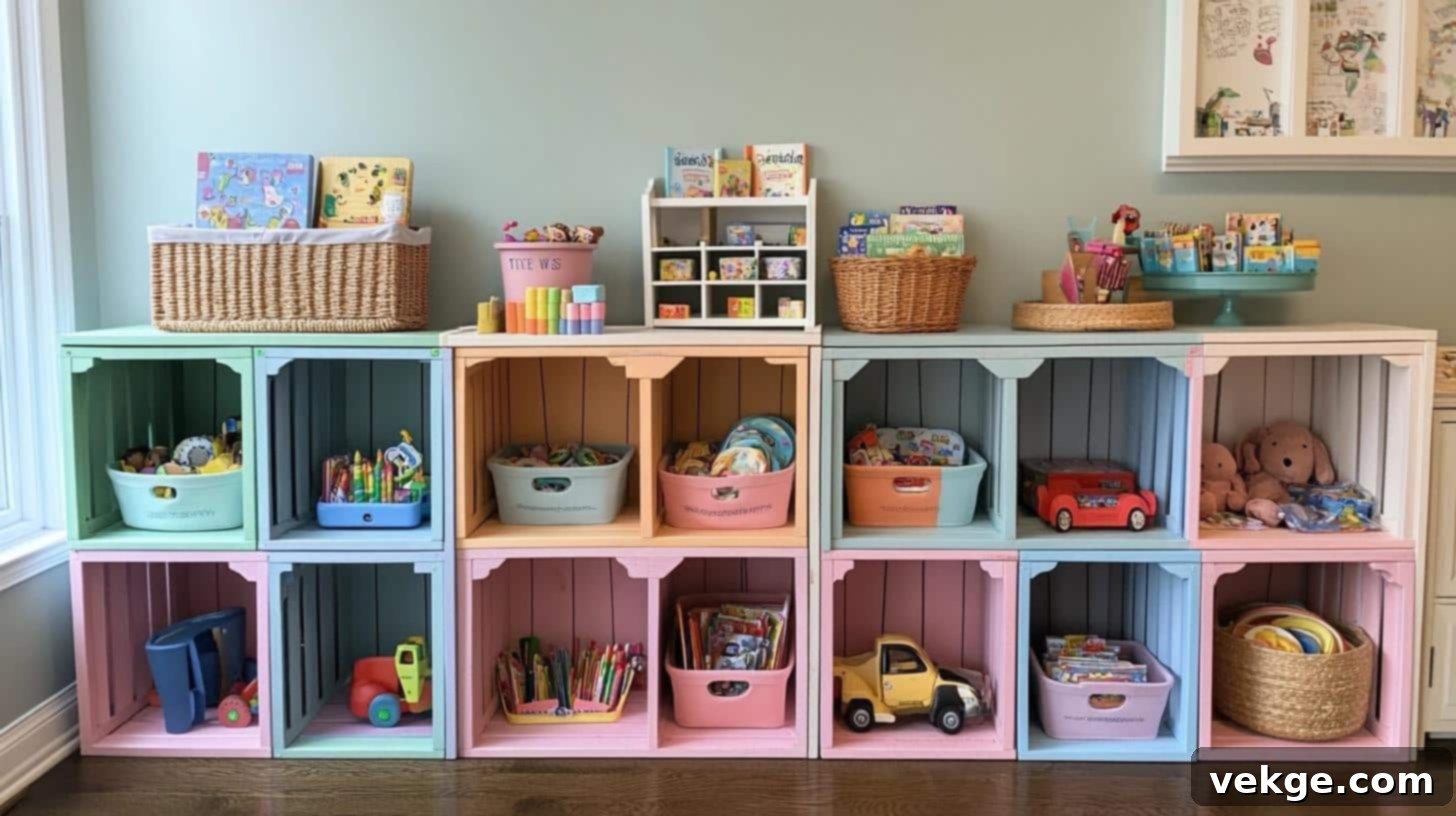
Repurpose old wooden crates or sturdy cardboard boxes into charming and functional toy storage bins. Paint them in bright colors, decorate with stencils, or leave them natural for a rustic look. These versatile bins can be stacked, fitted with wheels for mobility, or even mounted on walls to create dynamic storage solutions. Clear labels encourage children to participate in cleanup.
Setup Tips:
- Sand any rough edges on wooden boxes to prevent splinters.
- Use child-safe, non-toxic paints if you choose to decorate them.
- Install small, sturdy wheels if you want mobile storage.
- Create clear, picture-based labels to help younger children identify contents.
Key Features:
- Enhances organization, making cleanup simpler and more intuitive for kids.
- Designed for kid-height access, empowering children to get and put away their toys independently.
- Highly movable, allowing for flexible playroom layouts.
- Cost-saving: Often free (repurposed boxes) or very low-cost, needing only paint or decorations.
- Customizable: Can be decorated to match any playroom theme or color scheme.
7. Children’s Art Display: Showcase Masterpieces
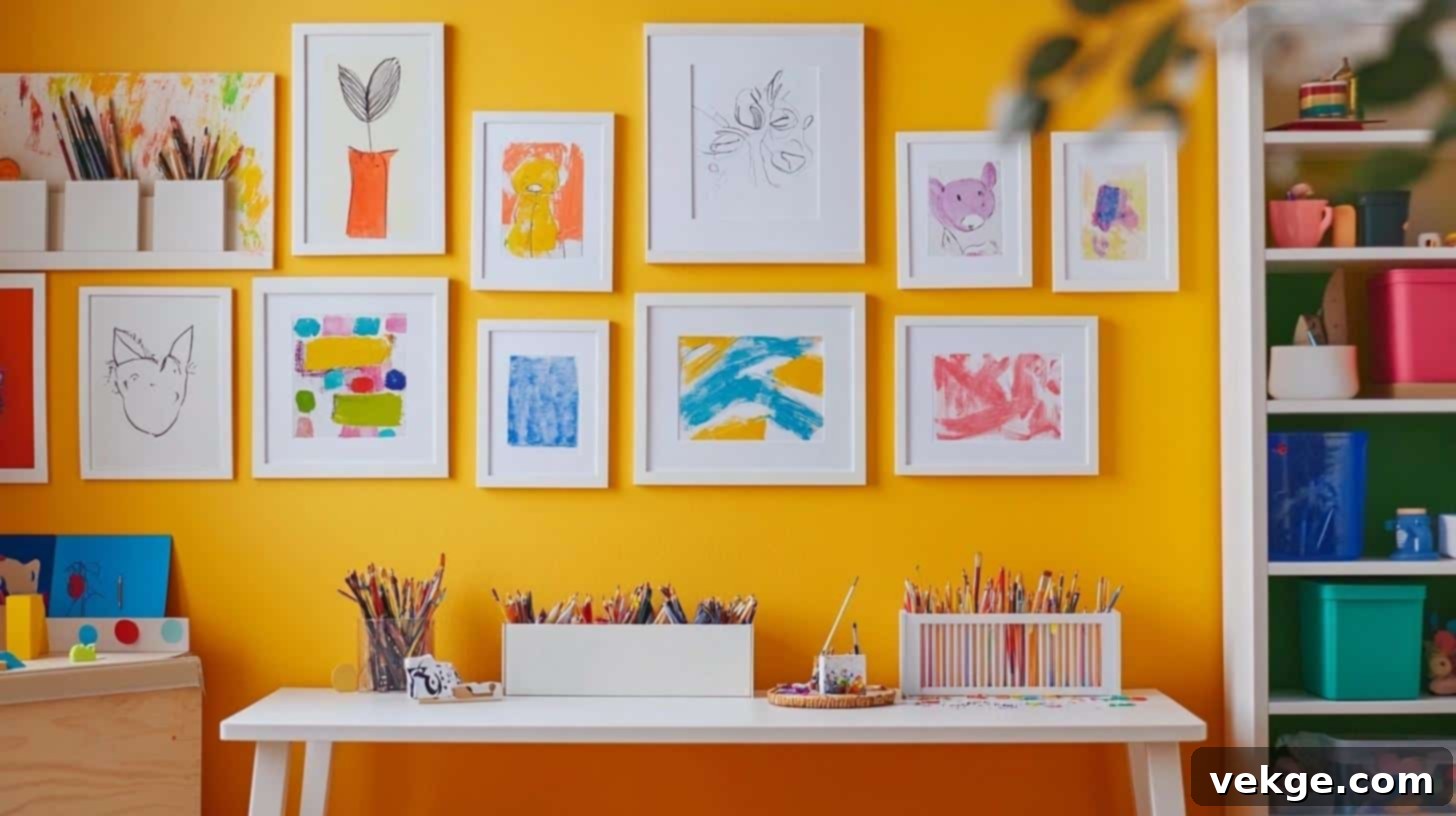
Celebrate your children’s artistic talents by creating a dedicated art display area. Simple frames, a length of string with clothespins, or a magnetic board can elegantly showcase their latest masterpieces. Regularly rotating the artwork keeps the display fresh and exciting, encouraging continued creativity.
Setup Tips:
- Use lightweight frames for easy hanging and safety.
- Install the display at child height so they can admire their work.
- Utilize easy-change clips or magnets for effortless swapping of artwork.
- Ensure items are hung in straight lines or a pleasing pattern for a tidy look.
Key Features:
- Adds a unique, personal touch to the playroom decor.
- Simple to update, keeping the space dynamic and engaging.
- Extremely budget-friendly: Frames from dollar stores or twine and clips cost under $10.
- Promotes a clean aesthetic by keeping artwork off other surfaces.
- Boosts children’s self-esteem and encourages their artistic endeavors.
8. Sensory Touch Wall: Tactile Exploration
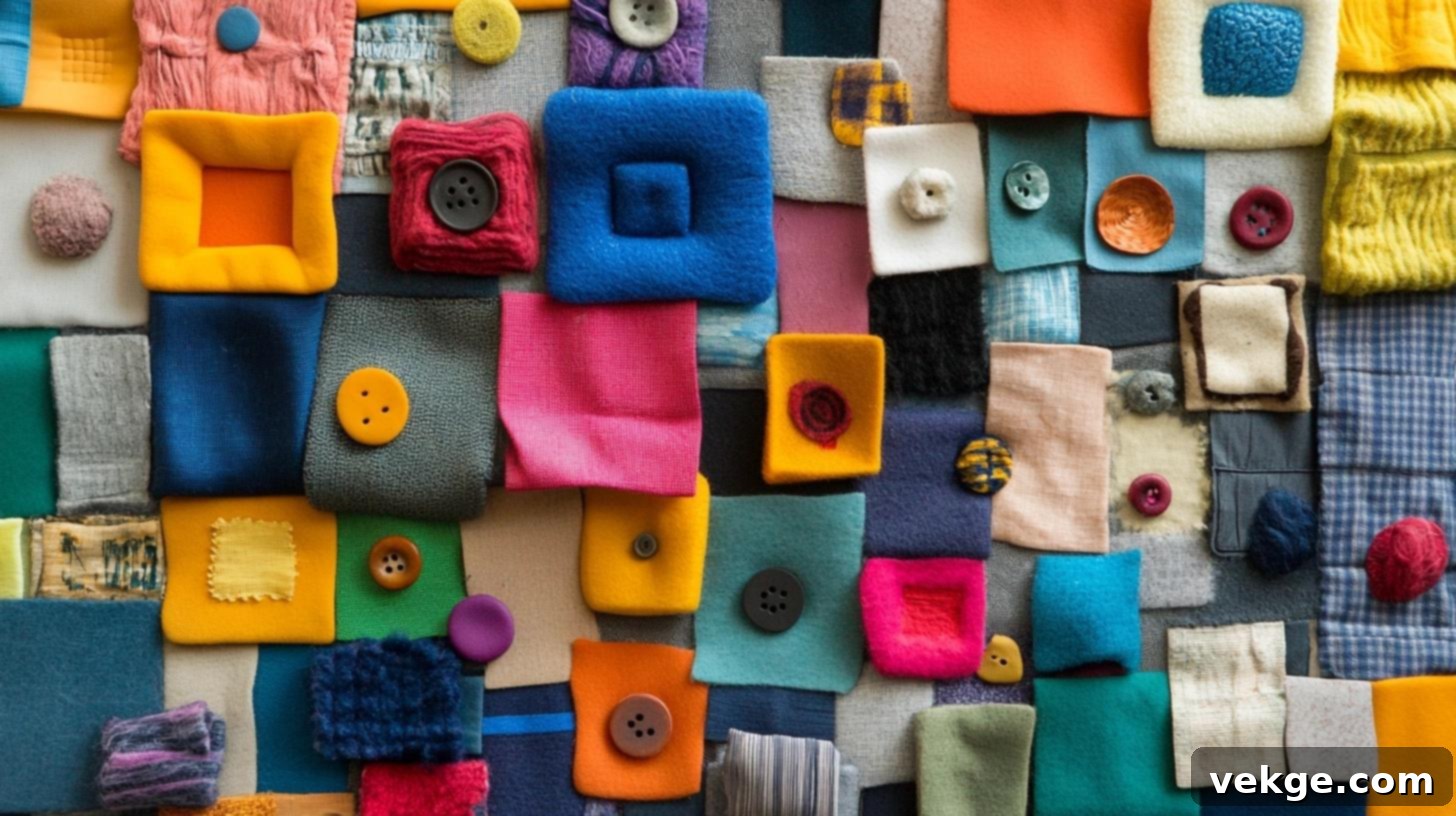
Design a sensory touch wall by attaching various safe materials with different textures to a wall panel. Include elements like soft fabric swatches, smooth plastic, bumpy surfaces, or rough sandpaper. This engaging feature offers rich tactile exploration, promoting sensory development in a contained and safe manner.
Setup Tips:
- Thoroughly test all attachments to ensure items are firmly secured and won’t detach.
- Incorporate a wide range of textures for a comprehensive sensory experience.
- Regularly clean the attached items to maintain hygiene.
- Perform daily checks for any loose parts or signs of wear.
Key Features:
- Stimulates sensory learning and fine motor skills.
- Utilizes safe, non-toxic materials suitable for children.
- Easy to clean and maintain, ensuring a hygienic play environment.
- Offers long-lasting fun and developmental benefits.
- Cost-saving: Many materials can be sourced from home or thrift stores.
9. DIY Puppet Stage: Theatrical Adventures
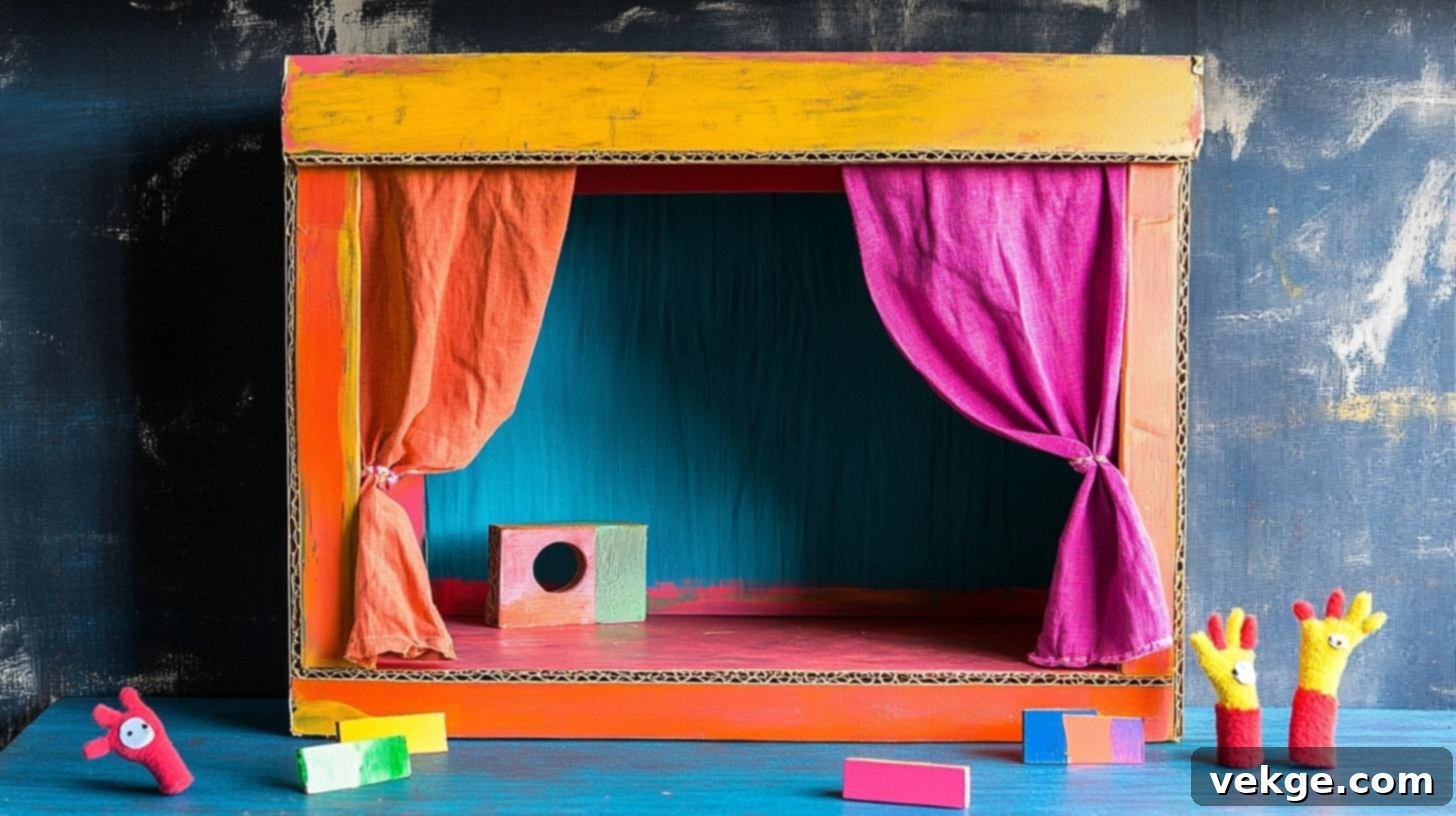
Ignite imaginative play with a simple puppet stage crafted from a large cardboard box or by hanging curtains between two points. Add fabric for curtains and basic decorations to set the scene. A DIY puppet stage encourages storytelling, role-playing, and vocal expression, providing hours of creative entertainment.
Setup Tips:
- Cut a viewing window at child height for performances.
- Install a lightweight curtain rod or string for fabric curtains.
- Ensure the base is stable to prevent tipping during enthusiastic play.
- Decorate the exterior with paint or paper to enhance the theme.
Key Features:
- Minimal footprint: Can be set up in small areas.
- Collapsible design: Easy to store away when not in use.
- Simple to set up, encouraging spontaneous performances.
- Powerfully sparks pretend play and narrative skills.
- Cost-saving: Made from free cardboard boxes and scrap fabric, costing virtually nothing.
10. Mini Indoor Climb: Building Strength
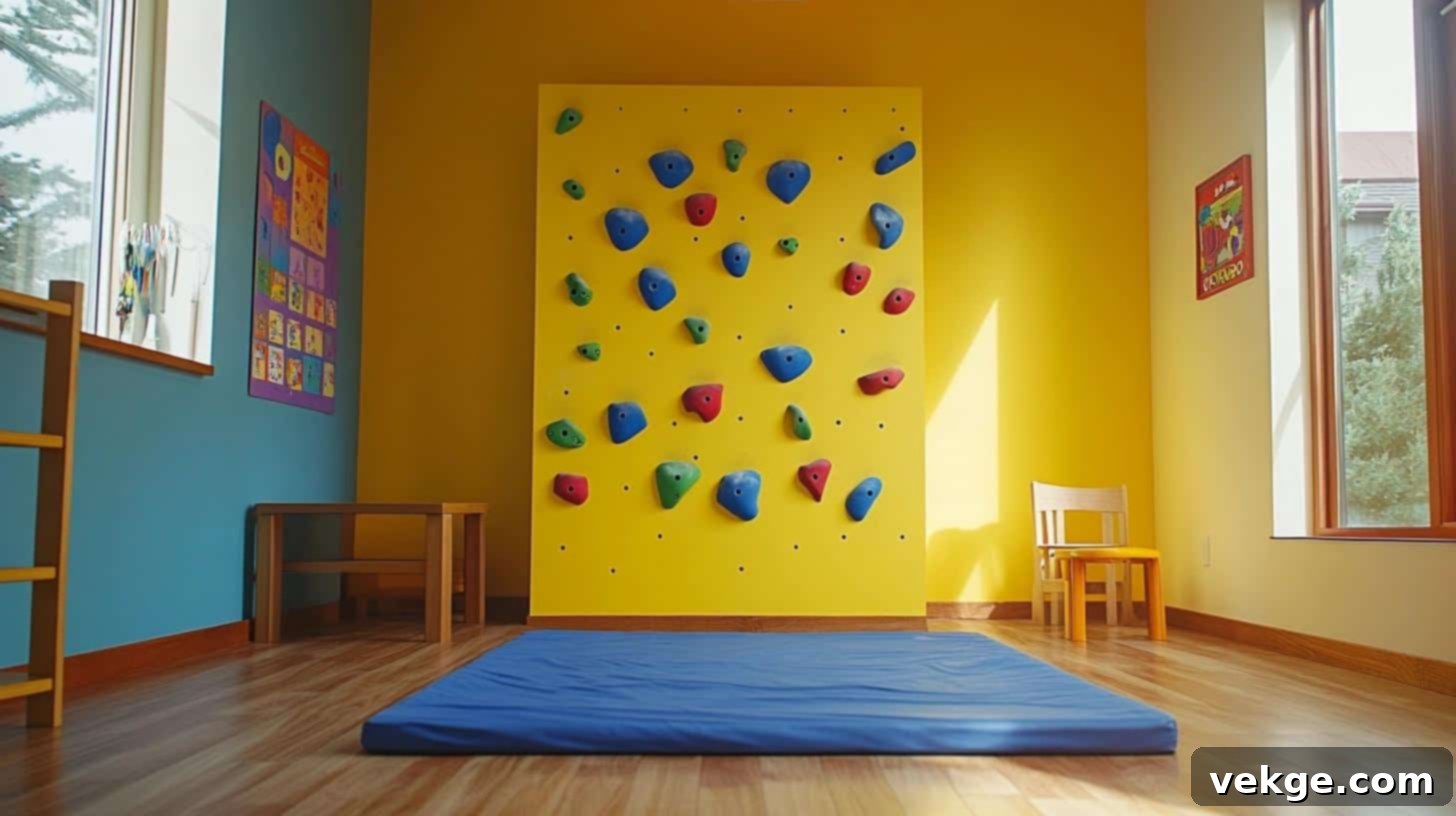
For active kids, a small indoor climbing area can be a fantastic addition. Install a few basic climbing holds on a sturdy wall section, ensuring proper safety mats are placed below. Keep the climbing height appropriate for young children to ensure safety while promoting physical activity, coordination, and strength.
Setup Tips:
- Always find and secure holds into wall studs for maximum safety and stability.
- Place thick safety mats directly below the climbing area to cushion falls.
- Regularly check climbing holds for any looseness or damage.
- Establish clear rules for usage to prevent accidents.
Key Features:
- Encourages physical activity, gross motor skills, and problem-solving.
- Can be implemented in a relatively small wall space.
- Requires only basic equipment (climbing holds, safety mats).
- Provides a safe and controlled environment for physical challenge.
- Cost-saving: Basic climbing hold sets start around $30, offering good value.
11. Play Mat Roads: Mini City Adventures
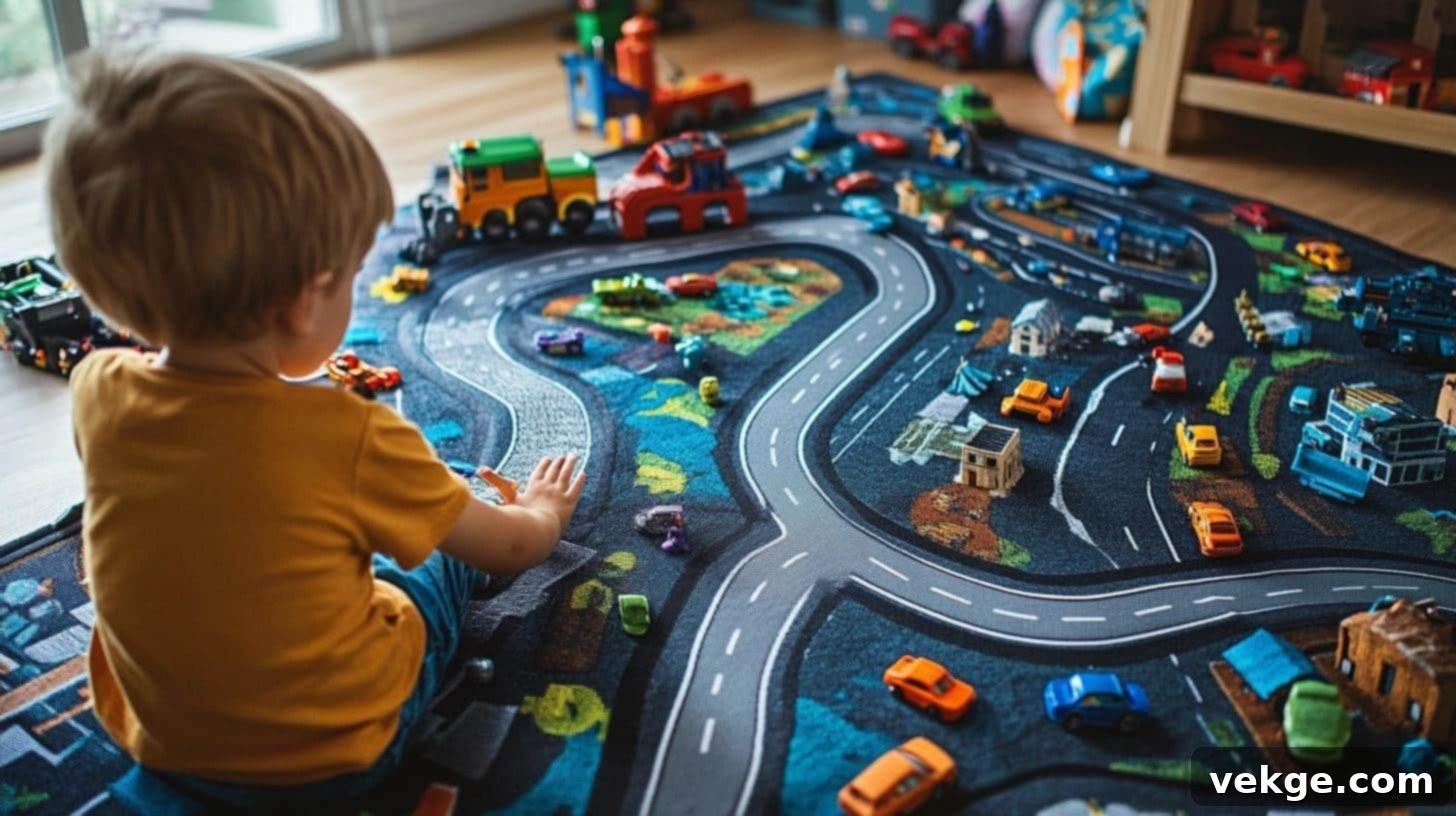
Transform your floor into an bustling miniature city with a play mat featuring printed roads. You can either purchase an affordable pre-printed mat or unleash your creativity by painting your own design onto a plain rug or canvas. Augment the experience with small buildings, trees, or traffic signs made from blocks or recycled materials, inviting endless imaginative car and town play.
Setup Tips:
- Choose a mat with a non-slip backing to prevent accidents during enthusiastic play.
- Add various town markers like a hospital, fire station, or park to enrich play scenarios.
- Designate specific parking spots and create realistic intersections for enhanced realism.
- Consider adding felt or fabric elements that can be moved around, like cars or people.
Key Features:
- Easy to clean: Most play mats can be wiped down or machine-washed.
- Portable design: Can be rolled up and moved or stored when not in use.
- Promotes imaginative story play and social interaction.
- Multi-use surface: Provides a designated play zone while protecting floors.
- Cost-saving: Painting your own design on a plain mat can cost as little as $15.
12. Dedicated Craft Station: Artistic Hub
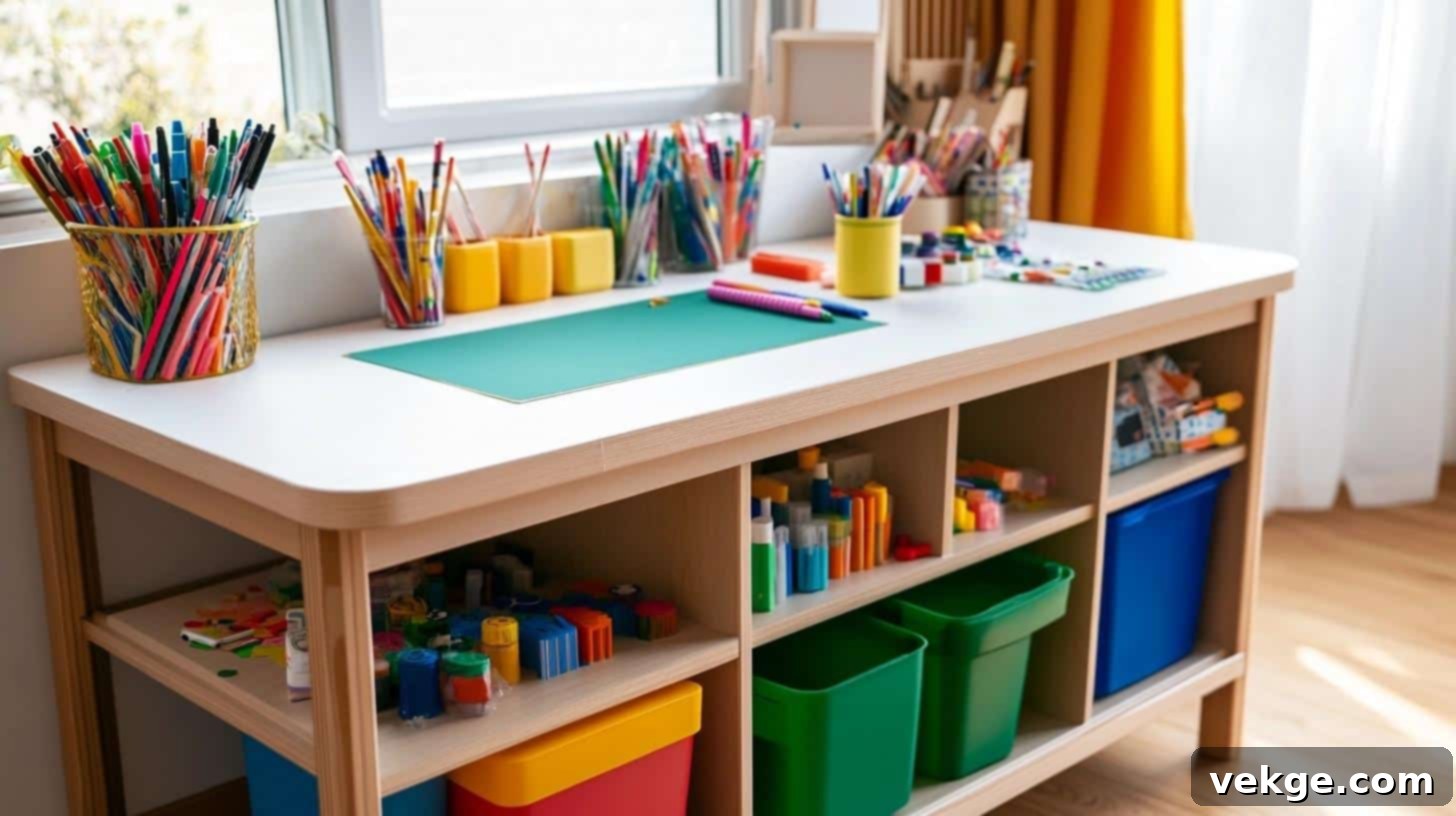
Design a simple yet functional craft station with a kid-height table and integrated storage for art supplies. A sturdy, flat surface allows for comfortable drawing, painting, and crafting. Underneath, use bins or repurposed containers to neatly organize paper, crayons, markers, and other creative materials, making them easily accessible for budding artists.
Setup Tips:
- Ensure the table height is perfectly suited for your child’s comfortable use.
- Integrate various supply holders, such as jars for pens or rolling carts.
- Choose surfaces and storage that are easy to wipe clean after creative sessions.
- Label storage spots clearly with words and pictures to aid organization.
Key Features:
- Provides a dedicated workspace for focused creative activities.
- Built-in storage keeps supplies tidy and within easy reach.
- Facilitates easy access to materials, encouraging independent crafting.
- Helps control mess by containing creative activities to one area.
- Cost-saving: Use an old table, or build one from scrap wood for a personalized touch.
13. Indoor Ball Pit Area: Bouncing Fun
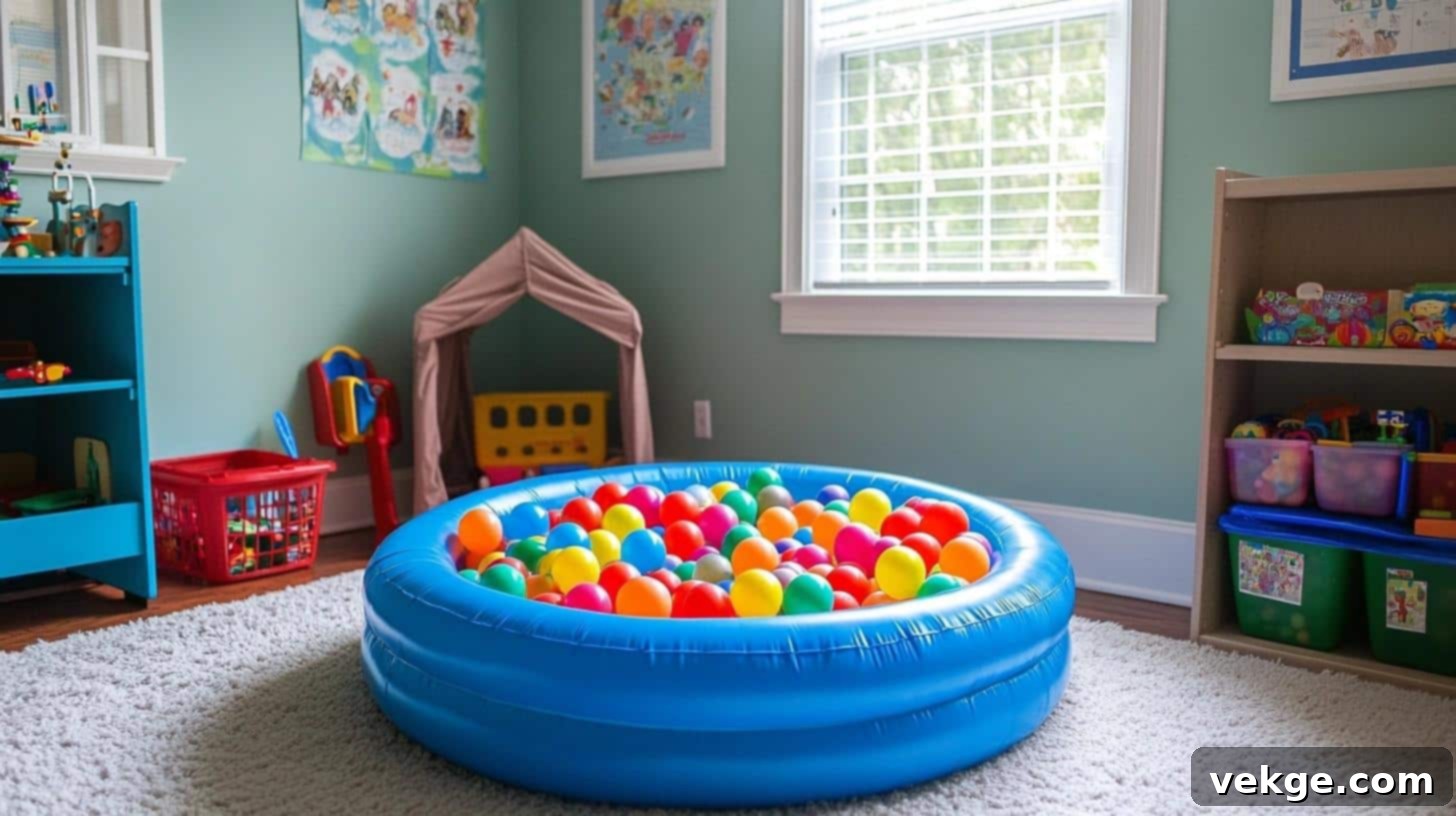
Create an exciting ball pit using a sturdy inflatable pool, a large fabric storage bin, or even a repurposed playpen. Fill it with lightweight plastic balls for a safe and stimulating play experience. Ensure the walls are high enough to contain the balls during enthusiastic play but low enough for children to safely enter and exit.
Setup Tips:
- Add a soft, padded bottom layer for extra comfort and safety.
- Regularly inspect the container for any tears or damage that could compromise safety.
- Periodically count the balls to ensure none are missing or pose a choking hazard.
- Establish clear play rules to ensure a safe and enjoyable experience for everyone.
Key Features:
- Provides safe boundaries for energetic play.
- Simple setup allows for quick creation of a fun zone.
- Easy to clean: Balls can be periodically washed, and the container wiped down.
- Offers active play, promoting gross motor skills and sensory exploration.
- Cost-saving: Small inflatable pools can be found on sale for $10-15, and balls are relatively inexpensive.
14. Stick-On Wall Mural: Ever-Changing Scenes
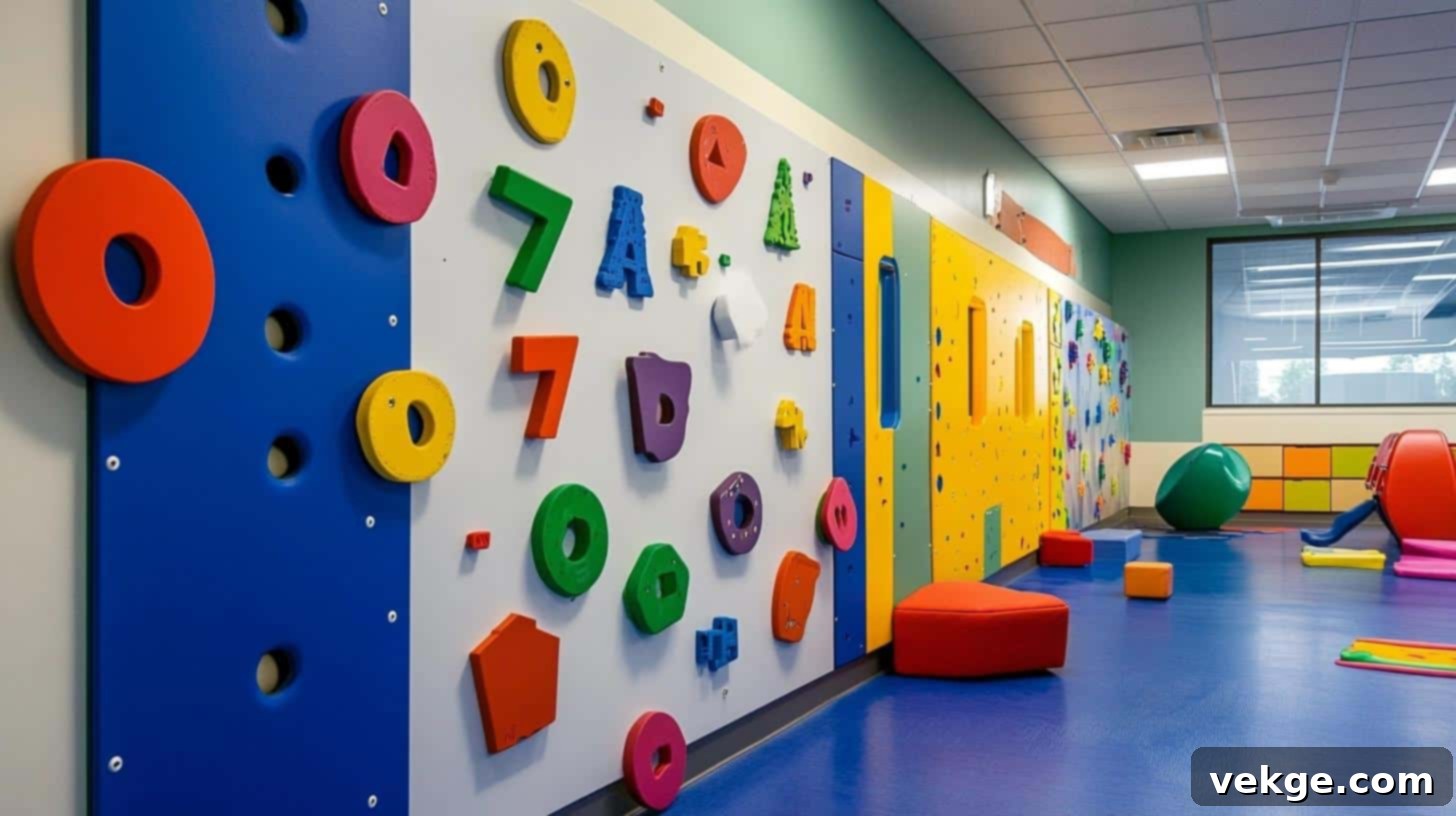
Design a dynamic play wall using hook-and-loop (Velcro) strips. Attach the loop side to a wall panel, then create various shapes, characters, or scene elements from felt or other fabrics with the hook side. This allows children to create ever-changing murals and stories, fostering creativity and fine motor skills. The versatility means you can switch themes whenever inspiration strikes.
Setup Tips:
- Clean the wall surface thoroughly before attaching the hook-and-loop strips for optimal adhesion.
- Space the strips strategically to provide ample play area.
- Create a diverse range of shapes and elements for endless play possibilities.
- Test the stick strength of both the wall strips and the felt pieces to ensure they hold well.
Key Features:
- Allows for quick and easy changes to the play scene, maintaining interest.
- Causes no damage to walls, making it ideal for rentals or temporary setups.
- Offers numerous play options, from storytelling to character design.
- Simple storage for felt pieces in a small bin or bag.
- Cost-saving: Hook-and-loop strips in bulk cost under $20, and felt is very affordable.
15. Cardboard Box Castle: Epic Imaginations
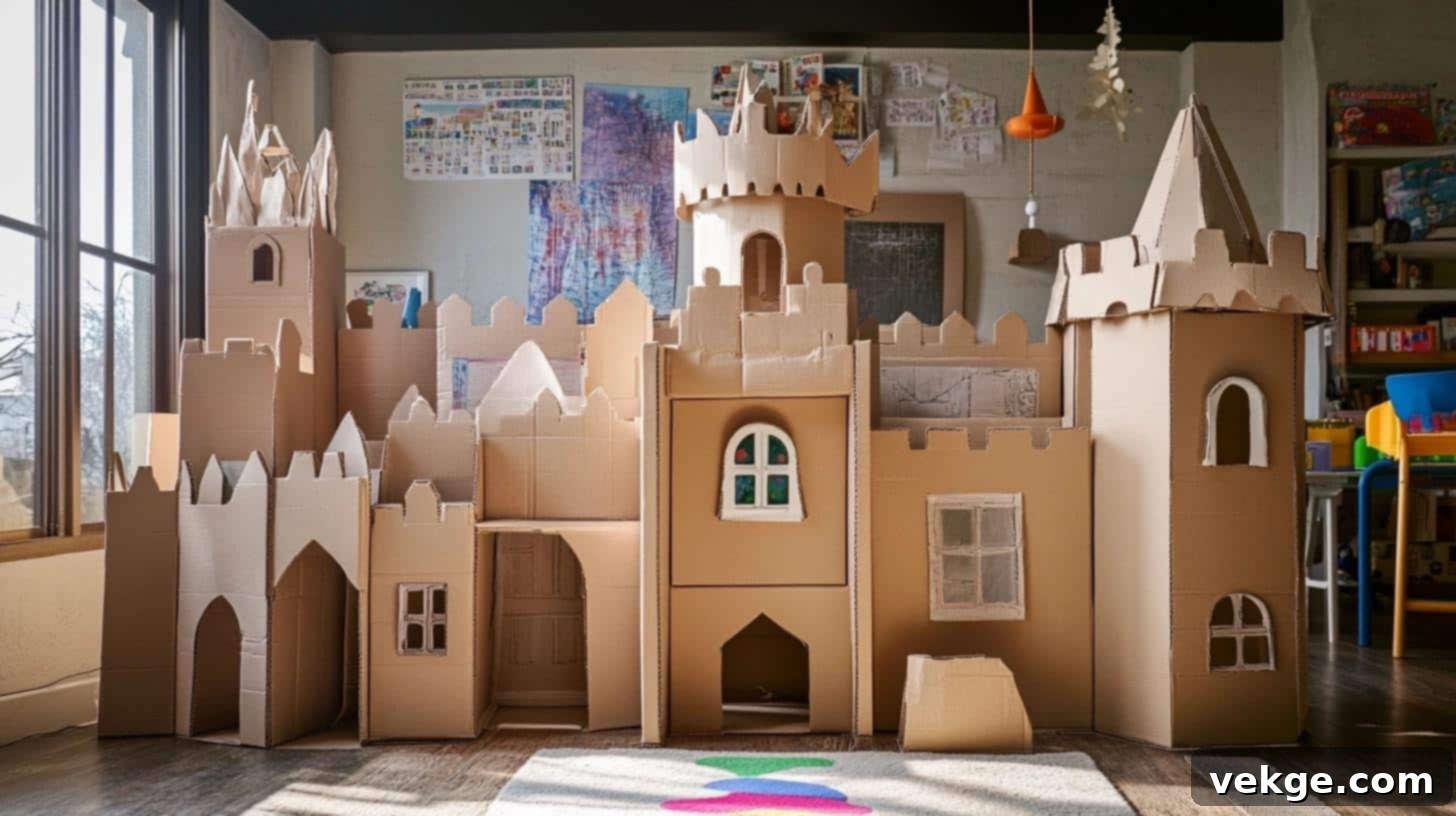
Unleash the magic of imagination by transforming large cardboard boxes into an impressive play castle, fort, or even a spaceship! Cut out windows, doors, and turrets, then let your creativity flow with paint, markers, or paper decorations. This project encourages collaborative building, imaginative role-play, and fine motor skill development, all from recycled materials.
Setup Tips:
- Secure all box joints firmly with strong tape or hot glue for structural integrity.
- Ensure all openings (windows, doors) are cut safely with rounded edges.
- Add small air holes for ventilation, especially if it’s an enclosed structure.
- Paint all sides for a finished look and added durability.
Key Features:
- Zero-cost build: Utilizes free cardboard boxes, requiring only paint and tape.
- Easy to replace: New adventures can be built as quickly as old ones are outgrown.
- Flexible size options: Can be expanded or shrunk based on available space.
- Safe materials: Cardboard is generally safe and non-toxic.
- Promotes collaboration, creativity, and imaginative role-playing.
16. Dedicated Costume Corner: Dress-Up Dreams
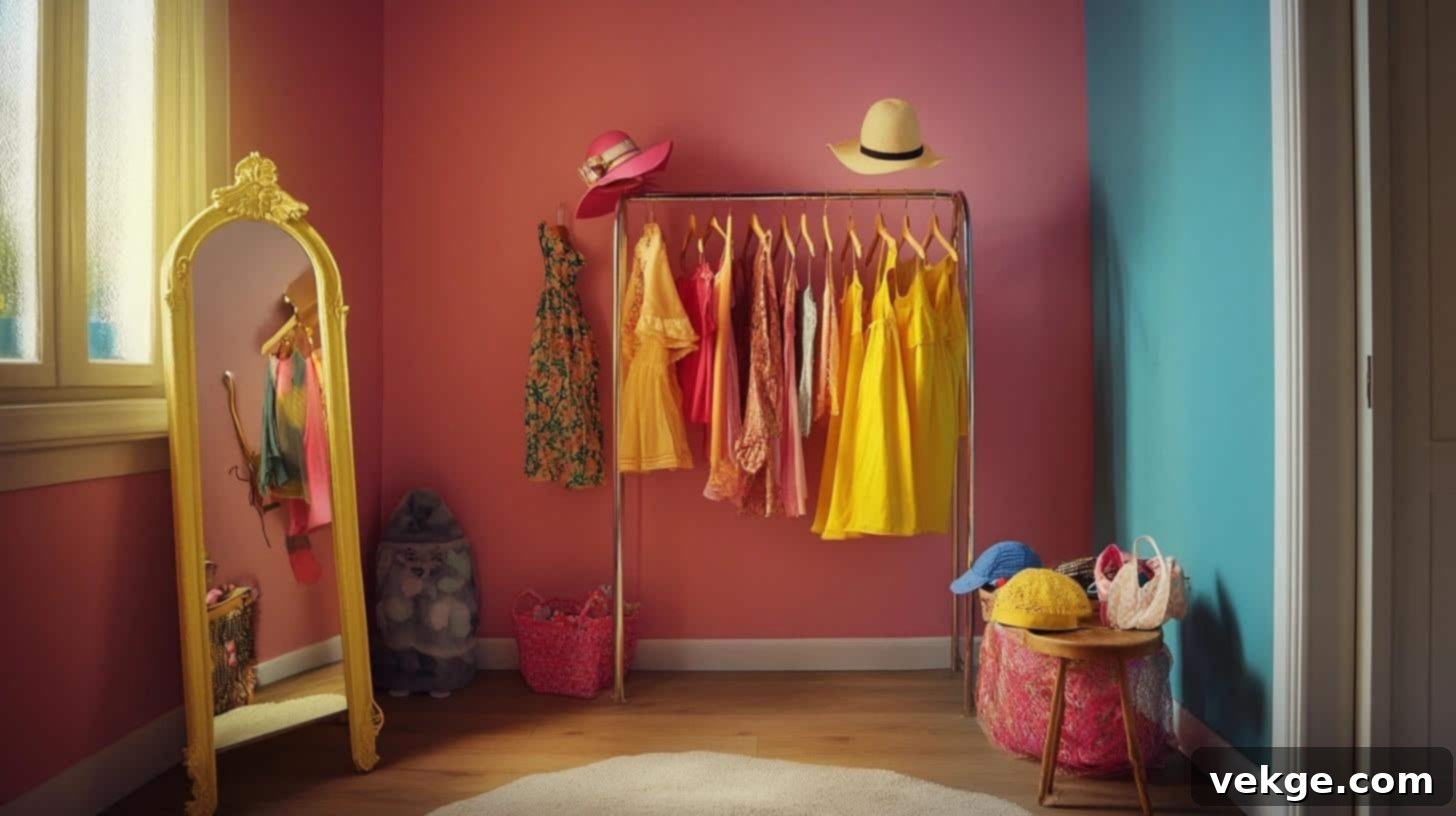
Designate a special corner for dress-up clothes and accessories. Install a low hanging rod or a series of hooks for costumes, making them easily accessible for children. Add a safe, unbreakable mirror at kid height to allow them to admire their transformations. This simple setup encourages imaginative role-play, social development, and self-expression.
Setup Tips:
- Install strong, child-safe hooks or a low rod that can support the weight of costumes.
- Sort clothes by type (e.g., capes, hats, accessories) for easy selection.
- Ensure the mirror is shatterproof or securely mounted to prevent accidents.
- Keep an inventory of items to easily spot what’s missing or needs replacing.
Key Features:
- Easy reach: Costumes are always at hand for spontaneous play.
- Simple setup: Minimal effort required to create this engaging zone.
- Quick cleanup: Encourages children to hang up costumes after use.
- Safe mirror: Allows kids to see themselves without risk.
- Cost-saving: Source second-hand clothes and basic hooks for an affordable setup.
17. Cozy Book Nook: A Reading Retreat
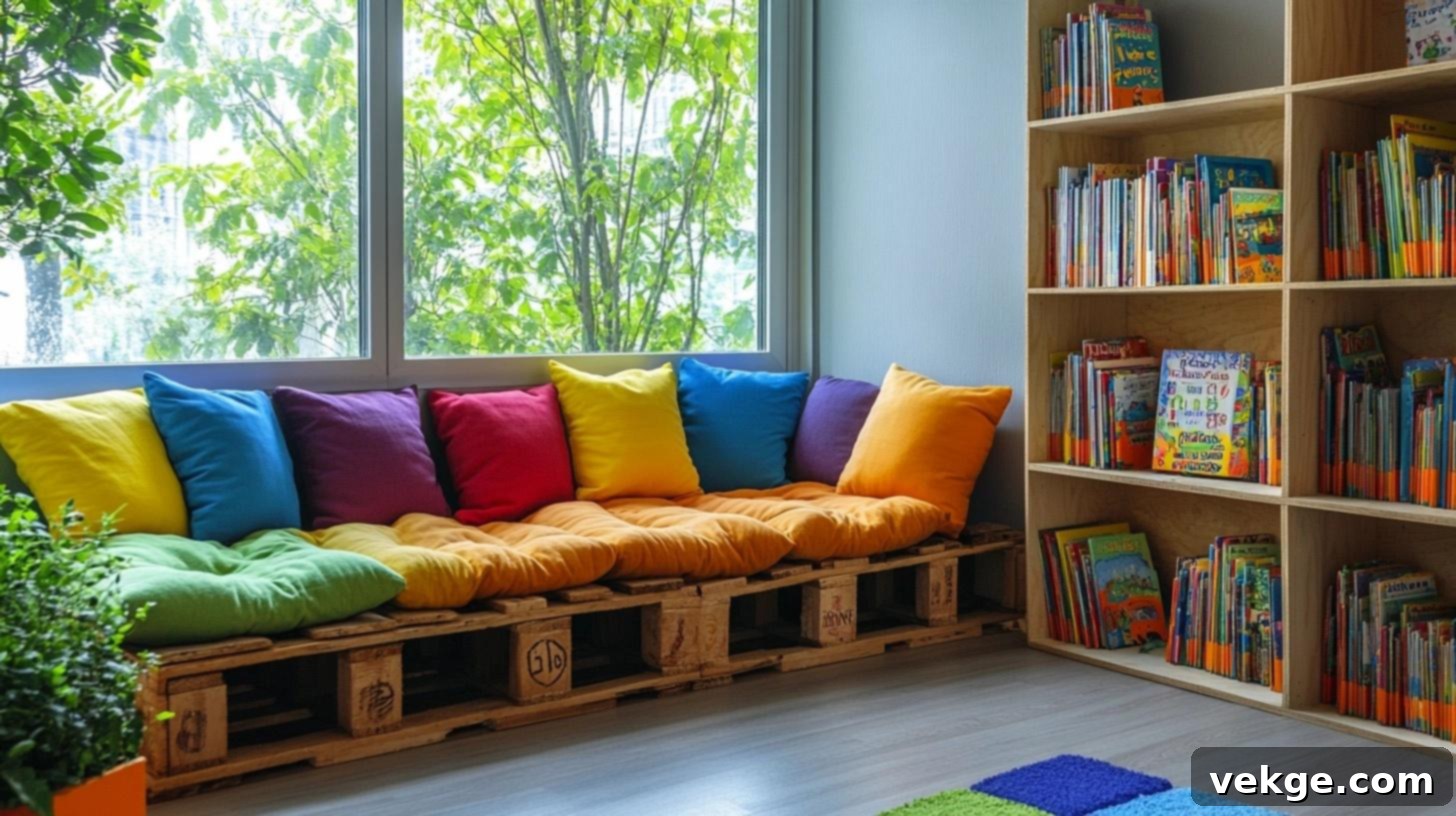
Cultivate a love for reading by creating a cozy and inviting book space. Use soft floor pads, oversized pillows, and comfortable blankets to define this quiet zone. Install low, forward-facing shelves to display books, making covers visible and enticing. Ensure good lighting with a child-safe lamp or string lights to create an atmosphere conducive to reading.
Setup Tips:
- Arrange soft seating (pillows, bean bags) to maximize comfort.
- Install low, accessible book shelves or fabric slings to display books attractively.
- Ensure the lighting is bright enough for reading but soft and warm.
- Organize books into thematic zones (e.g., animal stories, adventure books) for easy selection.
Key Features:
- Provides comfortable seating, encouraging long reading sessions.
- Offers organized book storage, promoting literacy and care for books.
- Ensures good lighting, preventing eye strain.
- Creates a quiet, calm zone for focused activities.
- Cost-saving: Build shelves from repurposed crates or find them at yard sales for cheap.
18. Glow-in-the-Dark Stars: Celestial Dreams

Transform the playroom ceiling into a magical night sky with glow-in-the-dark stars. Arrange them in constellations, sprinkle them randomly, or create unique patterns. This simple addition provides a calming ambiance at night, helps with fear of the dark, and sparks curiosity about the universe. Ensure they are attached with safe, reliable adhesive pads.
Setup Tips:
- Clean the ceiling surface thoroughly before attaching stars for best adhesion.
- Plan your star layout in advance for a desired effect (e.g., constellations, random spread).
- Test the adhesive power of the sticky pads to ensure stars stay up safely.
- Consider adding a few larger glow-in-the-dark elements like planets or a moon for extra impact.
Key Features:
- Functions as a gentle night light, providing comfort in the dark.
- Extremely easy and quick to install, requiring no special tools.
- Offers a long-lasting glow after exposure to light, providing consistent magic.
- Uses safe, non-toxic materials suitable for children’s rooms.
- Cost-saving: A basic pack of glow stars costs under $10, delivering immense value.
19. DIY Indoor Play Course: Active Challenges
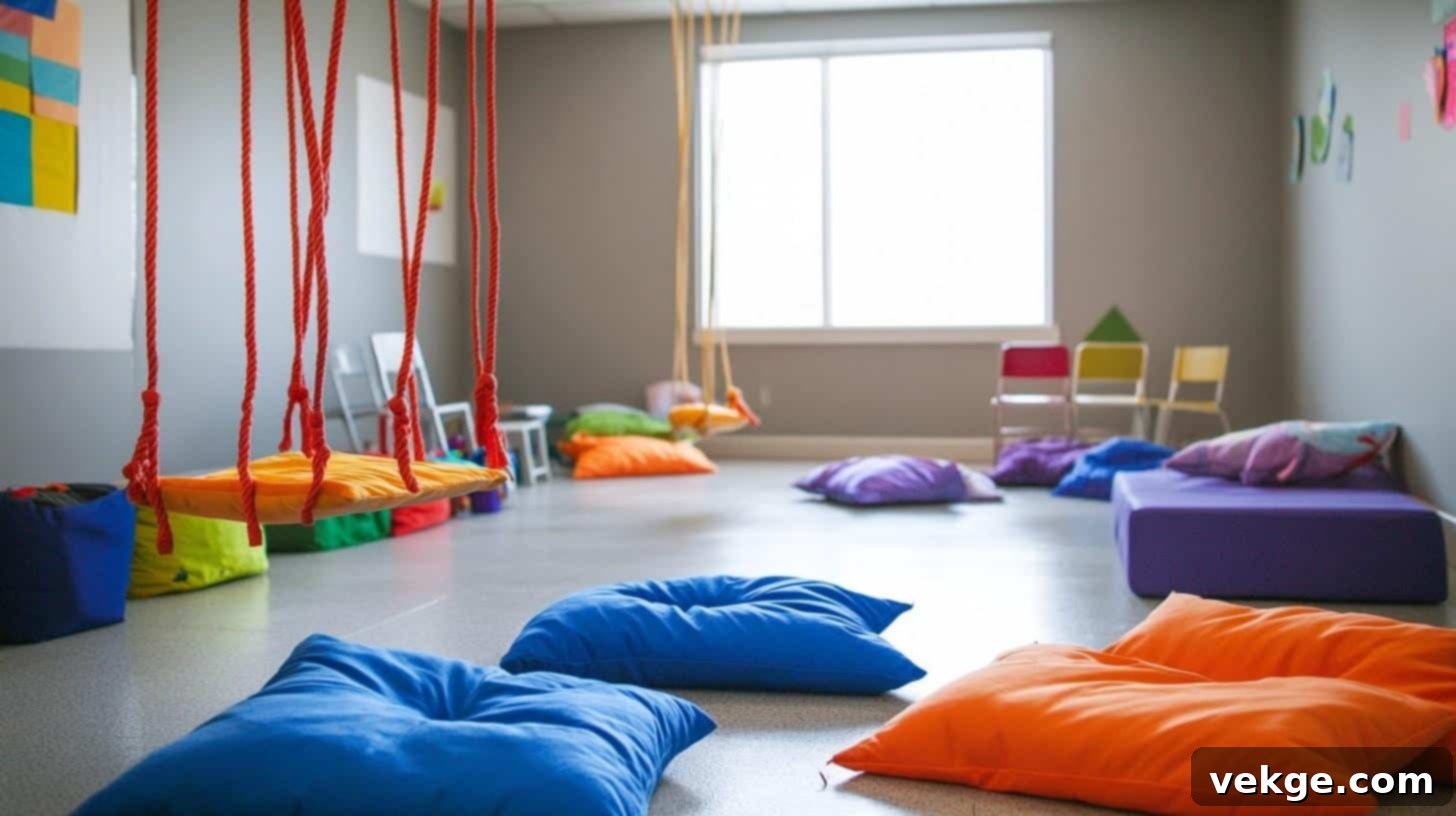
Ignite physical activity and problem-solving skills by setting up a dynamic indoor play course using everyday household items. Create tunnels with large boxes, define paths with cushions or tape, build bridges with sturdy boards, or add obstacles with pillows. The beauty of this idea is its infinite adaptability; you can change the layout frequently to keep kids engaged and challenged.
Setup Tips:
- Always check the safety of all items used, ensuring they are stable and free from hazards.
- Create a clear, easy-to-follow path with defined start and end points.
- Add simple direction signs or challenge instructions for more structured play.
- Consider setting time limits or challenges to make it a game.
Key Features:
- Constantly changing: The course can be reconfigured endlessly, preventing boredom.
- Uses home items: Relies on objects you already own, making it zero-cost.
- Fits any space: Adaptable to both large and small rooms.
- Promotes active play, gross motor skills, balance, and problem-solving.
- Cost-saving: Absolutely free, as it utilizes existing household items.
20. Natural Play Space: Serene Exploration
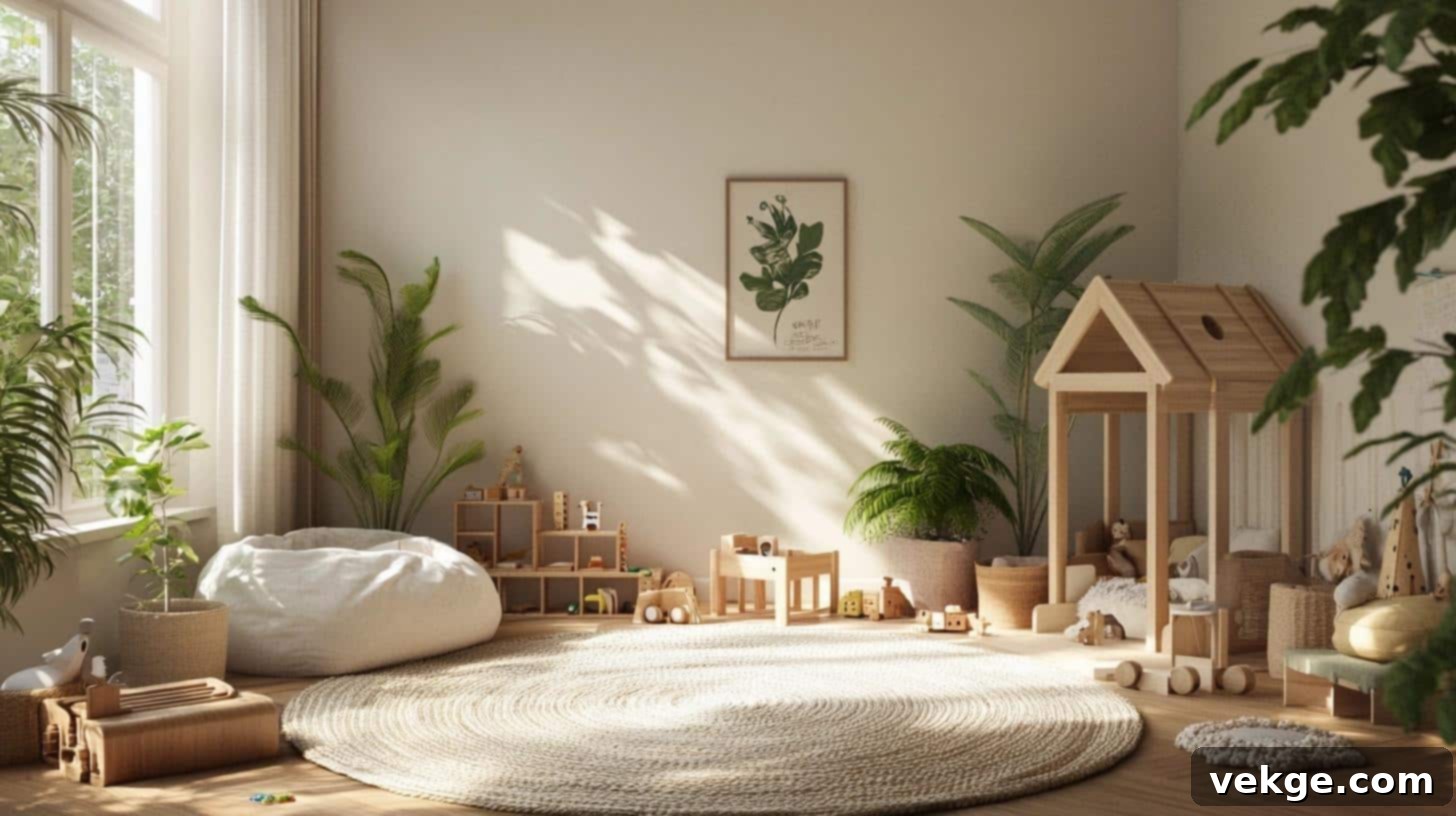
Bring the calm of nature indoors by creating a dedicated natural play space. Incorporate wooden toys, smooth river stones, pinecones, and a few safe, non-toxic plants. Decorate with natural colors and materials like woven baskets or cotton fabrics. This area encourages quiet, sensory play, connection with nature, and fosters an appreciation for the natural world. Ensure all elements are child-safe and regularly cleaned.
Setup Tips:
- Research and use only non-toxic, child-safe plants (e.g., spider plants, Boston ferns).
- Emphasize real wood toys and natural materials over plastic.
- Add soft, natural-fiber rugs or cushions to enhance comfort.
- Establish clear rules for keeping the natural items clean and respected.
Key Features:
- Incorporates safe plants, improving air quality and visual appeal.
- Focuses on natural items, offering diverse textures and promoting eco-awareness.
- Creates a calm and peaceful space, ideal for sensory and quiet play.
- Easy upkeep: Most natural elements require minimal maintenance.
- Cost-saving: Collect items from outside (safely), buy plants on sale, or find wooden toys second-hand.
Detailed DIY Playroom Projects: Step-by-Step Guides
Transforming your playroom with handmade elements adds a personal touch and saves a significant amount of money. Here are two detailed DIY projects you can tackle to create engaging and functional features for your kids.
1. DIY Chalkboard Wall: Your Child’s Giant Easel
A chalkboard wall provides an expansive, reusable surface for drawing, writing, and creative expression. Follow these steps to create one at home, making any playroom instantly more interactive and fun.
What You’ll Need:
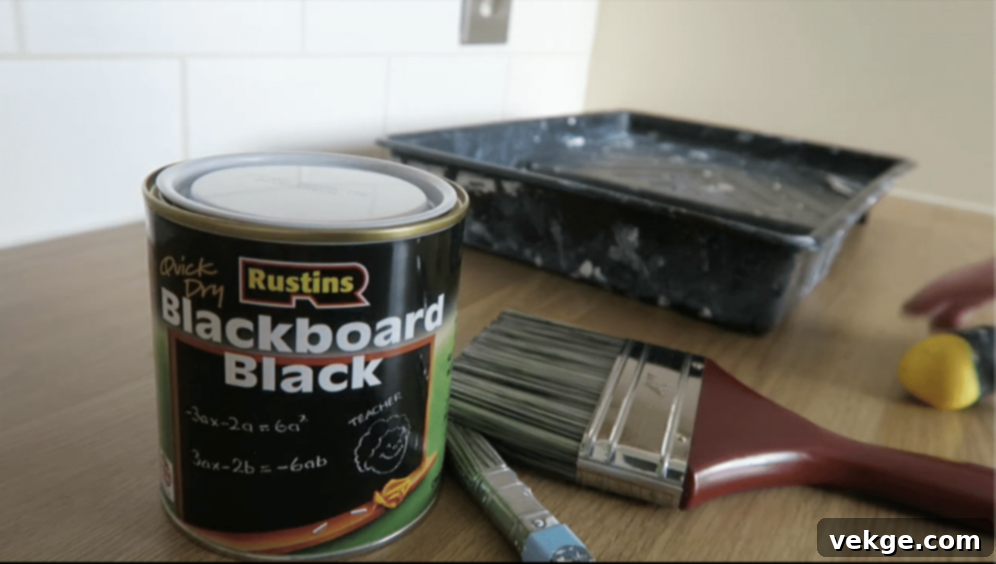
- Chalkboard paint (a quart can typically covers a good area)
- Painter’s tape (medium adhesion, low residue)
- Small roller brush with a smooth foam cover (for an even finish)
- Chalk (a box of white chalk for seasoning)
- Damp cloth or sponge
- Drop cloth or old newspapers (to protect floors)
- Optional: Level, sandpaper (fine-grit), mild soap, and water
Step-by-Step Guide:
Step 1: Select and Prepare Your Wall Space
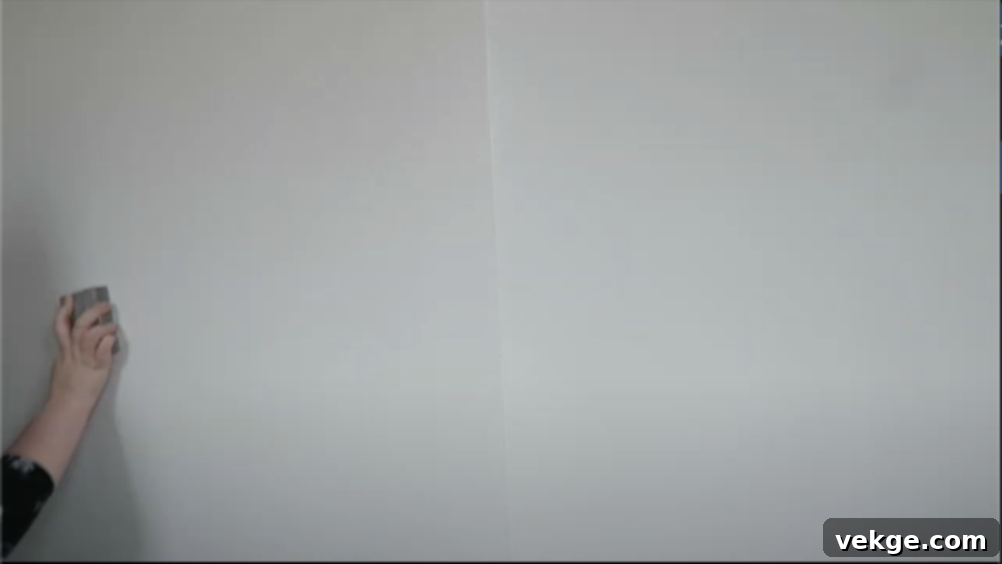
- Choose a Flat, Clean Section: Opt for a wall that’s not directly exposed to bright, constant sunlight to minimize glare when children draw.
- Ensure a Smooth Surface: Carefully inspect the wall for any bumps, holes, or rough patches. Sand any imperfections with fine-grit sandpaper for a flawless finish.
- Thoroughly Clean the Area: Wash the chosen section with a mild soap and water solution to remove all dirt, grease, and oils. This ensures optimal paint adhesion.
- Allow Complete Drying: Wait at least one to two hours after cleaning to ensure the wall is perfectly dry before proceeding to the next step.
Step 2: Precisely Mark Your Painting Area
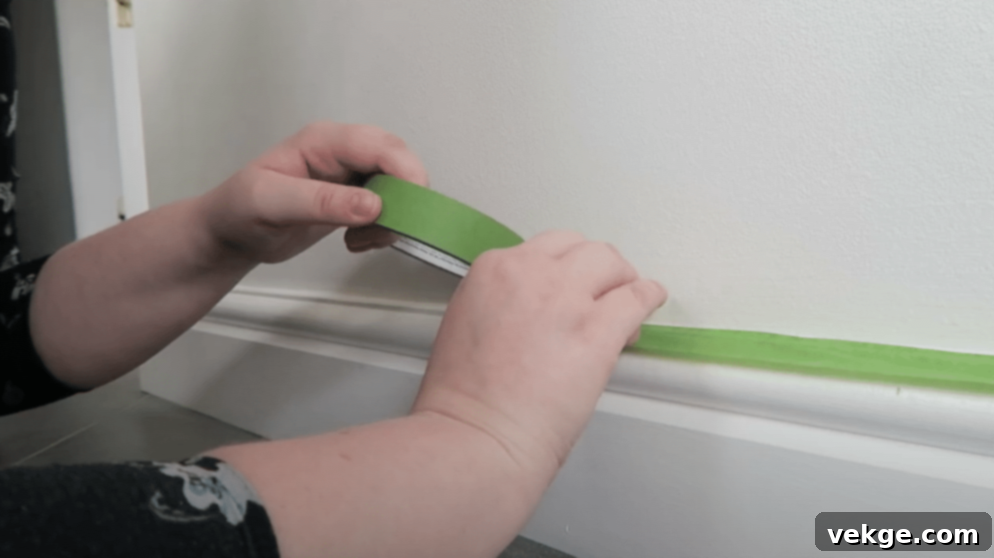
- Apply Painter’s Tape: Carefully outline the perimeter of your desired chalkboard area with painter’s tape. Use a level to ensure all lines are perfectly straight and even.
- Firmly Press the Tape: Run your fingers or a credit card along the edges of the tape to create a tight seal. This prevents paint from bleeding underneath and ensures crisp lines.
- Double-Check Alignment: Step back and observe the taped area from different angles to confirm the lines are straight and the section is square or rectangular as intended.
- Protect Surroundings: Lay down drop cloths or old newspapers on the floor directly beneath your taped area to catch any drips or spills.
Step 3: Apply Chalkboard Paint Evenly
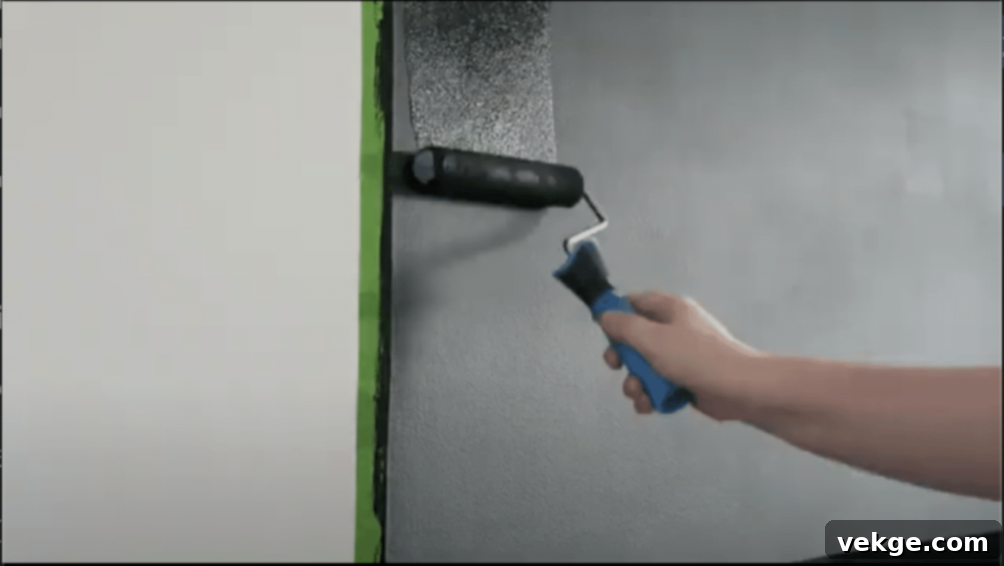
- Thoroughly Stir the Paint: Mix the chalkboard paint for at least two to three minutes. Chalkboard paint can separate easily, so proper stirring is crucial for consistent color and texture.
- Use a Roller for Even Coverage: Load your foam roller with a moderate amount of paint and apply it in smooth, overlapping “W” patterns. This technique helps ensure an even and consistent coat.
- Apply Multiple Thin Layers: Instead of one thick coat, apply two to three thin, even coats. Thin coats dry more efficiently and create a smoother, more durable surface.
- Observe Drying Times: Allow a minimum of two to three hours drying time between each coat. The surface should feel completely dry to the touch and not tacky before applying the next layer.
Step 4: Allow Adequate Curing Time
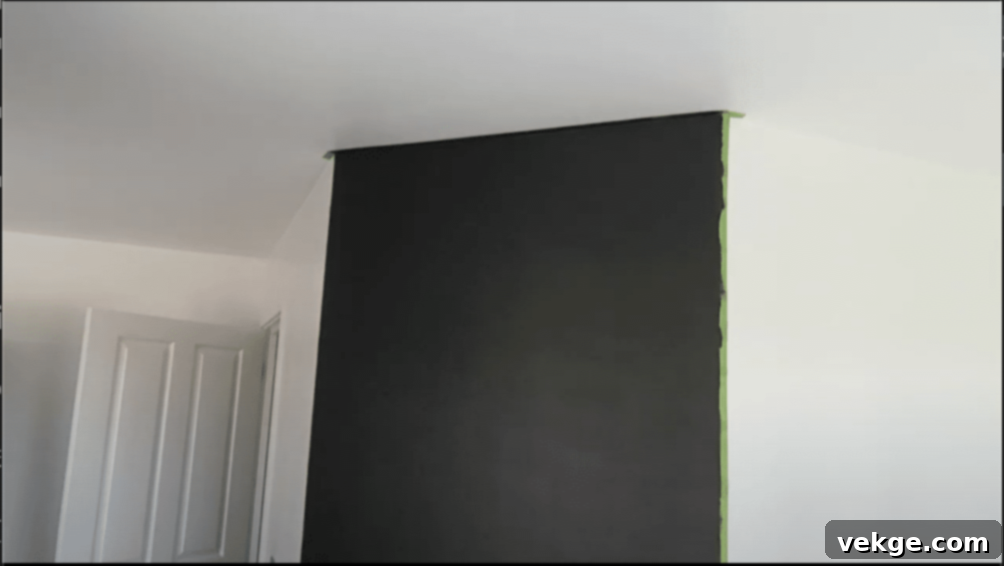
- Full 24-Hour Drying Period: After the final coat, allow the chalkboard paint to dry and cure for a minimum of 24 hours. Longer curing times (up to 3 days) can result in a more durable surface.
- Ensure Good Ventilation: Keep the room well-aired by opening windows or using fans to facilitate the drying process and disperse paint fumes.
- Avoid Touching the Surface: Resist the urge to touch or test the painted area during the curing phase, as even slight marks can affect the final finish.
Step 5: Prepare the Surface for Use (Seasoning)
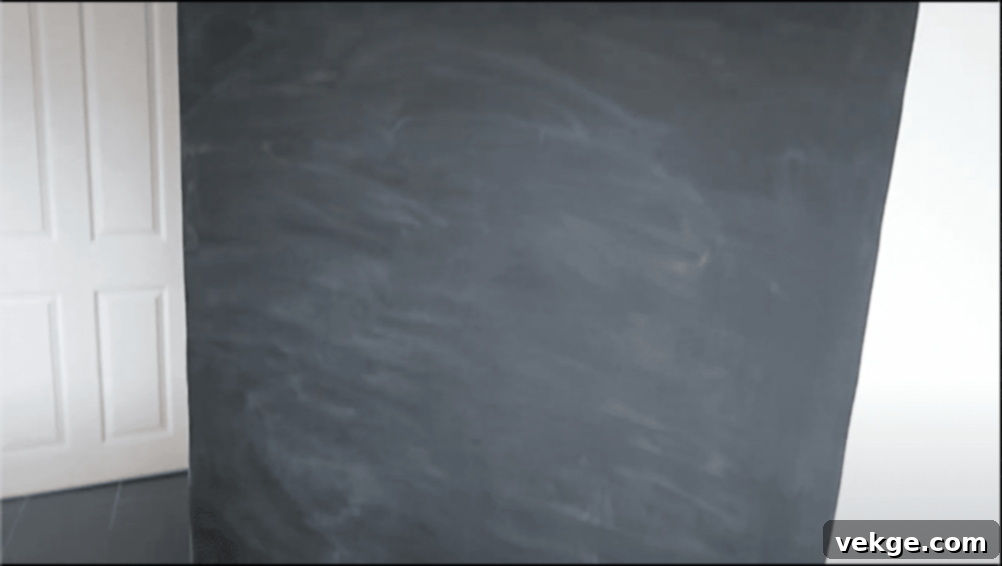
- Use a Piece of Chalk: Take a standard piece of white chalk and hold it flat, on its side, against the chalkboard wall.
- Cover the Entire Surface: Gently rub the chalk over every inch of the painted area, creating a light, even layer of chalk dust. This process is called “seasoning” and prevents “ghosting” from initial drawings.
- Wipe Clean with a Damp Cloth: Using a lightly damp cloth or sponge, gently wipe away the chalk dust. Apply light pressure to avoid scratching the newly cured surface.
- Final Dry Time: Allow the wall to dry completely for about one hour before allowing children to draw on it. This ensures the seasoning has properly set.
Step 6: Enjoy Your New Chalkboard Wall!
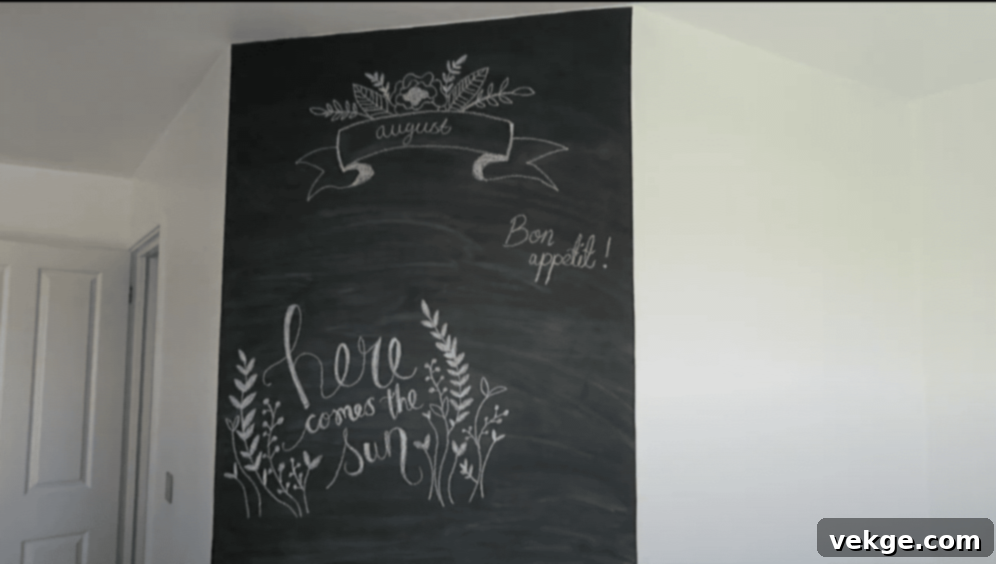
- Carefully Remove Tape: Gently pull off the painter’s tape at a 45-degree angle to reveal crisp, clean lines.
- Test in a Small Corner: Before full use, test a small drawing in a corner to ensure the surface is ready.
- Maintain with Damp Cloth: Keep a damp cloth nearby for easy cleaning. Regular, gentle cleaning helps maintain the wall’s pristine condition.
Tips for Success:
- Always paint in good, natural light to easily spot any missed areas or inconsistencies.
- Ensure children are kept away from the area until the paint is completely dry and seasoned.
- Clean the chalkboard with water only; avoid harsh chemical cleaners which can damage the paint.
- Replace chalk regularly and consider dustless chalk options for less mess.
Watch this, if you want to know about this process in depth.
2. DIY Play Tents or Forts: A World of Imagination
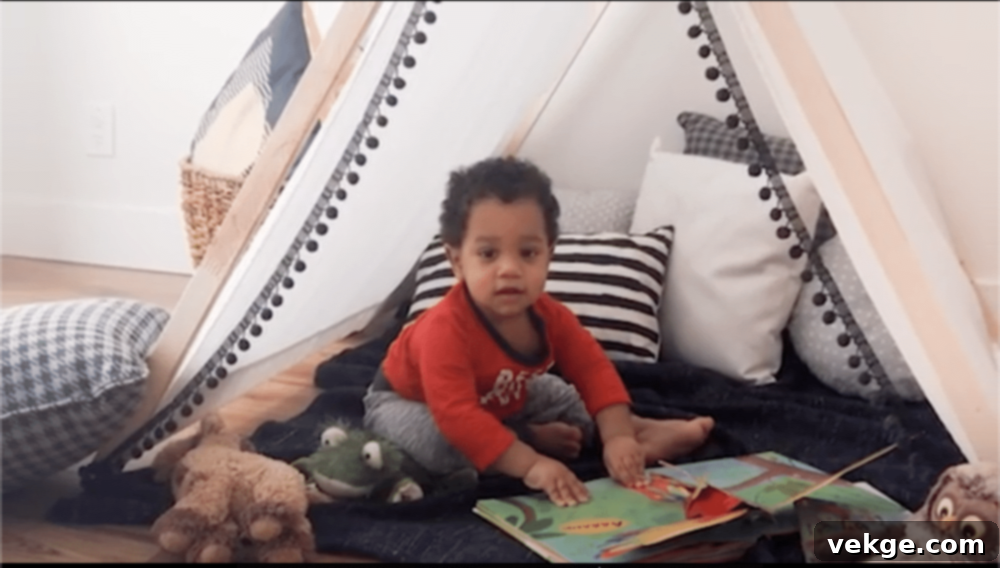
A handmade play tent creates a magical, cozy spot for reading, quiet play, or imaginative adventures. It’s a fantastic project that can be customized to your child’s preferences and easily adapted to any room size. Here’s a detailed guide to creating your very own play tent.
What You’ll Need:
- 4-6 sturdy bamboo sticks or PVC pipes (approx. 5-6 feet long)
- An old bedsheet, canvas drop cloth, or cotton fabric (sized appropriately for coverage)
- Strong rope or twine (for securing the frame)
- Scissors or fabric shears
- Clips (e.g., binder clips, clothespins) or Velcro strips (for attaching fabric)
- Optional: Measuring tape, drill (for PVC), sand (for stability), soft blankets, pillows, fairy lights.
Step-by-Step Guide:
Step 1: Construct the Tent Frame
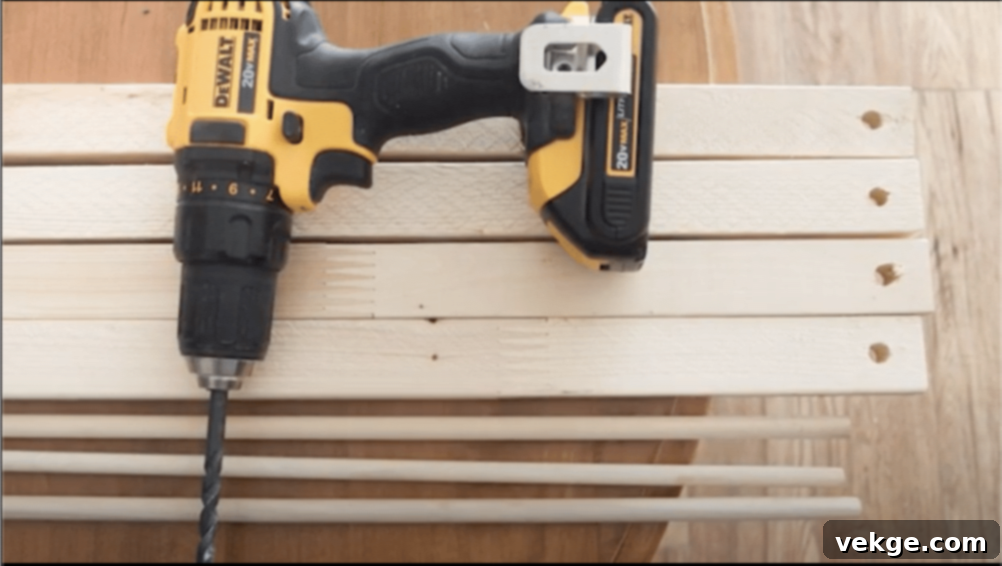
- Arrange Poles in a Circle: Lay your bamboo sticks or PVC pipes on the floor, evenly spaced in a circular pattern. The diameter of the circle will determine the base size of your tent.
- Gather Poles at the Top: Bring the tops of all poles together, forming a conical or teepee-like shape. Ensure the base remains stable.
- Secure Poles Firmly: Use strong rope or twine to tie the poles together tightly at the top. Wrap the rope several times and knot it securely to ensure the frame is stable and won’t splay outwards.
- Test Base Stability: Gently push and pull on the frame to check its stability. Adjust the spacing of the poles at the base if it feels wobbly until it’s firm. For added stability with PVC pipes, you can drill holes and use bolts, or fill the bottom of the pipes with sand.
Step 2: Drape and Fit the Tent Cover
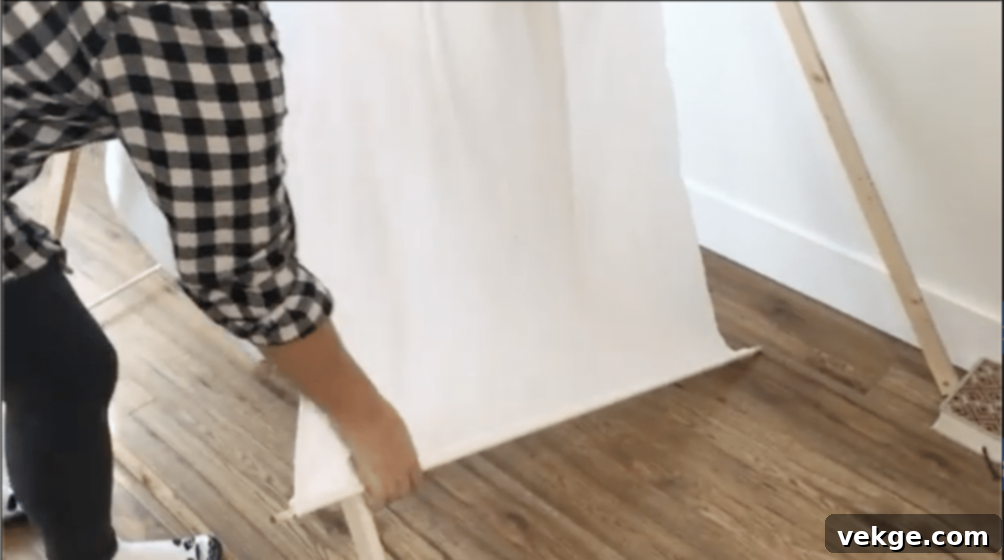
- Spread Fabric Over Frame: Carefully drape your chosen bedsheet or fabric over the assembled frame, starting from the tied peak.
- Allow Natural Fall: Let the fabric fall naturally around the frame, making sure it covers all sides you want covered. Adjust for even draping around the entire tent.
- Mark Openings: Decide where the entrance/exit should be and mark it. You might want to leave one section completely open or create an overlapping flap for a door.
- Trim Excess Material: If the fabric is too long or has awkward excess, carefully trim it, leaving a small hem if you wish to finish the edges. Keep the bottom edges neat and even.
Step 3: Secure the Tent Cover
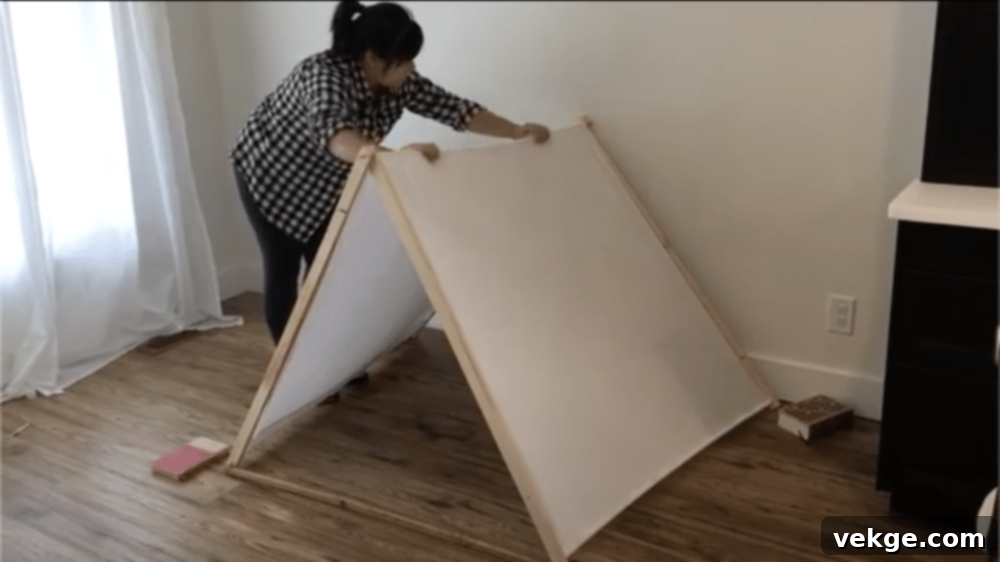
- Clip Fabric to Frame: Use binder clips, clothespins, or safety pins to secure the fabric to the poles around the base and sides. Space the clips every few inches for a snug fit.
- Optional Velcro Strips: For a more permanent but removable cover, sew or glue Velcro strips onto the fabric and the poles. This makes the cover easy to take off for washing.
- Secure Bottom Edges: To prevent the fabric from lifting, you can place heavy books, decorative weights, or even a few rocks along the bottom edge, especially if the tent is on a smooth floor.
- Test All Connections: Gently pull on the fabric and frame connections to ensure everything is securely attached and won’t come loose during play.
Step 4: Create a Cozy Interior
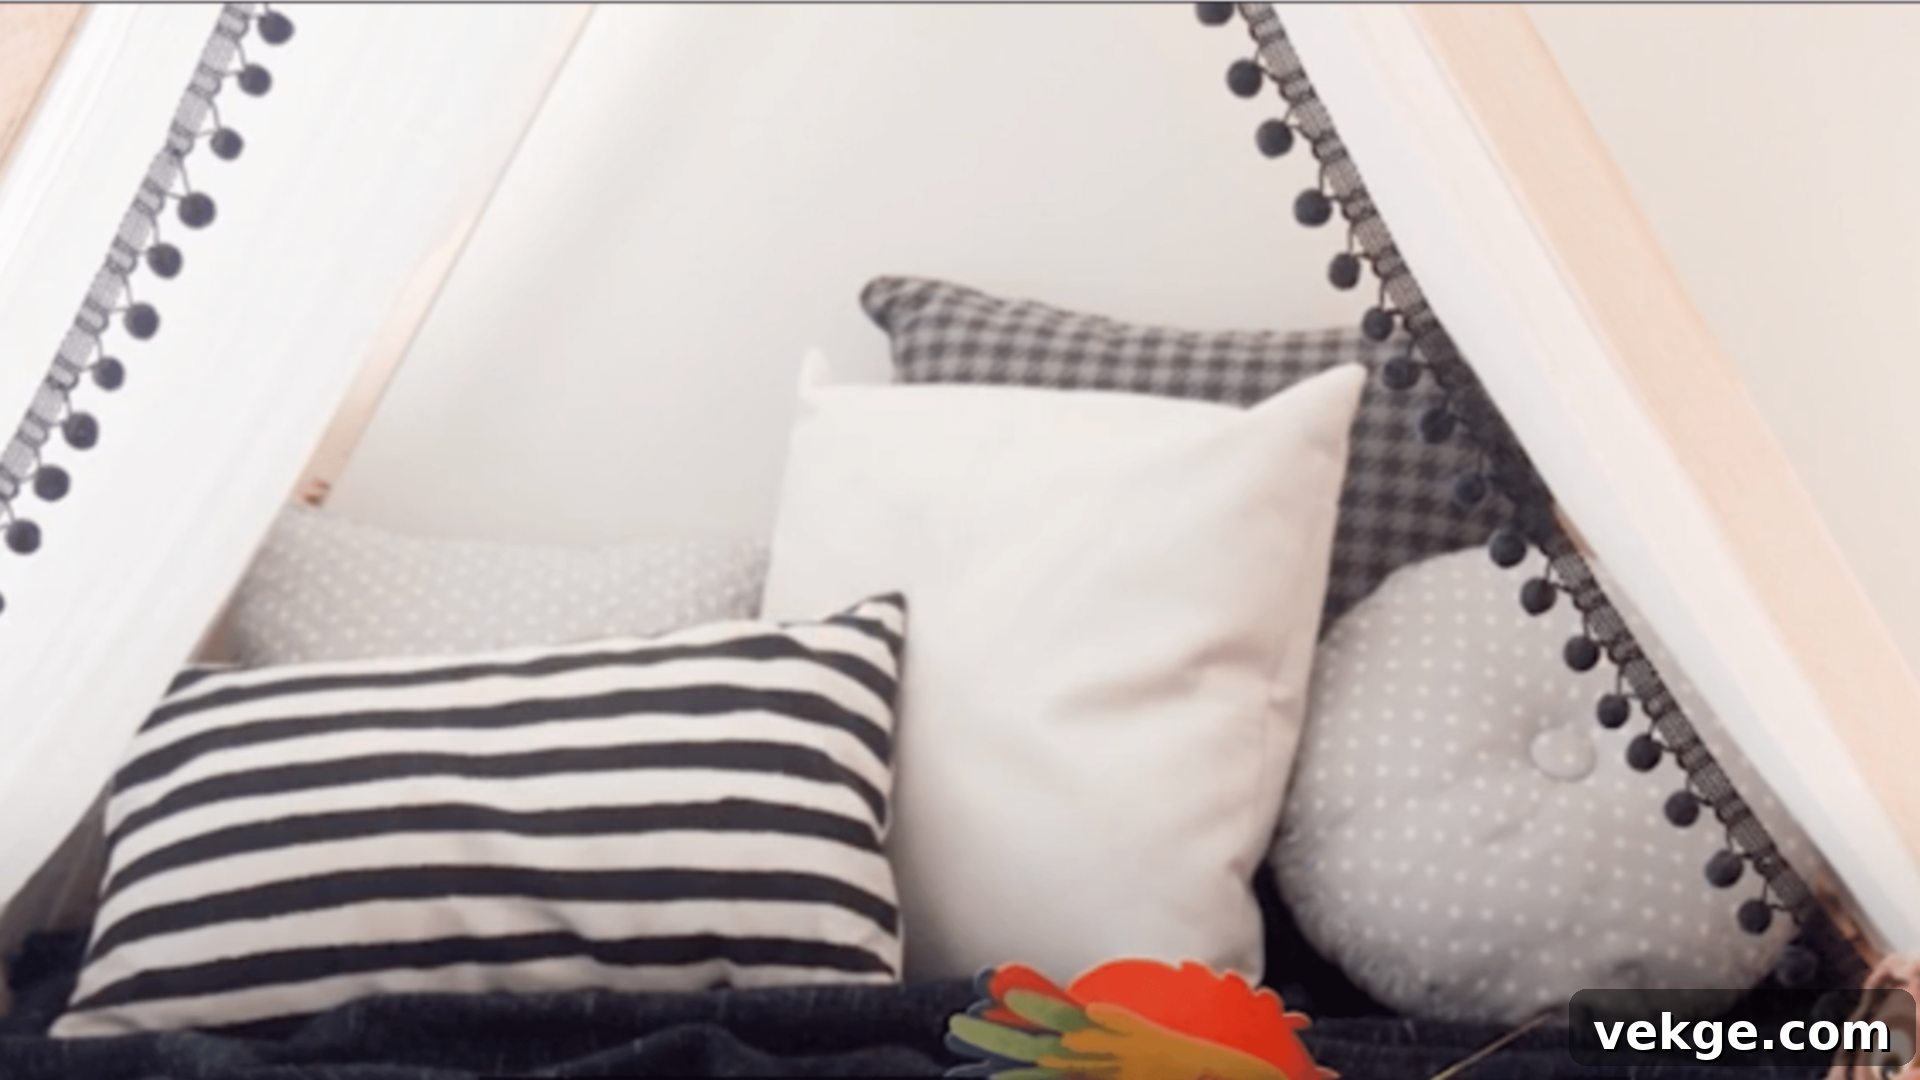
- Add Soft Pillows: Fill the tent with an abundance of soft, comfortable pillows. Choose covers that are easily washable.
- Layer Blankets: Place one or two soft blankets on the floor of the tent for extra padding and warmth, making it an inviting space for lounging.
- Incorporate Battery-Operated Lights: Hang child-safe, battery-operated fairy lights or lanterns inside for a magical glow. Ensure they are kept away from the fabric to prevent any heat buildup.
- Small Floor Mat: A small rug or mat adds another layer of comfort and defines the interior space, making floor sitting more enjoyable.
Step 5: Add Final, Engaging Touches
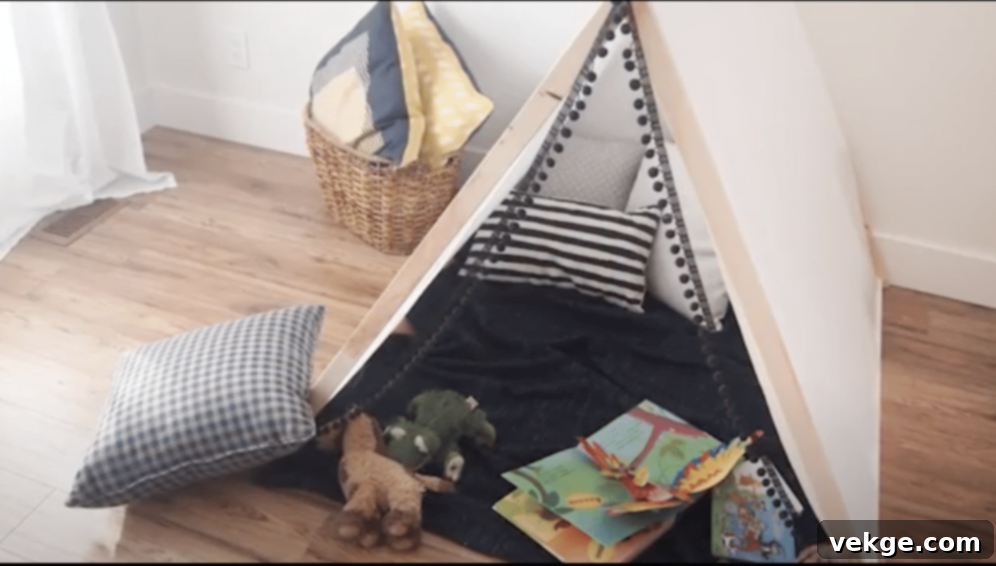
- Hang Safe Decorations: Add lightweight and child-safe decorations like fabric garlands, felt banners, or paper stars inside and outside the tent.
- Create a Door Tie-Back: If your tent has a fabric door, attach a ribbon or rope tie-back to hold it open, creating an inviting entrance.
- Set Up a Book Corner: Place a small basket or fabric sling filled with favorite books inside the tent, encouraging reading time.
- Curate Toys Inside: Add a selection of quiet play items like soft toys, puzzles, or coloring books to encourage focused, imaginative play within their new retreat.
Tips for Optimal Use:
- Set up the tent on a flat, even surface; carpeted floors often provide better grip for the poles than hard surfaces.
- Keep all decorations lightweight to avoid pulling down the tent structure.
- Ensure exits remain clear and easily accessible for quick movement in and out.
- Regularly check the ropes and connections of the frame, tightening them if they become loose to maintain stability.
Click here for a detailed guide.
Making Your Playroom Fun and Educational
A truly great playroom seamlessly blends fun with learning, creating an environment where children naturally develop new skills while engaging in joyful play. These budget-friendly ideas ensure that education is an integrated, exciting part of their play experience.
Interactive Learning Areas for Skill Development
Designate specific zones that make learning feel like an adventure, using simple, everyday items.
- Letter & Word Stations: String up letter cards or magnetic letters for spelling games and word building. A designated spot for these can greatly aid early literacy.
- Hands-On Math Centers: Create a simple math area using everyday items like buttons, pom-poms, or dried beans with ice cube trays for counting, sorting, and basic arithmetic.
- Dedicated Writing Spot: Set up a small, accessible area with paper, crayons, pencils in decorated cups, and maybe even a mini-notepad to encourage early writing and drawing.
- Simple Science & Nature Exploration: A magnifying glass, a collection of interesting rocks, leaves, or pinecones, and a small journal can create a captivating science corner, fostering observation skills.
- Dollar Store Counting Games: Utilize inexpensive items like plastic animals, colorful beads, or small toys for sorting, patterning, and counting games, making math tangible and fun.
- Flash Card Organization: Decorate shoe boxes or small bins to store flashcards by category, encouraging kids to practice independently.
- DIY Matching Games: Create letter or number matching games using index cards or cut-out paper, boosting memory and recognition skills.
Imaginative Play Zones for Creative Storytelling
Encourage children to step into different roles and create their own narratives, fostering creativity and social-emotional development.
- Simple Puppet Theater: Hang a large sheet or blanket between two chairs or in a doorway to create an instant puppet show stage.
- “Play Store” Setup: Collect empty food boxes, cans, and cartons. Add a small table for a “checkout counter” and some play money to create a mini grocery store.
- DIY Post Office: Use old envelopes, stamps, and paper. A shoebox can serve as a mailbox, encouraging letter writing and delivery role-play.
- Cardboard Box Kitchen: Decorate cardboard boxes to look like a stove, sink, and refrigerator, providing a realistic setting for culinary adventures.
- Instant Forts: Drape a sheet over chairs, a couch, or a clothesline to create an instant fort, perfect for secret missions and cozy gatherings.
- Crowns & Wands Craft Area: Keep supplies like paper, glitter, and glue readily available for kids to craft their own crowns, wands, or masks for imaginative story time.
- Doctor’s Office Corner: A small table, a toy medical kit, and a few bandages can transform a corner into a doctor’s office, promoting empathy and understanding.
Tech-Free Play Ideas for Hands-On Engagement
Offer engaging alternatives to screens, promoting hands-on exploration, social interaction, and problem-solving.
- Classic Board Game Station: Set up a low table with a rotating selection of classic board games (checkers, Candyland, Snakes and Ladders) to encourage strategic thinking and turn-taking.
- DIY Puzzles: Print out large pictures or use old magazine cut-outs, glue them onto cardboard, and then cut into puzzle pieces for a custom, low-cost activity.
- Accessible Art Station: Maintain a well-stocked art station with various types of paper, crayons, colored pencils, and perhaps even watercolors for open-ended creative expression.
- Building Block Wonderland: Keep a large bin of building blocks (wooden, LEGO, or even cardboard bricks) for engineering and architectural play, fostering spatial reasoning.
- Play Dough & Cookie Cutters: A simple container of homemade or store-bought play dough with a variety of cookie cutters provides endless tactile fun and fine motor skill development.
- Homemade Musical Instruments: Encourage musical exploration by making instruments from household items (e.g., rice in plastic bottles for shakers, rubber bands on a shoebox for a guitar).
- Basket Ball Toss Game: Set up a simple ball-toss game using small baskets or buckets and soft balls, promoting hand-eye coordination.
- Pattern Games with Clips: Use colored paper clips, beads, or buttons to create and replicate patterns, enhancing cognitive skills.
Making Your Playroom Safe and Comfy
Safety and comfort are paramount in any child’s play space. Achieving these doesn’t require a large budget, but rather thoughtful choices and consistent attention to detail. These practical tips help you create a secure and inviting environment where kids can play freely and safely.
Safe Flooring Options for Active Play
Choose flooring solutions that provide cushioning against falls and are easy to maintain.
- Foam Puzzle Mats: Purchase interlocking foam puzzle mats from discount stores. They offer excellent shock absorption for soft landings and are easy to clean.
- Layered Blankets & Rugs: Place old, thick blankets or duvets underneath existing rugs for an inexpensive extra layer of padding, particularly in high-traffic play areas.
- Rubber-Backed Rugs: Invest in or find second-hand rugs with rubber backings to prevent slips and slides, especially on hard floors.
- Carpet Squares from Outlets: Look for affordable carpet squares at flooring outlet stores. They can be arranged to cover specific play zones and are often easy to replace if damaged.
- Foam Camping Mats: Repurpose foam camping mats as temporary or portable play surfaces, offering good cushioning and easy roll-up storage.
- Non-Slip Underlays: For any rug without a rubber backing, use an anti-slip rug underlay to enhance safety and prevent movement.
- Simple Soap & Water Cleaning: Regularly clean all flooring surfaces with basic soap and water to keep them hygienic and free from dust or allergens.
Cozy Seating for Relaxation and Engagement
Add comfortable spots to sit and relax without incurring significant costs.
- DIY Floor Pillows: Stuff old pillowcases, duvet covers, or fabric scraps with foam pieces, old towels, or even clean fabric off-cuts to create large, soft floor pillows.
- Stacked Flat Cushions: Utilize several flat couch cushions, covered with new fabric, stacked together to create a multi-layered, comfortable reading or lounging spot.
- No-Sew Floor Poufs: Create simple, no-sew floor poufs by wrapping old blankets or fabric scraps around a central core (like an old tire or sturdy box) and securing with rope or fabric glue.
- Discount Store Bean Bags: Keep an eye out for affordable bean bags at discount retailers. They are lightweight, comfortable, and easy for kids to move around.
- Re-covered Couch Cushions: Give old couch cushions a new lease on life by making colorful, washable covers, turning them into versatile playroom seating.
- Sleeping Bags for Movie Time: Lay out sleeping bags for a comfortable, ready-made seating solution during movie sessions or quiet story times.
- Washable Covers: Ensure all fabric seating has removable, washable covers for easy cleaning and maintenance, crucial for a hygienic play environment.
Essential Child-Proofing Tips for Peace of Mind
Implement simple, budget-friendly measures to keep your children safe as they explore their playroom.
- Outlet Covers: Install basic plastic outlet covers on all unused electrical outlets to prevent curious fingers from getting into trouble.
- Cabinet & Drawer Locks: Attach child-safety locks or latches to any cabinets or drawers containing items that are not safe for children or need to be kept organized.
- Edge & Corner Guards: Affix soft foam or rubber edge and corner guards to sharp furniture corners or table edges to prevent bumps and bruises.
- Door Stoppers & Latches: Use simple door stoppers or pinch guards to prevent little fingers from getting caught in closing doors.
- First-Aid Kit Accessibility: Keep a basic first-aid kit readily accessible (but out of children’s reach) for quick fixes to minor scrapes or cuts.
- Rubber Bands on Handles: For temporary security, loop strong rubber bands around cabinet handles that are close together.
- Secure Cleaning Supplies: Ensure all cleaning supplies, medicines, and hazardous materials are stored in locked cabinets, far out of reach.
- Furniture Anchors: Use inexpensive zip ties or anti-tip furniture straps to secure tall bookshelves, dressers, or other heavy furniture to the wall studs, preventing tipping hazards.
- Regular Safety Checks: Routinely check toys and playroom items for loose parts, sharp edges, or any damage that could pose a safety risk.
Conclusion: Crafting Joy on a Budget
Creating an inspiring and functional playroom doesn’t demand a hefty investment; it simply requires thoughtful planning, a dash of creativity, and a willingness to embrace budget-friendly and DIY solutions. As we’ve explored, with simple items like foam mats for soft landings, repurposed storage bins for organization, and imaginative DIY projects like chalkboard walls and play tents, you can construct a beloved space where your children will thrive.
The journey begins by focusing on the essentials: ensure safe flooring, establish accessible storage, and provide comfortable seating. From there, gradually introduce interactive learning areas with simple craft supplies and cozy reading nooks. Segment the room into distinct zones using existing furniture or creative dividers, building upon your initial setup as your budget permits and your children’s needs evolve.
Remember, the most successful playrooms are dynamic spaces that grow with your kids. Continuously evaluate what works and what doesn’t. Be flexible, switch things around when needed, and most importantly, involve your children in the process. Their input is invaluable in shaping a space they will truly cherish and utilize. Your budget-friendly dream playroom is not just an aspiration but a series of achievable, enjoyable steps away. Pick one idea, start small, and watch the magic unfold!
Frequently Asked Questions About Budget-Friendly Playrooms
How can I create a playroom in a small space without it feeling cluttered?
To maximize a small playroom, focus on vertical storage solutions like wall-mounted shelves, pegboards, and multi-functional furniture such as storage benches. Utilize fold-down tables and roll-up play mats that can be stored away when not in use. Incorporate mirrors to create an illusion of more space and regularly declutter to keep bulky items to a minimum, ensuring clear pathways for play.
How do I make the playroom appealing to children of different ages?
Design a multi-age playroom by creating various zones. Place younger children’s toys and activities at easily accessible heights, while older kids’ items can be stored on higher shelves. Include a mix of basic open-ended play items like building blocks, art supplies, and a dedicated reading nook that appeal across age groups. Offering diverse activity types, from imaginative play props to puzzles and board games, ensures there’s something for everyone.
Should a playroom have seating for adults?
Yes, including comfortable seating for adults is highly recommended. Parents often spend considerable time in playrooms, whether supervising, participating in playtime, reading with children, or simply observing. Incorporate comfortable yet space-efficient options like large floor cushions, bean bags, or a small, sturdy armchair. This makes the space more inviting for adults and encourages more family interaction during play.
What are the best types of toys for a budget-friendly playroom?
Opt for open-ended toys that encourage creativity and can be used in multiple ways, rather than single-function toys. Examples include building blocks, art supplies (crayons, paper, play dough), dress-up clothes, dolls, cars, and simple puzzles. These toys offer long-term play value and don’t quickly become outdated. Additionally, consider repurposing household items for play, like cardboard boxes for forts or empty containers for sorting games.
How do I maintain cleanliness and organization in a budget-friendly playroom?
Effective organization starts with clear storage solutions like labeled bins, baskets, and shelves. Involve children in the cleanup process from an early age, making it part of the play routine. Implement a “one in, one out” rule for new toys to prevent accumulation. Regular decluttering sessions are crucial. For cleanliness, choose washable fabrics for seating and easy-to-wipe surfaces for tables and floors. Establish a simple cleaning schedule for quick tidies and deeper cleans.
