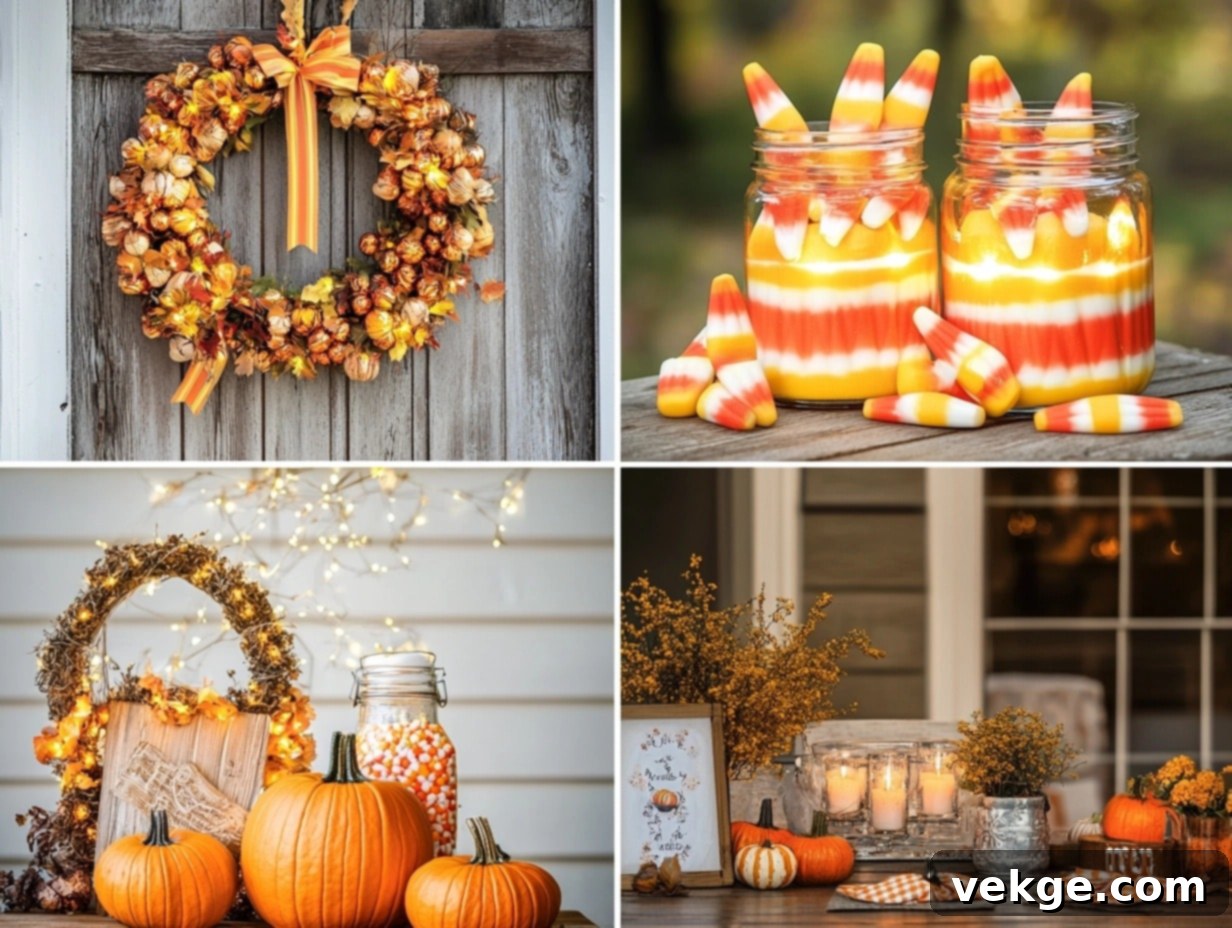
Sweet & Stylish: 18 Creative Candy Corn Decoration Ideas for Your Fall Home
As autumn leaves begin to fall and the crisp scent of pumpkin spice fills the air, many of us eagerly anticipate the enchanting season of Halloween. For me, this time of year isn’t just about costumes and treats; it’s a vibrant canvas for creative home decorating. My enduring passion for Halloween styling has always drawn me to the iconic colors and distinct shape of candy corn. These simple, tricolored pieces of candy, beloved by many, serve as an endless source of inspiration for countless imaginative decorating ideas.
After years of experimenting and transforming my home for the fall season, I’ve uncovered truly unique and sophisticated ways to incorporate these classic orange, yellow, and white hues. Beyond being a sweet treat, candy corn’s cheerful color palette offers a versatile foundation for a wide array of seasonal accents. Join me as I share how these delightful combinations can brighten any space, bringing warmth, whimsy, and a touch of nostalgic charm to your autumn and Halloween festivities.
The Fascinating History of Candy Corn
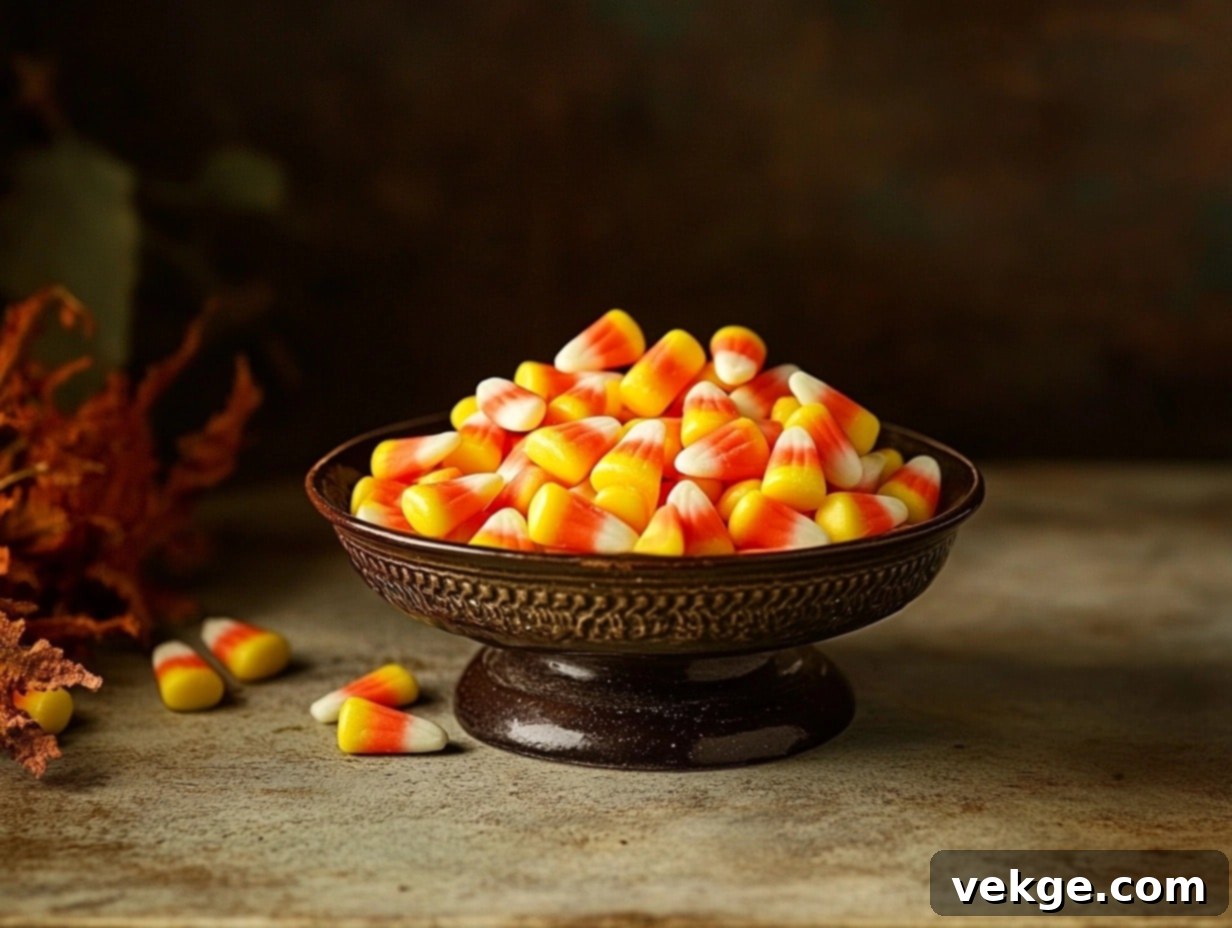
Before diving into creative decor, it’s worth appreciating the humble origins of candy corn. Researching its fascinating history reveals that this seemingly simple treat is deeply connected to America’s harvest celebrations and agricultural roots. Understanding its past only deepens its charm as a symbol of autumn.
The story of candy corn began in the 1880s at the Wunderle Candy Company, where George Renninger is credited with its invention. Originally known as “Chicken Corn,” these tricolored kernels were initially made entirely by hand, with each color meticulously layered. The process was labor-intensive, involving pouring a warm candy mixture into kernel-shaped molds, with each layer needing to set before the next was added. This painstaking method could take several days to complete a single batch.
In 1898, the Goelitz Confectionery Company, now famously known as Jelly Belly Candy Company, began mass-producing candy corn, helping to popularize it across the nation. These small, visually striking candies quickly became associated with harvest festivals and Halloween, thanks to their colors that beautifully mirror the changing hues of autumn corn – white for the tip, orange for the body, and yellow for the wider base, reflecting corn kernels ready for harvest.
By the 1950s, candy corn had solidified its place as an official and beloved treat of Halloween festivities, a tradition that many families continue to pass down. Its simple, yet distinctive design has since inspired countless seasonal decorations, crafts, and desserts, making it far more than just a candy – it’s a genuine symbol of fall.
Creative Ways to Use Candy Corn in Decor
Let’s explore some imaginative and stylish ways to bring the playful spirit of candy corn into your home decor, offering a fresh take on classic autumn themes.
1. Candy Corn-Themed Wreath
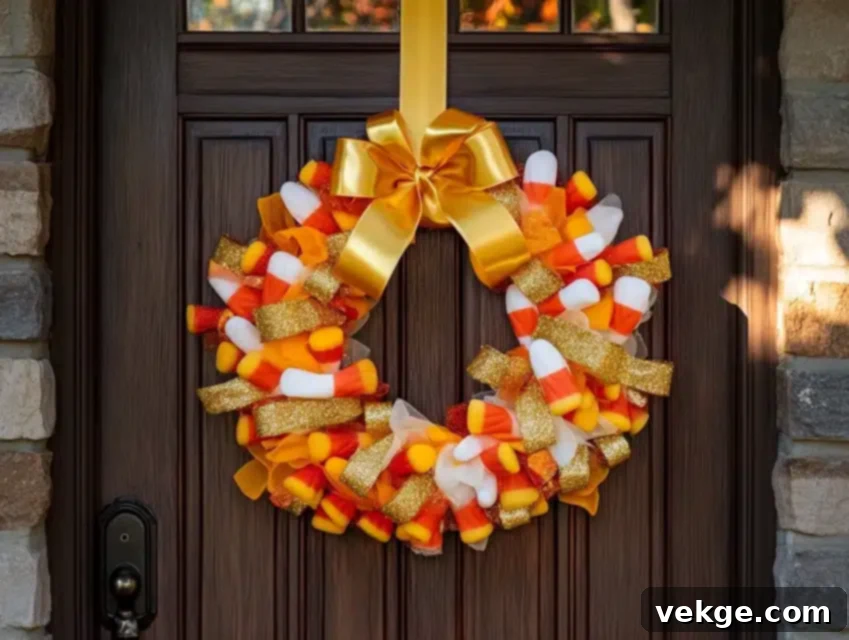
Welcome guests with a vibrant candy corn-themed wreath that radiates autumn cheer right from your front door. This eye-catching piece features carefully layered ribbons spiraling outwards, creating a perfect progression of candy corn colors. Small touches of glitter are strategically placed to catch the sunlight, adding a subtle sparkle as visitors approach. The substantial size of the wreath makes a bold statement, yet its elegant proportions ensure it complements any entrance beautifully. Each section seamlessly transitions from crisp white to warm orange and finally to sunny yellow, embodying the iconic look of the classic treat.
DIY Steps:
- Start with an 18-inch wire wreath form, providing a sturdy base.
- Layer a wide white ribbon tightly around the innermost section to form the base.
- Add an orange ribbon to the middle section, overlapping slightly with the white for a smooth transition.
- Complete the design with a bright yellow ribbon on the outermost layer, securing all ends neatly.
- Attach artificial candy corn pieces, either glued or wired, for added texture and thematic detail.
- Create a sturdy hanging loop using a strong, coordinating ribbon or floral wire.
- Apply a weather protection spray to ensure durability against the elements throughout the fall season.
2. Mason Jar Centerpieces
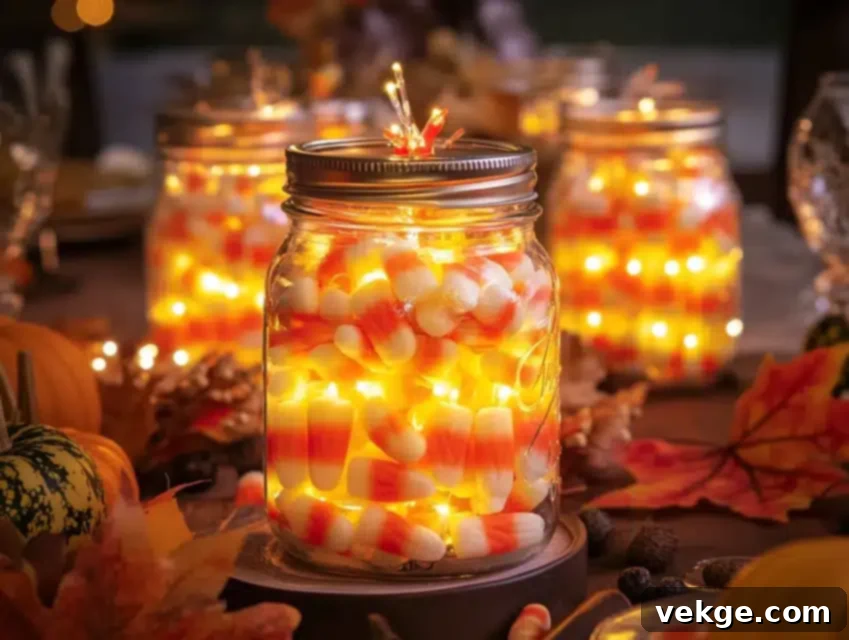
Transform simple glass jars into captivating, glowing candy corn displays that illuminate any dining room or mantelpiece. Each jar becomes a magical light show as delicate fairy lights twinkle through distinct layers of candy corn. The warm, inviting glow reflects beautifully off the glass, creating a cozy and enchanting autumn ambiance during evening gatherings. Guests often admire the flawless layered effect, wondering how such precision is achieved. The convenience of battery-operated lights allows for flexible placement anywhere in your home, eliminating concerns about cumbersome cords and outlets.
DIY Steps:
- Clean glass jars thoroughly with a glass cleaner to ensure optimal clarity and shine.
- Carefully layer white candy corn to fill the bottom third of each jar, pressing down gently.
- Add a vibrant layer of orange candy corn for the middle section, creating a distinct color band.
- Complete the candy corn effect with a top layer of bright yellow pieces.
- Insert battery-operated fairy lights into the center of the candy layers, allowing them to weave naturally.
- For a hanging option, create a sturdy wire handle, securing it firmly around the jar’s neck.
- Optionally, seal the tops with clear covers or decorative lids to protect the candy and lights.
3. Glowing Candle Holders
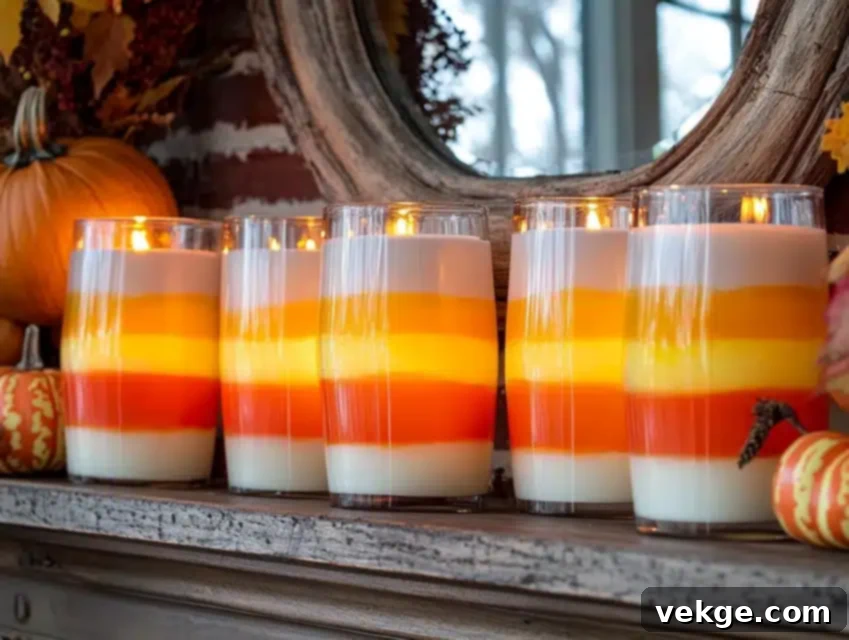
Enhance your window display or mantel with candy corn-inspired candle holders that cast beautiful, inviting shadows. These clear glass holders are adorned with hand-painted stripes, perfectly mimicking the iconic candy corn progression. When candles are lit within, they create a warm, captivating glow, beautifully highlighting each color transition from opaque white to luminous orange and bright yellow. Arranging them at varying heights adds significant visual interest, creating a dynamic and festive focal point. The specialized paint technique ensures that light shines through, maintaining the striped pattern’s integrity while creating a soft, ambient illumination.
DIY Steps:
- Clean glass holders thoroughly with rubbing alcohol to remove any oils or residue, ensuring paint adhesion.
- Apply a glass paint primer for enhanced durability and a smooth, even base for your colors.
- Use painter’s tape to create precise guides for perfectly straight lines between each color section.
- Paint the white section first, allowing it to dry completely before proceeding to the next color.
- Carefully add the orange middle stripe, ensuring clean edges against the white layer.
- Complete the design with the yellow top section, allowing ample drying time for all layers.
- Seal the finished candle holders with a clear protective coating to preserve the paint and add a subtle sheen.
4. Designer Throw Pillows
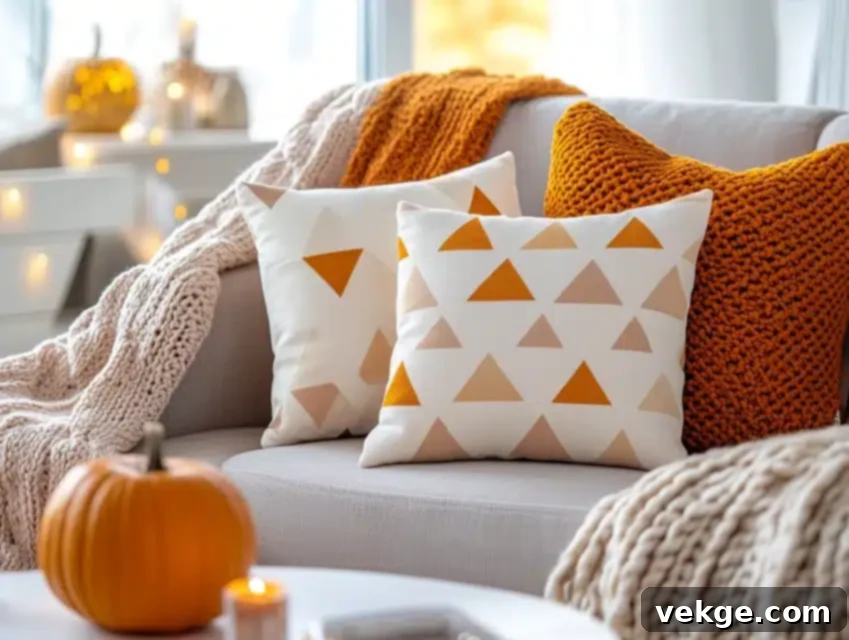
Infuse your living room seating with delightful candy corn charm by designing custom throw pillows. These stylish pillows feature modern geometric patterns that ingeniously utilize the classic candy corn color palette of white, orange, and yellow in captivating triangle arrangements. Each pillow boasts a unique design while maintaining a cohesive color theme, allowing for varied yet harmonious groupings. Crafted from durable fabric choices, these pillows are built to last, extending their festive appeal well beyond the immediate Halloween season. The inclusion of various sizes further enhances visual interest, creating inviting and comfortable arrangements on both chairs and sofas.
DIY Steps:
- Choose high-quality, washable fabric in white, orange, and yellow to ensure longevity and ease of care.
- Create paper templates for your desired geometric designs, such as triangles or chevrons, to guide your cuts.
- Cut fabric pieces carefully, remembering to include an extra seam allowance for sewing.
- Sew the fabric triangles together to form intricate candy corn patterns, paying attention to alignment.
- Add piping in contrasting or complementary colors along the edges for a professional, finished look.
- Insert quality pillow forms that maintain their shape and provide comfortable support.
- Integrate hidden zippers for easy removal of covers, simplifying cleaning and seasonal changes.
5. Festive Holiday Garland
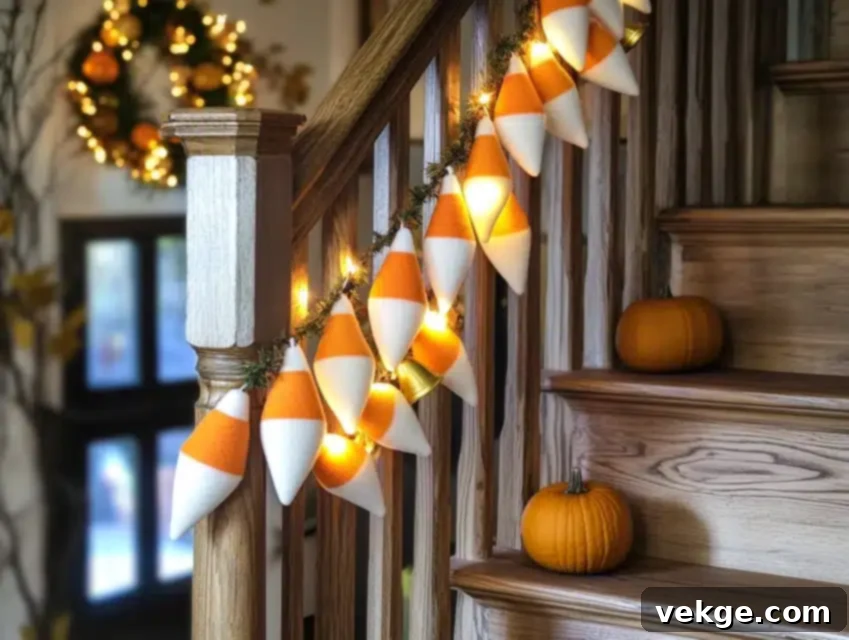
Adorn your staircase with a festive, handcrafted garland that transforms it into a captivating cascade of candy corn. This eye-catching decoration features alternating pieces of fabric and stiff felt triangles, each meticulously sized and shaped to mimic real candy corn. Small bells attached between segments add a gentle, whimsical tinkling sound as people pass by, enhancing the sensory experience. The garland gracefully weaves through the banister posts, creating a playful and inviting pattern that naturally draws the eye upward. Tiny LED lights thoughtfully woven through the garland pieces create magical sparkle effects, especially enchanting in the evening. Each connection point is reinforced to prevent any sagging or stretching, ensuring the garland maintains its beautiful form throughout the season. The entire length is adjustable, allowing for customization by adding or removing sections as needed to perfectly fit your space.
DIY Steps:
- Cut a generous number of triangle shapes from both stiff felt and patterned fabric in candy corn colors.
- Sew reinforced points at the top of each triangle for hanging strength and durability.
- Create spacing guides to ensure even distribution and a balanced look along the garland length.
- Attach small bells or other tiny embellishments between pieces, adding a delightful auditory element.
- Weave thin, flexible wire through the garland pieces to incorporate delicate LED light strands.
- Install discreet hook points along your banister or mantelpiece for secure and easy hanging.
- Design a practical storage roll or box to keep the garland organized and protected for use in subsequent years.
6. Welcoming Door Display
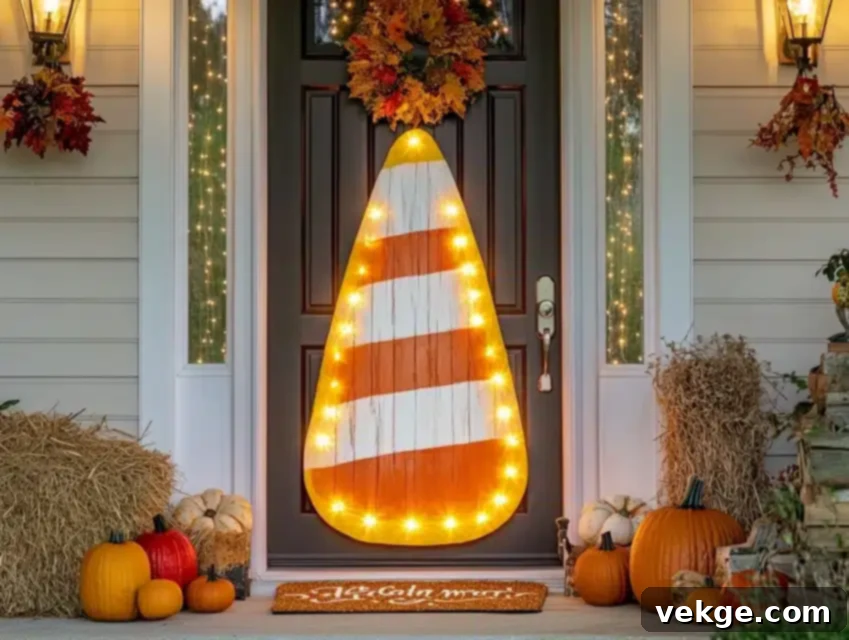
Make a grand statement with an oversized candy corn creation that becomes the focal point of your front door. This impressive wooden base is meticulously cut to perfect candy corn proportions, featuring hand-painted sections in vivid, seasonal colors. To ensure its enduring beauty through autumn’s unpredictable weather, weather-resistant paint and a durable sealer are applied, maintaining its brightness against rain and wind. Small, battery-operated lights subtly outline the edges, creating a warm, inviting glow that welcomes visitors as evening approaches. Custom lettering can be added to display personalized messages, easily changeable throughout the season for various holidays. The integrated hanging system allows for effortless removal and convenient storage between seasons. Each color section is subtly enhanced with a touch of glitter, catching sunlight throughout the day and adding an extra layer of sparkle.
DIY Steps:
- Carefully cut a large piece of plywood into the distinct candy corn shape, ensuring smooth, even edges.
- Sand all edges thoroughly for a smooth finish, removing any splinters or rough patches.
- Apply an outdoor primer coating to prepare the wood surface, enhancing paint adhesion and weather resistance.
- Paint the sections in the proper candy corn order (white, orange, yellow) using high-quality outdoor paint.
- Add custom lettering or decorative elements using stencils or freehand, once the paint is dry.
- Install an outdoor lighting system, such as solar-powered string lights or battery-operated LEDs, along the edges.
- Attach sturdy hanging hardware to the back, ensuring secure placement on your door or porch.
7. Dining Table Runner
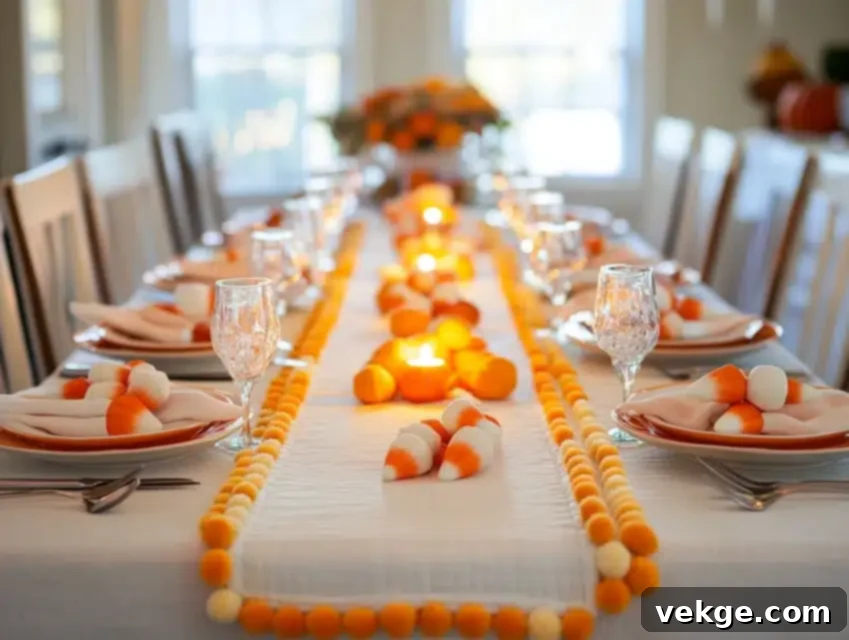
Craft a captivating table runner to serve as the festive centerpiece for your Halloween dining experience. The carefully selected fabrics include subtle metallic threads that beautifully catch candlelight during evening meals, adding an extra layer of sophistication. Each stripe transitions smoothly into the next, creating a perfect and harmonious candy corn color progression. The edges are adorned with small pompom trim in alternating seasonal colors, providing an extra touch of whimsical charm. Both ends of the runner feature elegantly quilted candy corn shapes that drape gracefully over the table edges. Designed with practicality in mind, the runner’s length allows for comfortable place settings while ensuring all decorative elements remain visible. A special non-slip backing fabric is incorporated to prevent any movement or slipping on the table surface, ensuring a perfect presentation.
DIY Steps:
- Accurately measure your dining table to determine the proper length and width for your runner.
- Cut fabric strips in graduating widths, corresponding to the white, orange, and yellow sections of candy corn.
- Sew the fabric stripes together with reinforced seams for durability and a clean finish.
- Add charming quilted end pieces in a candy corn motif, securely attaching them to the runner.
- Carefully attach decorative trim, such as pom-poms or tassels, along the edges for added flair.
- Create a non-slip backing layer, using material like felt or rubberized fabric, to prevent movement on the table.
- Sew a small care instruction label to your runner, making it easy to maintain for future seasons.
8. Seasonal Flower Arrangements
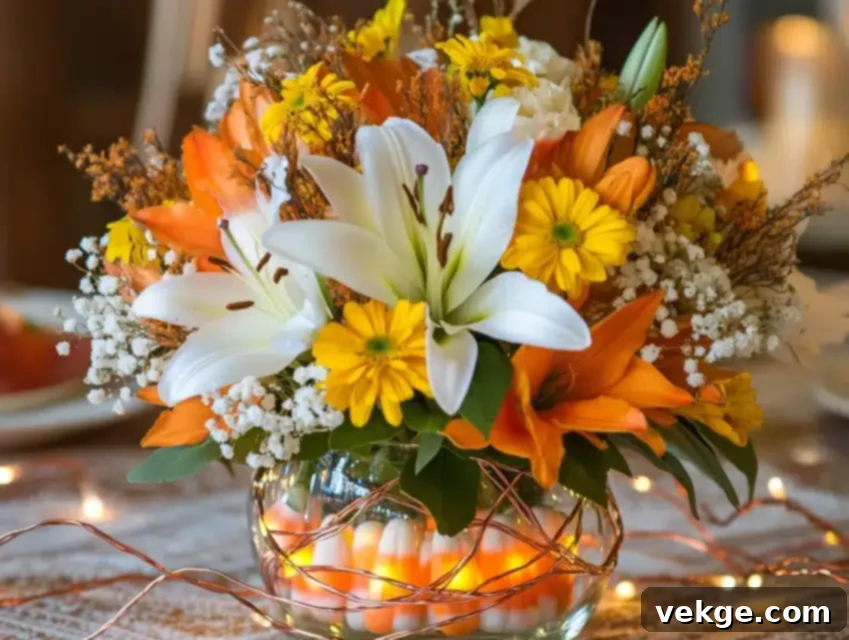
Create stunning floral displays that naturally capture the vibrant hues of candy corn using carefully selected blooms. Each arrangement begins with pure white lilies at the base, gracefully transitioning to rich orange marigolds in the middle section, and crowned with bright yellow daisies at the top, perfectly mirroring the candy corn’s iconic color progression. Small sprays of baby’s breath are strategically placed to add delicate texture and create soft, ethereal transitions between each color section. The clear glass vase itself becomes part of the design, with layers of actual candy corn nestled between the flower stems, adding a whimsical and unexpected touch. Subtle copper wire lights are artfully woven through the arrangement, providing magical illumination in the evening hours. With proper care and regular flower food, each arrangement can last approximately two weeks, bringing extended beauty to your home.
DIY Steps:
- Select fresh, vibrant flowers in crisp white (lilies, carnations), bright orange (marigolds, alstroemeria), and sunny yellow (daisies, chrysanthemums).
- Establish graduated height guides for your arrangement, with the tallest flowers at the top, gradually decreasing in height.
- Carefully layer real candy corn inside a clean glass vase, filling about one-third of the way up before adding water.
- Begin building your floral arrangement from the bottom up, placing white flowers first, then orange, and finally yellow.
- Gently weave thin copper wire lights throughout the arrangement, ensuring the battery pack is discreetly hidden.
- Mist the flowers daily with water to maintain their freshness and vibrant appearance.
- Change the water every three days, adding flower food to prolong the life of your beautiful arrangement.
9. Decorated Seasonal Pumpkins
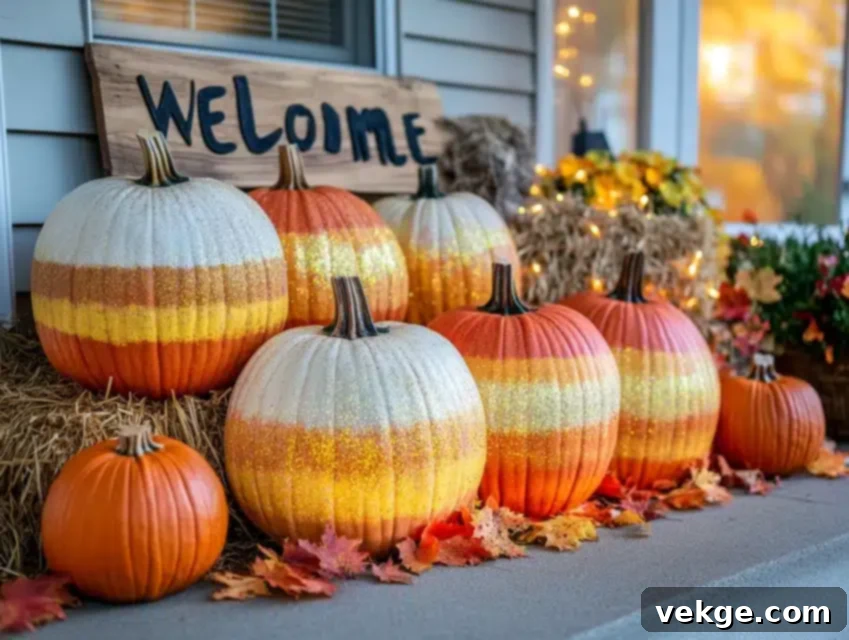
Transform ordinary pumpkins into dazzling candy corn masterpieces, instantly brightening your front porch or indoor fall display. Each pumpkin features meticulously hand-painted stripes that perfectly mimic candy corn coloring, starting with a crisp white base near the stem. The middle sections showcase rich orange hues that seamlessly fade into bright yellow bases, creating a natural and captivating ombre effect. Small rhinestones and glitter accents are strategically placed in certain sections, beautifully catching the morning dew and evening lights, adding an extra layer of sparkle. The entire arrangement benefits from a variety of pumpkin sizes, ranging from tiny decorative gourds to impressive large statement pieces. A weather-resistant sealer is applied to keep the paint vibrant and fresh throughout the entire autumn season. Importantly, using special non-toxic paint allows these pumpkins to be composted or returned to the garden after the season concludes.
DIY Steps:
- Clean pumpkins thoroughly with a damp cloth and allow them to dry completely before painting.
- Apply a white primer base coat to the top section of each pumpkin, near the stem, allowing it to dry fully.
- Carefully paint the distinct color sections – white, orange, and yellow – creating clean lines or a subtle gradient effect.
- Add sparkle embellishments, such as rhinestones or glitter, while the paint is still slightly wet for better adhesion.
- Seal the decorated pumpkins with a weather-protection spray or clear coat to ensure durability outdoors.
- Create attractive display platforms or stands of varying heights to showcase your pumpkins effectively.
- Monitor your decorated pumpkins throughout the season for any touch-up needs or signs of wear.
10. Creative Wall Display
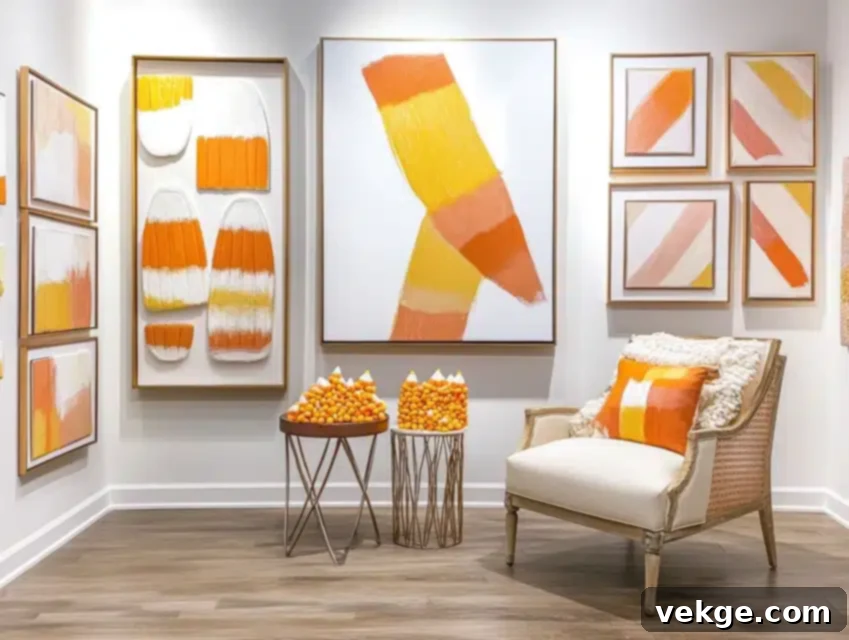
Curate an inspiring gallery wall that celebrates candy corn through diverse artistic interpretations, transforming an ordinary wall into a festive focal point. Large canvas pieces can feature abstract candy corn shapes rendered in bold brush strokes and rich textures, adding a contemporary touch. Smaller framed pieces showcase actual candy corn thoughtfully arranged in captivating photographic patterns, offering a unique perspective. Mixed media elements, such as fabric art with intricately embroidered candy corn motifs, introduce depth and tactile interest. Metallic frames in warm copper and gold tones add a sophisticated gleam and warmth to the overall display. Strategically placed LED picture lights effectively highlight key pieces, creating a dramatic and inviting ambiance during evening hours. The entire gallery arrangement is designed for easy updates, allowing for seamless seasonal variations or the introduction of new fall-themed artwork.
DIY Steps:
- Before hanging, plan your gallery wall layout on the floor first to visualize the arrangement and ensure balance.
- Create paper templates of each artwork, taping them to the wall to finalize spacing and positioning before drilling.
- Install proper wall anchors appropriate for the weight of your chosen artwork to ensure secure hanging.
- Begin by hanging the largest or central pieces first, using them as anchors for the rest of the display.
- Arrange smaller artwork around the main pieces, creating visual flow and cohesion.
- Install discreet picture lighting, such as LED strips or small spotlights, to enhance the artwork in the evenings.
- Label the back of each artwork with its placement to ensure easy reassembly or storage for next year.
11. Outdoor Light Display
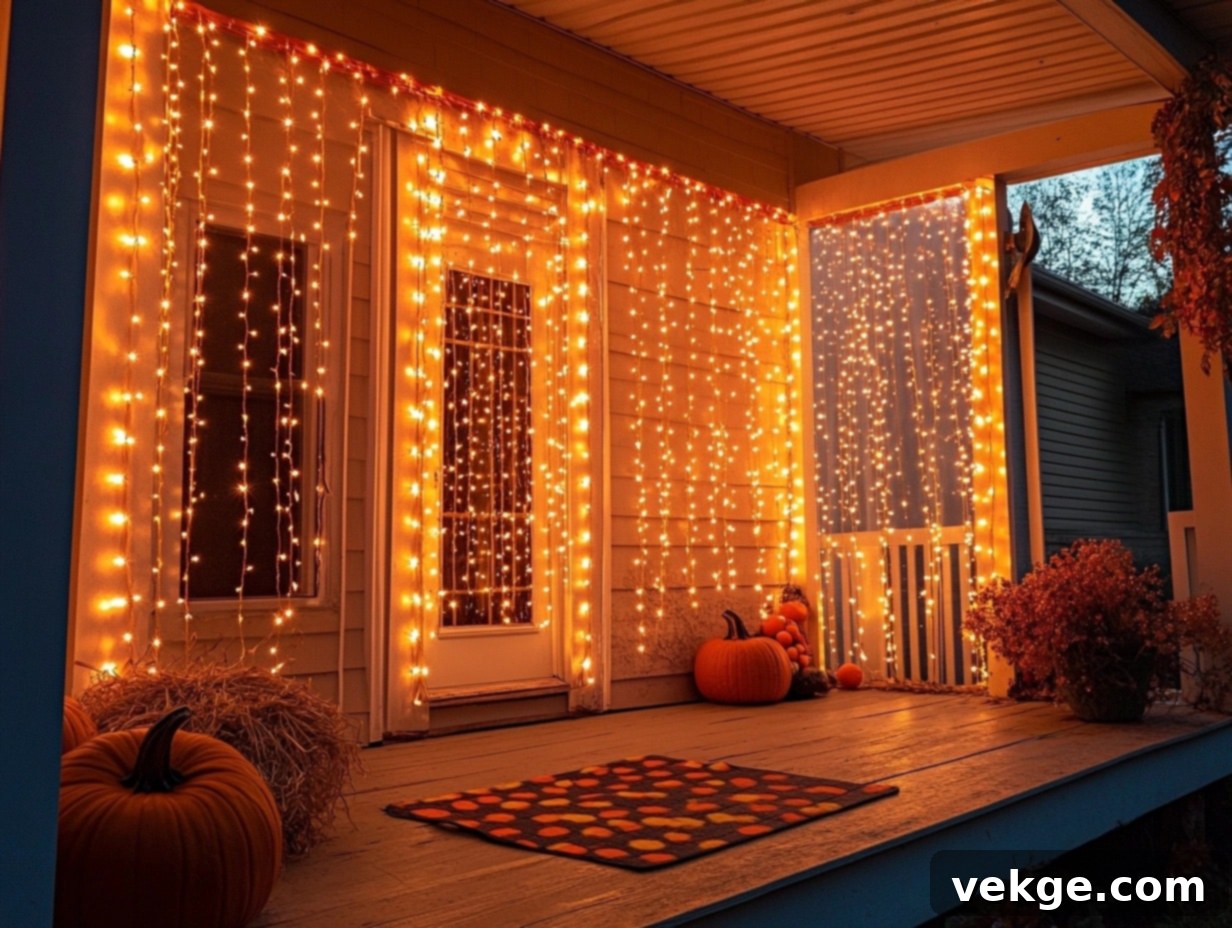
Transform your front porch into a magical candy corn wonderland using custom-painted string lights. Each bulb cover features meticulously hand-painted candy corn stripes, creating a striking and vibrant effect when illuminated. The lights cascade gracefully from the porch ceiling in varying lengths, forming a dazzling curtain of glowing candy corn. Special weatherproof paint ensures that the colors remain vibrant and resistant to fading, even through autumn rain and wind. The arrangement includes timer-controlled settings, allowing for perfect evening displays without manual intervention. For an extra touch of enchantment, motion sensors can activate special lighting patterns when guests approach, adding an element of surprise. The entire display casts beautiful, warm-colored shadows on the porch floor below, enhancing the festive atmosphere.
DIY Steps:
- Carefully clean each light cover or bulb housing to ensure a clean surface for painting.
- Apply a high-quality weatherproof primer first, creating a durable base for your colors.
- Paint the stripes in the proper candy corn sequence (white, orange, yellow) onto each bulb cover, allowing ample drying time between coats.
- Seal the painted covers with an outdoor protectant spray to enhance durability and weather resistance.
- Create graduated hanging points along your porch ceiling to achieve a dynamic cascading effect for the light strands.
- Install a timer and, optionally, motion sensors to automate your light display for convenience and visual interest.
- Before final installation, conduct a thorough test for weather resistance to ensure the paint and lights will withstand outdoor conditions.
12. Layered Candle Creation
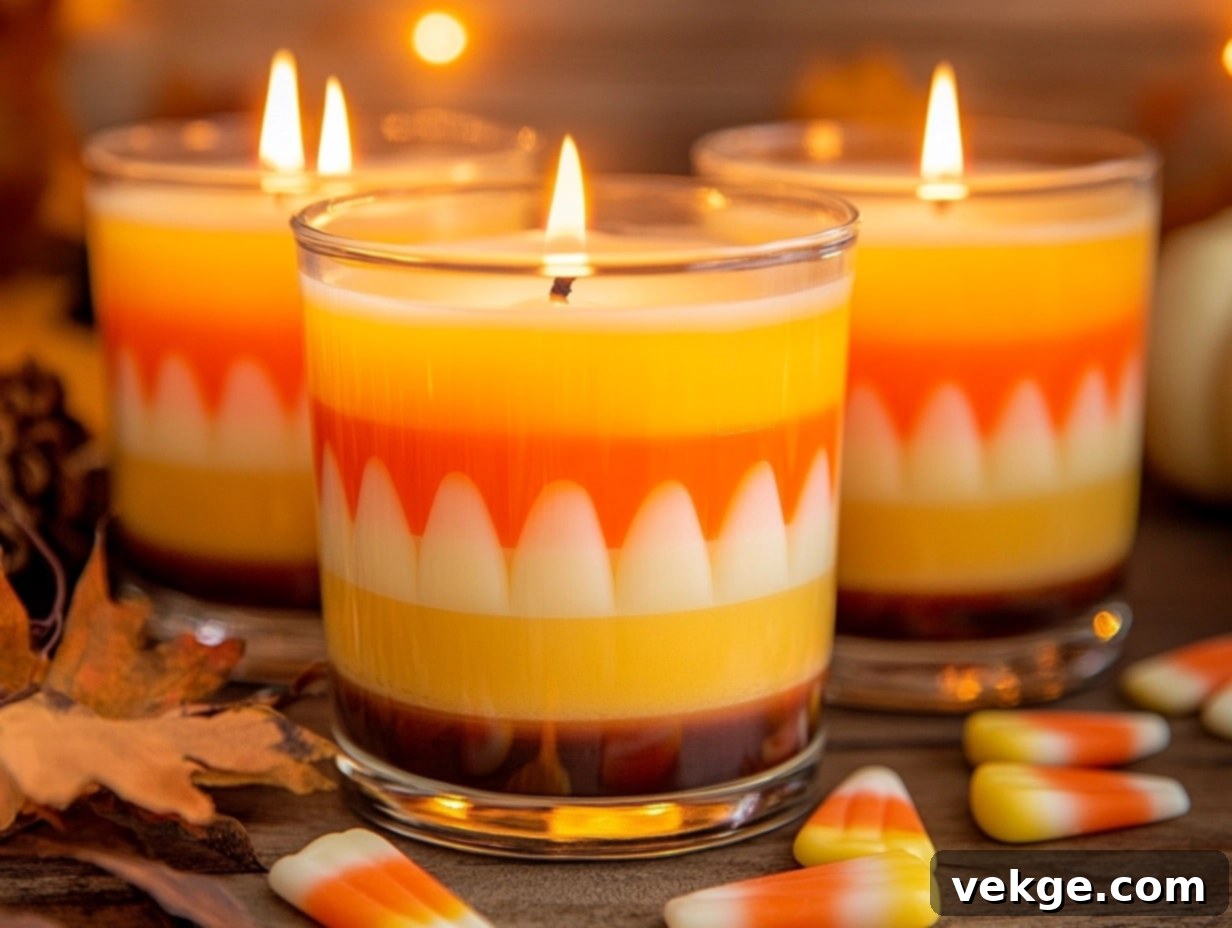
Craft unique layered candles that elegantly reveal candy corn colors as they slowly burn down, adding a dynamic element to your autumn decor. Each distinct layer contains a specially chosen scent: warm vanilla for the white top, sweet orange cream for the middle section, and rich honey for the yellow base, creating a delightful aromatic experience. The colors are designed to blend subtly at their meeting points, creating beautiful and natural gradient effects. Glass containers feature delicate etched candy corn patterns that glow enchantingly when the candles are lit, enhancing the visual appeal. A thoughtful triple-wick design ensures even burning throughout each colorful layer, maximizing the candle’s lifespan. Special wax additives create a captivating shimmer effect in the melted portions, adding a luxurious touch. Each candle offers approximately 40 hours of burn time, providing long-lasting seasonal ambiance and fragrance.
DIY Steps:
- Prepare wicks with proper support mechanisms, ensuring they remain centered during pouring.
- Melt each color of candle wax separately in dedicated pouring pitchers, monitoring temperature carefully.
- Add specific, complementary scents to each layer (vanilla for white, orange for orange, honey for yellow) for a multi-sensory experience.
- Pour each layer at the correct temperature, allowing sufficient cooling and setting time before adding the next.
- Ensure the wicks are perfectly centered throughout the pouring process to promote even burning.
- Create protective and decorative packaging for your finished candles, especially if gifting.
- Include clear burning instructions for safety and to optimize candle performance.
13. Holiday Accent Tree
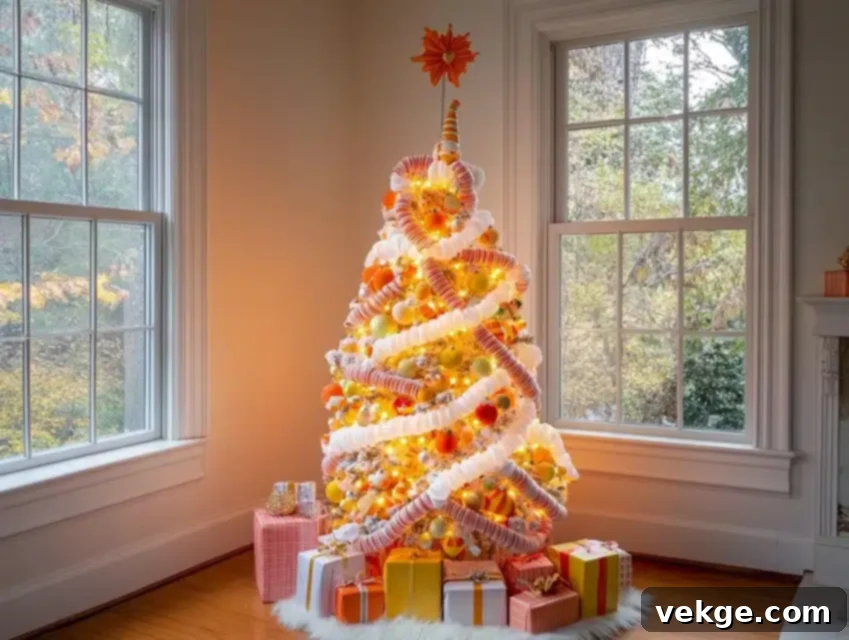
Introduce a charming four-foot accent tree to your living room corner, specially designed to embody the playful spirit of candy corn. Its branches are adorned with carefully curated ornaments in signature white, orange, and yellow hues, often in candy corn shapes themselves. Tiny LED lights are meticulously wrapped around each branch, creating a warm, inviting glow that softly illuminates the room. A custom-made candy corn garland gracefully spirals from the top to the bottom, achieving perfect symmetry and a cohesive look. Small mirror balls in complementary orange and yellow tones are strategically placed to reflect light throughout the space, adding a dynamic sparkle. The tree topper features an oversized, illuminated candy corn creation, serving as a whimsical crown. To complete the festive scene, presents wrapped in coordinating papers are thoughtfully piled beneath the tree’s branches, enhancing the holiday magic.
DIY Steps:
- Assemble the tree base securely, ensuring it is stable and upright.
- Add lights from the bottom branches upwards, evenly distributing them for a consistent glow.
- Create a custom ornament layout, grouping colors or shapes for visual impact, and distributing them evenly.
- Install the candy corn garland symmetrically, ensuring it spirals smoothly around the tree.
- Carefully position mirror elements or reflective ornaments to maximize light reflection throughout the room.
- Arrange aesthetically wrapped display boxes or faux presents beneath the tree to complete the festive look.
- Design a practical storage system for all tree components, ensuring easy packing and setup for future seasons.
14. Decorative Serving Collection
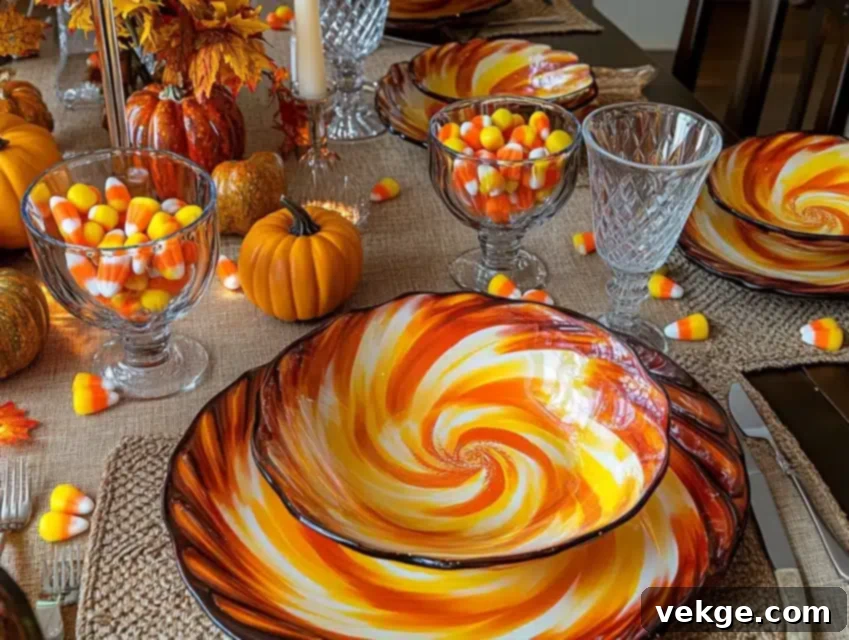
Curate a sophisticated collection of serving pieces that elegantly celebrate candy corn colors. Each bowl features exquisite hand-painted stripes, swirling gracefully outward from the center in a perfect, artistic color progression. The serving platters showcase subtle candy corn patterns along their edges, while maintaining clean, minimalist centers ideal for food display. Special ceramic glazes are employed to create depth and a sense of fluid movement within the color transitions. A delightful surprise awaits guests: hidden candy corn shapes gradually appear as each serving piece is emptied. This versatile collection includes everything from tiny dip bowls perfect for appetizers to large serving platters suitable for main courses. Importantly, every piece is crafted to remain food-safe, allowing you to display festive designs without compromising functionality when serving your autumn feasts.
DIY Steps:
- Clean ceramic pieces thoroughly to ensure a pristine surface for painting, using soap and water or rubbing alcohol.
- Apply a ceramic primer base, if necessary, to help the paint adhere smoothly and evenly.
- Paint your chosen designs with food-safe ceramic colors, allowing each layer to dry according to product instructions.
- Create a protective clear glaze finish that is also food-safe, ensuring durability and easy cleaning.
- Test a sample piece for dishwasher safety or recommend hand-washing to preserve the artwork.
- Design matching place cards or decorative labels to complement your serving collection.
- Create proper, padded storage spaces to protect your decorative serving pieces between seasons.
15. Glowing Paper Lanterns
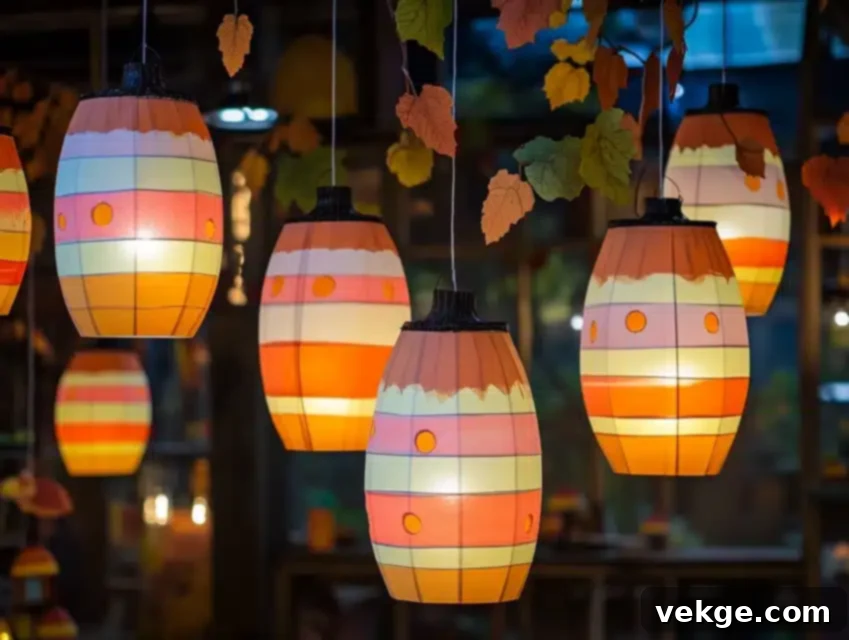
Craft a captivating series of paper lanterns that cast enchanting candy corn-colored shadows throughout your living space. Each lantern begins with white paper, carefully painted in graduated stripes of white, orange, and yellow, mimicking the iconic treat. Inside, battery-operated flameless candles provide safe, long-lasting illumination, eliminating any fire hazards. The lanterns are designed to hang at varying heights, creating a dynamic and visually interesting “floating candy corn” display. Special paint techniques allow light to beautifully filter through the colored sections while maintaining optimal color intensity. Small cutouts in whimsical candy corn shapes are integrated into the design, adding an extra layer of pattern to the light display. Thoughtful wire reinforcements ensure the lanterns maintain their perfect spherical or cylindrical shape over time, contributing to their durability and aesthetic appeal.
DIY Steps:
- Select proper paper weight for your lanterns, opting for sturdy but translucent options to allow light through.
- Create cutting templates first for consistent lantern shapes and accurate stripe placement.
- Paint colors in the proper candy corn order, ensuring each stripe is distinct and vibrant, and allowing drying time.
- Install wire support frames inside each lantern to help them maintain their desired shape.
- Add hanging hardware securely to the top of each lantern, ensuring it can support its weight.
- Position battery-operated lighting elements (flameless candles or small LED puck lights) inside each lantern.
- If using real candles, test flame resistance of paper and take extreme safety precautions; otherwise, stick to flameless options.
16. Layered Mantel Design
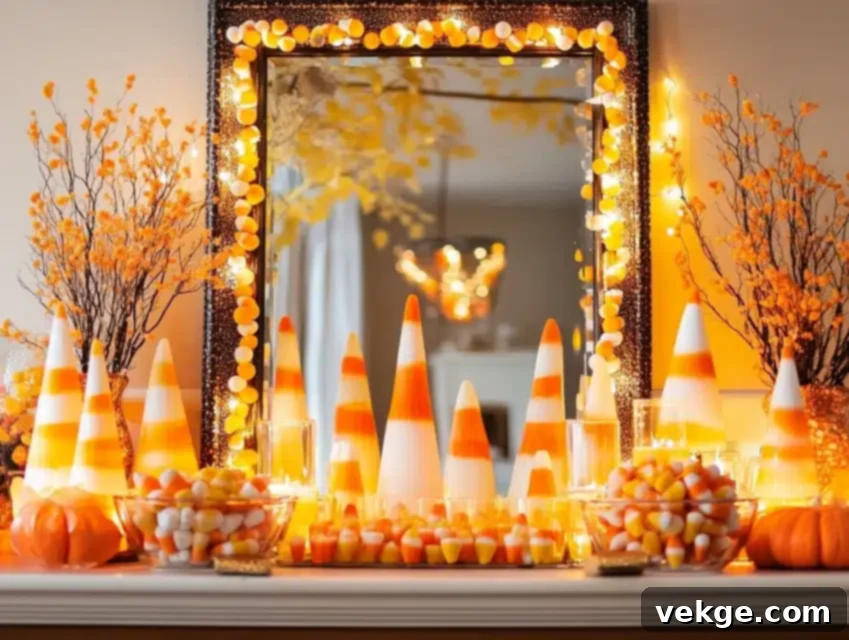
Revitalize your fireplace mantel into a captivating candy corn-inspired display that instantly commands attention. The background features a striking large mirror, artfully framed with hand-painted candy corn patterns that set the festive tone. Graduated pillar candles in harmonious seasonal colors create dynamic height variations, adding depth and visual interest across the entire display. Small, charming candy corn trees of varying sizes strategically fill spaces between larger elements, contributing to a lush and layered look. Elegant crystal bowls, brimming with actual candy corn, beautifully catch and reflect light, adding a touch of sparkle. Delicate string lights are intricately woven through the entire arrangement, casting a magical glow during evening hours. To maintain freshness, the entire display can be subtly altered each week by rotating seasonal elements, ensuring a perpetually engaging autumn focal point.
DIY Steps:
- Clear the mantel completely first, providing a blank canvas for your creative vision.
- Create a scaled arrangement plan (drawing or digital) to visualize the placement of each element.
- Position the largest items, such as the framed mirror and tallest candles, first to establish the foundation.
- Carefully add lighting elements, weaving string lights discreetly throughout the display for an even glow.
- Layer smaller decorations like candy corn trees and crystal bowls, filling gaps and adding intricate details.
- Create secure anchor points for any potentially unstable items, especially near children or pets.
- Document your arrangement with photos or notes for easy replication or adaptation in subsequent years.
17. Table Setting Accents
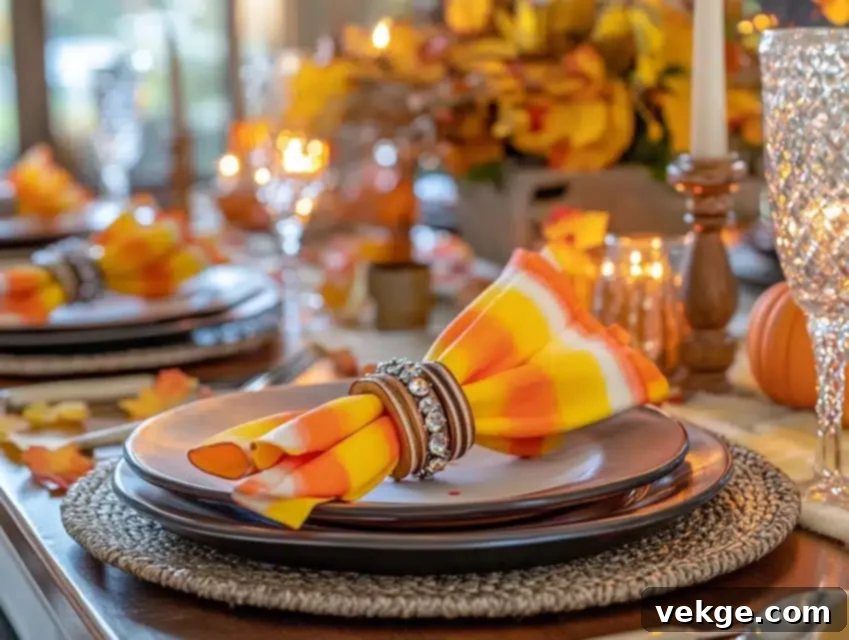
Elevate your autumn dining experience with these custom-designed napkin rings, crafted with exceptional attention to detail. Each ring features three distinct candy corn-colored bands, meticulously hand-painted onto sturdy wooden bases. Small, sparkling crystal accents are strategically placed at the color transitions, beautifully catching candlelight during elegant evening meals. The rings are designed to hold napkins in sculptural shapes, showcasing all three candy corn colors simultaneously for a harmonious effect. Matching place cards, adorned with miniature candy corn designs, perfectly coordinate with the rings, creating a cohesive and polished table setting. The durable finish ensures the rings withstand multiple dinner parties and careful storage, maintaining their beauty season after season. Furthermore, every ring includes a soft felt lining, thoughtfully added to protect delicate napkin fabrics from any potential snagging or damage.
DIY Steps:
- Carefully cut wooden ring bases to your desired size and thickness, ensuring smooth interiors for napkins.
- Sand all surfaces completely smooth to ensure a polished look and optimal paint adhesion.
- Precisely paint the white, orange, and yellow color bands onto each wooden ring, allowing each layer to dry thoroughly.
- Add small crystal embellishments or beads at the color transitions, carefully securing them with strong adhesive.
- Apply a protective clear coating or sealant to the painted rings to enhance durability and shine.
- Design suitable storage solutions, such as compartmentalized boxes, to protect your rings between uses.
- Create matching place cards, incorporating miniature candy corn designs, to complete your festive table setting.
18. Display Stand Collection
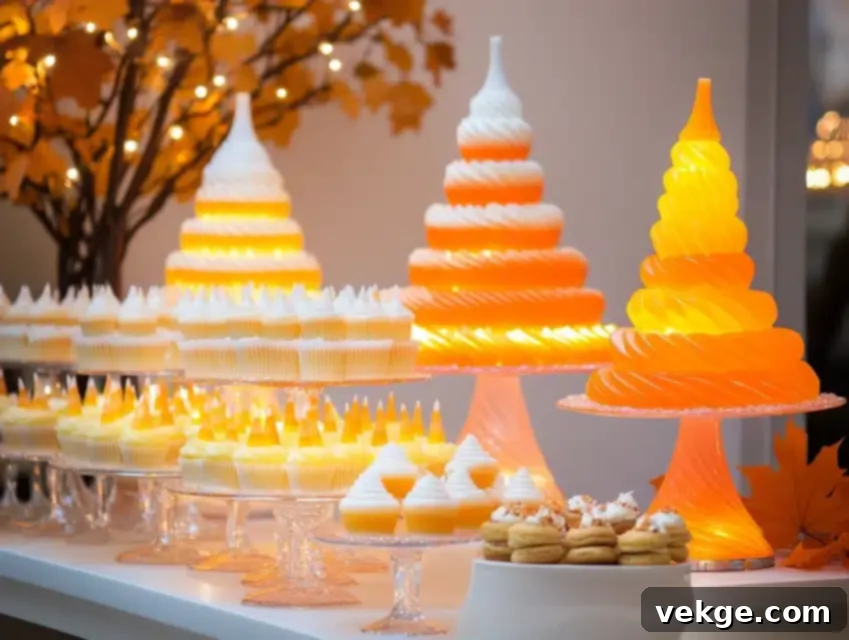
Curate a spectacular set of cake or dessert stands that create a stunning candy corn-colored display for your autumn treats. The stands feature thoughtfully graduated heights, with each tier meticulously painted in flowing, candy corn-inspired patterns that exude seasonal charm. Special food-safe paints are used, ensuring that delicious treats can be placed directly on the surfaces without any concerns. Small LED lights are cleverly built into the bases of the stands, illuminating each level with a subtle, inviting glow, perfect for evening entertaining. This versatile collection works beautifully both as a cohesive centerpiece or as individual accent pieces distributed throughout your home. Elegant crystal elements are added to each stand, creating an extra layer of sparkle and dynamic movement. The entire set is designed for efficient packing, allowing for easy storage between seasons and simple setup for your next festive gathering.
DIY Steps:
- Select various stand heights and sizes to create a dynamic and visually appealing tiered display.
- Create paint protection barriers, such as painter’s tape or stencils, to achieve clean, crisp lines for your designs.
- Apply food-safe color coats in white, orange, and yellow, following the candy corn color progression, and allow adequate drying time.
- Carefully install small, battery-operated lighting elements within the base or beneath the tiers of each stand.
- Add crystal decorations, such as beads or small pendants, to each stand for added sparkle and elegance.
- Test the weight capacity of each stand to ensure it can safely hold your desired treats and decorations.
- Design custom storage containers or padded boxes to protect your stands and simplify organization between seasons.
Conclusion
After years of joyfully developing these candy corn-inspired decorations, I’ve come to truly appreciate that this humble, tricolored candy offers endless creative possibilities for seasonal styling. Each project, whether big or small, brings its unique challenges and rewards, culminating in unique seasonal displays that never fail to delight visitors of all ages.
The key to success in transforming your home with a candy corn theme lies in careful color selection, ensuring a sophisticated balance, and meticulous attention to detail in every piece. These decorations are designed to work harmoniously together, weaving a cohesive and cheerful autumn theme throughout any space you choose to adorn. Remember, candy corn colors can be incredibly elegant and sophisticated when properly balanced and thoughtfully displayed, moving beyond mere kitsch to genuine autumnal charm.
Most importantly, allow yourself to have fun with your creations! These playful decorations are meant to bring immense joy to both the creators who craft them and the viewers who experience their magic. Whether you decide to start small with a single, charming project or feel inspired to transform your entire home, embracing candy corn decorations adds a unique warmth, whimsy, and vibrant spirit to the beloved autumn season.
Frequently Asked Questions
Where Can I Buy Candy Corn Decorations?
Finding candy corn decorations is usually quite easy during the fall season. I’ve consistently found the best selection at major craft stores like Michaels and Hobby Lobby, typically starting in late August. For unique, handcrafted pieces, online marketplaces such as Etsy are an excellent resource, often featuring artisan-made items you won’t find anywhere else. Retailers like Target and HomeGoods also frequently stock a wide array of affordable candy corn-themed items in their seasonal sections. Don’t forget to check local fall festivals and craft fairs, as they often feature one-of-a-kind, handmade decorations from local artisans.
What Are Some Unique Candy Corn Decor Items?
Beyond traditional items like wreaths and garlands, the creativity for candy corn decor is boundless. I’ve discovered fascinating pieces such as candy corn-shaped throw pillows, elegant ceramic serving dishes with subtle candy corn motifs, and even hand-painted furniture featuring the iconic stripes. Expand your search to include unexpected items like stained glass suncatchers that refract light in autumn hues, garden stakes to brighten your outdoor spaces, or festive bathroom sets for a cohesive seasonal look. Many independent artists and crafters continually innovate, creating one-of-a-kind pieces that incorporate candy corn themes in surprisingly sophisticated and imaginative ways.
How Can I Make DIY Candy Corn Decorations at Home?
Embarking on DIY candy corn decorations is a rewarding way to personalize your fall home. Start with simple, beginner-friendly projects like painting mason jars in candy corn layers or creating charming wooden signs with the signature colors. Basic craft supplies – including white, orange, and yellow acrylic paints, ribbons, and felt – can transform everyday items into delightful, themed decor. Before tackling larger, more complex pieces, I highly recommend beginning with smaller projects such as hand-painted pumpkins or paper crafts. Most projects require only minimal tools and readily available supplies from any local craft store, making it accessible for everyone.
What Are Creative Ways to Decorate with a Candy Corn Theme?
To create a balanced and appealing candy corn theme, try mixing these vibrant elements with more traditional fall decor, such as natural pumpkins, gourds, and autumn foliage. Layer different textures using fabric, paint, actual candy corn, and even natural elements to add depth and interest. Create small vignettes by combining various candy corn items at different heights on shelves, mantels, or side tables. I particularly love incorporating lighting elements – like fairy lights or flameless candles – to make displays glow warmly in the evenings. Remember to spread your decorative pieces throughout your space rather than clustering everything in one area, allowing the theme to flow naturally.
Are There Affordable Options for Candy Corn Decor?
Absolutely! Decorating with a candy corn theme doesn’t have to break the bank. Many dollar stores and discount retailers begin stocking a variety of candy corn-themed items from September onward, offering budget-friendly options. Furthermore, creating your own decorations is often the most cost-effective approach. You can transform existing fall decor with just a few cans of white, orange, and yellow spray paint, or use basic craft supplies to create charming pieces. Keep an eye out for end-of-season sales in early November to stock up on decor for the following year at significantly reduced prices. Making simple pieces yourself not only saves money but also allows you to achieve exactly the look and feel you desire for your autumn home.
