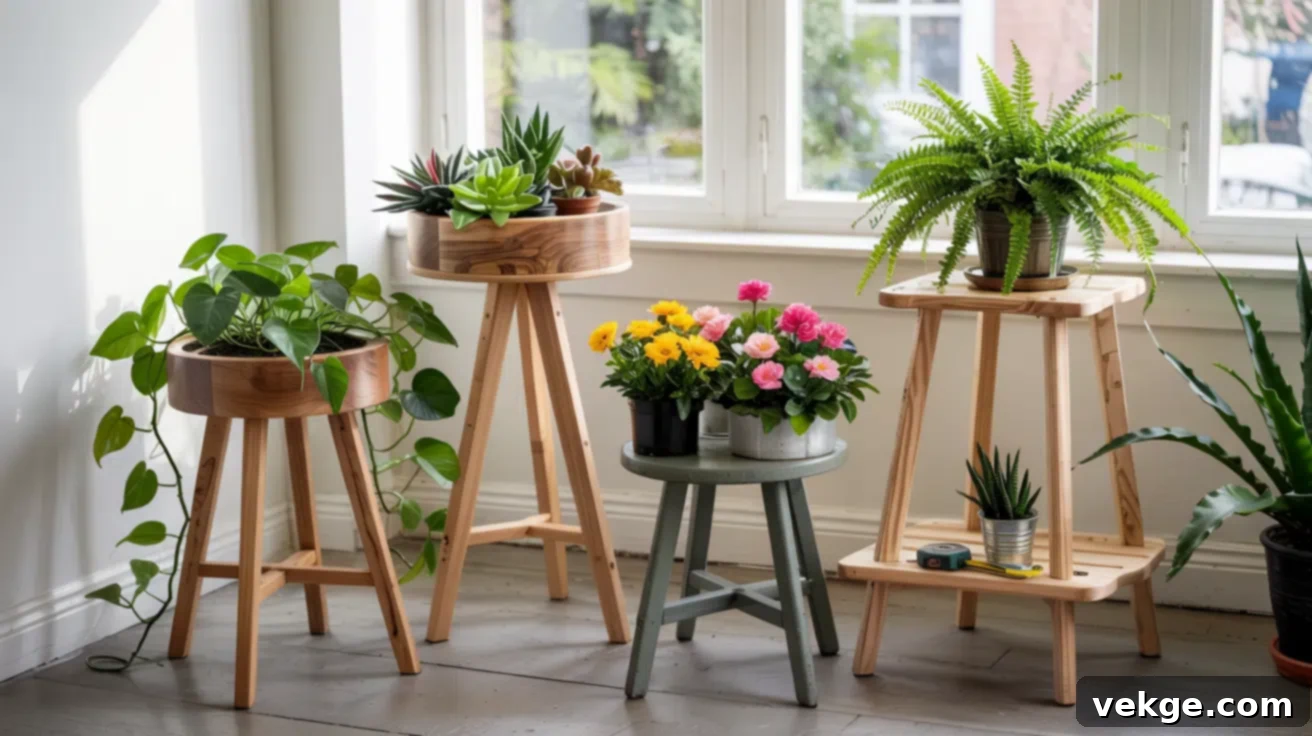
Elevate Your Greenery: 17 Easy DIY Plant Stand Plans for Every Home and Skill Level
Do you ever feel like your cherished plant collection is taking over every available surface, from windowsills to the floor? If you’re a proud plant parent, chances are you’ve faced the delightful dilemma of having more plants than ideal spots to showcase them. It’s a common challenge, but one with a simple, rewarding solution: DIY plant stands.
In this comprehensive guide, I’m excited to share 17 incredibly easy, budget-friendly, and stylish DIY plant stand plans. The best part? You won’t need a professional workshop or an arsenal of expensive tools. Whether you’re a seasoned DIY enthusiast or just starting your woodworking journey, you’ll find designs perfectly suited for small apartments, cozy indoor corners, expansive outdoor patios, and even elegant living room displays.
Get ready to transform your plant arrangements, reclaim your floor space, and add a touch of handcrafted charm to your home. These projects are designed to be stress-free, rewarding, and result in beautiful, functional pieces that your plants will love. Let’s dive in and give your leafy companions the elevated view they truly deserve!
Simple & Affordable DIY Plant Stand Ideas for Beginners
These plant stand ideas are ideal for anyone looking for quick weekend projects or for beginners taking their first steps into DIY. My philosophy is to make the most of what you already have – think scrap wood, leftover paint, and repurposed items. By keeping the designs straightforward, you can create a custom plant stand that perfectly fits your space and budget without unnecessary costs or complexity.
With just a little time and creative effort, you can craft a functional and aesthetically pleasing plant stand that enhances your decor and beautifully displays your greenery.
1. The Classic Scrap Wood Stand
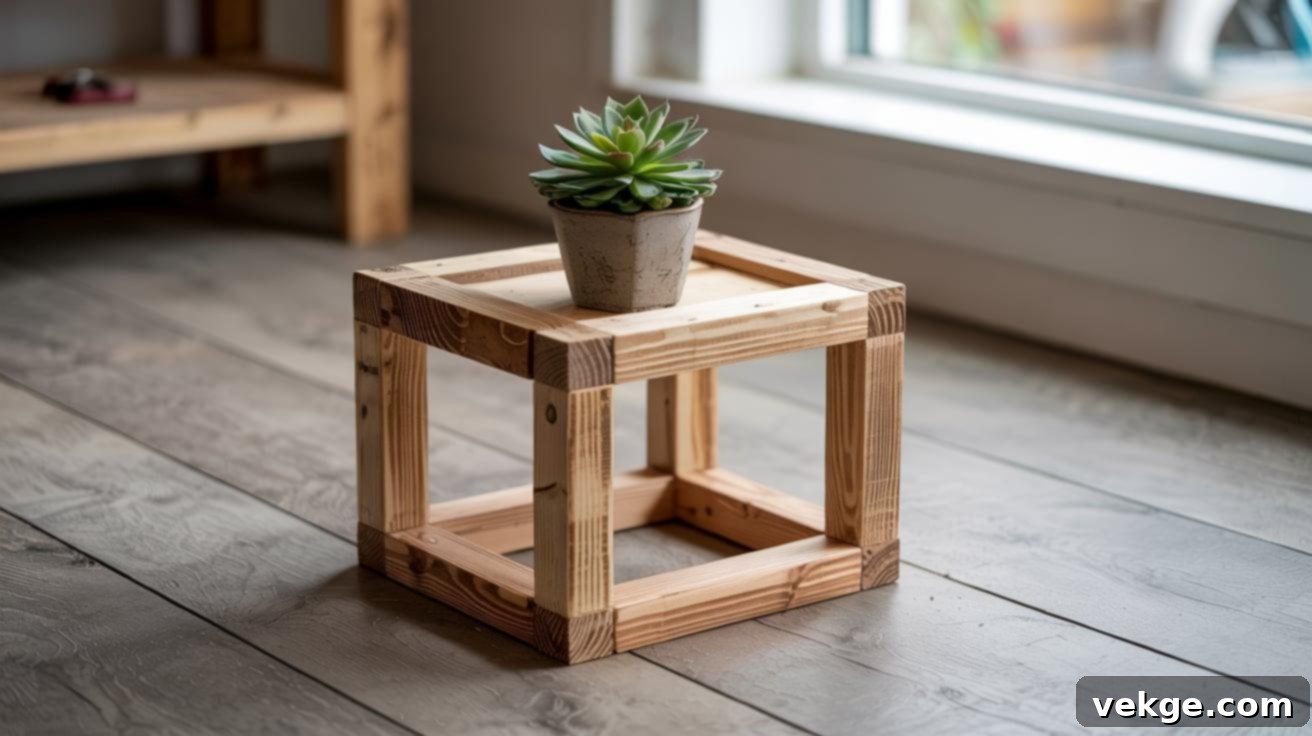
This beginner-friendly stand is a testament to the power of using leftover materials. Constructed from simple scrap wood pieces, it features a clean, square frame with no complex angled cuts or intricate joinery. Imagine using 1x2s salvaged from an old shelving project or other small timber remnants. Its flat, lightweight design makes it incredibly easy to assemble using just wood glue and a few nails or screws.
It’s the perfect project for those new to woodworking, offering a quick win without the need for advanced skills. Place it on a tabletop to add height to a smaller plant, or use it on an entryway floor to welcome guests. A quick sanding and a coat of paint or stain can elevate its appearance, making it look far more expensive than it actually was.
2. Tiered Plant Stand for Maximizing Small Spaces
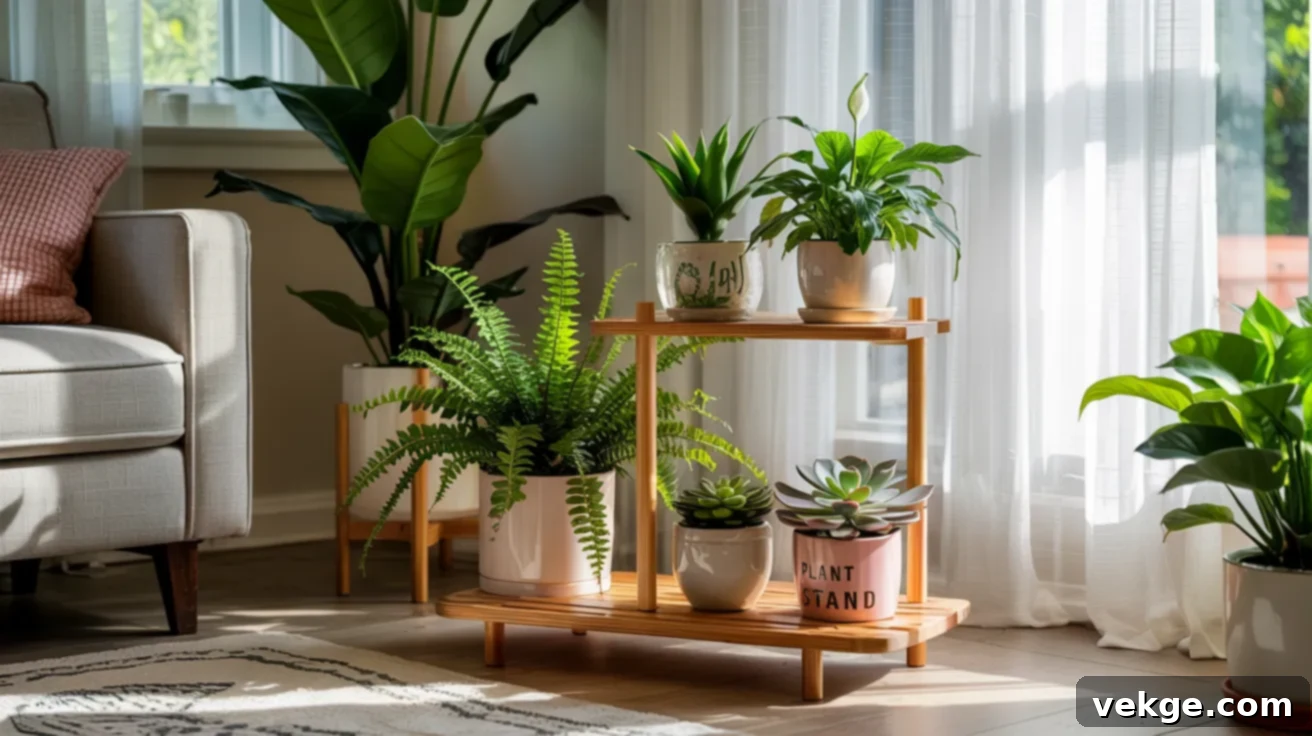
If you’re dealing with limited floor space but have a growing plant collection, going vertical is a smart strategy. A multi-level plant stand allows you to display several plants without occupying a large footprint. This design can be easily crafted using 1x2s for the frame and plywood scraps for the shelves, providing a sturdy yet compact solution.
The tiered structure is not only space-saving but also functional: the top tier is ideal for sun-loving plants that thrive in bright light, while the lower shelves can accommodate plants that prefer partial shade. This versatile design fits beautifully on a small balcony, in a narrow hallway, or tucked into a cozy corner of your living room. You can easily customize the size and spacing of the shelves to fit your specific pots and plant heights, making it a super useful and charming addition to any area.
3. Instant Plant Stands: Clever Dollar Store Hacks
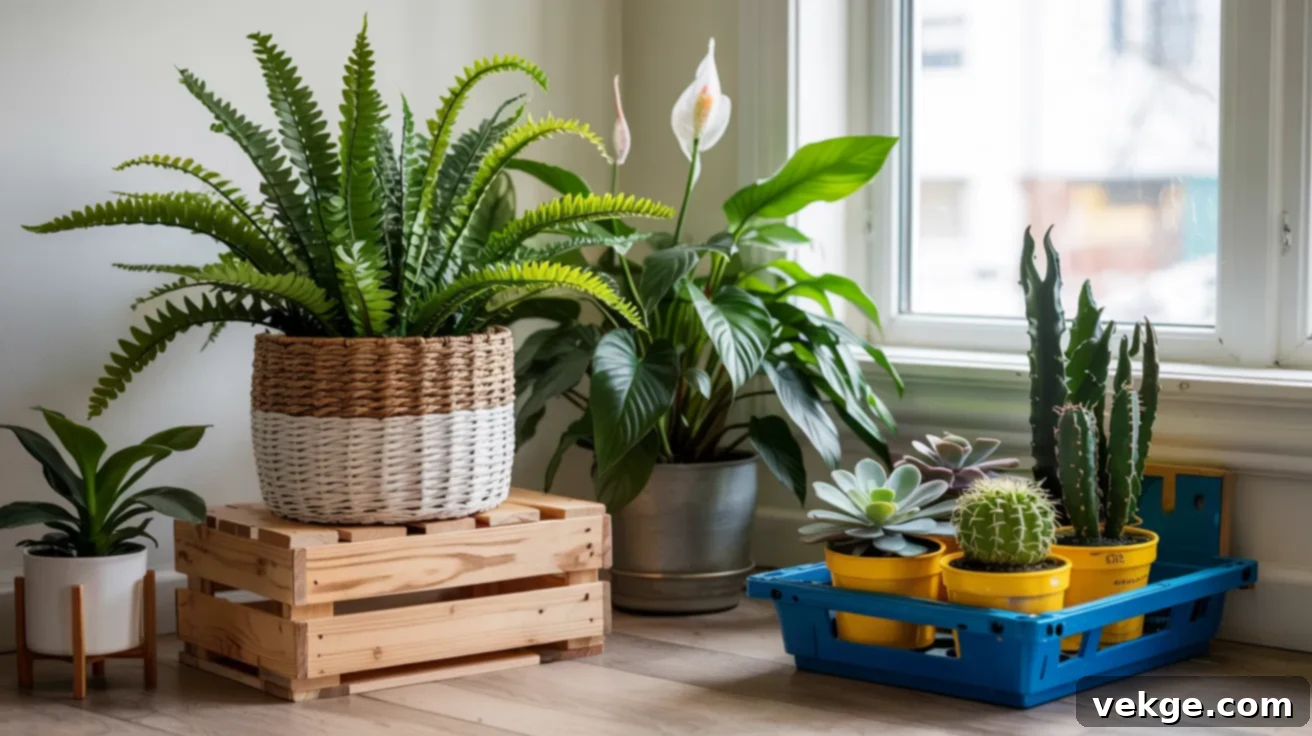
For the ultimate in budget-friendly and quick plant elevation, look no further than your local dollar store or discount retailer. You’ll be amazed at the variety of items that can be repurposed into stylish plant stands. Think beyond their intended use: baskets, crates, sturdy bins, and even small stools can be transformed with minimal effort.
A simple hack involves flipping a sturdy basket or small crate upside down – suddenly, you have an elevated platform for your plant. A coat of spray paint can instantly tie it into your existing decor, making it look much more sophisticated. For taller stands, simply stack two dollar store items securely. Trays can serve as instant shelves, or small plastic bins can be glued together to create modular, multi-level displays. This method offers the fastest way to get your plants off the floor and into prime viewing position, with the added benefit of being incredibly easy to swap out or rearrange as your needs change.
4. DIY Ladder-Style Plant Stand for Abundant Greenery
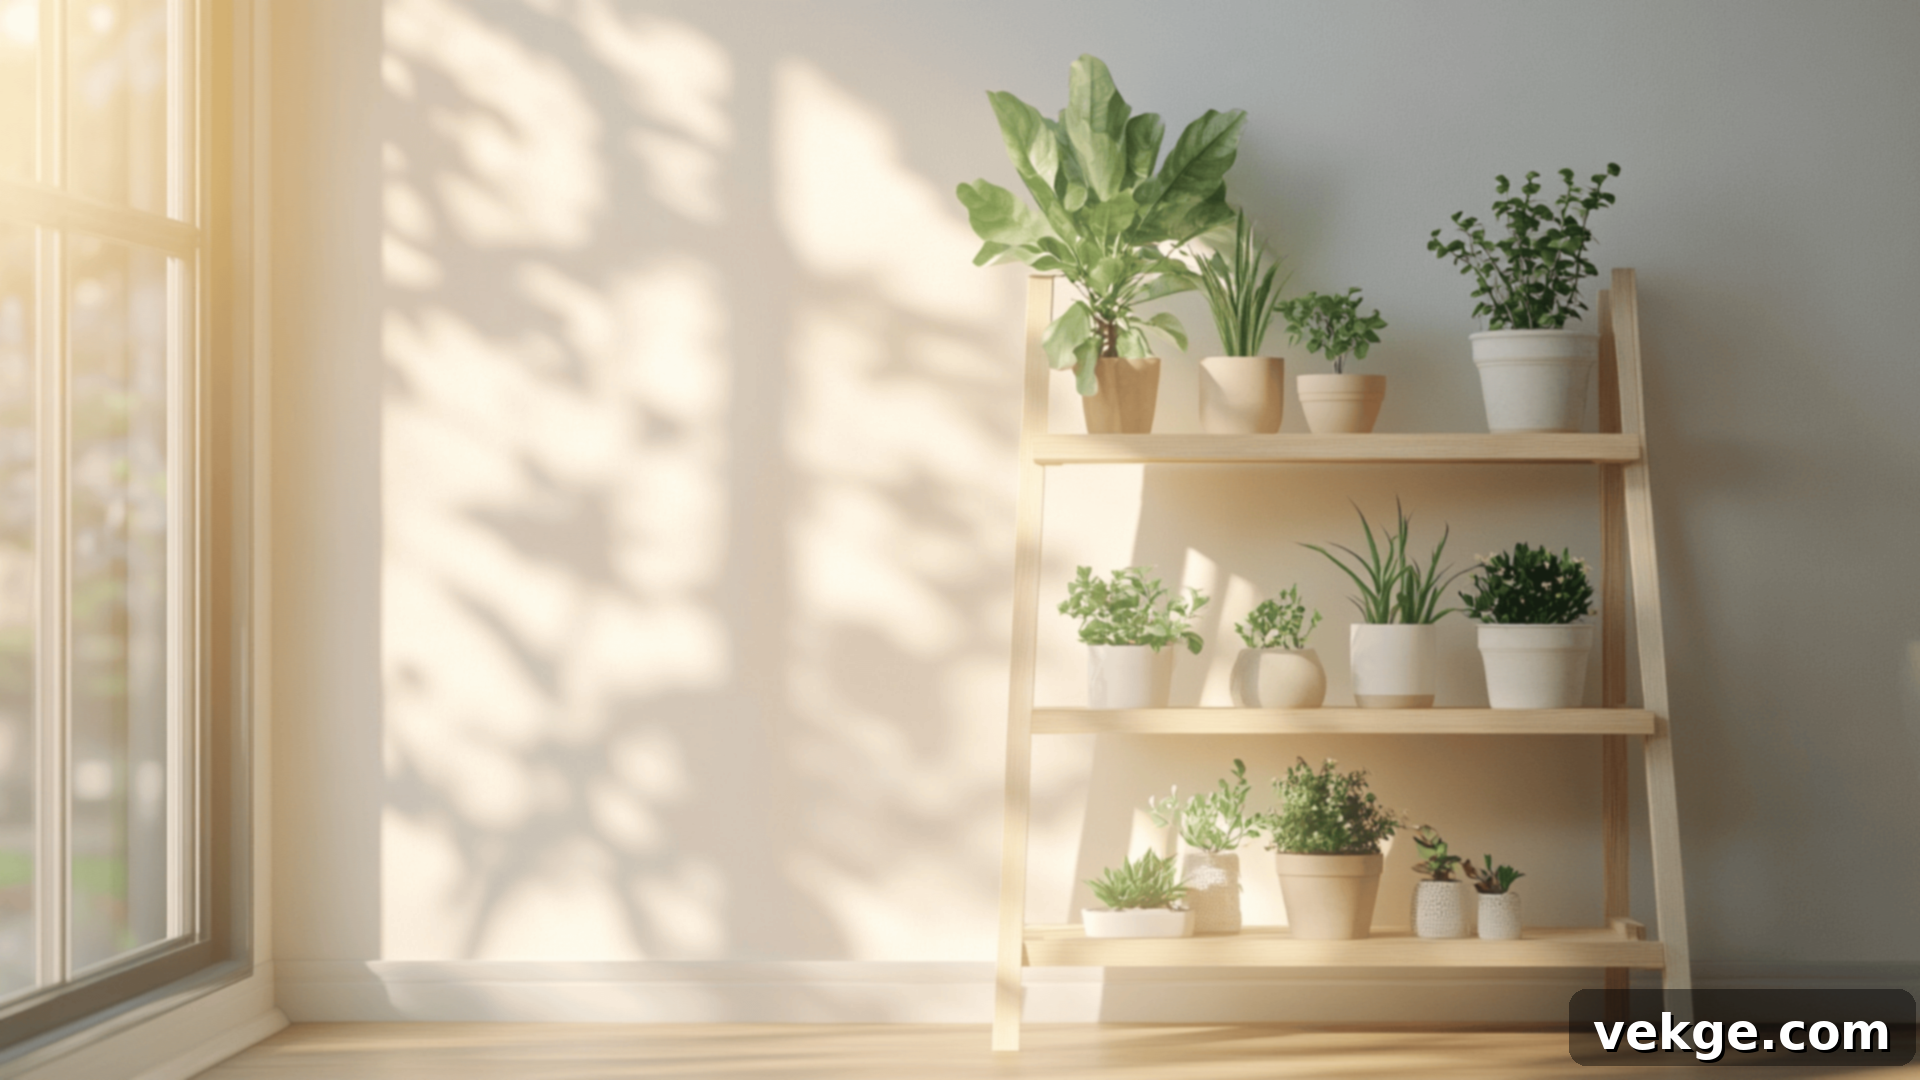
If your plant collection is robust and you need a display solution that offers both vertical space and a charming aesthetic, a ladder-style plant stand is an excellent choice. This design features a leaning frame with multiple wide steps or shelves, allowing you to showcase numerous pots of varying sizes. Each tier receives ample light, ensuring all your plants thrive.
The beauty of this stand is its space-saving nature; it leans elegantly against a wall, making it perfect for indoor spots like kitchens, bright sunrooms, or sunny corners in your living area. You can construct it using readily available 1×3 boards and wood screws, or for a more rustic and eco-friendly touch, consider using reclaimed fence boards if you have access to them. It’s a sturdy build that can be painted, stained, or left natural to complement your home’s style. You’ll find immense satisfaction in crafting this attractive and functional piece.
5. Upcycled Crate Plant Stand: Rustic Charm and Easy Storage
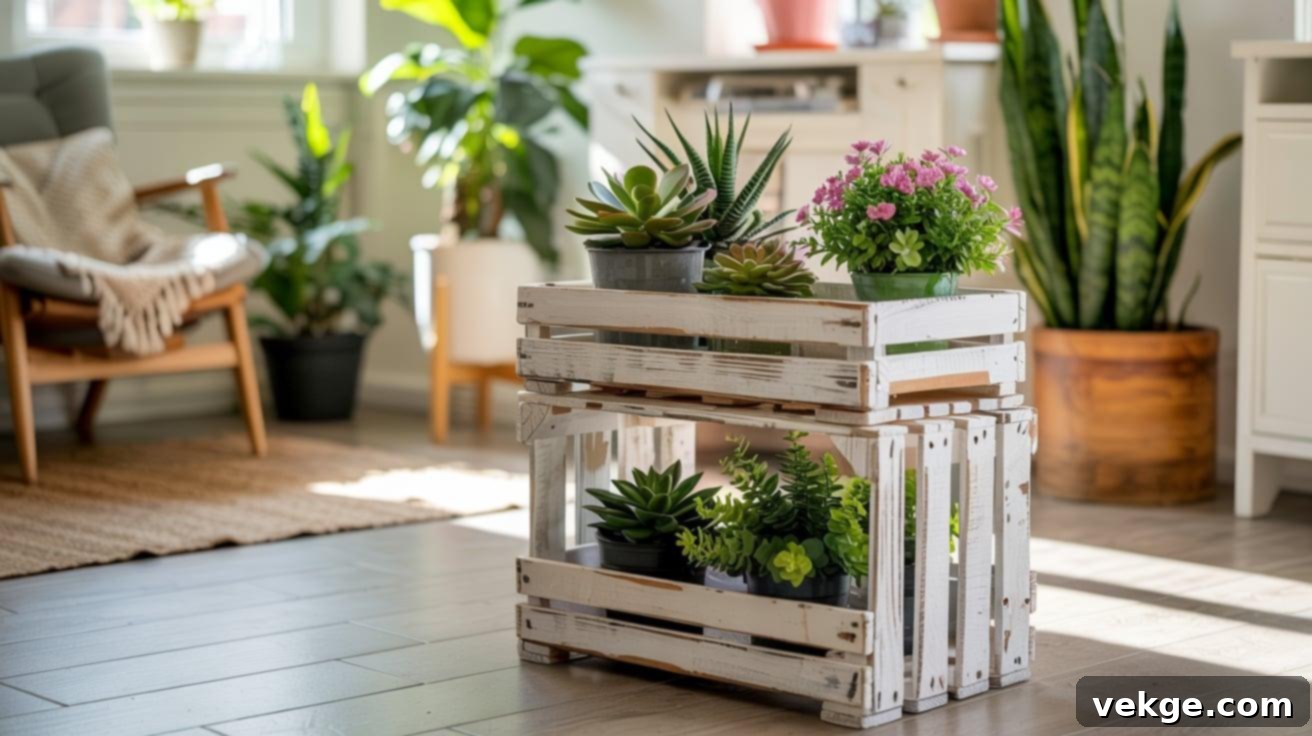
Old wooden crates are hidden gems for DIY projects, and transforming them into unique plant stands is incredibly simple. By stacking two crates and securely screwing them together, you instantly create multiple shelves perfect for displaying small to medium-sized pots. The open design of crates also offers additional storage for gardening tools, watering cans, or other decorative items, combining utility with aesthetic appeal.
For a refreshed look, sand the crates smooth and apply a coat of paint – a crisp white can brighten any indoor space, while a natural stain highlights the wood grain. If you desire mobility, easily attach caster wheels to the bottom for a rolling plant station. Crates are frequently found at thrift stores, garage sales, or even local markets, often at a very low cost, requiring minimal cutting or complex assembly. This makes it an ideal project for beginners and renters alike, offering both plant display space and practical storage in one charming setup.
6. Elegant Hanging Plant Shelf: Reclaiming Floor Space
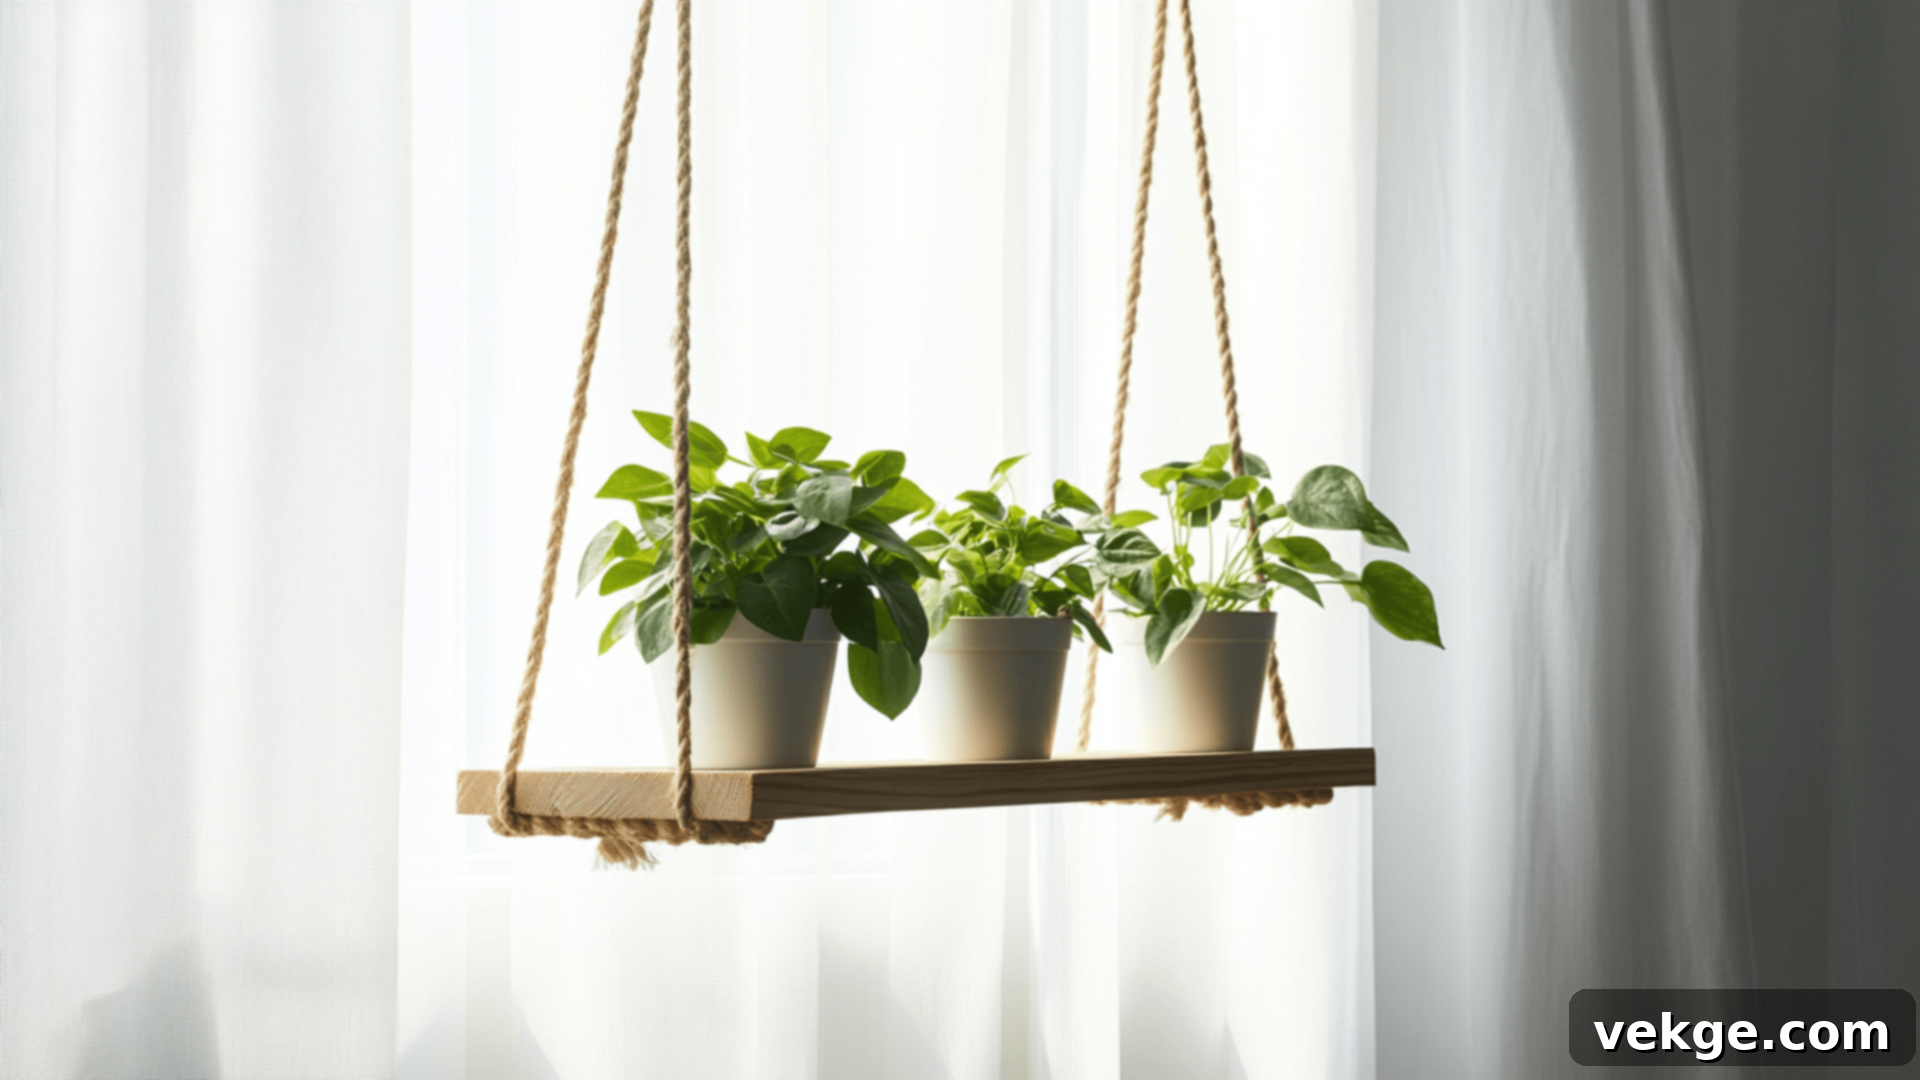
When floor space is at a premium, the only way to go is up! A hanging plant shelf is an ingenious solution that frees up valuable real estate while adding a touch of airy elegance to your room. This project involves a simple wooden board, sturdy rope or twine, and reliable ceiling hooks. By tying secure knots at each end of the board to create a hanger, you can suspend your plants beautifully.
This is a wonderfully quick and satisfying project that can often be completed in less than an hour. It looks particularly stunning near a window, allowing your plants to bask in natural light. Trailing plants like pothos, philodendrons, or string of pearls are especially well-suited for this type of display, cascading gracefully from above. Just be sure to use appropriate ceiling hooks that are securely anchored and capable of supporting the combined weight of your plant, pot, and shelf for safety.
7. Repurposed Painted Stool Plant Stand
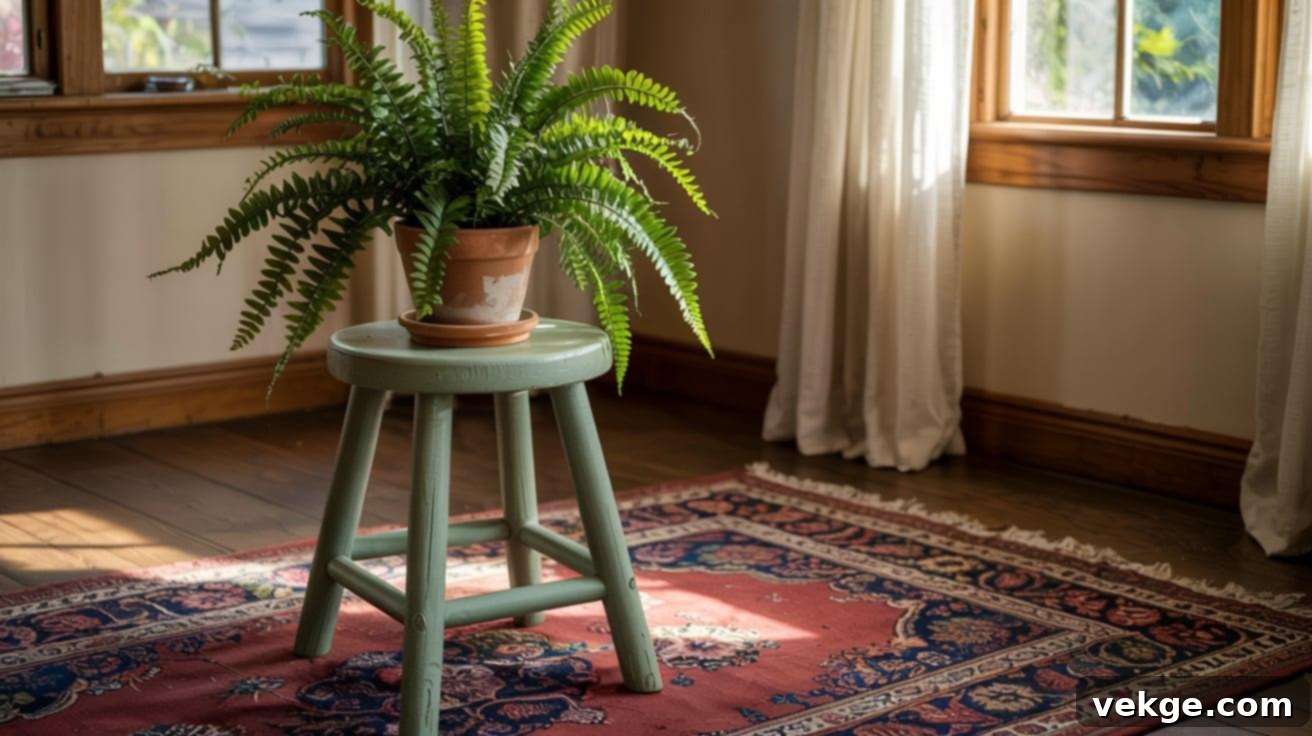
One of the quickest and most straightforward ways to elevate a single plant is by repurposing an old stool. Second-hand stools are abundant at thrift stores or flea markets and offer a perfect base for a potted plant. A fresh coat of paint can completely transform its appearance, allowing it to seamlessly blend with your existing decor or add a vibrant pop of color to a quiet corner.
For plants that don’t need excessive height, you can even shorten the legs of the stool with a simple saw cut. This project often requires no tools beyond a paintbrush and paint, making it incredibly fuss-free. To create dynamic visual interest, use stools of varying heights and sizes for a multi-level display. Stools are also wonderfully portable, making it easy to rearrange your plantscape whenever inspiration strikes. They are fantastic for balconies, hallways, or any spot needing a quick, charming plant fix.
8. Sturdy Simple Box Frame Stand
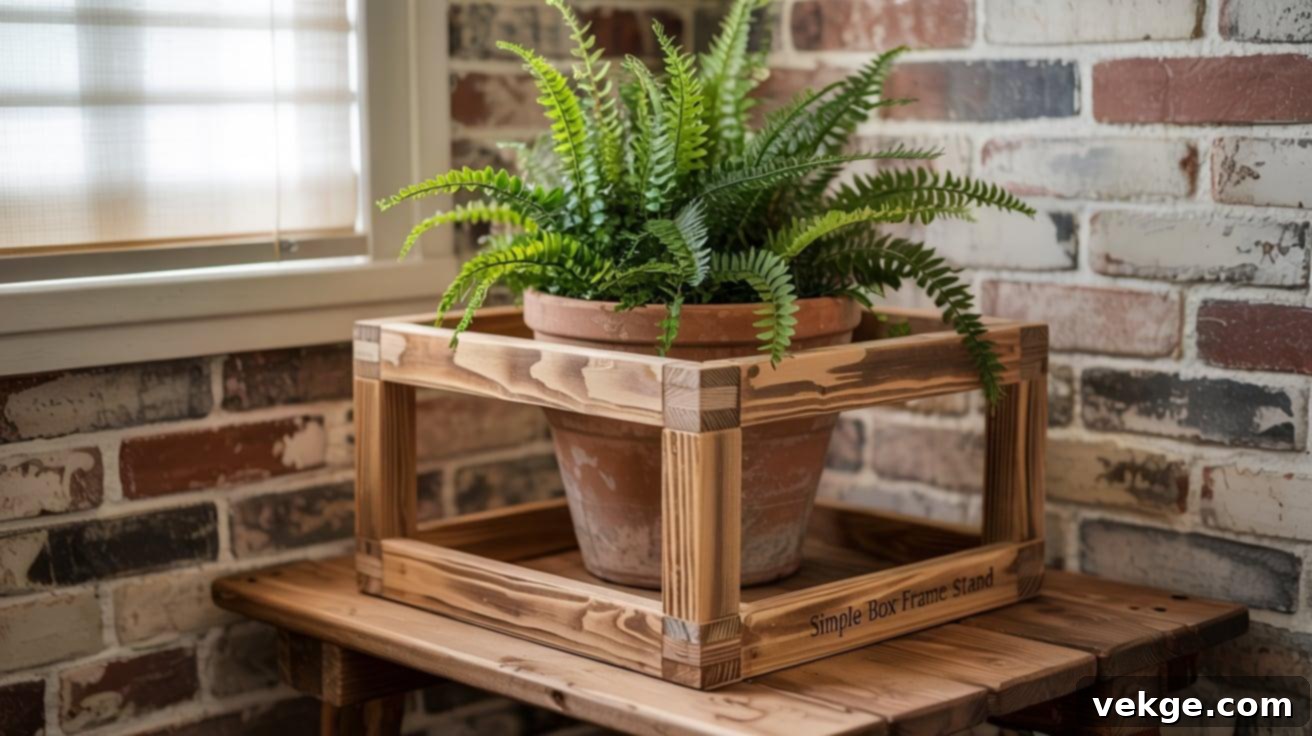
Taking the basic square frame concept a step further, the simple box frame stand offers enhanced stability and a more refined appearance. Constructed using 1×2 or 2×2 lumber, this design features more defined corners and horizontal connectors that create a robust, enclosed structure. This added sturdiness makes it an excellent choice for supporting medium to larger-sized pots without worry.
You can design this stand to sit flush against a wall, optimizing space, and its dimensions are easily adjustable to suit your specific needs and the size of your plants. While it might require a few more precise cuts and screws compared to the most basic scrap wood stand, the resulting structure is significantly stronger and more versatile. It performs equally well as an indoor accent piece or a durable outdoor plant holder, capable of withstanding various elements.
9. Space-Saving Corner Plant Shelf
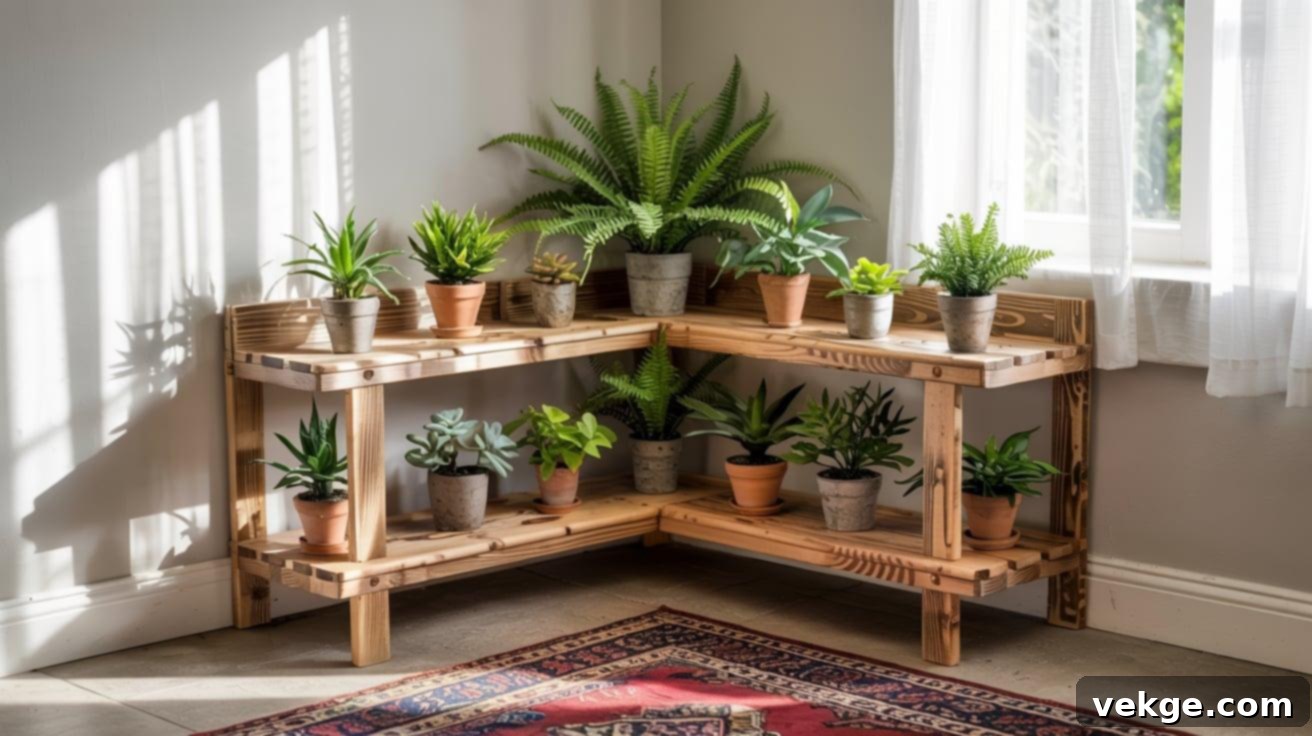
Corners are often overlooked and underutilized spaces in our homes. A corner plant shelf is specifically designed to fit snugly into these nooks, transforming an otherwise empty area into a vibrant display for your plants. This design typically involves three boards arranged in an L-shape, creating multiple shelf levels that can hold several small pots or a few medium ones.
It’s an incredibly efficient way to make good use of unused space, providing a neat and organized home for your greenery. You can even angle the shelves slightly to ensure maximum sunlight exposure for all your plants. While it requires a bit more precise measuring to get the angles right, it remains a beginner-friendly project. Utilize leftover pine boards and enhance their natural beauty with a touch of wood stain for a polished finish.
10. Organic Tripod Stick Stand: Minimalist & Natural
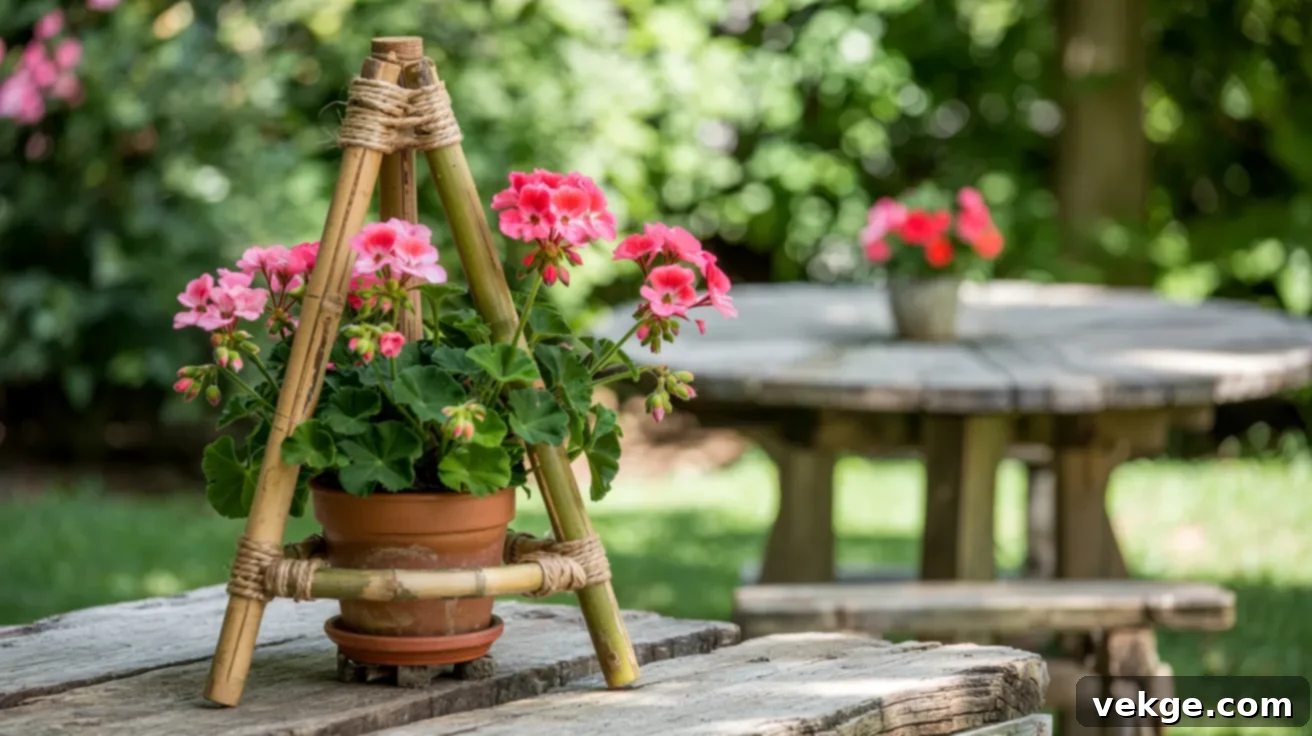
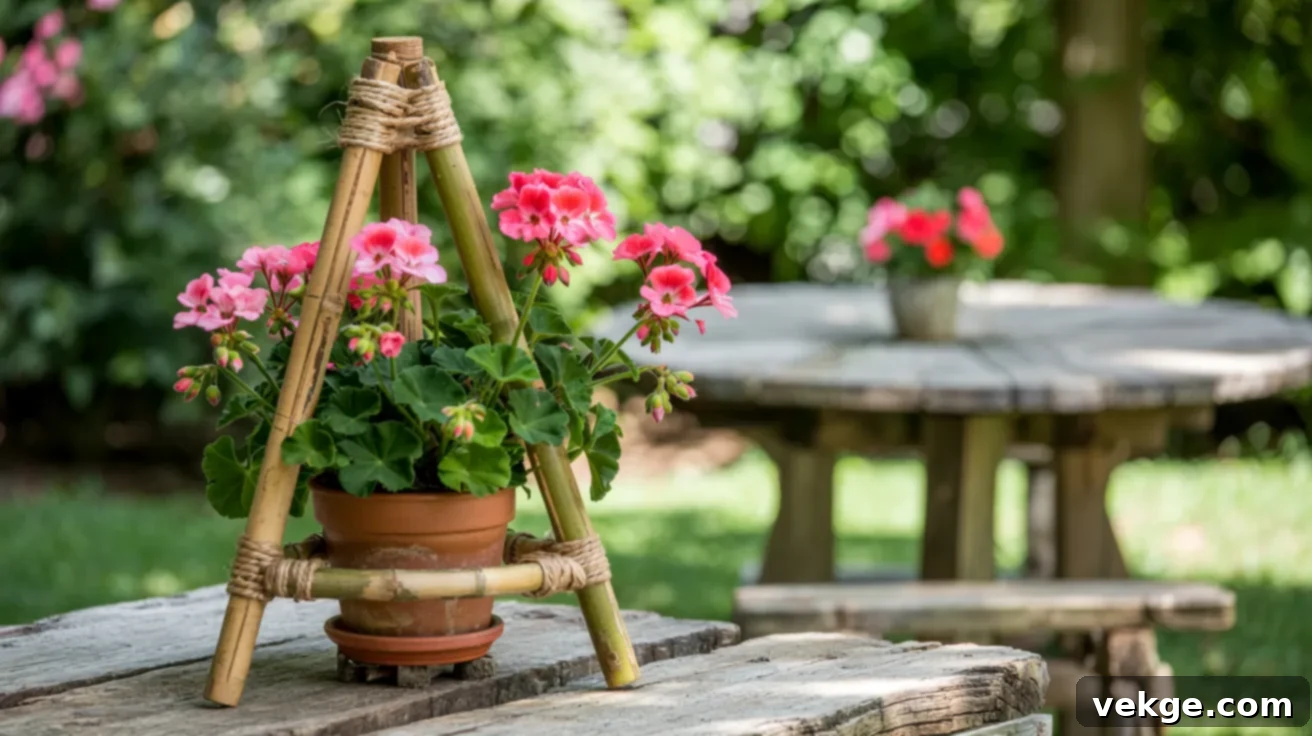
For a truly rustic, minimalist, and incredibly easy-to-build plant stand, consider the tripod stick stand. This charming design utilizes three sturdy sticks or wooden dowels, simply tied together at the top with natural rope or strong wire. Once bound, spread the legs evenly to create a stable tripod base, then place a small potted plant in the center of the structure.
Bamboo sticks are an excellent choice for this project, lending a beautiful, natural, and organic aesthetic that complements outdoor spaces or bohemian indoor decor. This stand is exceptionally quick to assemble and requires almost no tools, making it perfect for spontaneous projects. For smaller pots, you might be able to balance them directly within the tripod’s center, or for added stability, use a shallow tray or a small piece of wood to support the pot. It’s an ideal solution when you desire a light, movable stand with an earthy feel.
11. Practical Folding Plant Shelf for Versatile Displays
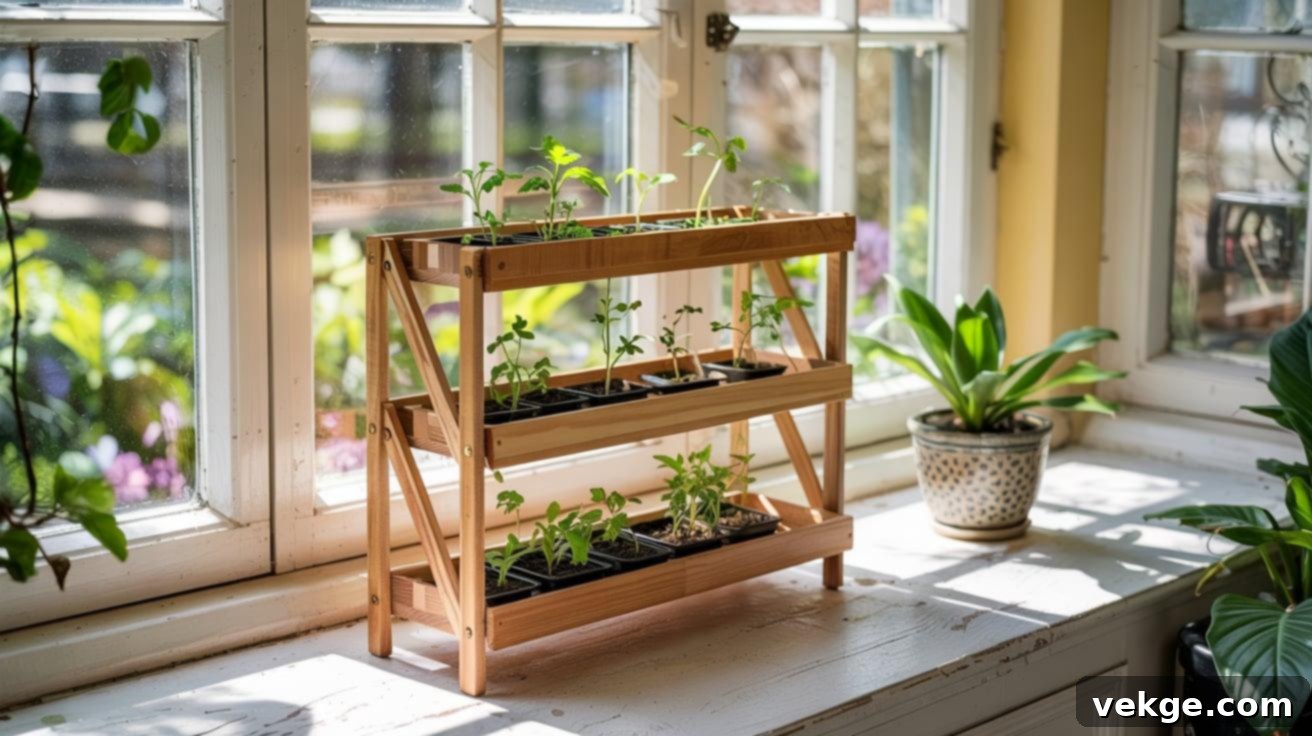
A folding plant shelf offers unparalleled flexibility and space-saving advantages, making it a clever choice for dynamic living spaces or seasonal plant arrangements. This design is typically built with hinged side supports and features three narrow boards that serve as steps or shelves. When not in use, the entire unit can collapse flat, allowing for effortless storage in a closet or behind furniture.
This design is particularly ideal for small spaces where maximizing square footage is crucial, or for displaying plants during specific seasons like spring and summer. While the construction involves a few more steps and a bit more precision with hinges compared to simpler stands, it remains a straightforward project for anyone comfortable with basic tools. Its compact, tuck-away form factor makes it a remarkably smart and functional storage solution for plant lovers who need versatility.
12. Durable & Waterproof PVC Pipe Stand
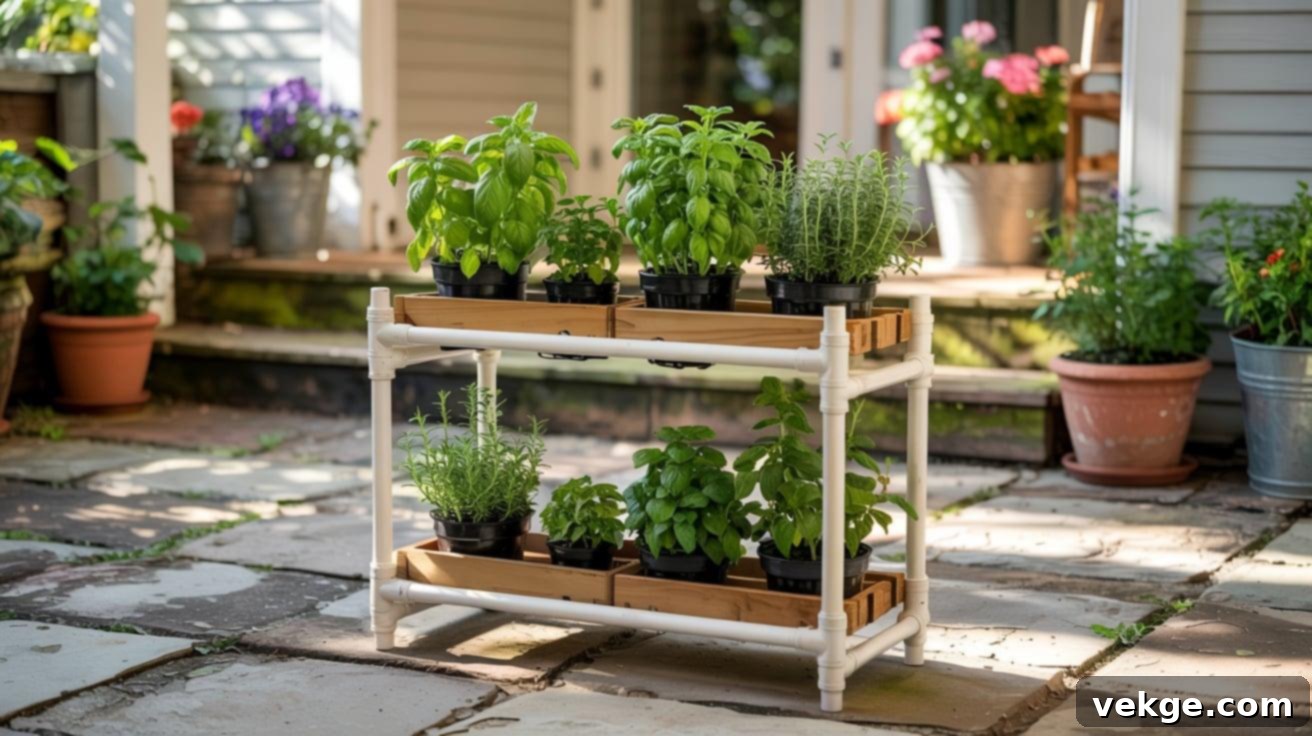
For a plant stand that combines durability, lightweight construction, and excellent water resistance, consider building one from PVC pipes. This versatile material allows you to create a robust frame using simple T-joints and elbows for connections. PVC pipes are incredibly easy to cut to size with an inexpensive pipe cutter, eliminating the need for complex woodworking tools.
Once assembled, the PVC frame can be left in its natural white state for a clean, utilitarian look, or easily spray-painted to match your specific decor or add a pop of color. To create sturdy shelves, simply lay wooden boards across the frame, securing them if desired. This type of stand is exceptionally well-suited for outdoor use, as it’s completely waterproof and resistant to rust and rot. Its lightweight nature also makes it easy to move, and it can even be disassembled and reconfigured, making it a highly practical choice for temporary or seasonal plant setups.
13. Elegant Reclaimed Table Legs Stand
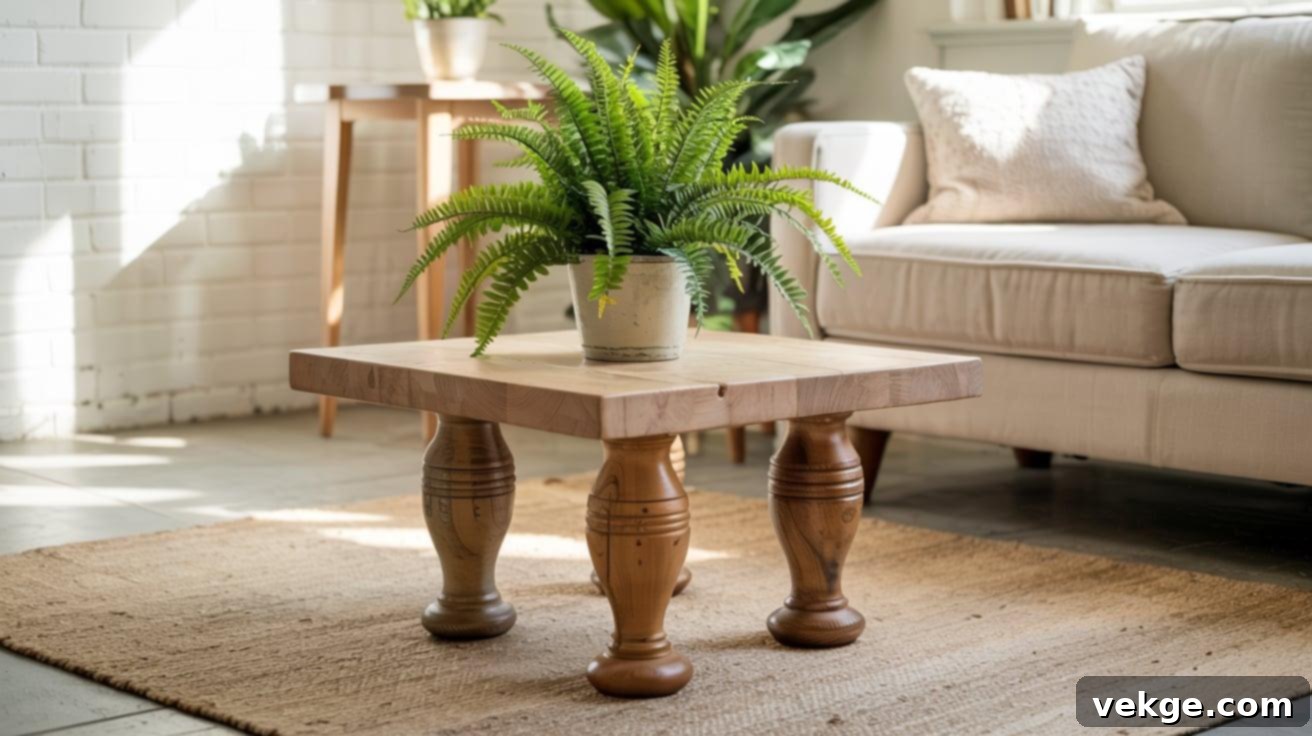
Give new life to old furniture by repurposing reclaimed table legs into stylish and incredibly sturdy plant stand bases. Often found at antique shops, salvage yards, or discarded furniture pieces, these legs frequently boast unique shapes and intricate details that can add immense character to your DIY project. The process is remarkably simple: attach a square or round wooden board to the top of the legs to create the plant platform.
Once assembled, sand the entire piece smooth and apply a fresh coat of paint or stain to unify the look and protect the wood. This idea offers fantastic flexibility, allowing you to mix and match different leg styles and heights to create a bespoke collection of stands. It’s a clever and cost-effective way to utilize salvaged parts, resulting in a durable and charming piece without significant expense, while also promoting sustainability by keeping useful materials out of landfills.
14. Artistic Hanging Ladder Rack
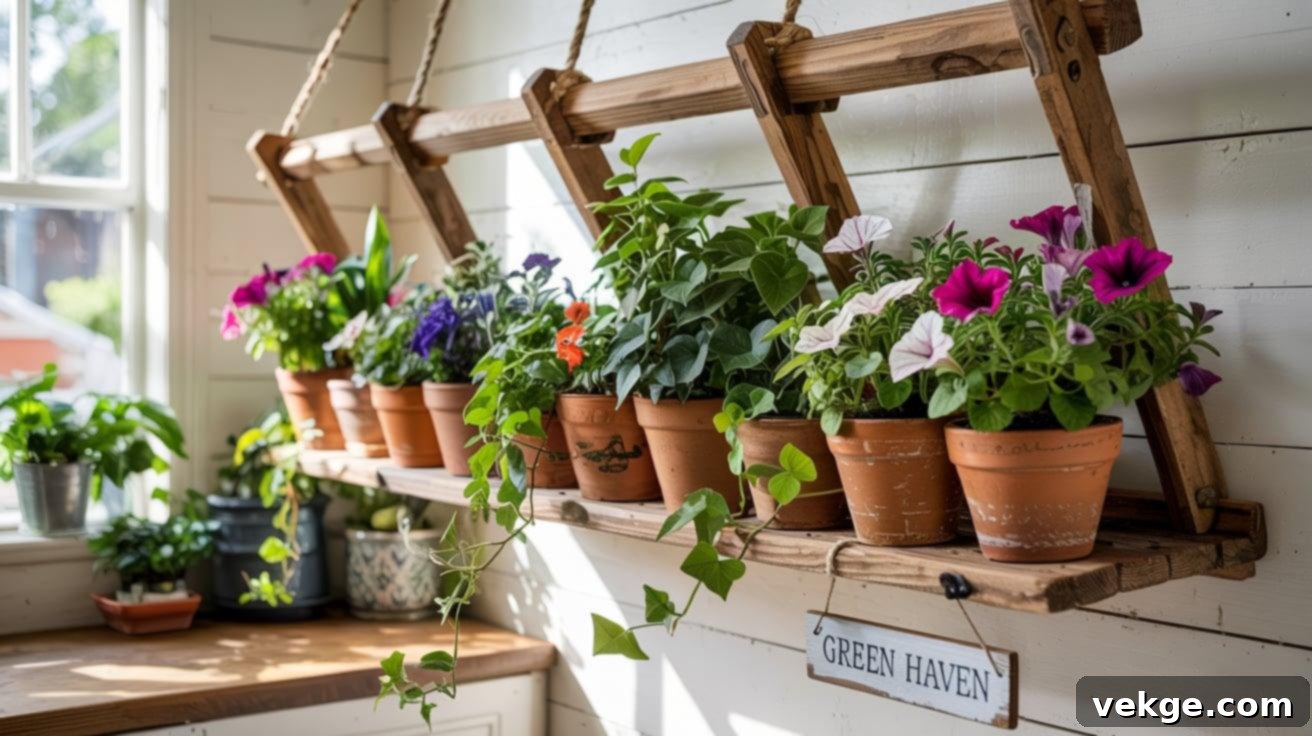
Transform a small, old step ladder into a unique and eye-catching hanging plant display by mounting it horizontally from the ceiling using strong chains or sturdy rope. The rungs of the ladder naturally serve as perfect shelf brackets or support posts, offering multiple levels to hang or place your potted plants. This setup is particularly effective near windows, allowing trailing plants to cascade beautifully and soak up ample sunlight.
The ladder itself can be painted a vibrant color, stained to highlight its wood grain, or simply left natural for a rustic aesthetic, depending on your desired look. This practical option provides a substantial vertical display solution without the hassle of installing numerous individual hooks. Furthermore, its suspended nature makes it easy to take down, move, or adjust as your plant collection evolves or your decor changes, offering both functionality and artistic flair.
15. Industrial-Chic Cement Block Stand
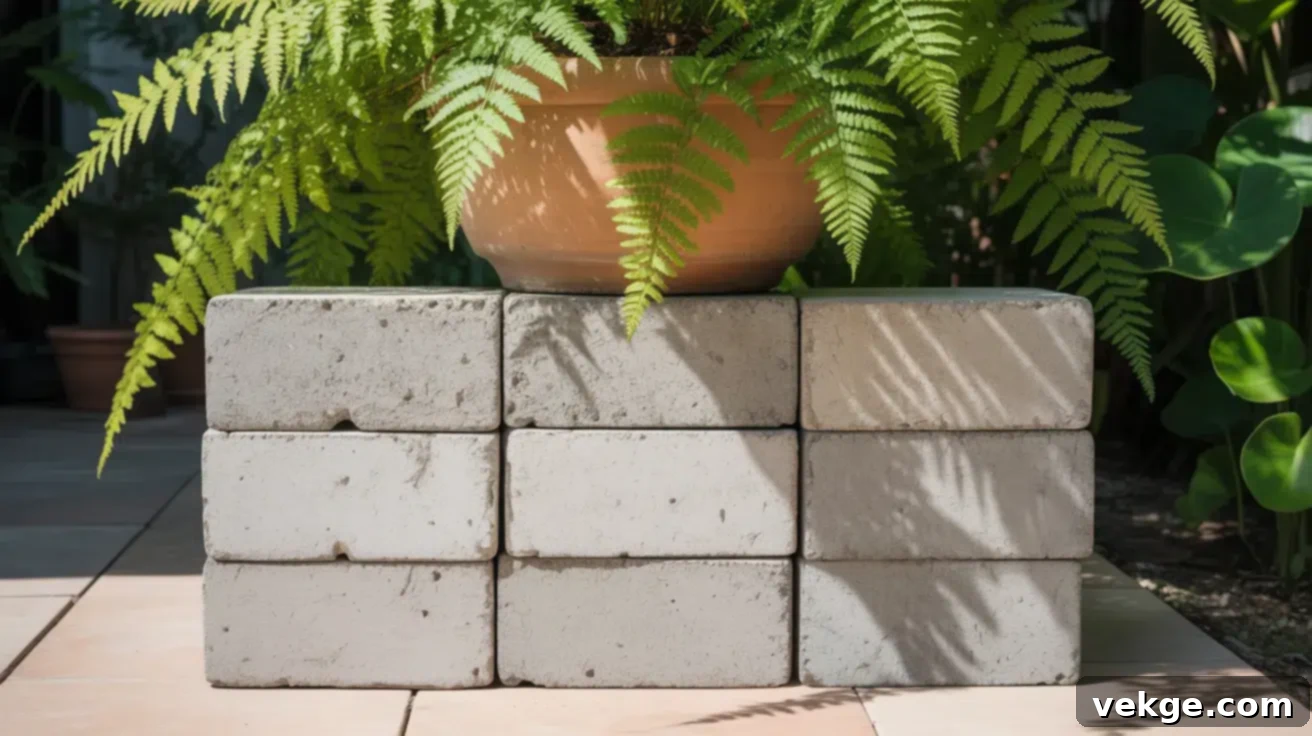
For a rugged, industrial-chic aesthetic and unparalleled stability, stacking cement blocks is an incredibly straightforward way to create a durable plant stand. This method requires absolutely no tools or intricate construction – simply stack the blocks in your desired configuration and place your plants on top. Blocks with open holes can even double as planters themselves, or you can opt for solid blocks for a clean, architectural stacked look.
This setup is exceptionally well-suited for heavy pots and is virtually indestructible, making it ideal for outdoor use where it can withstand wind, rain, and other elements without fear of tipping. If you’re looking for a low-effort, robust solution with a raw, simple, and modern feel, this idea delivers maximum impact with minimal time, cost, or materials. You can also paint the blocks for a more polished or colorful finish.
16. Compact Drawer Plant Shelf: Repurposed & Stylish
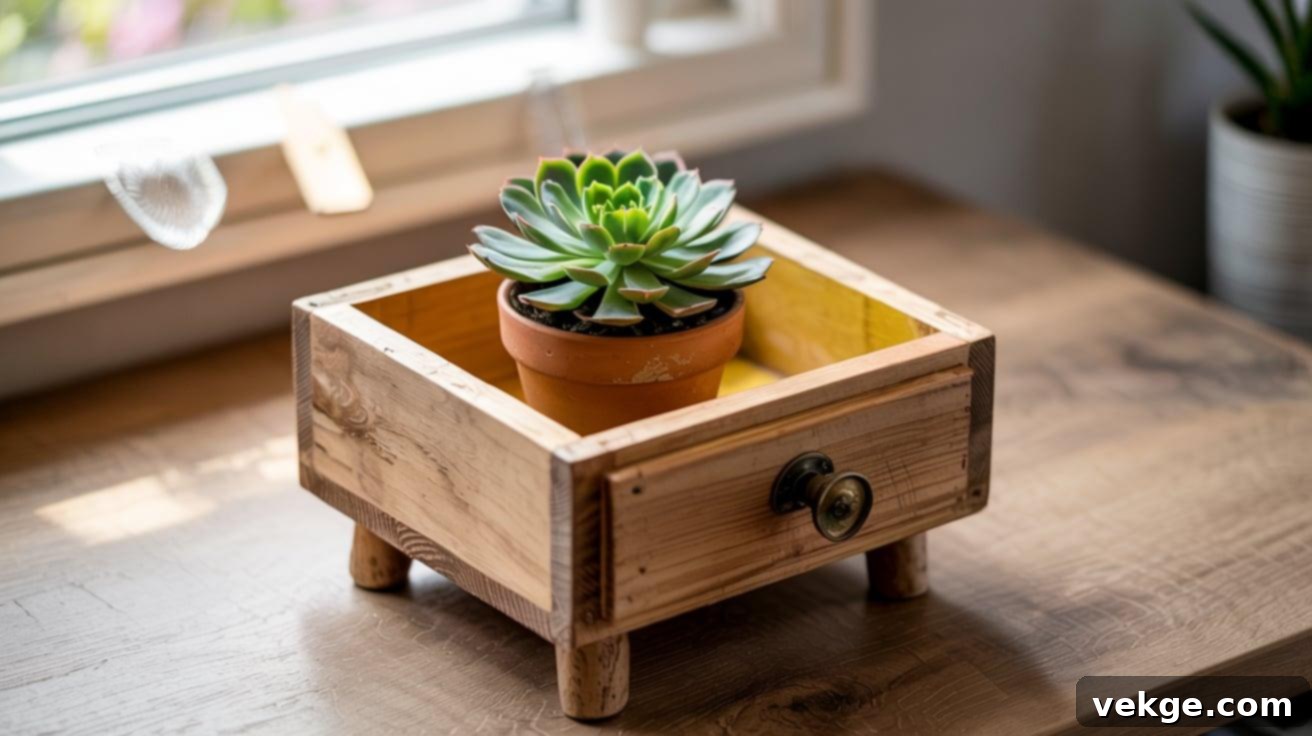
An old, discarded drawer holds surprising potential as a charming and functional plant stand or shelf. With just a few simple updates, a forgotten drawer can be transformed into a unique display piece. You can add short wooden legs to its base to create a small elevated stand, or mount it directly to a wall for a floating shelf effect. The interior of the drawer can be painted, lined with decorative contact paper, or simply cleaned for a fresh finish.
This compact setup is perfect for showcasing small pots, a collection of succulents, or nurturing seedlings. It fits neatly on desks, existing shelves, or countertops, adding character without taking up much space. Repurposing a drawer is a brilliant way to recycle old furniture parts, creating something both functional and distinctively decorative, contributing to a more sustainable home.
17. Instant Height: The Stacked Pot Stand
For the ultimate no-tools, instant plant stand solution, look no further than stacking pots. This incredibly simple method allows you to create varying heights for your plants using items you likely already have. Begin by selecting a few sturdy pots of different sizes. Invert one or two larger pots to form a stable base, then carefully place a right-side up pot on top to hold your plant.
For added stability, especially if the stand will be in a high-traffic area or outdoors, a bit of construction adhesive between the stacked pots can ensure everything remains secure. Painting the entire stack a single cohesive color can give it a clean, unified, and surprisingly sophisticated look. This idea works wonderfully when you need to quickly add height to a plant display without embarking on a building project. Just ensure the base is flat and stable to keep your plants safe and secure.
Choosing the Right Materials for Your DIY Plant Stand
The materials you select for your plant stand will significantly impact its aesthetic appeal, durability, and suitability for its intended location. Understanding the properties of different materials is key to a successful and long-lasting build.
Best Wood Choices for Indoor Plant Stands
- Softwoods (Pine, Fir): These are excellent, budget-friendly choices, widely available, and very easy to work with. Pine and fir take paint and stain beautifully, allowing for a customizable finish to match any interior decor. They are lightweight, making stands easy to move.
- Hardwoods (Walnut, Maple, Oak): For a more premium look and superior durability, hardwoods are ideal. They offer richer, more distinctive grain patterns and are inherently stronger and more resistant to dents. Hardwoods are perfect if you plan to leave the wood exposed with a natural finish, showcasing their inherent beauty. They are heavier and more challenging to cut but result in a high-quality, lasting piece.
Outdoor-Grade Wood Options for Weather Resistance
When building plant stands for outdoor use, resistance to moisture, rot, and insects is paramount. Selecting the right wood will ensure your stand withstands the elements season after season.
- Cedar: Naturally resistant to rot, decay, and insect infestation, cedar is a fantastic choice for outdoor furniture. It’s lightweight, easy to work with, and has a pleasant aroma. Cedar weathers beautifully to a silvery-grey patina if left untreated, or can be sealed to maintain its original color.
- Redwood: Similar to cedar, redwood offers excellent natural resistance to rot and insects. It’s known for its stunning reddish hue and impressive durability. Redwood is also a sustainable choice, often harvested from managed forests.
- Pressure-Treated Pine: This is a highly cost-effective option for outdoor use. Pine is chemically treated to resist rot, fungal decay, and insect attacks. While it might not have the natural beauty of cedar or redwood, it’s incredibly durable and can be painted or stained to improve its appearance. Ensure it’s fully dry before applying finishes.
Non-Wood Alternatives for Modern & Durable Stands
- Concrete: Extremely strong, durable, and completely rot-proof, concrete offers a minimalist, industrial look. It’s ideal for heavy pots and very stable, but its significant weight makes it less portable. Concrete can be cast into various shapes for unique designs.
- Metal (Steel or Aluminum): Metal stands offer a sleek, modern, and often minimalist aesthetic. Steel provides excellent strength and rigidity, while aluminum is lighter and naturally corrosion-resistant. For steel, always ensure it’s properly sealed or powder-coated to prevent rust, especially in outdoor or humid environments.
- Bamboo: A highly sustainable and eco-friendly material, bamboo is surprisingly strong for its weight. It offers a natural, tropical, and lightweight option for plant stands. Bamboo is relatively easy to work with and can be used for both indoor and sheltered outdoor settings.
- PVC Pipe: As mentioned earlier, PVC is a lightweight, inexpensive, and completely waterproof option. It’s easy to cut and assemble and can be painted to suit your style, making it great for utility or outdoor use.
Essential Finishing Tips for Longevity and Beauty
The right finish not only enhances the appearance of your plant stand but also protects it, especially from moisture damage. Always consider the environment where your stand will be placed.
- Water-Resistant Finishes: For any stand, particularly those used outdoors or near plants that require frequent watering, a water-resistant finish is crucial. Spar urethane, marine varnish, or outdoor-grade polyurethane will provide excellent protection against moisture and UV rays.
- Sealing MDF: If you use MDF (Medium Density Fiberboard), it’s vital to seal all surfaces thoroughly, as MDF is highly susceptible to swelling when exposed to moisture. Use a primer before painting, and ensure all edges are fully covered.
- Curing Time: Always allow finishes to dry and cure fully according to the manufacturer’s instructions. Rushing this step can lead to a less durable finish and an imperfect appearance. Multiple thin coats are generally better than one thick coat.
Detailed Plant Stand Plans for Every Skill Level
Regardless of your current tool collection or your woodworking experience, these detailed plans will guide you with confidence. We’ll cover everything from selecting the perfect design and gathering the right materials to step-by-step construction and applying a professional finish. You’ll be amazed at what you can create!
Choosing Your Ideal Plant Stand Design
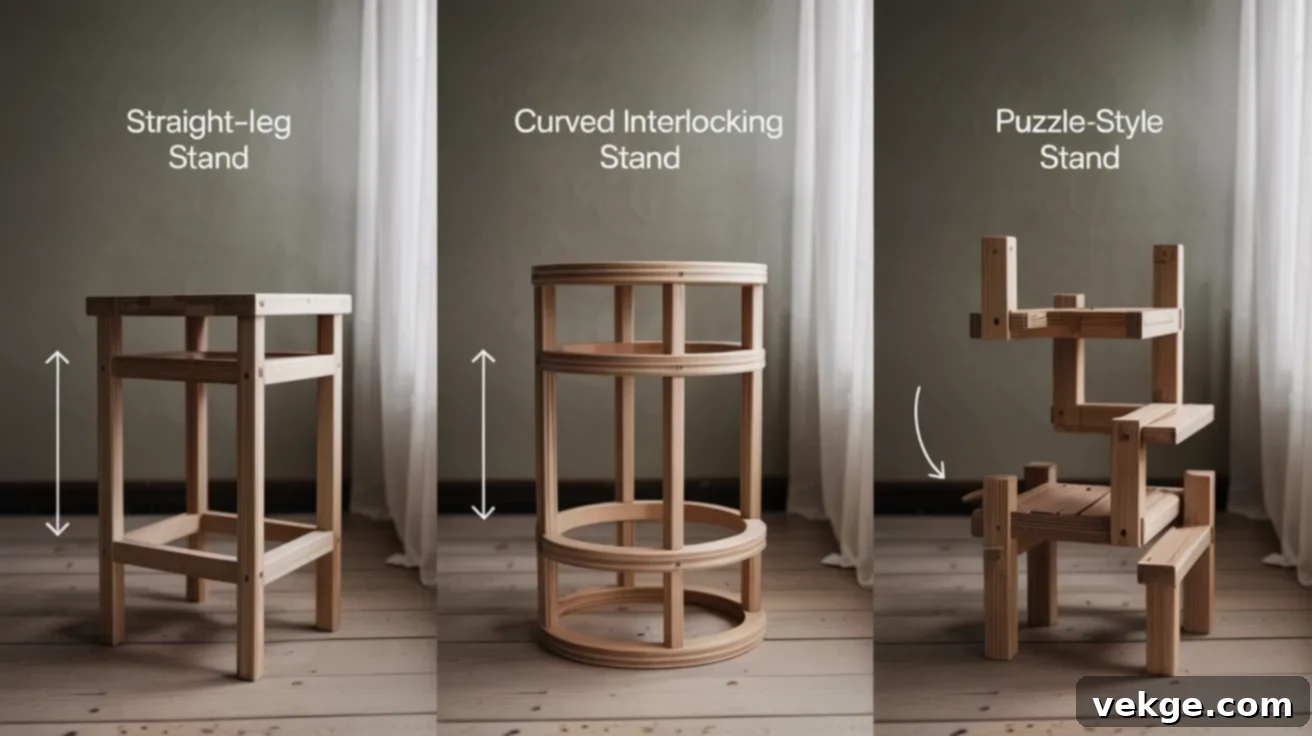
To ensure a satisfying building experience, it’s important to select a design that aligns with your skill level and available tools. Here are three solid styles, each catering to different equipment setups and desired outcomes:
- The Simple Straight-Leg Stand: This is your go-to if you’re a beginner with only basic tools like a saw, tape measure, and clamps. It’s quick to build, features clean lines, and results in a classic, elegant look. It’s perfect for practicing basic cuts and gluing techniques.
- The Curved Interlocking Stand: If you have access to a band saw or a jigsaw and want to add a bit more flair to your project, this design is an excellent choice. The interlocking pieces create a stable and visually interesting stand with graceful curves, elevating the aesthetic appeal.
- The Puzzle-Style Stand (Advanced): For those with a CNC machine, or who enjoy experimenting with intricate designs and mixed materials, this stand is perfect. It offers immense customization potential, allowing you to create unique patterns and combine different wood types. This advanced project is also ideal if you’re looking to create items for sale, as its unique design stands out.
Gathering Your Tools and Materials
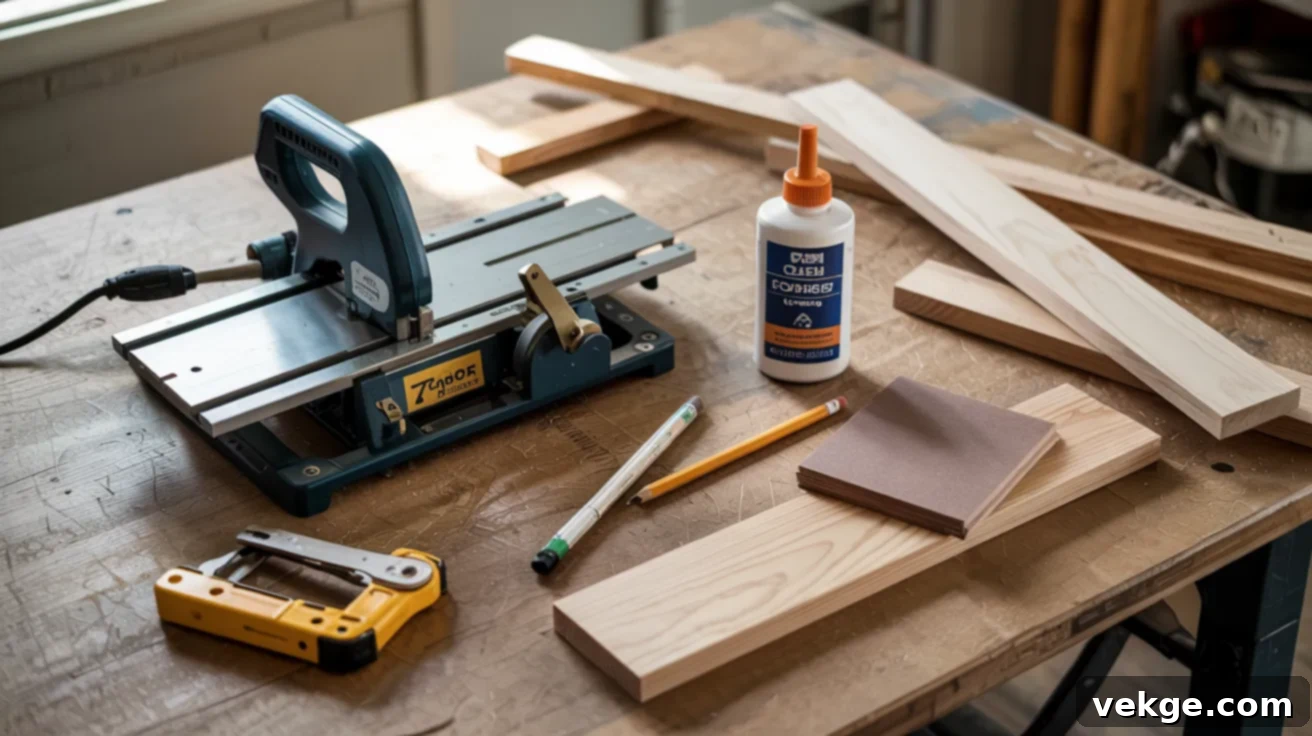
Preparation is key to a smooth building process. Before making any cuts, ensure you have all necessary tools within reach and your chosen wood ready. This minimizes interruptions and helps maintain focus.
General Tools You’ll Need:
- Cutting Tools: Depending on your chosen design, you’ll need a table saw (for straight, precise cuts), a band saw (for curves and intricate shapes), a jigsaw (for curves and more freehand cuts), or a CNC machine (for advanced, precise designs).
- Measuring & Marking: A reliable tape measure or ruler, a woodworking square (for checking angles), and a pencil for marking cuts.
- Clamping: Various clamps (bar clamps, C-clamps) are essential for holding pieces securely during gluing and assembly, ensuring strong joints.
- Sanding: Sandpaper in various grits (60-120 grit for initial shaping and smoothing, 150-220 for fine finishing). A sanding block or orbital sander can speed up the process.
- Joining: Wood glue (ensure it’s appropriate for indoor/outdoor use as needed). For some designs, wood screws or nails may also be required, along with a drill/driver.
Wood Options to Consider:
- Thickness: ¾-inch thick boards are a common and versatile choice for most plant stand projects, offering a good balance of strength and manageability.
- Material Types:
- MDF (Medium Density Fiberboard): Affordable and stable, excellent for painting. Remember to seal thoroughly if exposed to moisture.
- Pine: Easy to work with, affordable, takes stain and paint well. Good for beginners.
- Walnut, Maple, Cherry: Hardwoods offer superior strength, durability, and beautiful grain patterns for a natural finish. They are more expensive and harder to cut.
- Pre-Milled Wood (S4S): If you don’t have planning or jointing tools, opting for S4S (Surfaced Four Sides) wood is highly recommended. These boards are already planed and dimensioned to a smooth, consistent thickness, saving you significant preparation time.
- Avoid Raw MDF Outdoors: Raw MDF should never be used outdoors or in high-moisture environments without being completely encapsulated with a waterproof sealer, as it will quickly swell and degrade.
1. Step-by-Step: Building the Simple Plant Stand
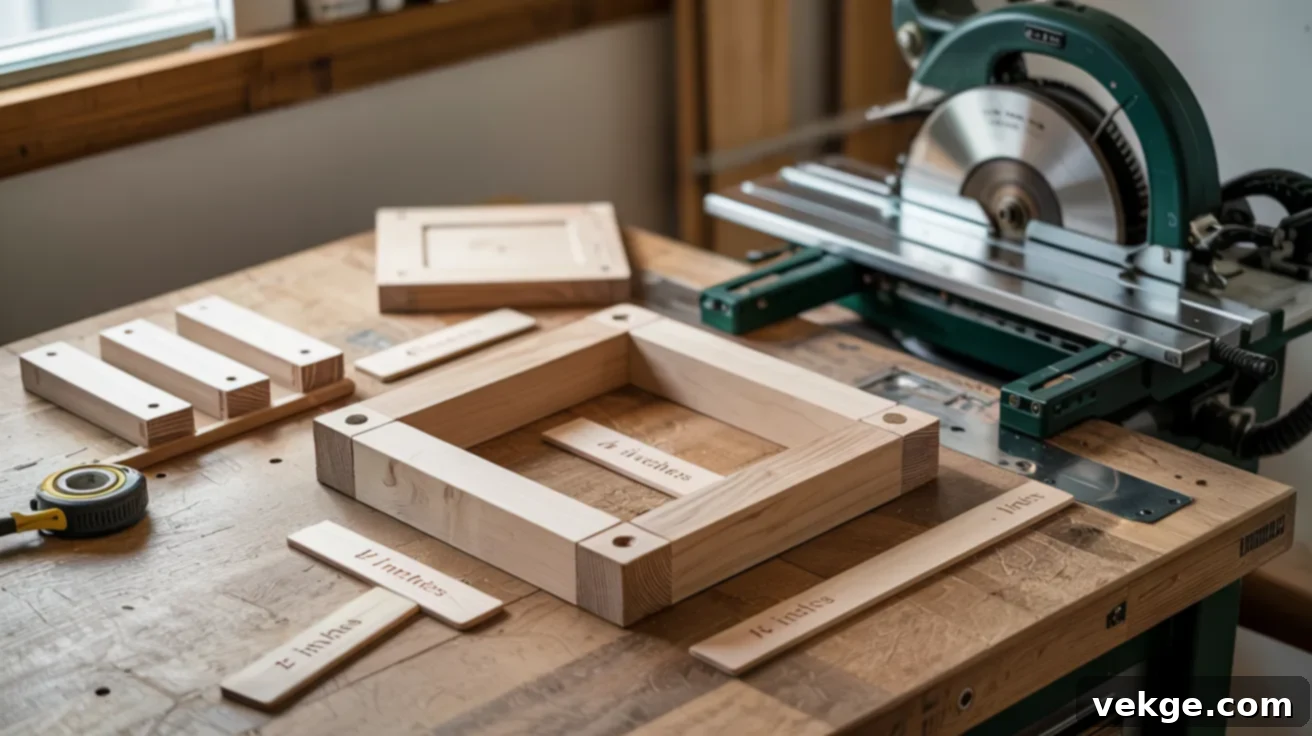
This simple design is perfect for honing your basic woodworking skills. Precision in measuring and cutting will ensure a strong and attractive finished product.
- Prepare Your Wood: Start with a ¾-inch thick board, roughly 17 inches long by 4.5 inches wide. Using a table saw or hand saw, carefully cut this board into 1-inch wide strips.
- Cut the Components: From these strips, you will need to cut the following pieces:
- Four leg pieces, each exactly 8 inches long.
- Two connector pieces, each exactly 8.5 inches long.
It’s a good practice to label each part as you cut it to avoid confusion during assembly.
- Marking for Joints: On each of the four leg pieces, measure and mark the locations where the connector pieces will attach. These marks should create a snug, interlocking joint. For a simple design, you’ll want the connectors to meet at the top of the stand and about halfway down the legs.
- Cutting the Joints (Rabbets): This stand uses shallow rabbet joints for a clean, secure fit. Clamp your leg pieces down firmly. Using your table saw (with a dado blade if available, or by making multiple passes with a standard blade), carefully cut rabbet joints. These should be approximately halfway through the thickness of the wood, matching the width of your connector pieces. The goal is for the connector pieces to sit flush within these cuts.
- Dry Fit Assembly: Before applying any glue, perform a dry fit. Assemble all the pieces without adhesive to ensure everything slides together smoothly and fits snugly. If any joints are too tight, carefully sand or trim a tiny bit of material. If too loose, don’t worry, the glue will still provide strength.
- Sanding Edges: Lightly sand all edges of your components, especially where joints connect, to remove any burrs and ensure a smooth fit.
- Final Gluing: Apply a thin, even layer of wood glue to all mating surfaces of the rabbet joints. Assemble the stand, ensuring all corners are square. Use clamps to hold the pieces firmly in place while the glue dries. Wipe away any excess glue with a damp cloth immediately.
2. Step-by-Step: Building the Curved Interlocking Stand
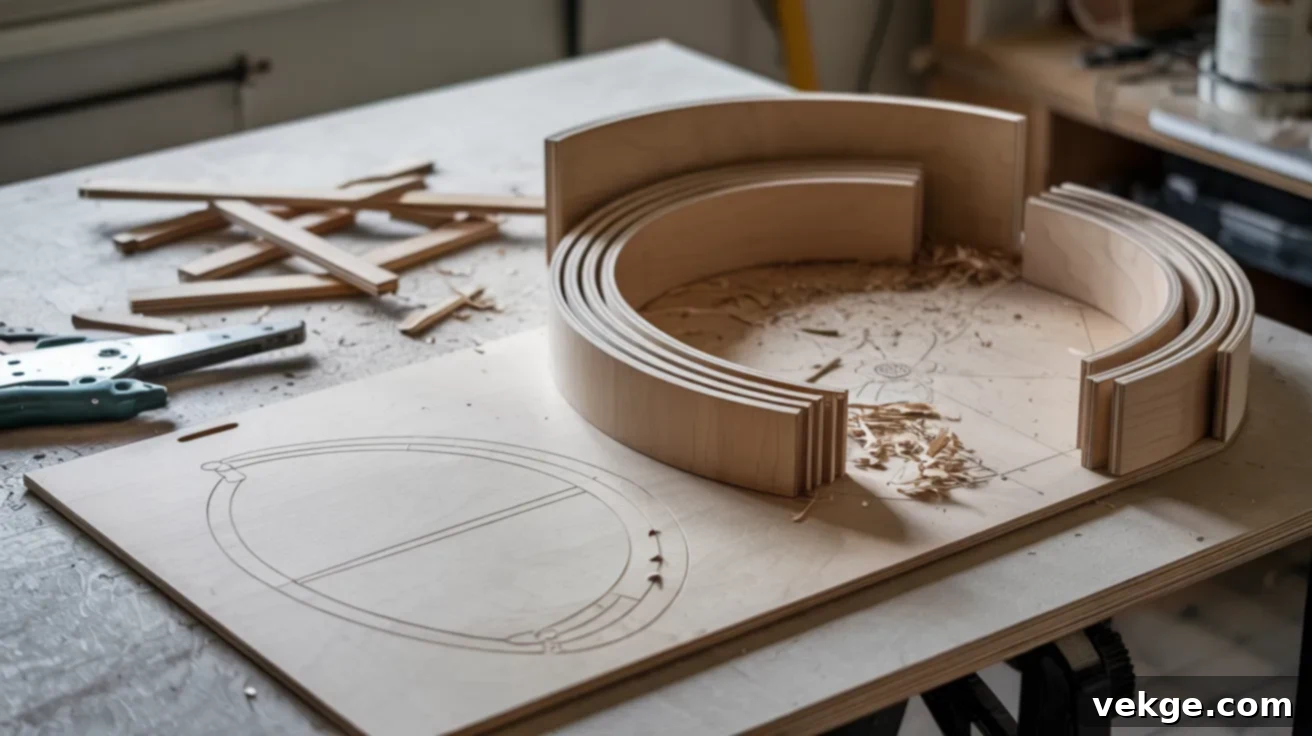
This design adds an artistic touch with its graceful curves. It requires a bit more precision with cutting curves but is still very manageable.
- Template Preparation: Begin by printing out a template for your curved interlocking pieces. Ensure the template is scaled correctly for your desired stand size. Carefully cut out the template.
- Trace onto Wood: Place your template onto ¾-inch thick MDF or softwood. Trace the design accurately. Double-check that the connection tabs on your template are precisely matched to the thickness of your chosen wood – this is crucial for a snug fit.
- Cutting the Pieces: Using a band saw or a jigsaw, carefully cut out each piece following your traced lines. Take your time, especially around the curves, to ensure smooth edges. For efficiency, if you have multiple pieces of the same shape, you can tape two boards together and cut them simultaneously, ensuring identical parts.
- Sanding and Smoothing: After cutting, generously sand all edges, particularly the curved parts, to eliminate any splinters, rough patches, and to achieve a smooth finish. This also helps with the interlocking fit.
- Dry Fit and Refine: Just like the simple stand, perform a dry fit. Interlock all the pieces to ensure they fit together perfectly. If any tabs are too tight, gently sand them down. If too loose, the design still typically holds together well due to its interlocking nature, but you can use glue for extra security.
- Finishing Touches: At this stage, you can choose to leave the wood raw for a natural look, paint it to match your decor, or seal it for protection. If using MDF, remember to apply a water-safe finish if the stand will be exposed to moisture, as MDF is highly susceptible to water damage.
3. Step-by-Step: Building the Puzzle-Style Stand (Advanced)
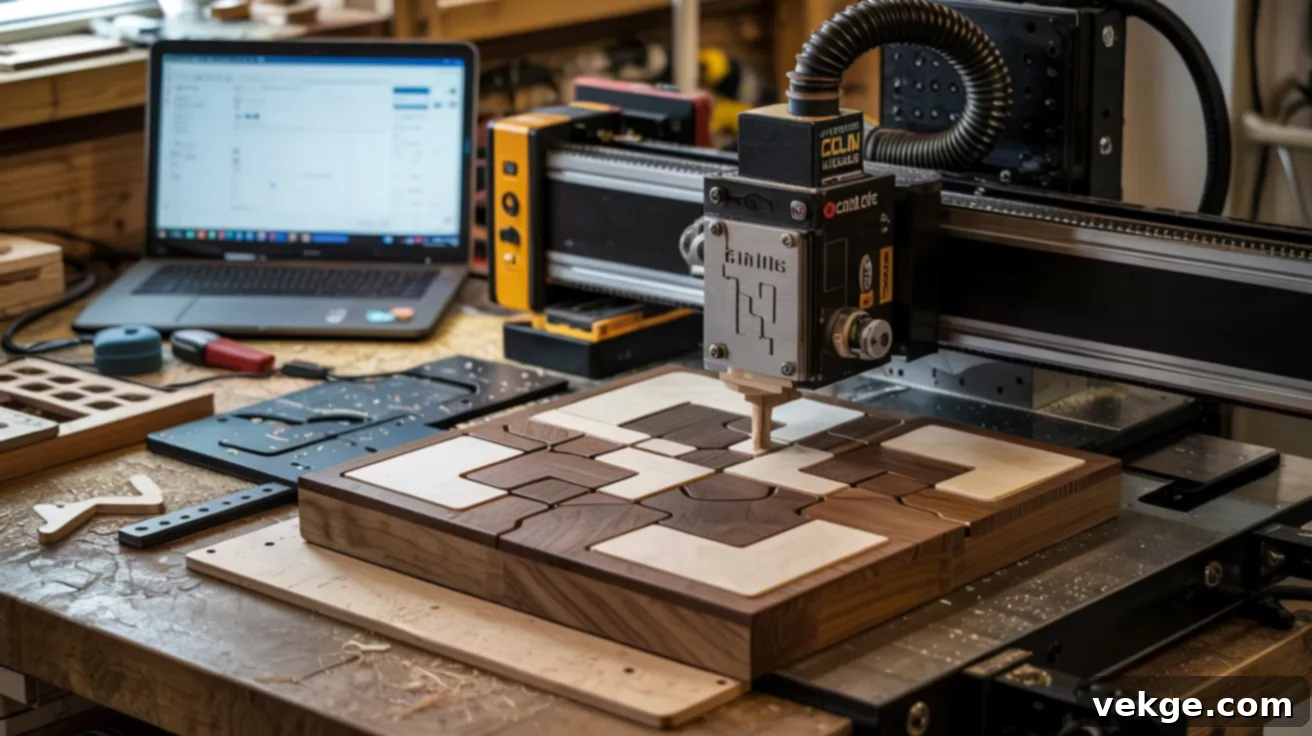
This advanced design is ideal for those with CNC machine access, allowing for intricate patterns and excellent wood conservation. It’s a fantastic project for custom pieces or products for sale.
- Design in CAD/CAM Software: Using software like Carbide Create (or your preferred CAD/CAM program), design your puzzle-style pieces. Focus on creating interlocking shapes that conserve wood by nesting them efficiently within your stock material. This also allows for the exciting possibility of using various wood types within the same design for a unique, multi-tonal look.
- Toolpath Generation: When generating your toolpaths, always set your CNC machine to cut *outside* the shape for the best fit. This ensures that the final piece dimensions are accurate to your design and fit together precisely.
- Adding Tabs: Incorporate small “tabs” into your design. These are tiny sections of uncut material that hold the pieces in place within the larger board during the CNC cutting process. This prevents pieces from shifting once fully cut, ensuring accuracy and safety.
- CNC Cutting Process: Load your wood and run the CNC program. Monitor the cut closely.
- Post-Cutting Refinement: Once the CNC cutting is complete, carefully remove the tabs by breaking or cutting them. Be mindful not to apply excessive force, which could damage the edges of your newly cut pieces.
- Edge Finishing: Smooth out any remaining tab marks and refine all edges using a drum sander or fine-grit sandpaper. The goal is a clean, seamless edge that allows the puzzle pieces to fit together perfectly.
- Assembly: Test fit your puzzle pieces. They should interlock cleanly. You can choose to glue them together for a permanent bond or leave them unglued if the fit is snug enough for easy disassembly and transport.
4. Final Assembly and Finishing Touches
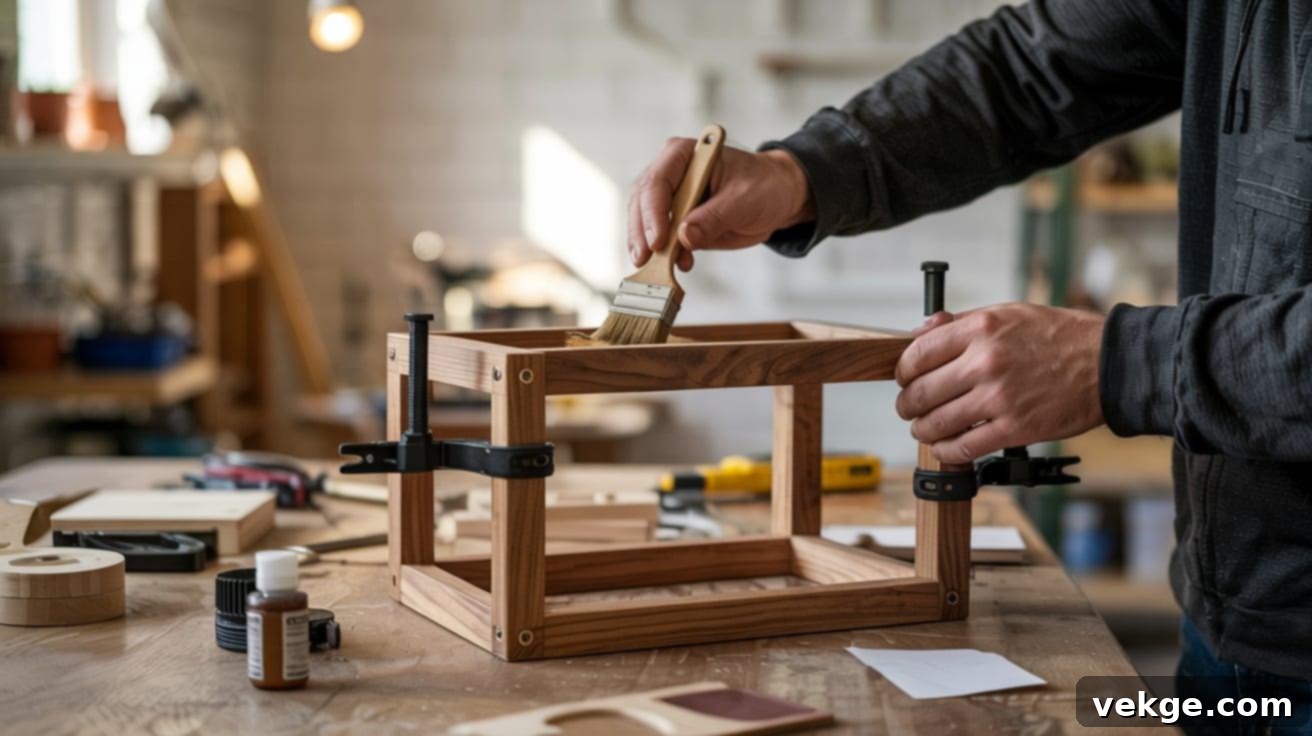
The finishing stage is where your plant stand truly comes to life. A well-applied finish protects the wood and enhances its beauty. For most of the stands, especially the Simple and Curved Interlocking designs, these steps are universal.
- Gluing Strategy: When gluing, apply wood glue only to the actual joints. Avoid applying glue to the middle sections of the wood that aren’t part of a joint. This allows for easier disassembly in the future if needed for repairs or modifications, especially for the puzzle-style stand. Clamp all glued joints firmly and wipe away any excess glue with a damp cloth before it dries.
- Curing Time: Allow the glue to dry and cure completely, typically overnight (or as per the glue manufacturer’s instructions). Rushing this step can compromise the structural integrity of your stand.
- Final Sanding: Once the glue is fully dry, perform a final sanding of the entire stand. Start with 120-grit sandpaper to remove any lingering rough spots or glue residue, then move to 180 or 220-grit for a truly smooth, ready-for-finish feel. Be thorough but avoid over-sanding, which can soften crisp edges.
- Choosing Your Finish:
- Boiled Linseed Oil (BLO): An excellent choice for enhancing the natural beauty of dark woods like walnut or cherry. BLO penetrates the wood, bringing out the grain and providing a subtle, rich sheen while offering some water resistance. Apply thin coats and wipe off excess thoroughly to prevent a sticky finish.
- Spar Urethane: If your plant stand is destined for outdoor use or a high-moisture indoor environment, Spar Urethane is a robust choice. It’s designed to withstand harsh weather, UV radiation, and moisture, providing a durable, long-lasting protective layer.
- Paint: For MDF or pine, or if you want to add a vibrant splash of color to match your home decor, painting is a great option. Use a good quality primer first, especially on MDF, to ensure even paint adhesion and to seal the material effectively. Apply multiple thin coats for a smooth, professional-looking finish.
- Application and Drying: Apply your chosen finish according to the manufacturer’s directions. Allow each coat to dry completely before applying the next, and lightly sand between coats (using a very fine grit, like 320-400) for the smoothest possible result.
5. Display or Sell Your Beautifully Crafted Stands
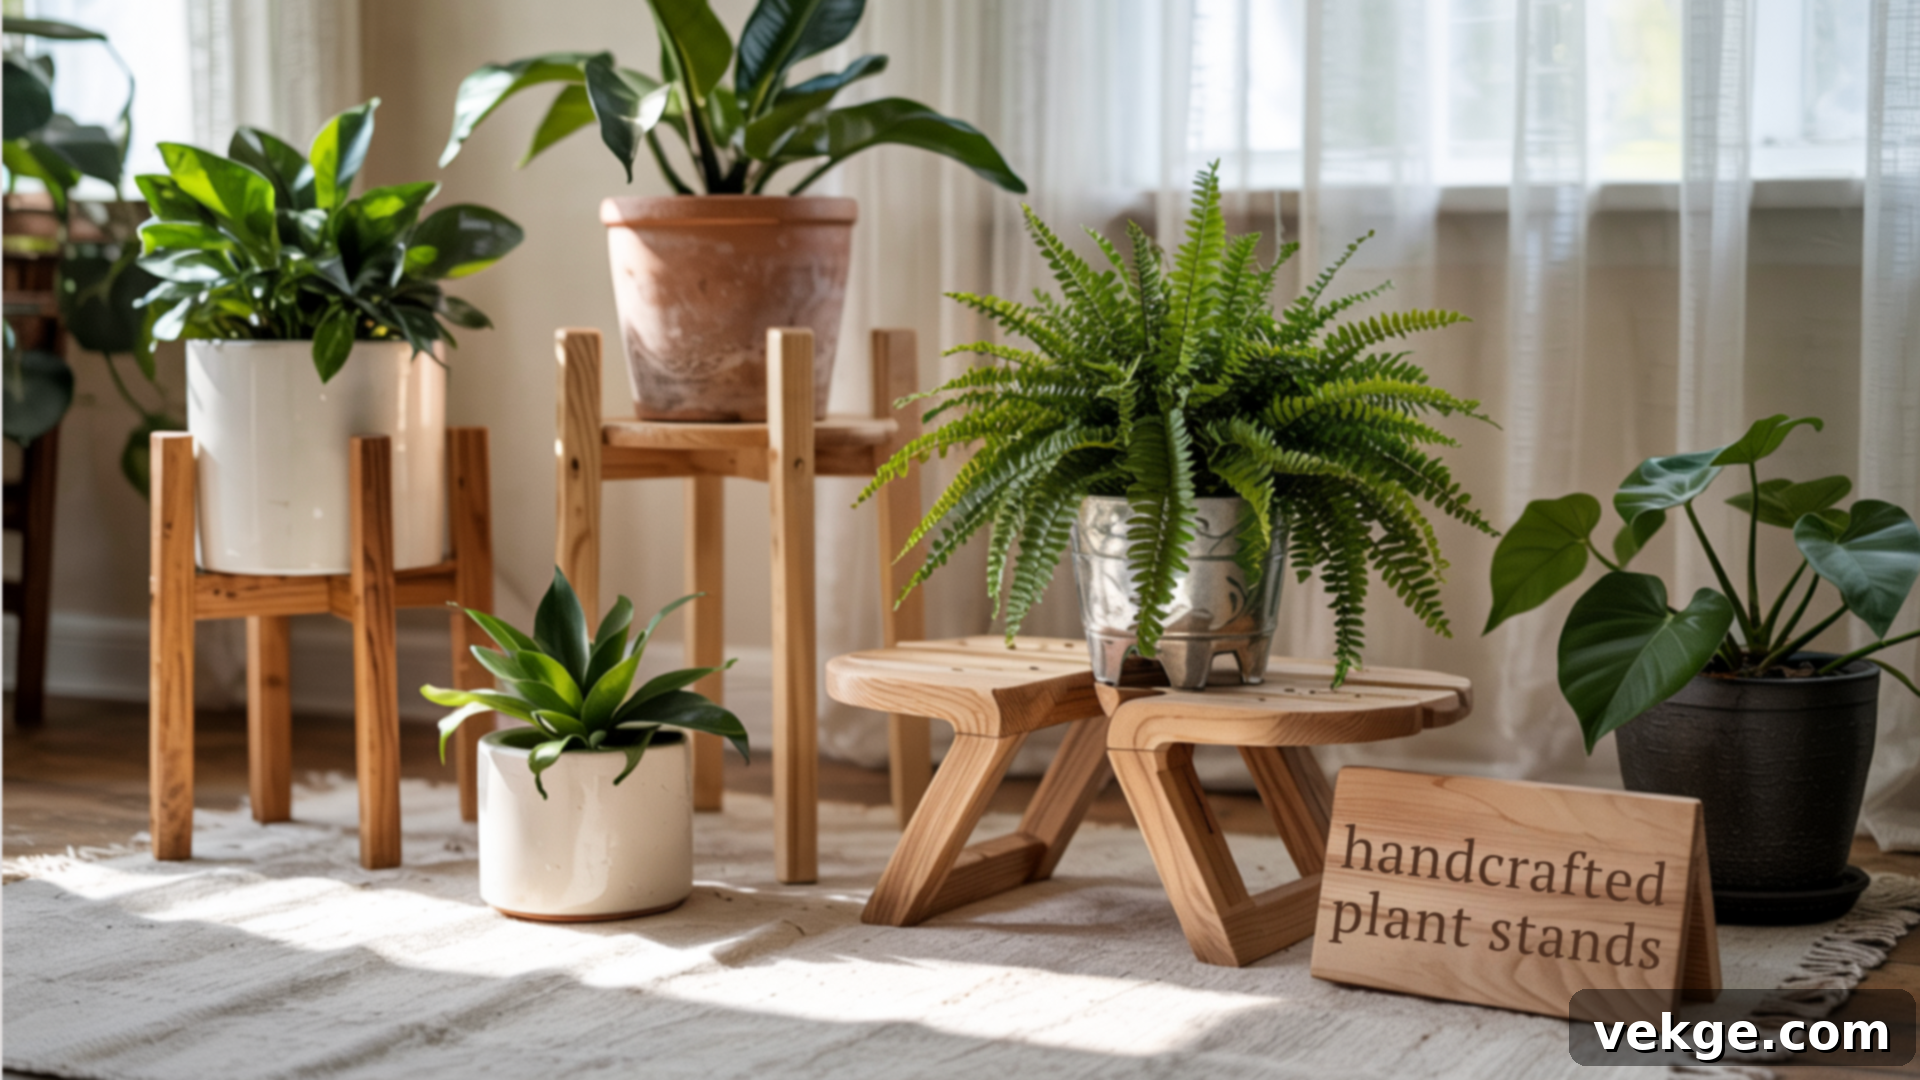
After all your hard work, it’s time for the most enjoyable part: showcasing your new DIY plant stand! Place it in its designated spot, carefully arrange your favorite plant, and take a moment to admire the functional and beautiful piece you’ve created from scratch. There’s a unique sense of pride that comes with building something with your own hands.
If you’ve ventured into building the more advanced puzzle-style stand with the intention of selling, presentation is key. Consider offering a variety of sizes or even different wood options to appeal to a wider range of customers. Gathering feedback from friends and family on which styles they prefer can also provide invaluable insights, sparking new ideas and helping you refine future designs for even greater success. Don’t forget to take appealing photos of your finished work and share them on social media or with your community. Celebrate your craftsmanship and inspire others with your DIY achievements!
Popular Plant Stand Styles to Build and Adorn Your Space
Beyond the specific plans, understanding popular plant stand styles can inspire your next project. These aesthetics are often easy to achieve and cater to various tastes and living environments.
- Mid-Century Modern: Characterized by clean lines, organic shapes, and a minimalist appeal, Mid-Century Modern plant stands often feature angled legs and simple, elevated platforms. They are typically built using 1x2s for the frame and dowels for legs, requiring no complex joinery. These stands look fantastic with either a natural wood finish (like walnut or teak) or a painted accent color. They are perfect for living rooms, bedrooms, or any space seeking a touch of retro elegance.
- Tall and Slim: Designed specifically for tight spaces and awkward corners, tall and slim plant stands maximize vertical display without consuming precious floor area. These can be simple upright columns or multi-tiered narrow shelves. Adding cross supports or a solid base is crucial for stability, especially for taller designs. A basic build usually involves straightforward measuring and cutting of vertical and horizontal pieces, making them accessible for beginners.
- Tripod and Geometric: These stands add a playful and architectural element to your plant display. Tripod designs (three-legged stands) offer inherent stability and a unique silhouette, often made from wooden dowels or carefully shaped cuts. Geometric designs might incorporate squares, triangles, or other abstract forms. While they might take a bit more time for precise angle cuts or assembly, the result is a highly decorative piece suitable for both indoor and outdoor settings, adding a contemporary touch.
- Multi-Level/Stackable: The ultimate solution for maximizing your plant collection, multi-level or stackable stands provide tiered shelves or modular cube designs. These are ideal for patios, sunrooms, or dedicated “plant corners” where you want to display numerous plants. While the overall planning might seem more involved due to the number of components, breaking the project down into individual sections or modules makes it much more manageable, even for those with moderate experience.
Common Mistakes to Avoid for a Smooth DIY Experience
Even the simplest DIY projects can encounter unexpected hiccups. Being aware of common pitfalls can save you time, frustration, and materials. Here are a few less obvious mistakes to watch out for, ensuring your plant stand build goes smoothly:
- Skipping Dry Fits: This is arguably the most crucial step often overlooked. Always, always test-fit all your pieces together *before* applying any glue, screws, or permanent fasteners. This allows you to catch any sizing errors, misalignment issues, or unexpected gaps early on when adjustments are easy to make. Trying to fix these problems after glue has dried or screws are in place can be incredibly difficult and often damaging.
- Overtightening Screws: While it might seem counterintuitive, overtightening screws can be detrimental, especially when working with softer woods (like pine) or composite materials like MDF. Excessively tightening can strip the screw hole, crack the wood (particularly near edges), or even cause the screw head to break off. Tighten screws just until they are snug and secure, then stop. Consider pre-drilling pilot holes to prevent splitting.
- Ignoring Wood Grain Direction: For visible parts of your plant stand, paying attention to the wood grain direction is important for both aesthetics and durability. Aligning the grain direction consistently across your pieces results in a cleaner, more professional-looking finish when stained or clear-coated. More importantly, cutting or joining wood against the grain can weaken the material and make it more prone to warping, splitting, or breaking over time.
- Using Indoor Glue Outdoors: Not all wood glues are created equal. Standard indoor wood glues are not designed to withstand moisture, humidity, or temperature fluctuations. If your plant stand will be exposed to the elements or high humidity (e.g., on a patio, in a bathroom, or near frequently watered plants), you absolutely must use an exterior-grade or waterproof wood glue. These glues contain additives that prevent them from breaking down when wet, ensuring the longevity of your joints.
- Forgetting Felt Pads or Rubber Feet: This small detail makes a big difference for indoor plant stands. Adding felt pads or small rubber feet to the bottom of the stand’s legs serves several vital purposes:
- Floor Protection: Prevents scratches, scuffs, and indentations on delicate flooring surfaces (hardwood, laminate, tile).
- Stability: Helps to level the stand on uneven surfaces and prevents it from sliding around.
- Airflow: For stands placed directly on the floor, felt pads can provide a tiny air gap, preventing moisture buildup underneath that could damage both the floor and the stand over time.
This inexpensive addition adds a professional touch and protects your home.
Budgeting and Time Estimates for Your DIY Plant Stand Project
Embarking on a DIY project often comes with questions about cost and time commitment. Here’s a realistic breakdown to help you plan effectively:
Cost-Saving Strategies:
- Utilize Scrap Materials: The most significant cost-saving method is using what you already have. Leftover wood from previous projects, discarded furniture pieces (like table legs or drawers), or even sturdy branches can be excellent free resources.
- Affordable Wood Options: If buying new, basic pine lumber is incredibly cost-effective and widely available at any hardware store. Look for sales or “cull lumber” sections where you can find discounted pieces suitable for smaller projects.
- Repurpose & Upcycle: Thrift stores, garage sales, and dollar stores are treasure troves for items like old stools, crates, baskets, or PVC pipes that can be repurposed into unique plant stands for minimal expense.
- Bulk Buys & Community Resources: For larger projects or if you plan to build multiple stands, consider buying lumber in bulk. Also, check local community groups or online marketplaces for free or cheap materials.
Time Commitment Estimates:
- Simple Plant Stands (e.g., Scrap Wood Stand, Dollar Store Hacks, Painted Stool): These projects are incredibly quick, often taking as little as 1-2 hours from start to finish. This includes cutting, assembly, and a basic finish (though paint drying time will add more). They are perfect for a spontaneous afternoon project.
- Moderate Complexity Stands (e.g., Tiered Stand, Ladder Stand, Box Frame, Corner Shelf): These designs involve more cuts, potentially more intricate assembly, and perhaps multiple components. Expect to dedicate 4-6 hours of active building time. This can typically be spread across a weekend, allowing for glue drying times.
- Advanced/Detailed Stands (e.g., Puzzle-Style Stand, Folding Shelf, Multi-Level from scratch): Projects requiring more precise cuts, complex joinery, or multiple hinged components will naturally take longer. Plan for a full day of dedicated work (8+ hours), or spread across several days, especially if you include extensive sanding and multiple coats of finish with appropriate drying times.
Tips for Efficiency:
- Plan Ahead: Read through the entire plan before you start. Make a detailed cut list and material list.
- Batch Your Cuts: If you have multiple pieces of the same length or shape, cut them all at once. This saves time on setting up your saw repeatedly.
- Organize Your Workspace: A clean and organized workspace makes it easier to find tools and materials, reducing wasted time.
- Factor in Drying Time: Always account for the drying time of glue, paint, or stain. These periods are non-negotiable for a durable and beautiful finish.
Conclusion: Your Green Oasis Awaits!
By now, you’re equipped with a comprehensive set of DIY plant stand plans and a wealth of knowledge to confidently tackle your next project. Trust me when I say, building these stands isn’t just about creating a functional piece; it’s about the immense satisfaction of bringing a vision to life with your own hands. I’ve built many of these myself, and the transformation they bring to both my plants and my living space is truly remarkable. Beyond the improved aesthetics for my beloved greenery, there’s an undeniable sense of pride in the final, handcrafted results.
So, why not give one a try? Start with a simple design, make the most of the materials you already have, and remember that the joy is in the process. Don’t stress about achieving absolute perfection; every small imperfection tells a story of your unique craftsmanship. It’s all part of the fun and learning experience.
If you’ve caught the DIY bug and are eager to keep building and creating, know that there are many more exciting guides and ideas waiting for you. Explore other blogs and resources on the website to discover what incredible project you’ll embark on next. Happy building, and enjoy your beautifully elevated plant collection!
