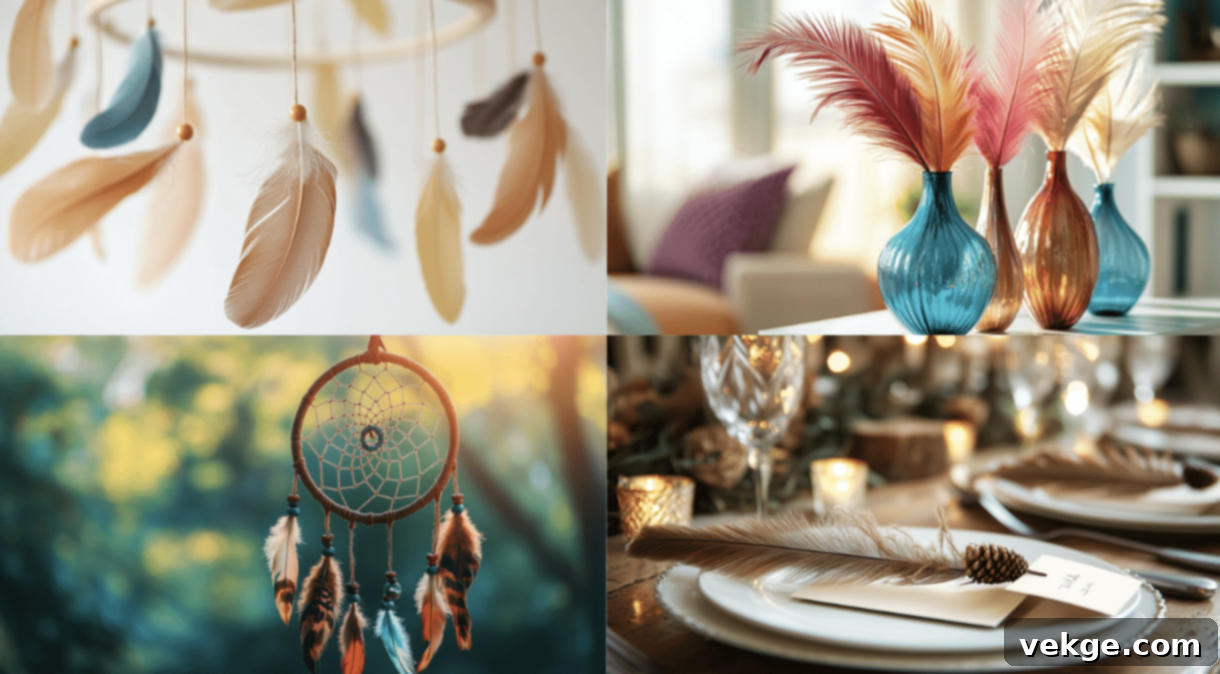
16 Stunning Feather Decoration Ideas to Transform Your Home with Elegance
Are you yearning to infuse your living space with a touch of softness, whimsy, and natural beauty? Look no further than the delicate charm of feathers! These lightweight, ethereal elements are more than just pretty; they can evoke a sense of serenity, add unique texture, and create an inviting atmosphere in any room. Whether you prefer a minimalist, bohemian, or chic aesthetic, incorporating feathers into your home decor is a surprisingly versatile and impactful way to personalize your environment.
In this comprehensive guide, we’re thrilled to share 16 enchanting and easy-to-implement feather decoration ideas that you’re absolutely going to adore. From simple DIY projects perfect for beginners to more ambitious, eye-catching displays, there’s a creative concept here for every skill level and design preference. Get ready to explore how these natural wonders can jazz up your living room, add a cozy feel to your bedroom, or even bring an unexpected touch of elegance to your dining table.
Prepare to unleash your inner interior designer and transform your home into a feathery sanctuary. We’ll walk you through each idea, providing practical steps, material lists, and tips on how these decorative elements can enhance your space. Trust us, you won’t want to miss out on these simple yet profoundly stunning decoration tips that promise to make your home feel more uniquely “you.”
16 Feather Decoration Ideas to Transform Your Space
1. Feather Coasters
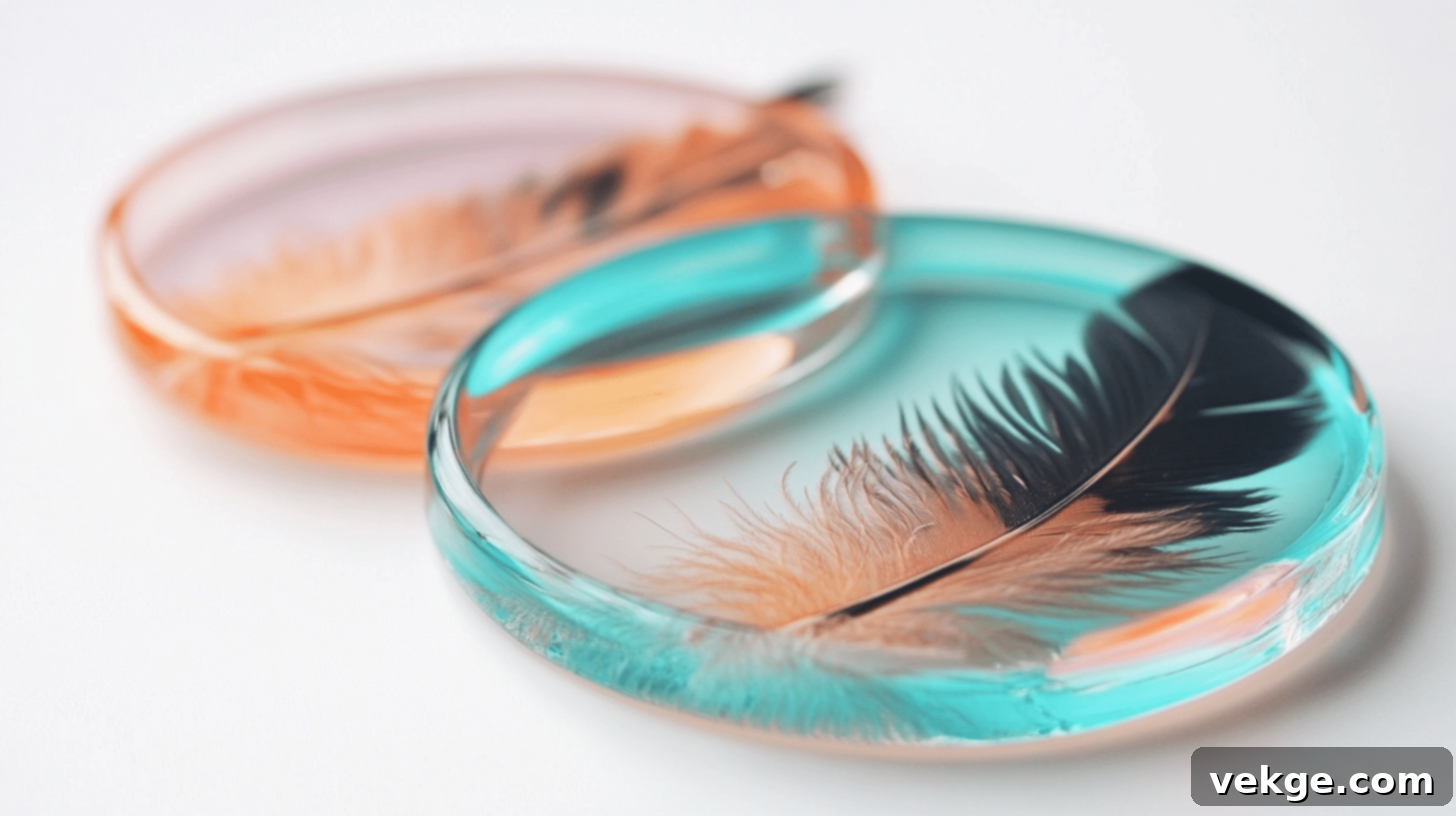
- DIY Difficulty Level: Beginner
- How It Enhances Your Home Decor: These elegant feather coasters add a natural, artistic element to your table setting, protecting surfaces while introducing a subtle touch of organic beauty. They bring a bespoke, high-end feel to everyday items, perfect for a cozy coffee break or a sophisticated dinner party.
| Materials Needed | Quantity |
|---|---|
| Clear resin | 250 ml |
| Small feathers (natural or colored) | 4-6 |
| Coaster molds (silicone is best) | 4 |
| Mixing cups | 1 |
| Stir sticks | 1-2 |
- Begin by mixing the clear resin according to the manufacturer’s instructions in your mixing cup.
- Carefully pour a thin, even layer of the mixed resin into each of your coaster molds.
- Gently place 1-2 small feathers into the resin layer. You can arrange them in a pattern or randomly for a natural look.
- Cover the feathers with another layer of resin, ensuring they are fully submerged and air bubbles are removed.
- Allow the resin to cure completely as specified by the product, usually 24-72 hours, before carefully removing your unique feather coasters from the molds.
2. Framed Feather Collage
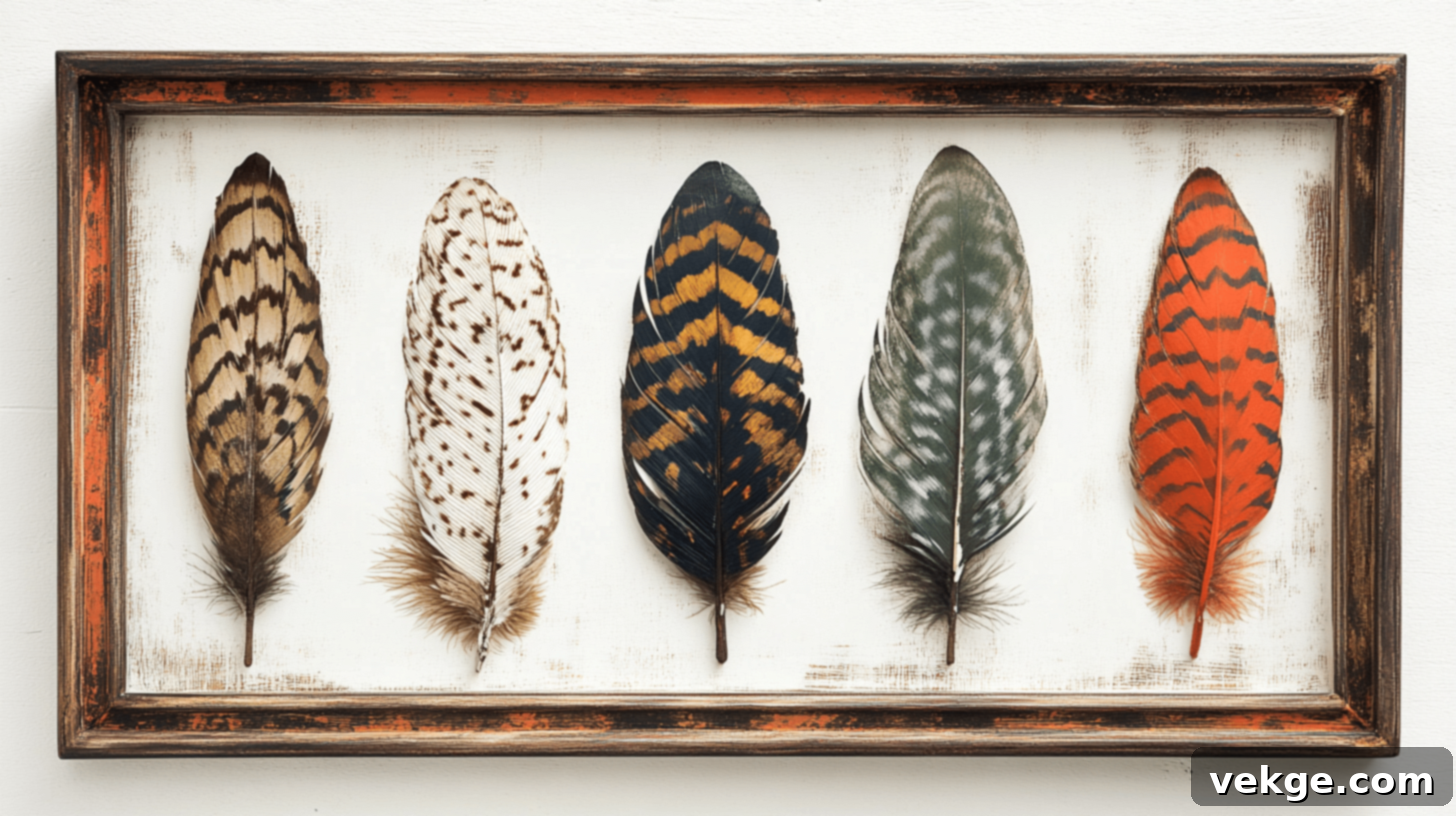
- DIY Difficulty Level: Beginner
- How It Enhances Your Home Decor: A framed feather collage adds a minimalistic, natural, and highly artistic element to your walls. It creates a serene and sophisticated vibe, perfect for a gallery wall, a quiet corner, or as a focal point above a console table. The simplicity highlights the intricate beauty of each feather.
| Materials Needed | Quantity |
|---|---|
| Shadow boxes or deep picture frames | 2-4 (or more for a larger display) |
| Individual feathers (various sizes, shapes, or colors) | 4-6 per frame |
| Craft glue or double-sided adhesive tape | 1 tube/roll |
| Scissors (optional, for trimming) | 1 pair |
- Carefully open your shadow box or picture frame and remove the backing.
- Arrange your chosen feathers inside the frame, experimenting with different layouts until you achieve an artistic pattern that speaks to you. You might layer them, create a symmetrical design, or let them flow organically.
- Once satisfied with the arrangement, secure each feather gently but firmly to the backing using a small dab of craft glue or a piece of double-sided adhesive tape.
- Ensure all feathers are securely attached, then close the frame and hang it on your wall, either individually or as part of a stunning collection.
3. Feather Candle Holders
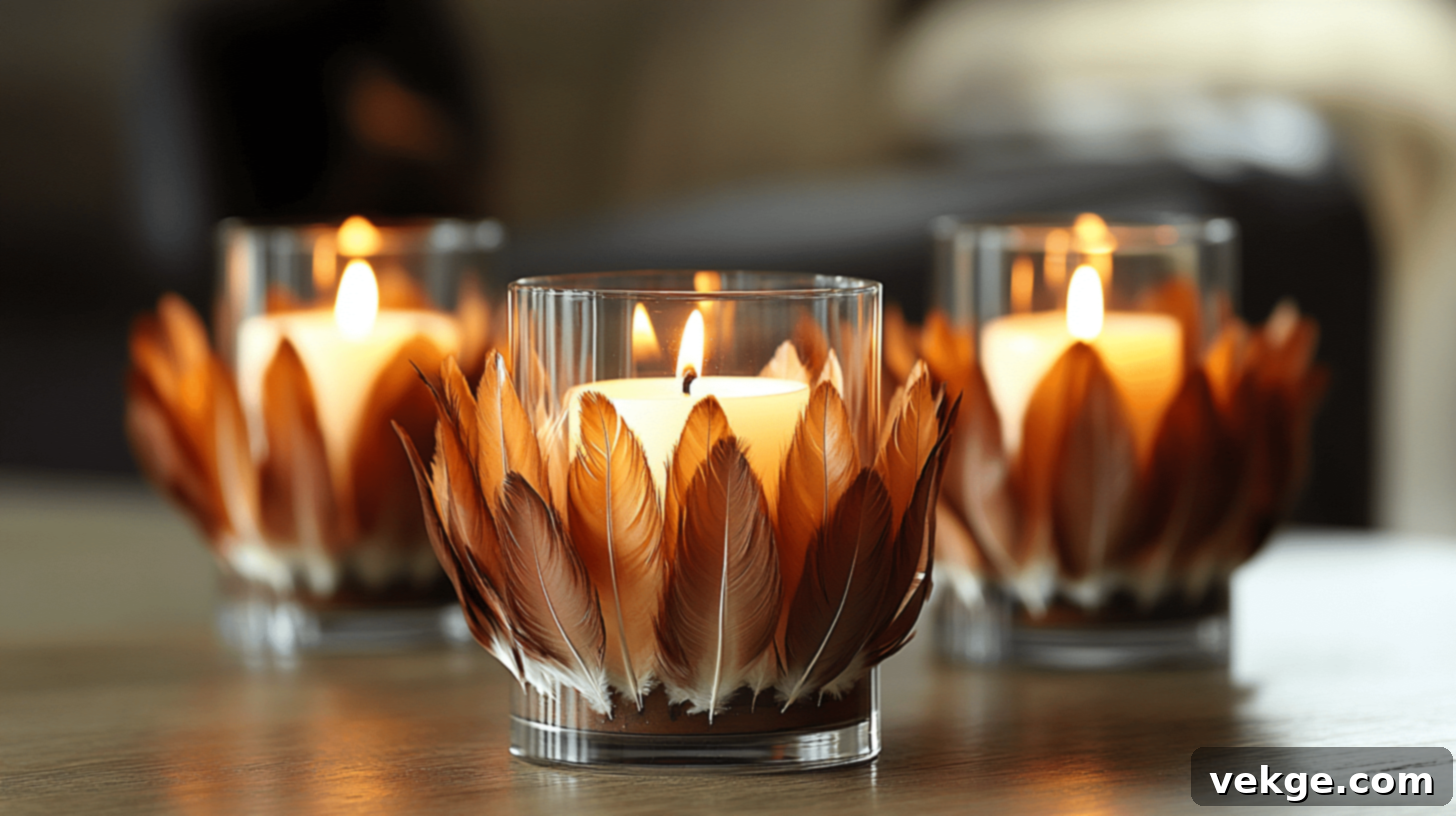
- DIY Difficulty Level: Beginner
- How It Enhances Your Home Decor: Feather candle holders create a soft, romantic glow, adding a textured and stylish touch to any setting. The delicate feathers beautifully diffuse candlelight, making them perfect for creating an intimate ambiance during dinner parties or relaxing evenings.
| Materials Needed | Quantity |
|---|---|
| Glass or ceramic candle holders | 2-4 |
| Decorative feathers (medium to small) | 6-8 per holder |
| Hot glue gun and glue sticks | 1 gun/tube |
| Scissors | 1 pair |
- Gather your candle holders and a selection of feathers. You might choose feathers of a single color for a monochromatic look or a mix for a more bohemian vibe.
- Trim the quills of the feathers if necessary, ensuring they will sit flush against the candle holder and won’t be too close to the flame.
- Using a hot glue gun, carefully apply a small bead of glue to the base of each feather and attach it evenly around the exterior base or mid-section of the candle holder. Layer them slightly for a fuller appearance.
- Continue until the desired look is achieved. Allow the glue to dry completely before placing candles inside, ensuring the feathers are a safe distance from the flame or using LED candles for extra safety.
4. Feather Curtain Tiebacks
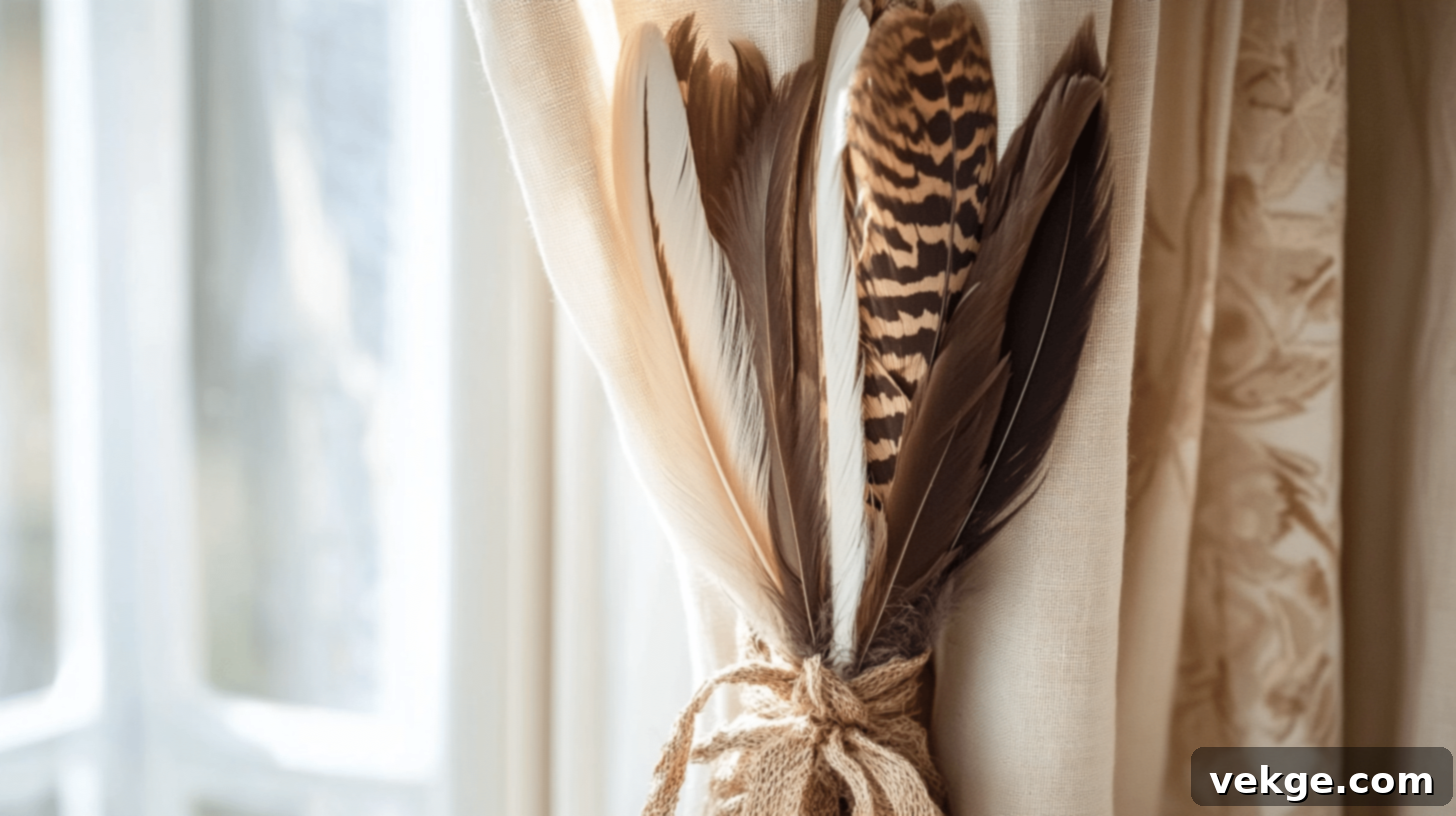
- DIY Difficulty Level: Beginner
- How It Enhances Your Home Decor: This simple yet ingenious feather decoration idea brings a natural, organic, and stylish feel to your windows. Feather curtain tiebacks are an unexpected detail that can elevate plain curtains, adding a touch of bohemian chic or rustic elegance to your living room or bedroom.
| Materials Needed | Quantity |
|---|---|
| Decorative feathers (medium to large) | 6-8 per tieback |
| Strong string, ribbon, or macrame cord | 2-3 feet per tieback |
| Hot glue gun and glue sticks | 1 gun/tube |
| Scissors | 1 pair |
- Take a length of string or ribbon that is long enough to comfortably tie back your curtains.
- Gather a bundle of feathers, arranging them in a visually pleasing way. You can vary lengths and colors for more interest.
- Securely tie or hot glue the feather bundle to one end of the string or ribbon, making sure they are firmly attached.
- To use, simply wrap the string around your curtain and tie it back, allowing the feather bundle to drape elegantly. This instantly adds a personalized and handcrafted touch to your window treatments.
5. Feather Wreath
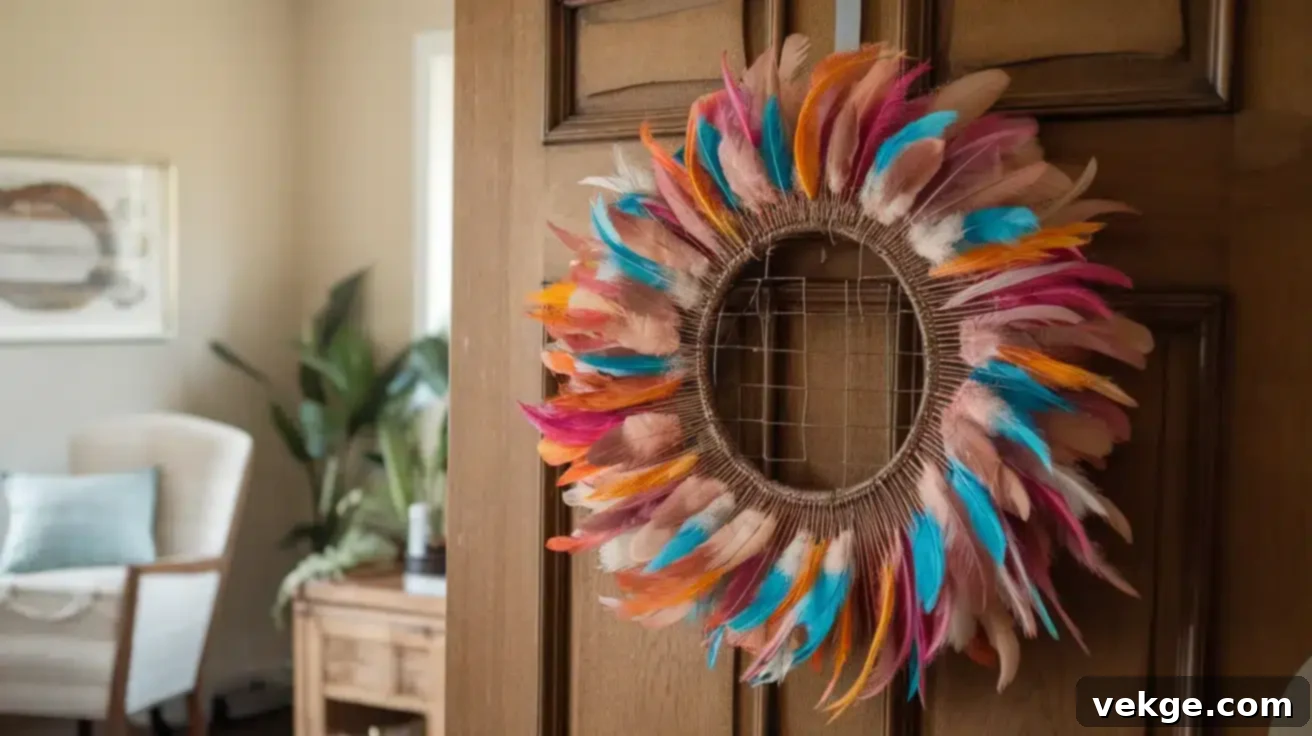
- DIY Difficulty Level: Intermediate
- How It Enhances Your Home Decor: A feather wreath creates a stunning focal point for doors, walls, or even above a mantelpiece. This feather decoration idea is perfect for seasonal decor (think autumn or winter) or as a year-round statement piece that brings texture, warmth, and a touch of organic luxury to any room.
| Materials Needed | Quantity |
|---|---|
| Wreath base (foam, wire, or grapevine) | 1 |
| Feathers (varied sizes, colors, and types like goose, turkey, or peacock for different effects) | 20-30 (or more for a very full wreath) |
| Hot glue gun and glue sticks | 1 gun/tube |
| Scissors | 1 pair |
- Start by applying feathers to your wreath base using a hot glue gun. Begin from the outer edge and work your way inwards, layering the feathers to create fullness and dimension.
- Ensure you overlap the feathers slightly to hide the base and create a plush, dense look. Rotate the wreath as you go to maintain an even distribution and symmetrical shape.
- Consider using larger, more prominent feathers for the base layers and smaller, softer feathers for the top layer to add texture.
- Once all feathers are securely glued, allow the glue to dry completely. Hang your beautiful feather wreath on your front door, above a fireplace, or as a unique wall accent.
6. Feather Garland
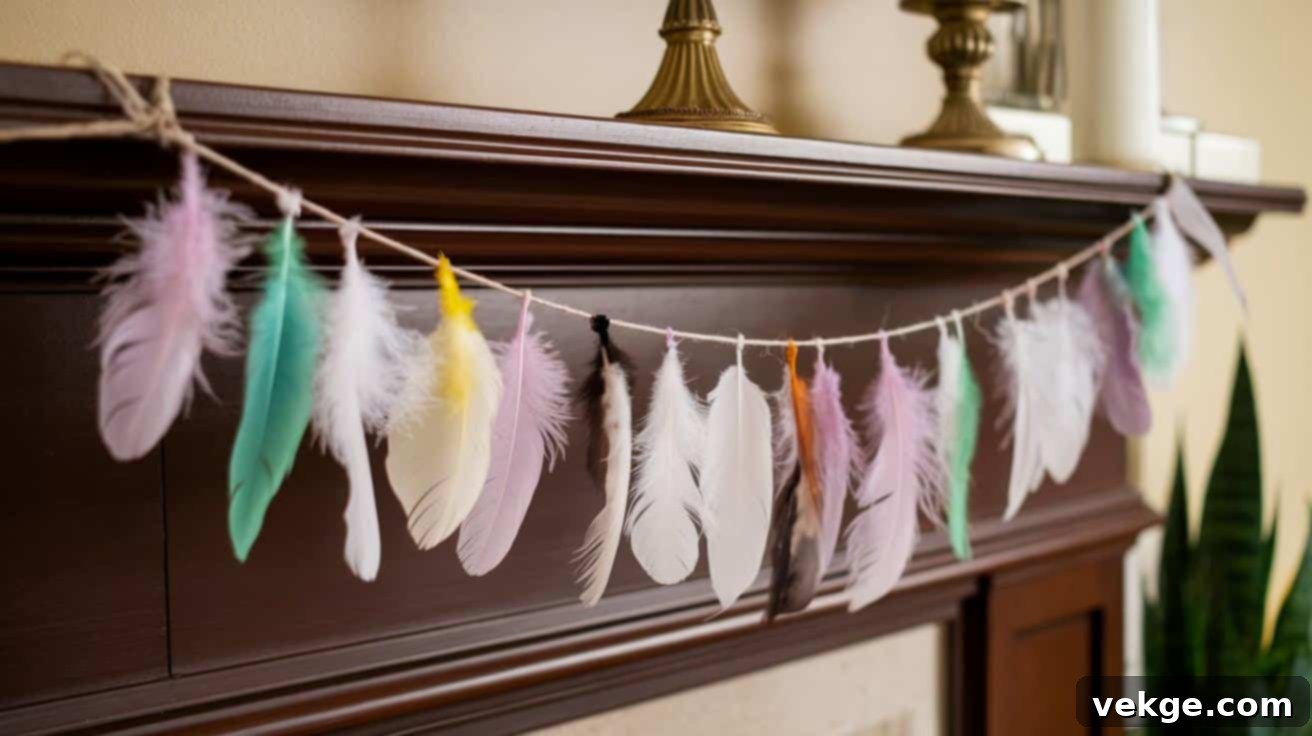
- DIY Difficulty Level: Beginner
- How It Enhances Your Home Decor: A feather garland adds a whimsical, light, and airy touch to various areas of your home. It’s perfect for draping across windows, mantels, headboards, shelves, or even along stair banisters, bringing a delicate, festive, or bohemian flair to any space.
| Materials Needed | Quantity |
|---|---|
| Twine, strong thread, or thin ribbon | 6-8 feet (or desired length) |
| Small to medium feathers (various colors or natural tones) | 15-20 (or more, depending on desired density) |
| Hot glue gun and glue sticks | 1 gun/tube |
| Scissors | 1 pair |
- Measure and cut your twine or ribbon to the desired length for your garland.
- Decide on the spacing you want between each feather. For a fuller look, space them closer; for a more delicate garland, space them further apart.
- Using a hot glue gun, carefully apply a small dab of glue to the quill of each feather and attach it to the twine or ribbon at your chosen intervals. Ensure the feathers are facing the same direction or alternate them for visual variety.
- Allow the glue to dry completely before hanging the garland across windows, mantels, headboards, or wherever you wish to add a soft, decorative touch.
7. Feather Bookmarks
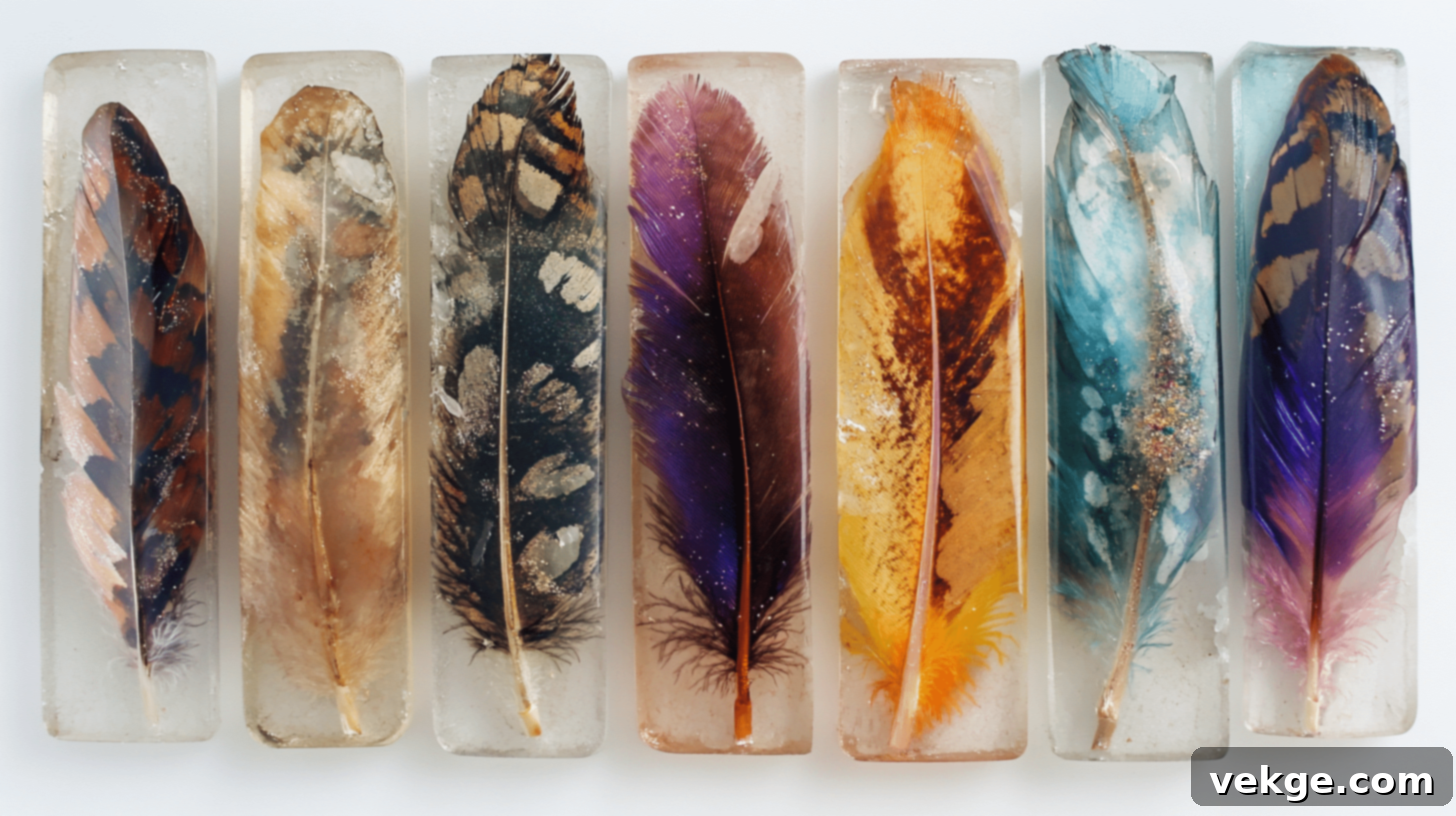
- DIY Difficulty Level: Beginner
- How It Enhances Your Home Decor: Feather bookmarks are not just functional; they are artistic little treasures that add a personal, creative touch to your bookshelves or make thoughtful, unique gifts. They elevate the simple act of reading, bringing a piece of natural beauty into your literary world.
| Materials Needed | Quantity |
|---|---|
| Clear resin | 50 ml |
| Small, delicate feathers | 2-3 per bookmark |
| Bookmark molds (silicone is ideal) | 1-2 |
| Mixing cup and stir stick | 1 each |
| Optional: Tassels or charms | 1 per bookmark |
- Mix the clear resin thoroughly according to the manufacturer’s instructions.
- Pour a thin layer of resin into each bookmark mold, ensuring it covers the bottom.
- Carefully place your chosen small feathers onto the resin layer. You can arrange them artfully or let them float naturally. If desired, you can also add a tiny sprinkle of glitter or a small charm at this stage.
- Gently pour another layer of resin over the feathers, ensuring they are fully encapsulated. Remove any air bubbles using a toothpick or heat gun.
- Allow the resin to cure completely (as per product instructions). Once cured, carefully remove your custom feather bookmarks from the molds. You can add a tassel to the top hole for an extra decorative touch.
8. Feather Wall Hooks
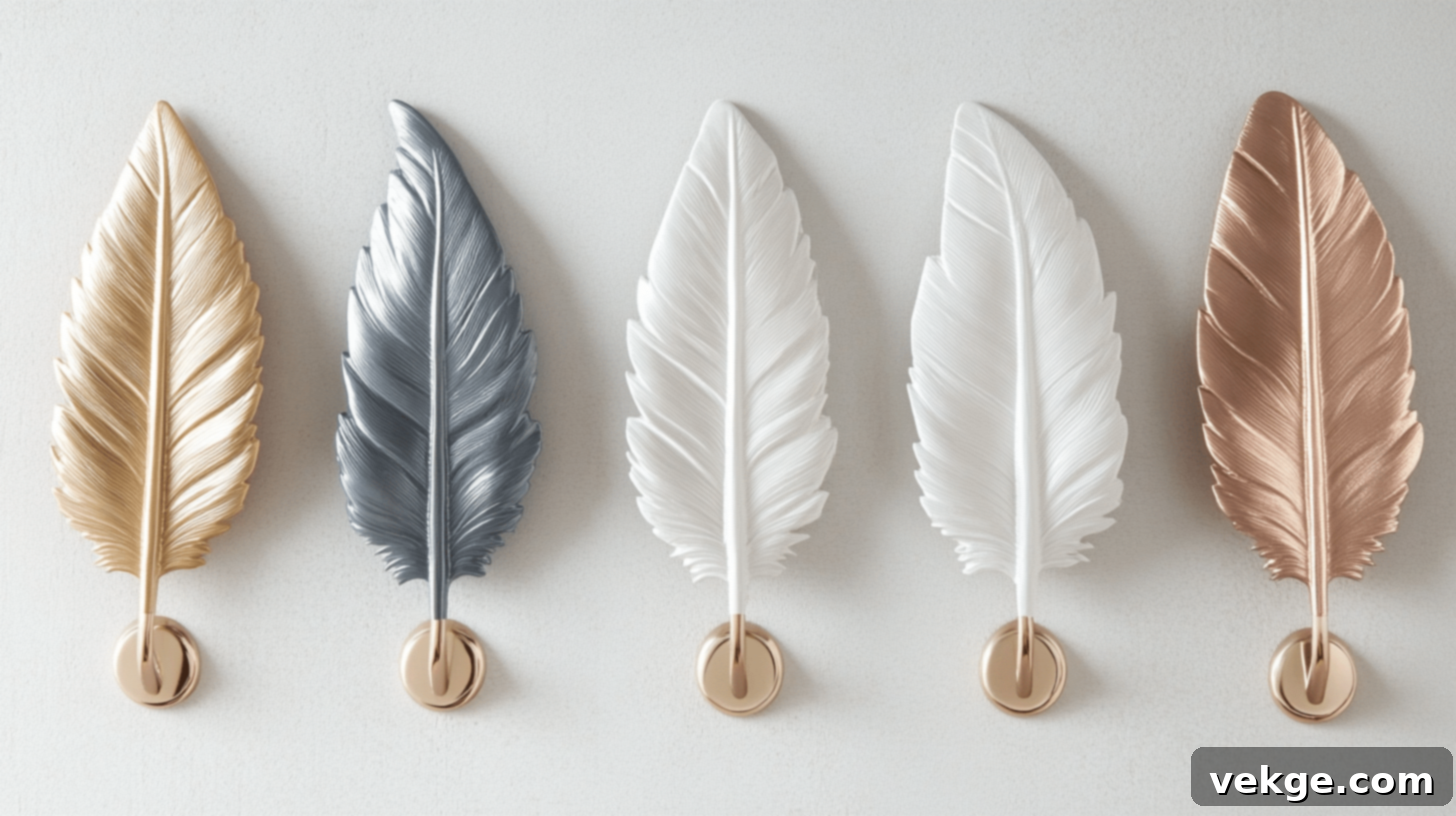
- DIY Difficulty Level: Beginner
- How It Enhances Your Home Decor: These feather-shaped wall hooks beautifully combine function and style, adding a decorative yet practical element to entryways, bedrooms, or even bathrooms. They introduce a subtle, artistic detail that can elevate an otherwise plain wall, offering a touch of whimsy and natural elegance.
| Materials Needed | Quantity |
|---|---|
| Feather-shaped wall hooks (pre-made) | 2-4 (or as many as needed) |
| Wall anchors and screws (usually included with hooks) | 1 set per hook |
| Drill or screwdriver | 1 |
| Pencil | 1 |
- Decide on the placement for your feather wall hooks. Use a pencil to mark where you want each hook to be installed on the wall.
- If your hooks require drilling, use a drill to create pilot holes at your marked spots. Insert wall anchors if necessary, ensuring a secure fit for the screws.
- Align the feather-shaped hooks with the holes and use a screwdriver to firmly secure them to the wall with the provided screws.
- Once installed, these decorative hooks are ready to hold coats, hats, bags, or even delicate scarves, serving as both functional storage and a charming wall art piece.
9. Feather Jewelry Stand
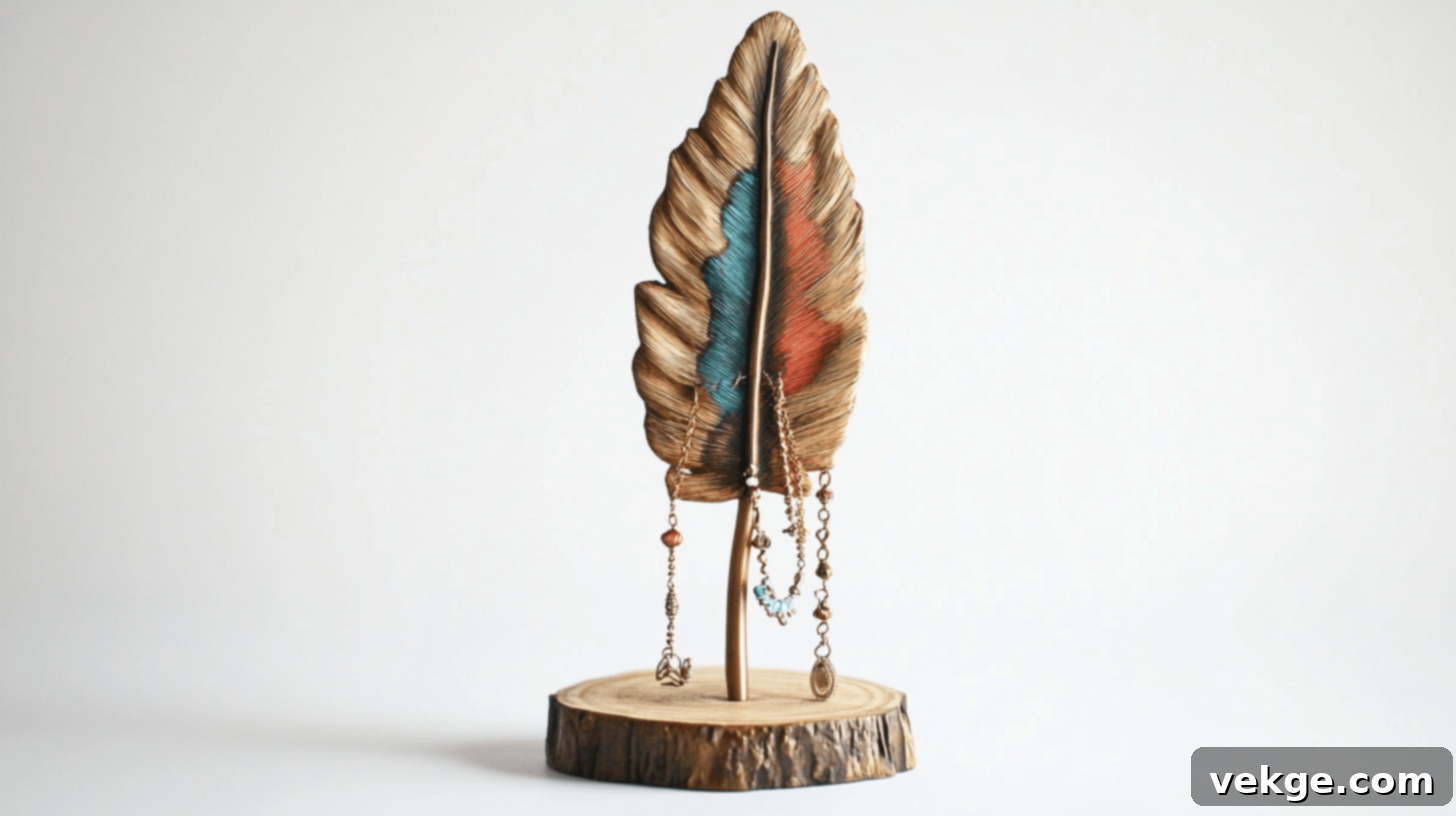
- DIY Difficulty Level: Beginner
- How It Enhances Your Home Decor: A feather jewelry stand is an elegant and functional piece that beautifully organizes your delicate jewelry while significantly enhancing the aesthetic of your vanity table, dresser, or bedside stand. It transforms everyday clutter into a stylish display, adding a unique, natural touch.
| Materials Needed | Quantity |
|---|---|
| Large, sturdy decorative feather (e.g., peacock, goose quill) | 1 |
| Small stand base (e.g., wooden block, heavy stone, or a small pedestal) | 1 |
| Hot glue gun and glue sticks | 1 gun/tube |
| Optional: Felt pad for base | 1 |
- Ensure your chosen stand base is stable and heavy enough to support the feather and any jewelry you plan to hang.
- Carefully apply a generous amount of hot glue to the base of the feather’s quill.
- Firmly attach the feather into the center of the stand base, holding it in place until the glue sets and the feather is stable and upright. You may need to use extra glue for reinforcement.
- Allow the glue to dry completely before using the stand. Once dry, delicately hang rings, earrings, or lightweight necklaces from the feather’s barbs, turning your jewelry into a beautiful, organized display.
10. Feather Dreamcatchers
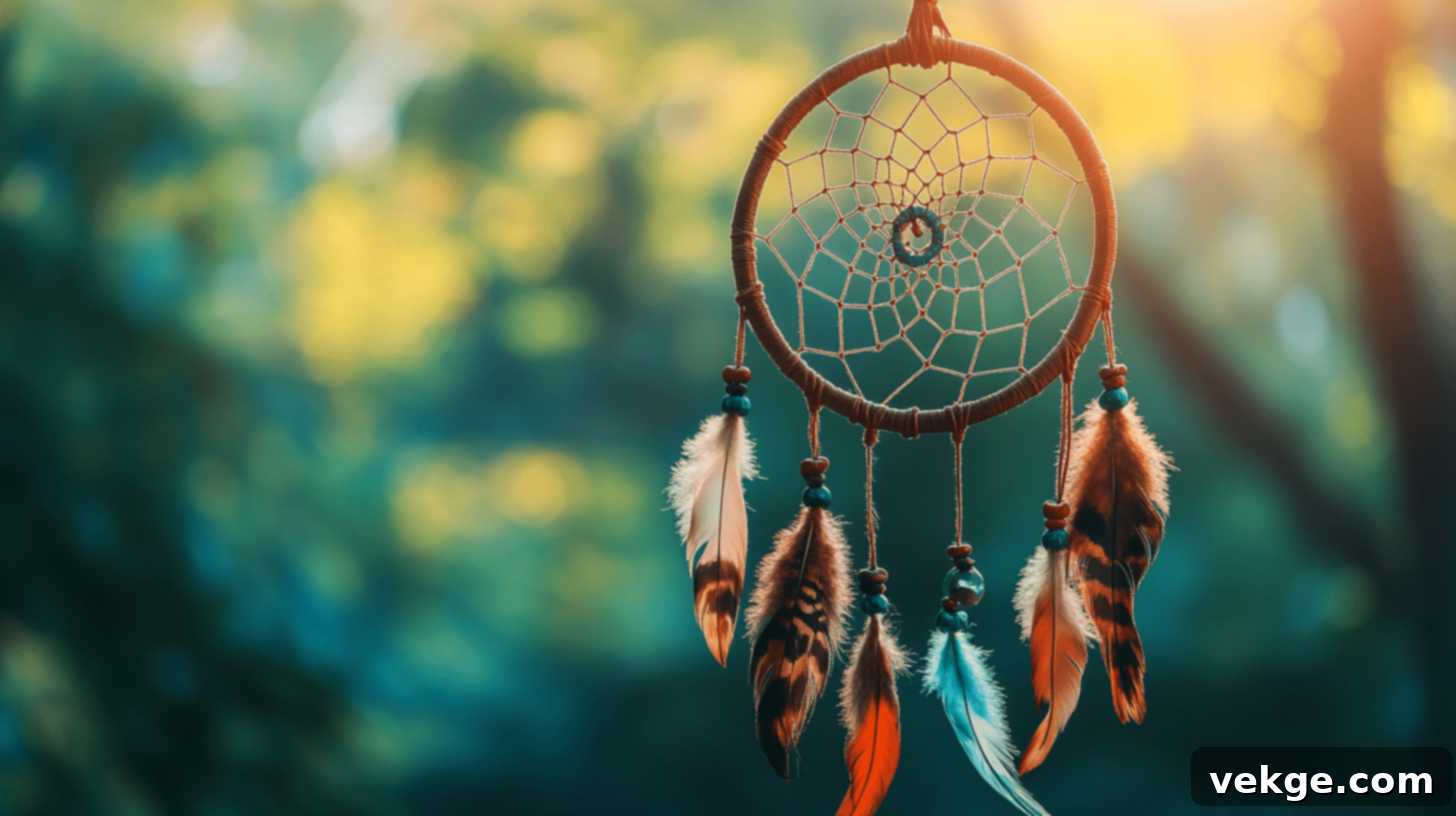
- DIY Difficulty Level: Intermediate
- How It Enhances Your Home Decor: Feather dreamcatchers add a whimsical, spiritual, and deeply artistic touch to bedrooms, nurseries, or living rooms. They are not only beautiful to look at but also evoke a sense of calm and ancient wisdom, making them perfect for creating a bohemian or serene sanctuary.
| Materials Needed | Quantity |
|---|---|
| Metal or wooden hoop for dreamcatcher base | 1 (various sizes available) |
| Feathers (real or faux, in various sizes and colors) | 6-8 (or more, depending on desired fullness) |
| Waxed linen thread, embroidery floss, or thin string | 2-3 feet (for the web) + additional for hanging feathers |
| Beads or embellishments (wooden, glass, or metallic) | Optional (6-10) |
| Scissors | 1 pair |
- Begin by creating the dreamcatcher web. Tie your string to the hoop and weave it in a circular pattern, creating a central “spider web” design. There are many tutorials online for various web patterns.
- Once your web is complete, cut several lengths of string for hanging the feathers.
- Thread a bead onto a string, then tie a feather to the bottom of the string. Repeat this for all your desired feather strands.
- Attach these feather strands to the bottom of the hoop, varying their lengths for visual interest. You can also incorporate additional beads or charms directly onto the hoop or strands.
- Hang your finished dreamcatcher in your room, allowing it to gently sway and add a magical touch to your space.
11. Feather Lampshades
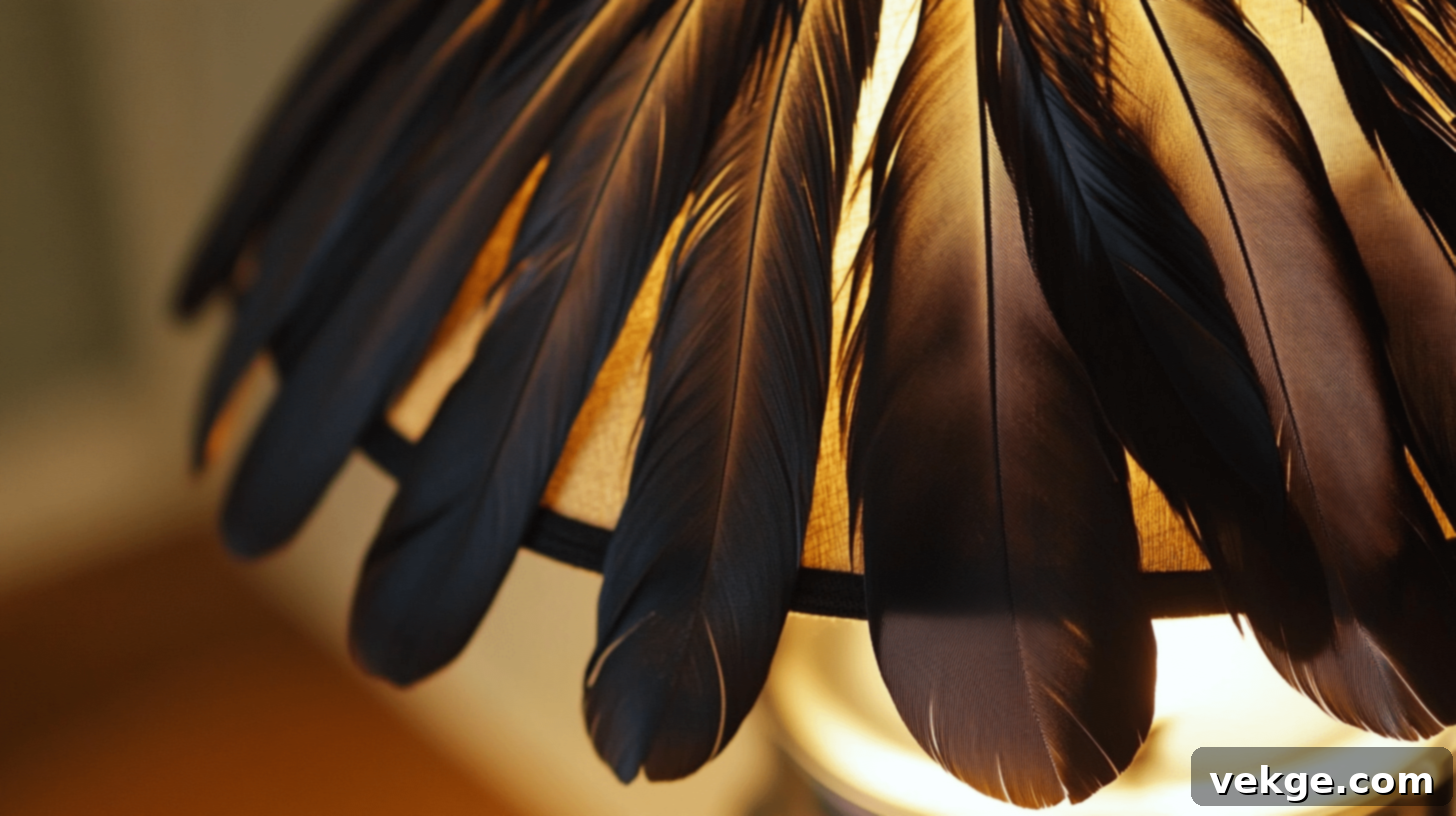
- DIY Difficulty Level: Intermediate
- How It Enhances Your Home Decor: A feather lampshade adds a soft, diffused glow and an incredibly luxurious texture to any room, instantly making it feel cozy, elegant, and sophisticated. It transforms a standard lamp into a statement piece, creating a warm and inviting ambiance, perfect for a bedroom or living area.
| Materials Needed | Quantity |
|---|---|
| Plain lampshade (drum or empire style works best) | 1 |
| Fluffy feathers (e.g., marabou, boa feathers, ostrich plumes) | 12-15 packs/strands (or a large quantity of individual feathers) |
| Hot glue gun and glue sticks | 1 gun/tube |
| Scissors | 1 pair |
| Tweezers (optional, for precise placement) | 1 |
- Begin by ensuring your lampshade is clean and dry.
- Starting from the bottom edge of the lampshade, apply a line of hot glue and firmly press the quills of the feathers onto it. Work in small sections to prevent the glue from drying too quickly.
- Layer the feathers upwards, ensuring each new layer slightly overlaps the previous one to create a full, seamless look. You can trim feathers to fit if they are too long or uneven.
- Continue until the entire lampshade is covered, or just the top/bottom edges for a more subtle effect.
- Allow the glue to dry completely before placing the lampshade back on its lamp base. Be mindful of feather proximity to the light bulb, choosing LED bulbs to prevent heat issues.
12. Feather Vase Fillers
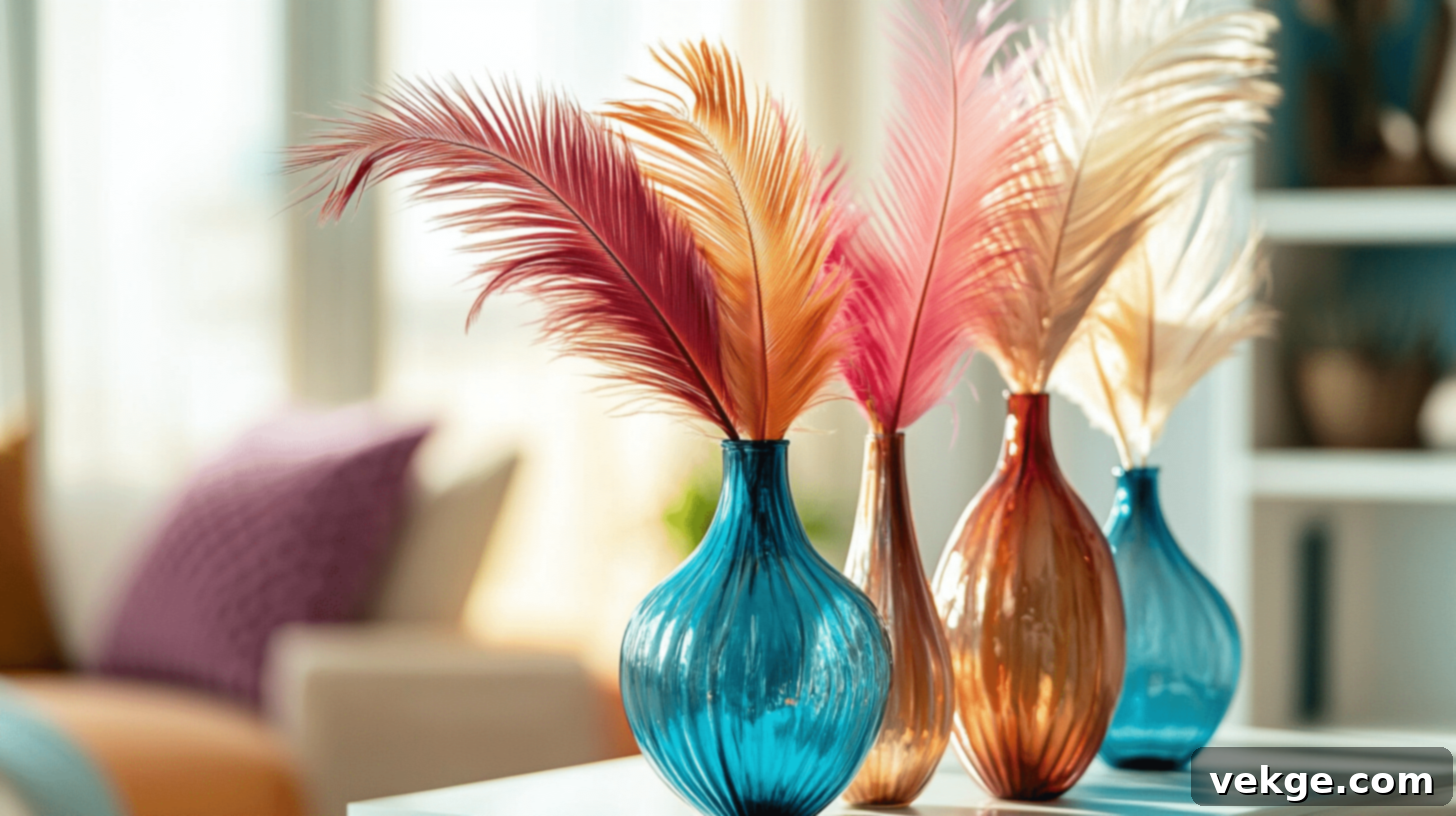
- DIY Difficulty Level: Beginner
- How It Enhances Your Home Decor: Using feathers as vase fillers adds a soft, unique texture and an unexpected element to your decor. It’s an elegant alternative to traditional flowers, bringing a natural, minimalist, or rustic vibe to any room. This idea is perfect for those who want a long-lasting, low-maintenance decorative arrangement.
| Materials Needed | Quantity |
|---|---|
| Clear glass vases (various shapes and sizes work well) | 2-3 |
| Feathers (varied sizes, colors, and types like peacock, ostrich, or goose feathers) | 10-15 (or more, depending on vase size and desired fullness) |
| Optional: Sand, small stones, or clear marbles (to hold feathers upright) | 1 bag/container |
- Select feathers that complement your room’s existing color scheme and style. Consider tall, elegant plumes for a dramatic statement or smaller, softer feathers for a delicate touch.
- If your vase is wide or the feathers are thin, you might add a layer of sand, small decorative stones, or clear marbles to the bottom of the vase to help hold the feathers upright and stable.
- Carefully arrange the feathers within the vases, ensuring a balanced and aesthetically pleasing look. You can mix different feather types and lengths for added visual interest.
- Place the vases on tables, shelves, countertops, or a mantelpiece for a chic, natural, and effortlessly elegant touch that instantly elevates your space.
13. Feather Wall Hangings
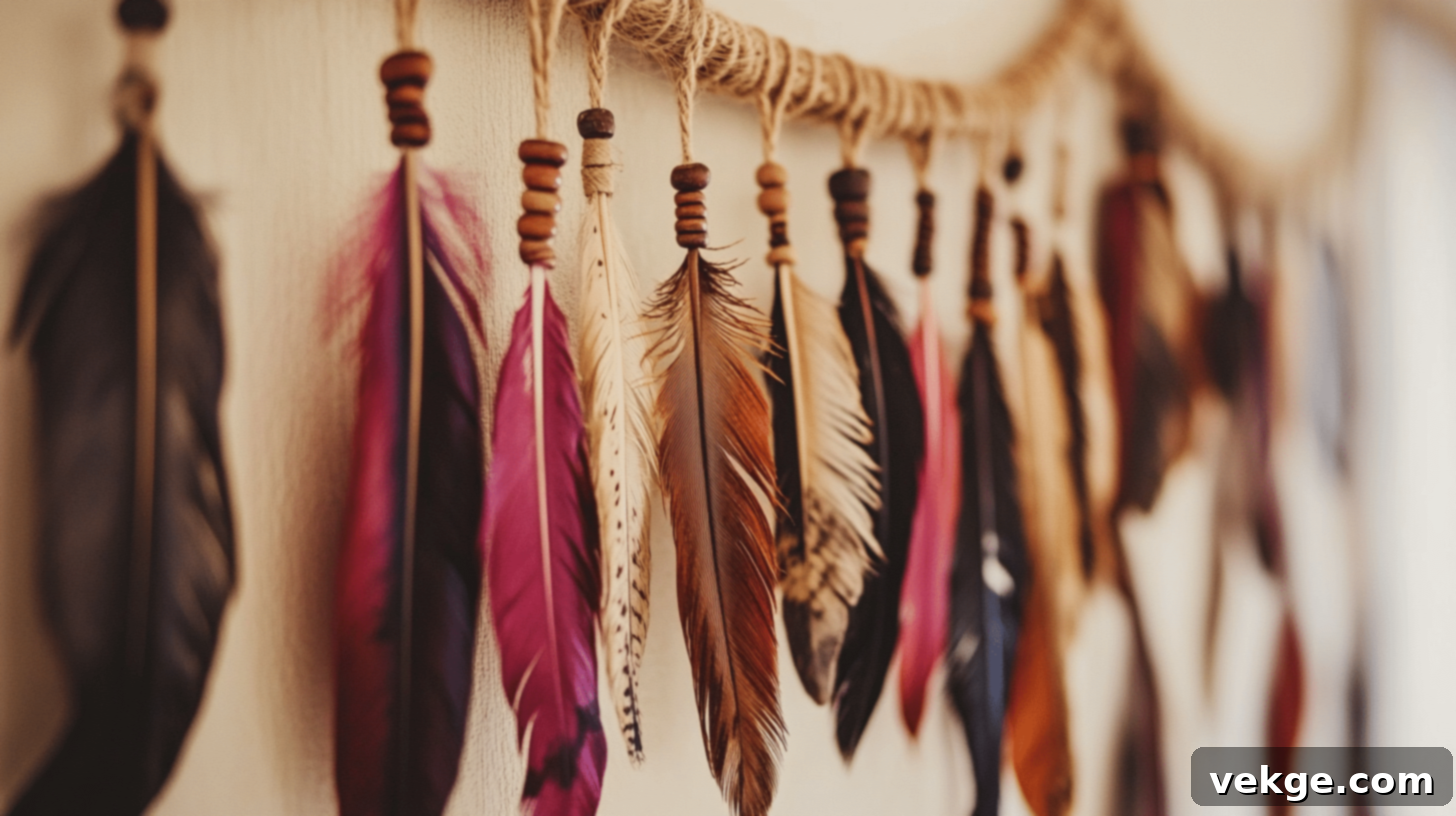
- DIY Difficulty Level: Intermediate
- How It Enhances Your Home Decor: This is one of those feather decoration ideas that truly adds texture, personality, and a unique artistic statement to your walls. A feather wall hanging creates a bohemian, natural, or even Nordic-inspired aesthetic, bringing warmth and character to a blank space in your living room, bedroom, or entryway.
| Materials Needed | Quantity |
|---|---|
| Feathers (various sizes and types) | 8-12 (or more for a larger piece) |
| Macrame cord, sturdy string, or fishing line | 1-2 feet (for the main hanging strings) + additional for attaching feathers |
| Wooden beads (various sizes, natural or painted) | 6-8 (optional, for added texture) |
| Hanging rod or natural stick/dowel | 1 (length depends on desired size) |
| Hot glue gun or strong craft glue | 1 |
| Scissors | 1 pair |
- Cut several lengths of macrame cord or string for attaching your feathers. The lengths can vary to create an uneven, artistic look.
- Tie or hot glue individual feathers to the ends of these cords. For added texture, thread wooden beads onto the cords above the feathers.
- Attach these feather-adorned strings to your hanging rod or stick. You can tie them securely or use glue for a more permanent fixture. Arrange them along the rod, varying the hanging heights and the arrangement of feathers and beads.
- Ensure everything is secure, then tie a loop of string to each end of the rod for hanging. Place this beautiful, handcrafted piece on your wall to instantly transform the area.
14. Feather Mobile
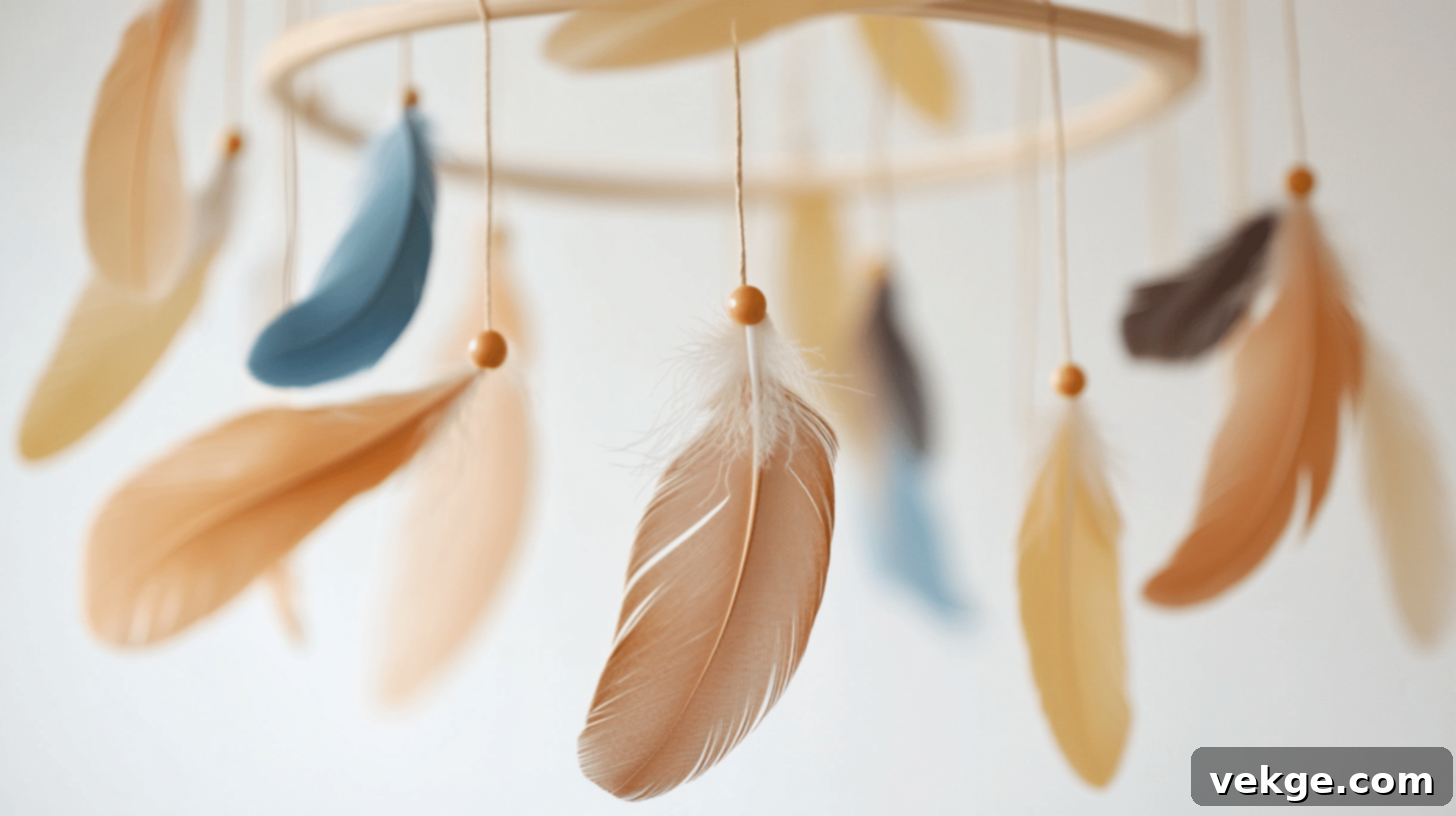
- DIY Difficulty Level: Intermediate
- How It Enhances Your Home Decor: A feather mobile adds a whimsical, peaceful, and artistic touch to nurseries, calm spaces, or even a reading nook. The gentle movement of the feathers creates visual interest and a soothing atmosphere, making it a perfect decorative element for promoting relaxation and wonder.
| Materials Needed | Quantity |
|---|---|
| Circular frame (e.g., embroidery hoop, metal ring) | 1 |
| Feathers (varied types, sizes, and colors) | 8-12 (or more for a fuller mobile) |
| Strong string, fishing line, or clear monofilament | 4-6 feet (or more, depending on desired drop length) |
| Small beads (wooden, glass, or plastic) | 10-12 (optional, for weight and decoration) |
| Scissors | 1 pair |
| Hot glue gun or strong craft glue | 1 |
- Cut several lengths of string or fishing line, varying their lengths to create different hanging levels for your feathers.
- At the end of each string, tie or glue a feather. If using beads, thread a few onto the string above each feather for added weight and visual appeal.
- Tie the other end of each string to the circular frame, distributing the feather strands evenly around the hoop. You can experiment with different arrangements until you achieve a balanced and pleasing design.
- Attach a longer central string or three evenly spaced strings to the top of the circular frame for hanging the entire mobile.
- Hang the mobile from the ceiling in a nursery, a serene corner, or any space where you want to add a delicate, floating, and calming decorative element.
15. Feather Chandelier
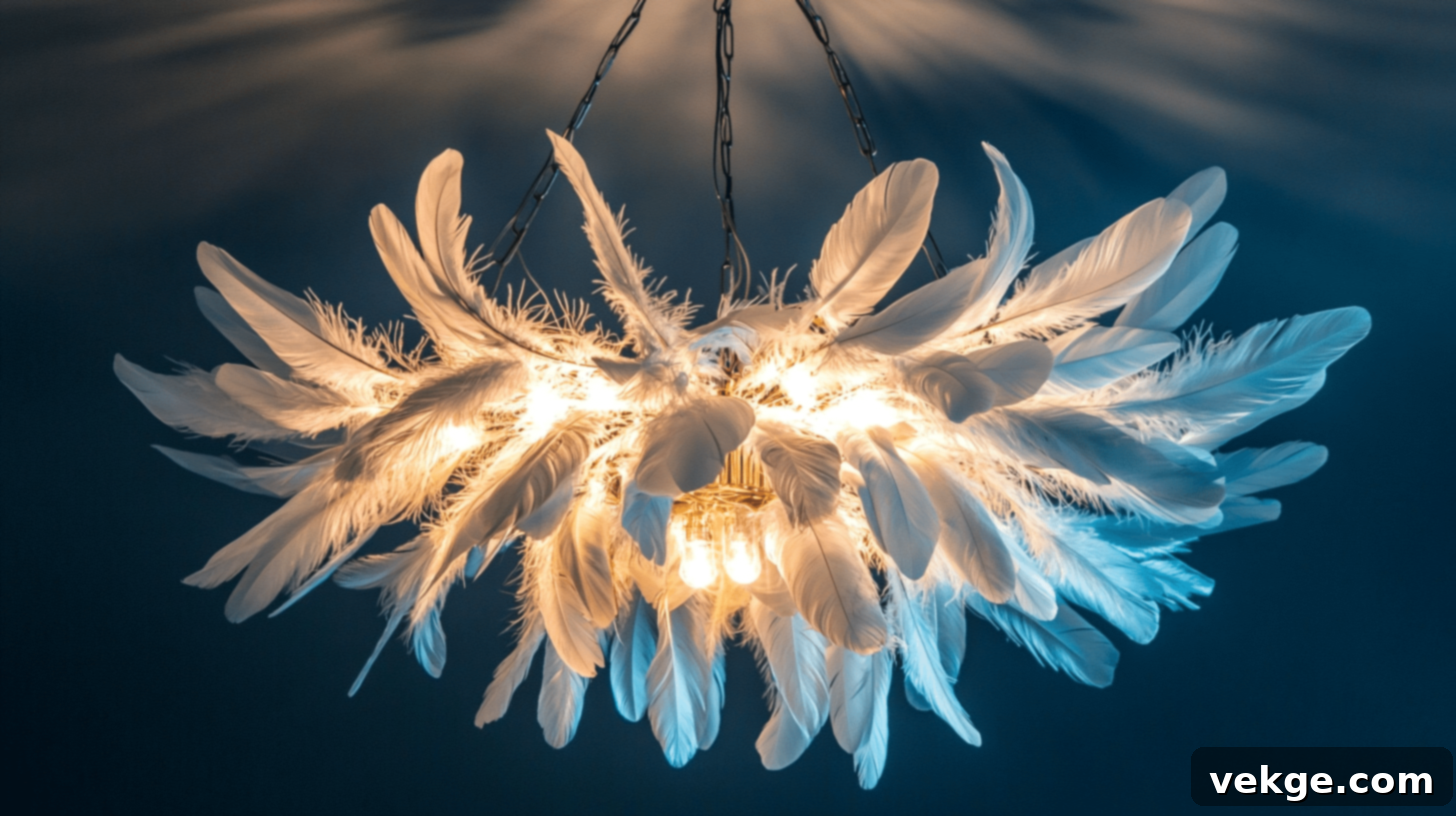
- DIY Difficulty Level: Advanced (due to volume of feathers and precision required)
- How It Enhances Your Home Decor: A feather chandelier creates a soft, ethereal lighting fixture that instantly adds unparalleled elegance, charm, and a touch of grand luxury to any room. It transforms a functional light source into a breathtaking work of art, making a strong statement in dining rooms, bedrooms, or even entryways.
| Materials Needed | Quantity |
|---|---|
| Chandelier base (a pre-existing frame, a large wire sphere, or a sturdy lamp shade frame) | 1 |
| Soft and fluffy feathers (e.g., goose, marabou, boa feathers – a significant quantity is needed) | 15-20 large packs/strands (or hundreds of individual feathers) |
| Hot glue gun and many glue sticks | 1 gun/tube |
| Thin wire or strong thread (optional, for additional securing) | 5-6 feet |
| Scissors | 1 pair |
- Start with a sturdy chandelier base. If repurposing an old chandelier, remove any existing decorations.
- Begin attaching feathers to the base using a hot glue gun. Work in small sections, applying glue to the quill of each feather and pressing it firmly onto the frame.
- Layer the feathers from the bottom upwards, ensuring each new layer slightly overlaps the previous one. This creates a full, dense, and luxurious look, hiding the base beneath.
- Pay close attention to even spacing to ensure a balanced appearance around the entire chandelier. For larger feathers, you might want to secure them with a bit of wire wrapped around the quill and base for extra stability.
- Once all feathers are securely in place, allow the glue to dry completely. Prior to hanging and connecting electricity, ensure no feathers are too close to light bulbs, or opt for low-heat LED bulbs for safety.
16. Feather Place Cards
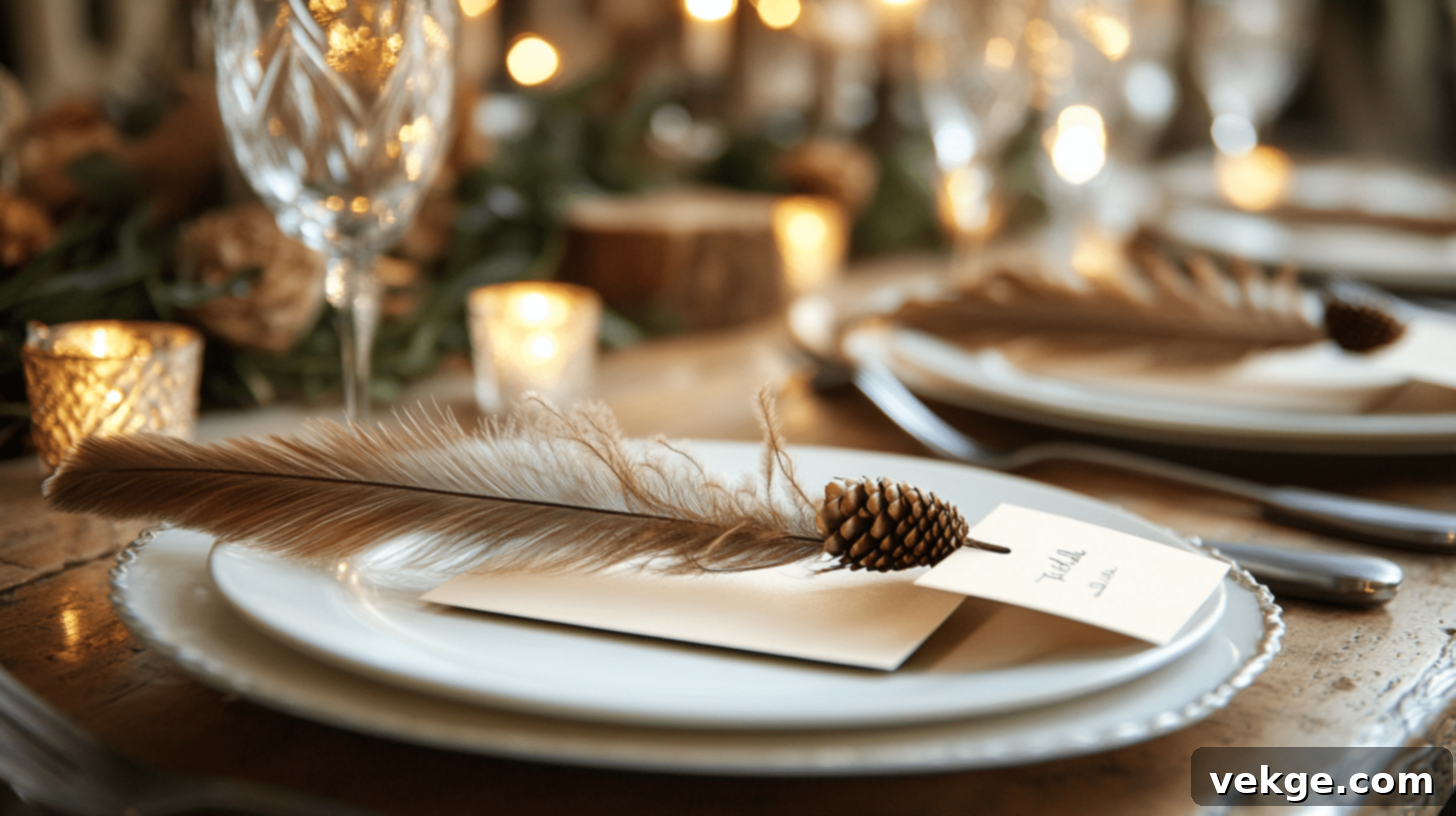
- DIY Difficulty Level: Beginner
- How It Enhances Your Home Decor: This is one of those feather decoration ideas that adds a personal, elegant, and sophisticated touch to special table settings, making it perfect for weddings, dinner parties, or festive gatherings. Feather place cards elevate the guest experience and tie into a natural, rustic, or bohemian theme beautifully.
| Materials Needed | Quantity |
|---|---|
| Small, delicate feathers (e.g., guinea fowl, natural craft feathers) | 10-15 (or one per guest) |
| Blank place cards (pre-folded or flat, high-quality cardstock) | 10-15 (or one per guest) |
| Hot glue gun and glue sticks (or strong craft glue) | 1 gun/tube |
| Fine-tip marker or calligraphy pen | 1 |
- Prepare your blank place cards. If they are not pre-folded, fold them neatly.
- Select a small, delicate feather for each place card. You can choose feathers that match your event’s color scheme or opt for natural, neutral tones.
- Using a hot glue gun (or a small dab of strong craft glue), carefully attach the quill end of a feather to one corner or along the top edge of each place card. Hold it in place for a few seconds until the glue sets.
- Once the feathers are securely attached and the glue is dry, use a fine-tip marker or calligraphy pen to elegantly write each guest’s name on the place card.
- Set these beautifully crafted feather place cards at each guest’s seat, creating a unique, decorative, and personalized touch for your special event.
Wrapping It Up: Embrace the Feathered Charm in Your Home
We hope these 16 exquisite feather decoration ideas have truly sparked your creativity and inspired you to look at these natural elements in a new light! From delightful DIY projects like feather coasters and garlands to more ambitious, eye-catching displays such as lampshades and chandeliers, there’s an incredible spectrum of possibilities waiting for you to explore with feathers.
Feathers are far more than just decorative accents – they possess a unique ability to infuse a sense of calm, lightness, and organic beauty into any room. Their delicate texture and natural forms can soften harsh lines, add a whimsical touch, or introduce a layer of sophisticated elegance, effortlessly transforming your home into a more personal and inviting sanctuary.
So, why not embark on a creative journey today? Start small by crafting a charming feather garland for your mantelpiece, or take on the rewarding challenge of a statement feather wall hanging. The best part about decorating with feathers is their adaptability; you can easily change things up as your tastes evolve or as seasons shift, keeping your decor fresh and inspiring.
Remember, decorating your home should always be a joyful and deeply personal experience. Allow your imagination to soar with these feathery inspirations and create a space that genuinely reflects your unique style and spirit. Have you already tried any of these feather decoration ideas in your home, or do you have a unique feather craft you adore?
We’d absolutely love to hear about your experiences, see your beautiful creations, or discover your own clever tips. Feel free to share your thoughts, photos, and stories in the comments section below! Your insights could inspire others on their own creative home decor journey.
