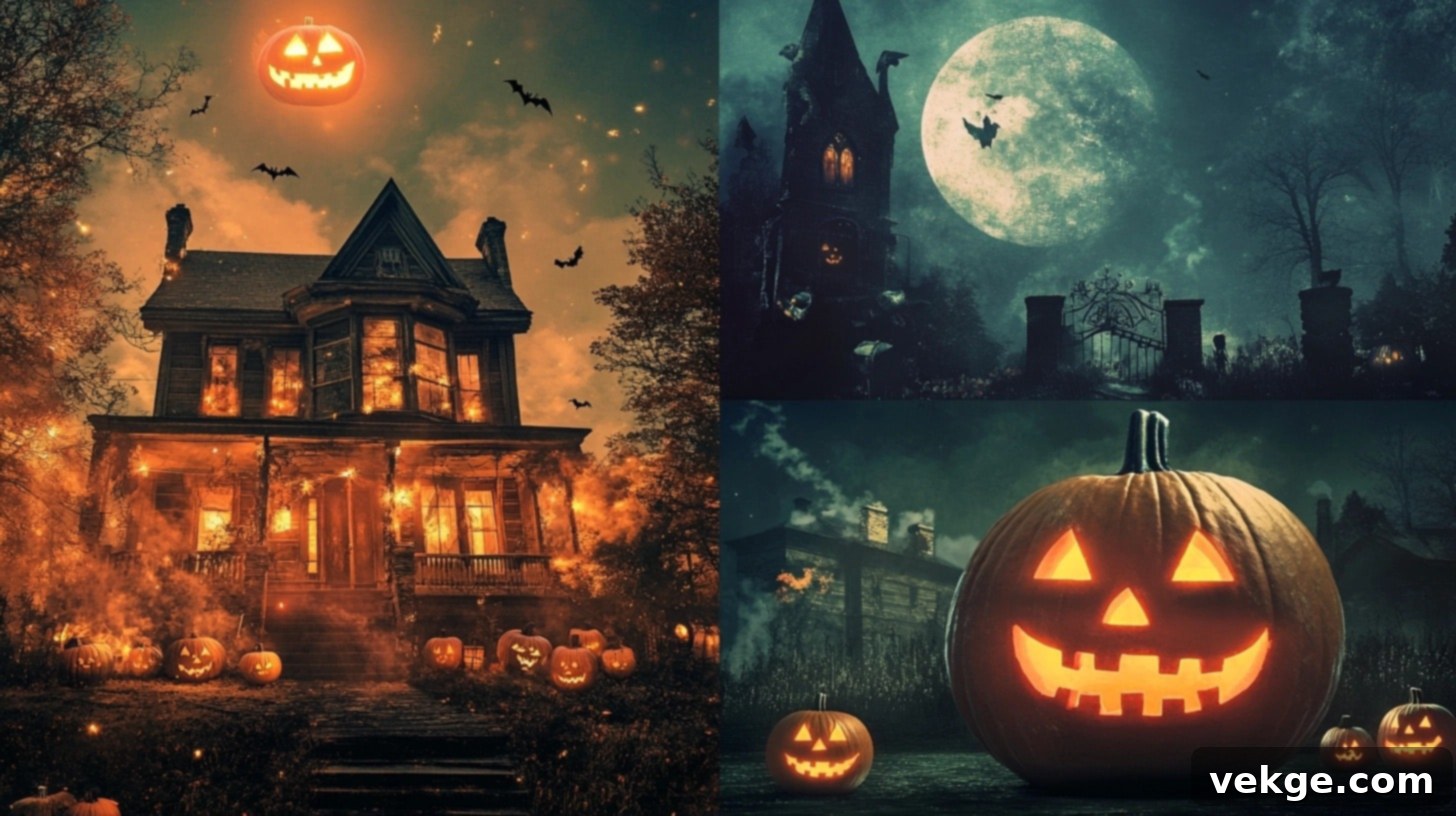
The Ultimate Guide to Spooky & Immersive Halloween House Decorations: 15 Spine-Chilling Ideas
Halloween is more than just a holiday; it’s an opportunity to transform your home and yard into an unforgettable, immersive experience. For years, I’ve dedicated myself to crafting spooky spaces that captivate and thrill, and I’m excited to share how these 15 unique ideas work together to create not just decorations, but an entire Halloween world. The most memorable displays are those that engage all the senses, telling a story through carefully chosen elements.
To achieve a truly spectacular Halloween display, begin by selecting foundation pieces that align with your comfort level, budget, and available space. Once the main elements are in place, build layers of intricate details that will truly bring your spooky vision to life. Remember, the most effective Halloween displays aren’t just about static props; they tell compelling stories through their scenes and carefully curated setups.
Your lighting choices are crucial for setting the perfect mood and subtly guiding visitors through your display, highlighting key elements and creating dramatic shadows. Sound effects and ambient music are powerful tools that create an enveloping atmosphere, enhancing every visual element with chilling auditory cues. Incorporating movement, whether it’s a subtle sway or a dramatic jump scare, breathes life into otherwise static displays, making them feel dynamic and alive.
Interactive elements are key to engaging visitors and crafting truly memorable experiences that will have them talking for years. Finally, never overlook the importance of weather protection; ensuring your hard work is safeguarded will allow your Halloween masterpiece to last throughout the entire spooky season, ready to delight and fright night after night.
List of Spooky Halloween House Ideas for an Unforgettable Display
1. Eerie Spider Web Wonderland
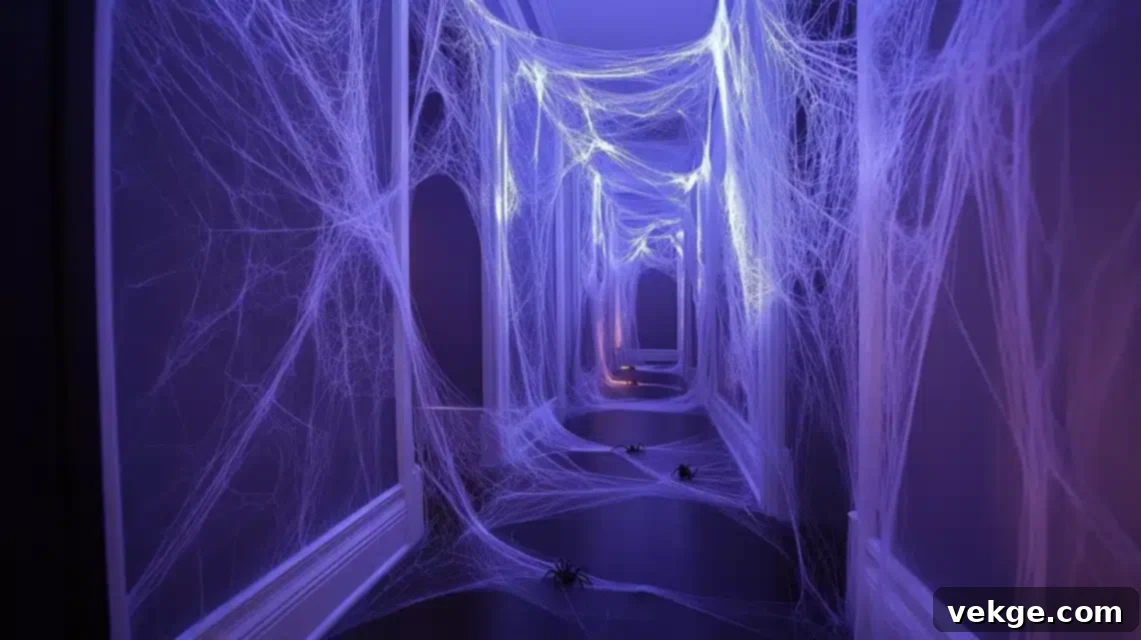
Transforming ordinary corners into mysterious, captivating spaces is an art, especially when it comes to spider web creation. My approach focuses on intricate detailing to craft a realistic, immersive spider web wonderland. The secret lies in creating genuine depth through layered web placement, meticulously stretching each section to mimic natural web patterns. This careful stretching and securing, often with clear fishing line, maintains the illusion of delicate, floating strands, making the display appear truly ancient and abandoned.
To add an otherworldly glow, hide small, battery-operated LED lights within the deeper web sections. These lights, especially those that slowly change colors, create an ethereal evening luminescence. The visual interest dramatically increases by adding varied sizes of spiders, from tiny, almost invisible babies to massive, commanding mothers. This suggests an active, thriving arachnid colony. Positioning these elaborate web installations near windows allows the evening light to cast dramatic, dancing shadows across interior walls, enhancing the spooky effect from both inside and out.
Complete Setup Guide for an Eerie Spider Web Wonderland:
- Strategic Web Placement: Position webs in natural gathering spots like corners, doorways, and around porch lights to maximize impact and realism.
- Layered Webbing for Depth: Use different densities and types of web material (e.g., cotton batting, store-bought stretch webs) to create realistic depth effects, making the display look more ancient and substantial.
- Integrated LED Lighting: Install subtle, color-changing LED strands deep within the web sections, ensuring the light source is hidden but the glow is visible, creating an atmospheric, shifting illumination.
- Invisible Anchor Points: Utilize clear command hooks, fishing line, or small adhesive dots to create natural-looking anchor points for the webs, maintaining the illusion that they are naturally spun.
- Dramatic Spider Positioning: Place the largest, most imposing spiders near the centers of the most prominent web sections for dramatic effect, ensuring they are securely fastened to withstand wind and weather.
- Weatherproofing: Choose webs and spiders designed for outdoor use and ensure all electrical components are weather-resistant or properly covered.
- Safety First: Ensure webs don’t obstruct pathways or create tripping hazards, especially when stretched low to the ground.
2. Ghostly Yard Guardians
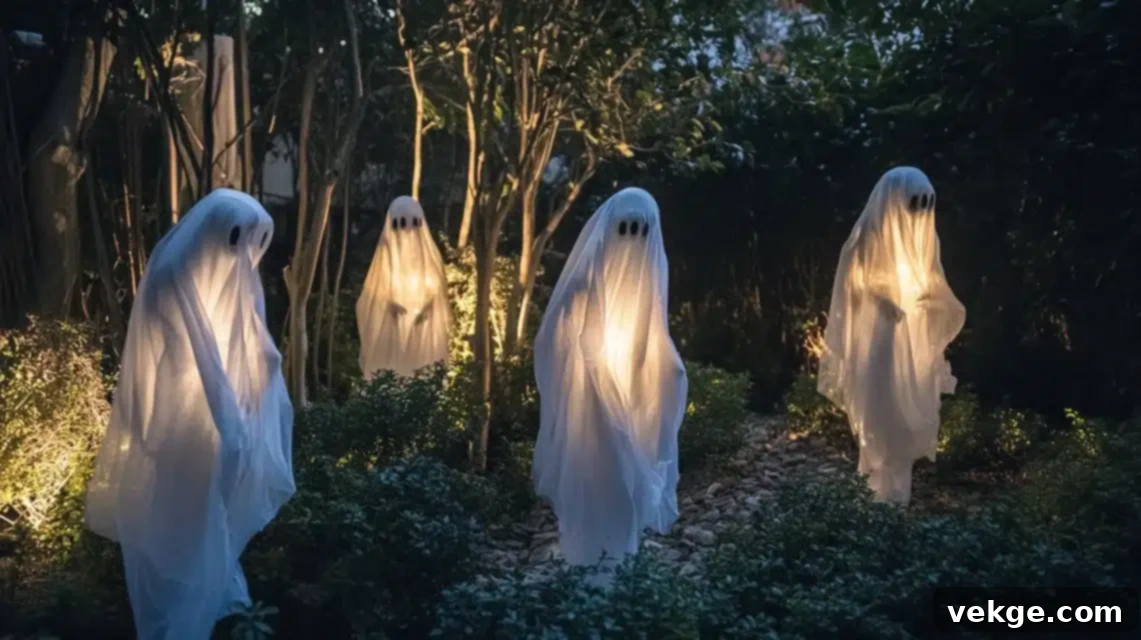
Bringing movement and mystery to any outdoor space is the essence of creating truly ethereal spirits. My method for crafting ghostly yard guardians involves careful consideration of height, positioning, and subtle motion to create natural groupings that appear to drift throughout your yard. Strategic uplighting from below is key; it makes these translucent figures appear to float mysteriously above the ground, especially during the eerie evening hours, casting long, unsettling shadows.
To enhance the illusion of movement, small, battery-operated fans are discreetly placed to create gentle ripples in the fabric. This subtle motion suggests spirits caught in an otherworldly breeze, adding a dynamic and lifelike quality. Varying the heights and poses of your ghost figures helps tell a story, perhaps of ghostly families gathering or spectral figures emerging from the mist. Positioning figures to face different directions contributes to an unsettling feeling of being watched from all angles, creating a truly immersive and haunting experience for your visitors.
Complete Setup Guide for Ghostly Yard Guardians:
- Material Selection: Choose lightweight, weatherproof white fabric (e.g., cheesecloth, bed sheets, white tarps) that will catch the breeze easily and create a flowing, ethereal effect.
- Invisible Support Structures: Construct sturdy yet invisible support structures using PVC pipes, rebar, or garden stakes, ensuring they are securely anchored in the ground.
- Atmospheric Ground Lighting: Install ground-level LED lighting with color-changing capabilities (blues, greens, purples) directly beneath or slightly behind each ghost, making them glow ominously.
- Subtle Movement Fans: Position small, quiet oscillating fans nearby to create constant, gentle movement in the fabric, simulating spectral motion. Ensure fans are weatherproof or well-protected.
- Emergency Weather Protocols: Design a quick system for covering or temporarily storing your ghost figures in case of sudden heavy rain or strong winds to prevent damage.
- Varied Poses & Heights: Create different poses by bending support structures or attaching fabric in various ways, and vary heights to add depth and interest to your ghostly ensemble.
- Sound Integration: Consider adding subtle, distant wailing or whispering sound effects near the display for an added layer of creepiness.
3. Pumpkin Path Illumination
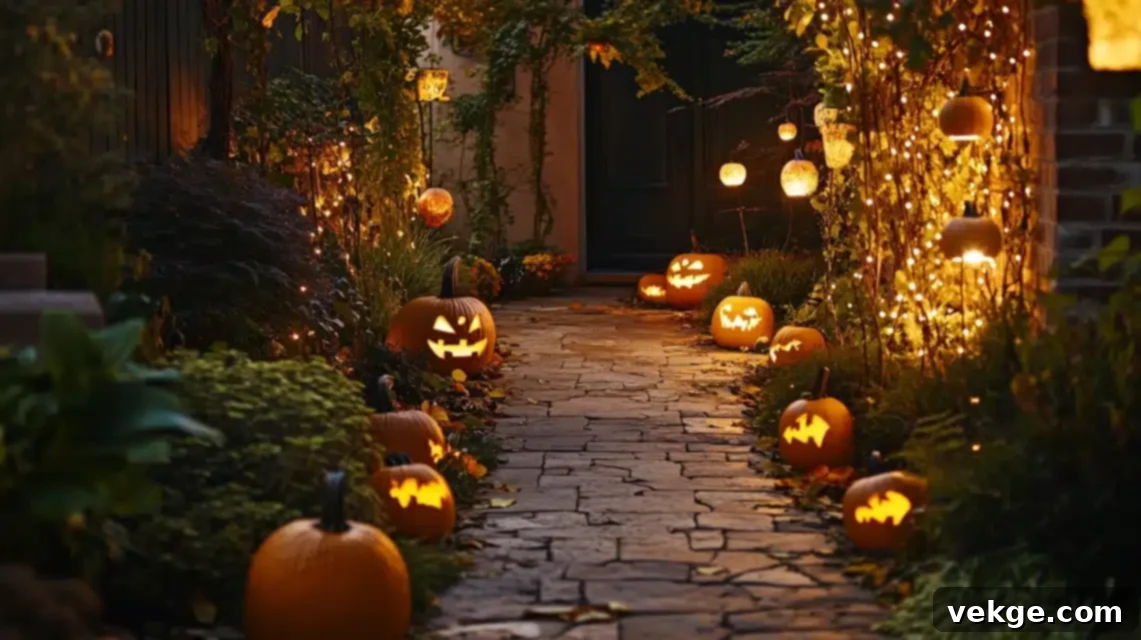
My design for creating magical walkways transforms ordinary paths into enchanting, spooky Halloween passages that beckon visitors forward. The key is arranging pumpkins of varying sizes to create a natural, inviting flow that subtly draws the eye toward your front door. Each pumpkin, with its different carving pattern, contributes to a progressive story along the journey, building excitement and anticipation with every step. Strategic placement of larger, intricately carved statement pumpkins at key points serves as natural pause points, encouraging visitors to stop and admire the intricate details and the unfolding narrative.
To illuminate these gourd-filled masterpieces, small uplighting fixtures are strategically positioned between pumpkin groups. These lights cast dramatic, dancing shadows across the carved faces, adding depth and a dynamic quality to the display. Incorporating both traditional vibrant orange pumpkins and more unusual varieties like ghostly white and sage green pumpkins adds visual interest and a sophisticated, curated appeal. Finally, weaving battery-operated vine lights or string lights between the pumpkins creates a magical, glowing connection that elegantly ties the entire path illumination display together, leading guests safely and spookily to your doorstep.
Complete Setup Guide for Pumpkin Path Illumination:
- Key Pumpkin Placement: Position the largest, most detailed pumpkins at path turning points and prominently near your entryway to serve as focal points.
- Weather-Resistant Lighting: Install durable, weather-resistant LED uplights or puck lights between groups of pumpkins, ensuring they are safe from moisture and positioned to highlight carvings.
- Narrative Carving Progression: Design carving patterns that tell a story or gradually increase in intensity, building excitement as visitors approach your door.
- Protective Covers: Keep protective covers (e.g., small tarps, plastic sheeting) on hand to quickly shield carved pumpkins and lighting elements from sudden rain or harsh weather.
- Daily Maintenance Schedule: Implement a routine for checking pumpkins for spoilage, cleaning debris, and ensuring all lights are functioning properly to maintain a fresh appearance throughout the season.
- Variety in Pumpkins: Mix and match real pumpkins with high-quality artificial ones for durability and consistent visual appeal, especially in high-traffic areas.
- Cable Management: Securely tape down or bury any electrical cords to prevent tripping hazards and maintain a clean aesthetic.
4. Skeleton Story Scenes
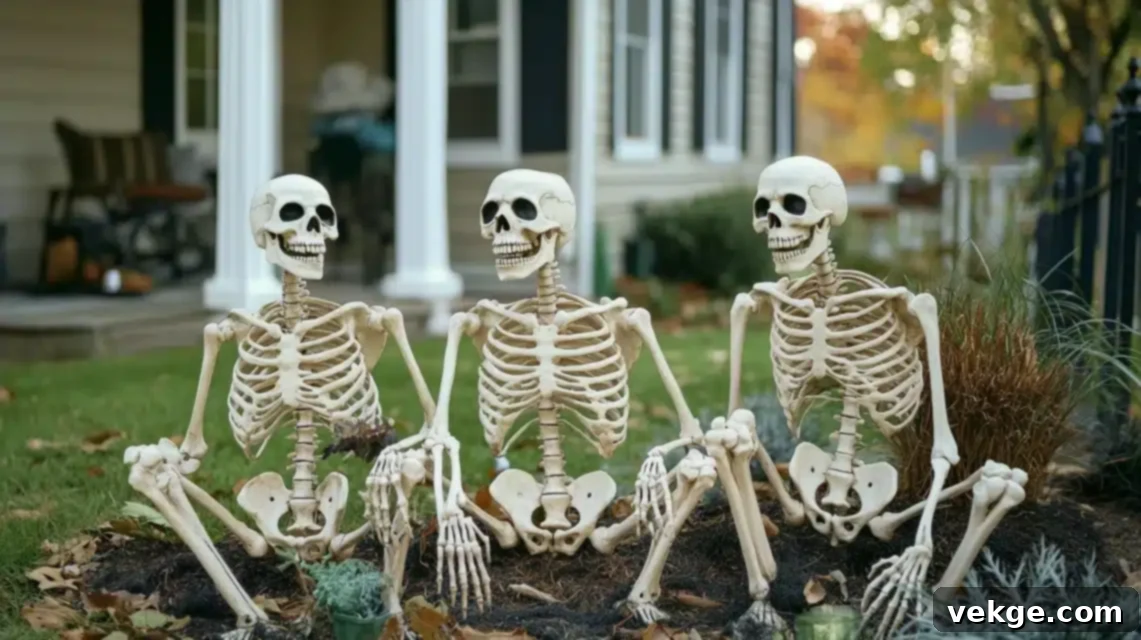
My unique approach to skeleton displays goes beyond static figures; it’s about crafting engaging, often humorous scenes that make people pause, smile, and perhaps even laugh. The trick is positioning multiple skeletons in human-like poses, engaged in everyday activities, bringing a delightful touch of humor to the horror. Careful attention to anatomical accuracy, even in playful contexts, makes these scenes more believable and impactful. By creating multiple vignettes throughout your yard, you keep viewers engaged, encouraging them to explore the entire display and uncover each mini-story.
Small props and accessories are transformative; they turn basic skeleton figures into distinct characters with unique personalities and narratives. A skeleton holding a fishing rod by a pond, or a skeletal family having a picnic, suddenly comes to life. Adding spotlights with motion sensors dramatically enhances these scenes, causing them to spring to life as visitors approach, creating an unexpected and delightful surprise. For an extra touch of seasonal fun, consider daily scene changes, inviting neighbors and passersby to return and discover what new, whimsical adventures your skeletal crew has embarked upon.
Complete Setup Guide for Skeleton Story Scenes:
- Secure Positioning: Firmly secure skeletons with ground stakes, fishing line, or zip ties to prevent them from toppling in wind or being disturbed by curious hands.
- Themed Accessory Boxes: Organize themed accessory boxes (e.g., “Gardening Skeletons,” “Party Skeletons”) to facilitate easy and quick scene changes throughout the Halloween season.
- Motion-Activated Lighting: Install motion-activated spotlights or floodlights for each scene, ensuring they illuminate the skeletons dramatically as visitors approach, adding a dynamic element.
- Clear Explanatory Signs: For more complex or humorous scenes, consider positioning small, weatherproof explanatory signs to ensure your story is fully understood and appreciated.
- Weatherproofing: Apply weather-resistant sprays to fabric accessories and ensure props are made of durable materials suitable for outdoor display, protecting them from the elements.
- Pose Variability: Utilize skeletons with articulate joints to create a wide range of realistic and humorous poses, making each character unique.
- Ground Level Details: Integrate elements like artificial cobwebs, fallen leaves, or themed ground coverings to fully immerse the skeletons in their environment.
5. Window Shadow Theatre
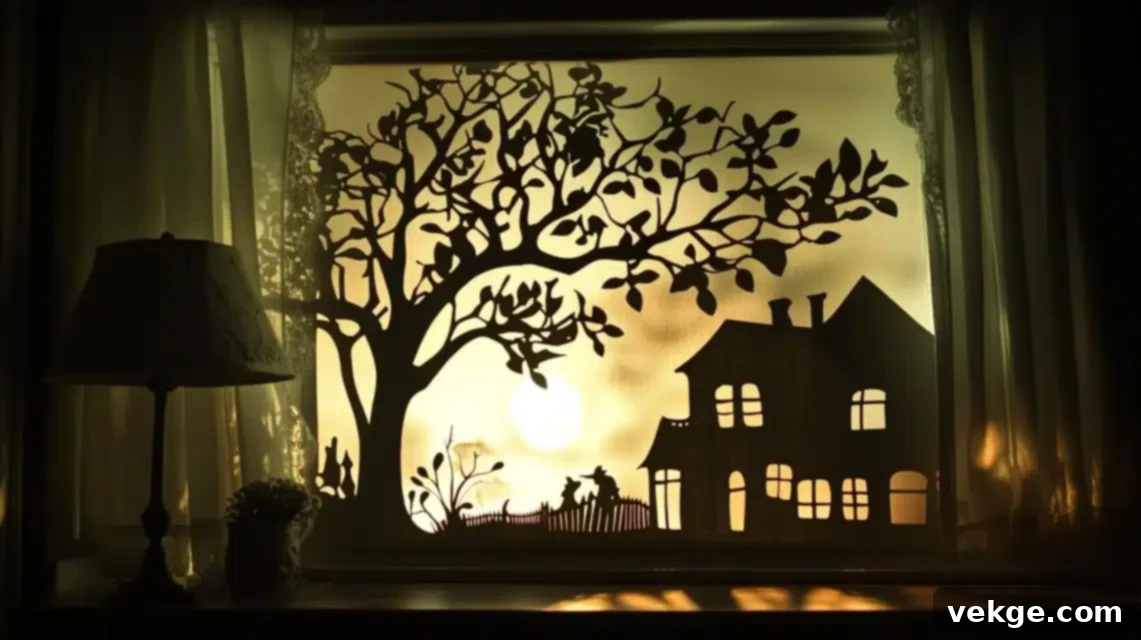
My technique for creating window silhouettes brings mysterious, captivating scenes to life, visible from both inside and outside your home. The magic lies in crafting detailed cutouts, which requires careful planning of negative space to ensure recognizable and eerie shapes when backlit. Each window can tell a distinct part of a larger story, encouraging viewers to move around the house, piecing together the complete narrative like chapters in a spooky book. Strategic lighting placement behind the cutouts is paramount; it creates sharp, clear shadows without revealing the light source itself, maintaining the illusion.
To add an extra layer of unsettling realism, incorporate subtle movement through rotating elements or oscillating fans. This allows shadows to shift and dance eerily, making the scenes feel alive and unpredictable. Utilizing both ground-level and upper-story windows transforms your entire house into a full-scale theatrical experience, inviting onlookers into a world of spectral stories. This dynamic display captures attention and creates a truly unique and memorable Halloween spectacle.
Complete Setup Guide for Window Shadow Theatre:
- High-Quality Materials: Use durable, opaque black paper, cardstock, or vinyl for cutouts to ensure crisp, clean edges and strong shadow definition.
- Adjustable LED Backlighting: Install adjustable LED panels or floodlights behind the cutouts, allowing for precise control over brightness and shadow intensity.
- Multi-Layered Scenes: Create scenes with multiple layers of cutouts at varying distances from the light source to achieve depth and dimension in your shadows.
- Automated Timer Systems: Utilize timer systems for consistent evening displays, ensuring your window theatre automatically activates and deactivates, saving energy and effort.
- Backup Scene Designs: Prepare several backup silhouette scenes for quick replacements or seasonal variations, offering flexibility and keeping the display fresh.
- Blackout Curtains: Install blackout curtains or opaque screens behind the projection area to prevent light bleed and ensure the sharpest possible shadows.
- Secure Mounting: Use temporary adhesive, painter’s tape, or static cling vinyl to securely attach cutouts to windows without causing damage.
6. Witch’s Brewing Station
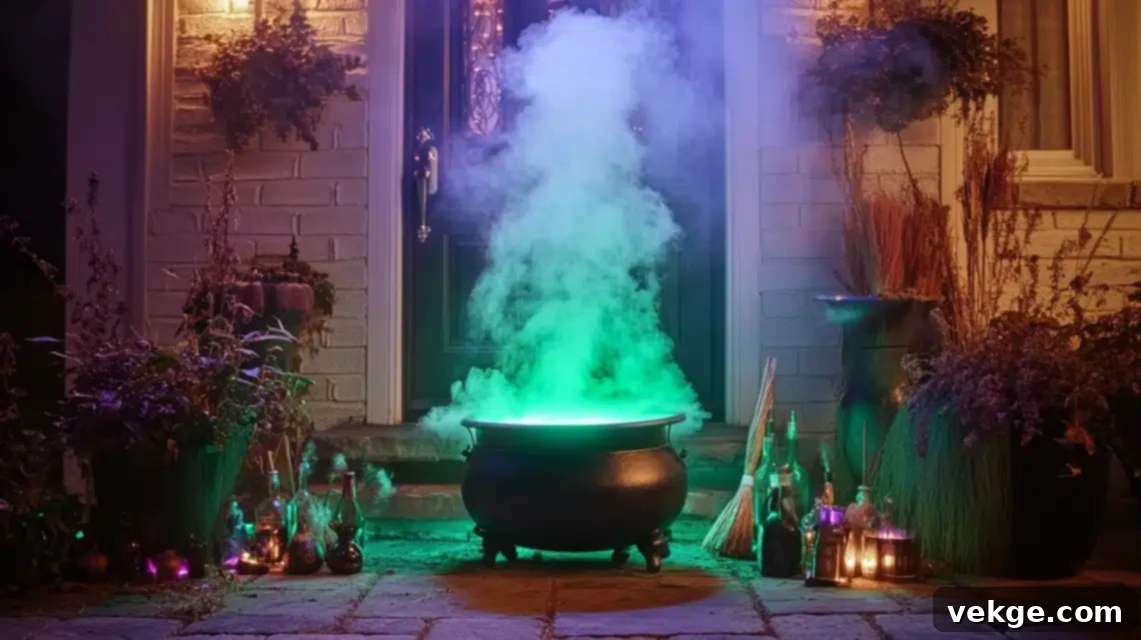
My creation of an interactive potion-making scene brings theatrical magic and a touch of the macabre to any porch or yard, making it a focal point of your Halloween display. The design centers around a large cast-iron cauldron, positioned at an optimal height to create the perfect flow of mystical fog. Hidden pipes subtly direct this mysterious mist precisely where needed, ensuring an enveloping, eerie effect around the cauldron. The atmosphere is further enhanced by carefully selected sound effects of bubbling brews and cackling witches, which activate through motion sensors as curious visitors approach, drawing them into the witch’s realm.
Multiple layers of LED lighting, predominantly in eerie greens and mystical purples, are strategically placed to create captivating depth within the swirling fog. This suggests magical ingredients actively brewing and simmering below the surface, adding a vibrant, otherworldly glow. Authenticity is key: adding genuine-looking potion bottles, dried herbs, spell books, and ancient-looking ingredients around the cauldron builds a complete, believable witch’s workshop scene. Strategic placement of broomsticks leaning nearby and open spell books implies the witch has just stepped away for a moment, heightening the sense of an active, magical presence.
Complete Setup Guide for a Witch’s Brewing Station:
- Continuous Fog Circulation: Install hidden plumbing or tubing to ensure a continuous and consistent flow of fog from your fog machine into and around the cauldron.
- Weatherproof Electrical Connections: Use outdoor-rated power strips, extension cords, and waterproof covers for all electrical connections to ensure safety and functionality in any weather.
- Optimal Audio Coverage: Position weather-resistant speakers discreetly to provide optimal audio coverage, ensuring bubbling sounds and cackles are clear but not overwhelmingly loud.
- Secure Prop Placement: Anchor all props, especially the cauldron and any tall elements like broomsticks, securely against wind and accidental bumps from visitors.
- Daily Maintenance: Establish a routine for checking fog machine fluid levels, wiping down surfaces, and ensuring all lighting and sound effects are functioning for a fresh appearance each evening.
- Interactive Elements: Incorporate motion sensors to trigger specific sounds or fog bursts as visitors approach, making the display interactive and surprising.
- Themed Backdrops: Consider adding a themed backdrop or hanging draped fabrics behind the station to enhance the enclosed, mystical workshop feel.
7. Aerial Night Creatures
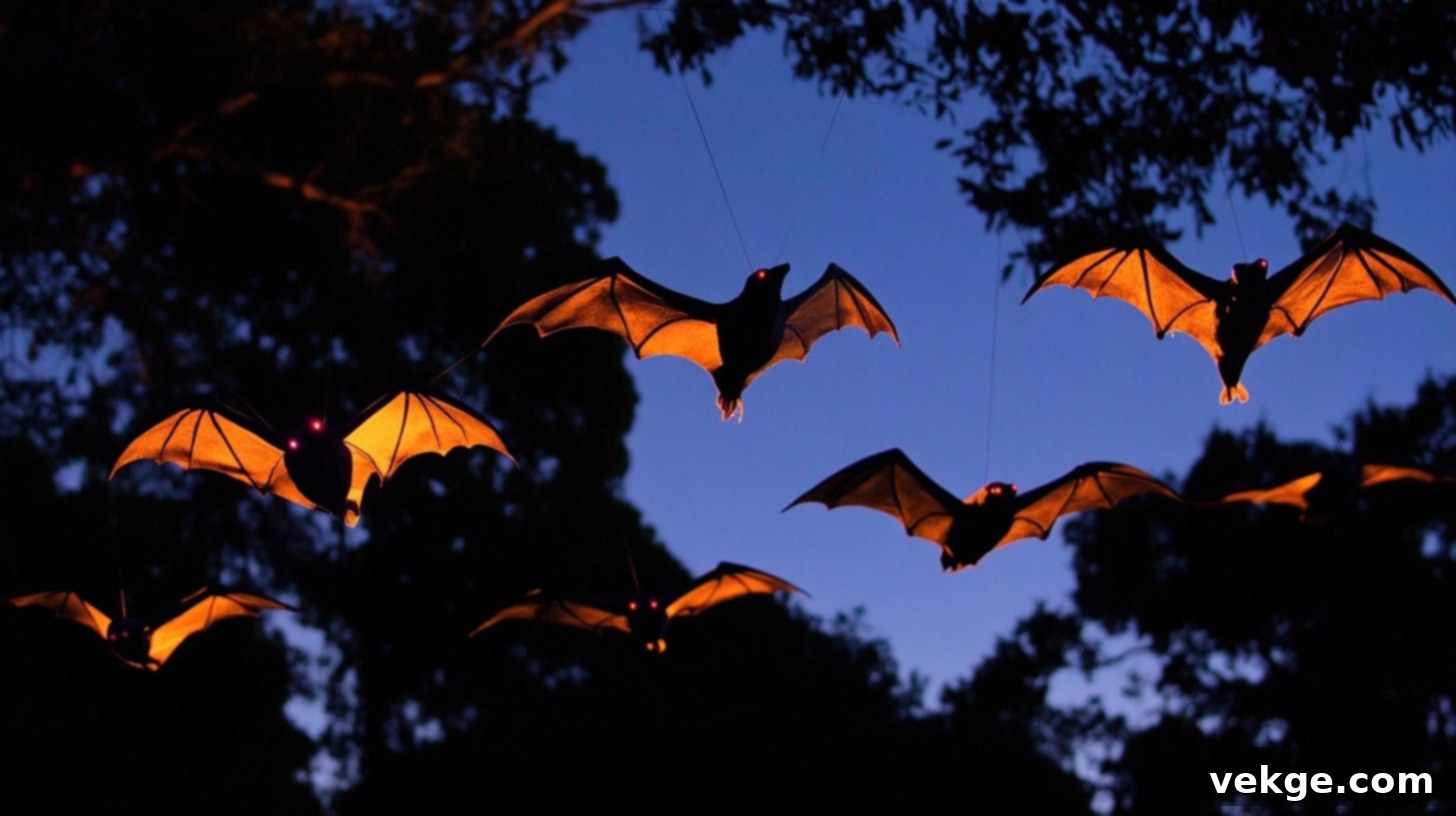
My method for creating flying creature displays transforms empty aerial space into a living, eerie night sky. The key is suspending bats, ravens, and other nocturnal beasts at varying heights using almost invisible clear fishing line, creating realistic flight patterns that suggest diving, swooping, and soaring. Each creature is meticulously balanced to allow for natural, graceful movement in the slightest breeze without tangling, enhancing the lifelike illusion. To add a supernatural touch, apply UV-reactive paint to the wings of these creatures; under blacklights, they’ll exhibit a subtle, unearthly gleam, hinting at their magical origins.
Small, red LED eyes, discreetly installed, bring each creature eerily to life in the darkness, adding a piercing, watchful quality. By creating different groupings and varying flight patterns – some solitary, some in flocks – you can tell stories of hunting, migration, or even a nocturnal gathering. This dynamic aerial display adds a thrilling vertical dimension to your Halloween decorations, captivating visitors as they look up into your haunted skies.
Complete Setup Guide for Aerial Night Creatures:
- Varying Line Weights: Use different gauges of clear fishing line, matching the weight of the creature, for natural, unrestricted movement and to prevent tangling.
- Blacklight Fixture Installation: Position weather-resistant blacklight fixtures to cast light over the flying creatures, activating UV-reactive paint and creating an eerie glow.
- Tangle Prevention: Carefully space and angle suspended creatures to prevent them from bumping into each other or tangling in the wind.
- Emergency Weather Protocols: Develop a plan for quickly lowering or securing the creatures during high winds or severe weather to prevent damage or loss.
- Day and Night Viewing: Design your creatures to look good both in daylight (e.g., realistic textures) and at night (e.g., glowing eyes, UV paint) for continuous impact.
- Secure Attachment Points: Use sturdy, non-damaging attachment points on trees, eaves, or pergolas to suspend the fishing lines, ensuring they can withstand light breezes.
- Motion Simulation: Consider adding small, lightweight wind chimes or subtle fans nearby to enhance the natural movement of the creatures.
8. Gothic Entry Design
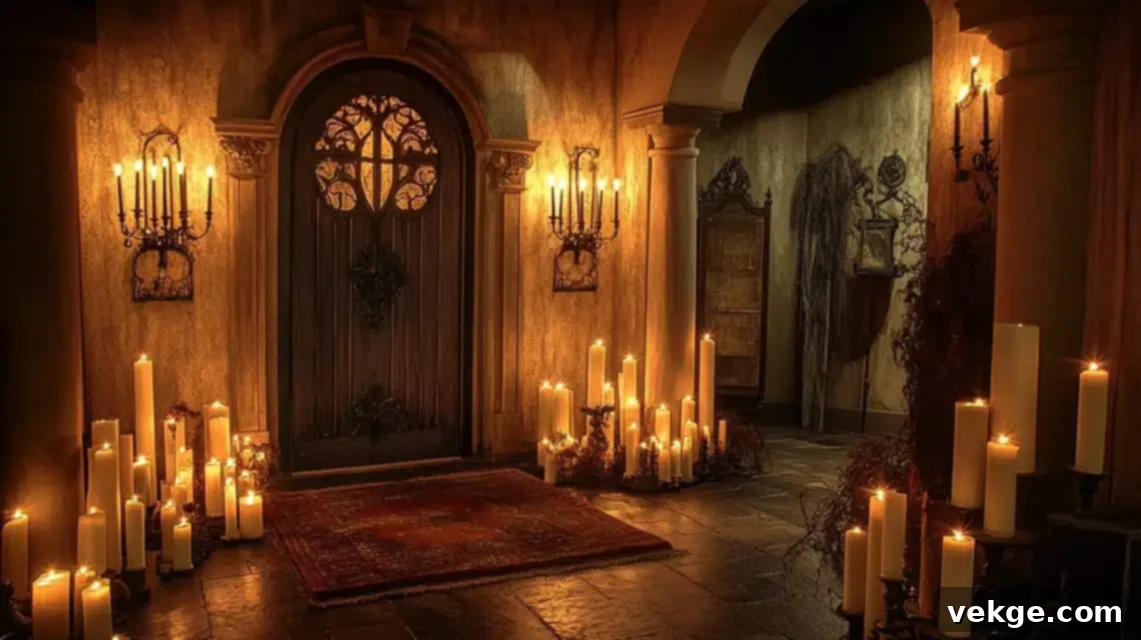
My approach to creating a Gothic entry design aims to set an immediate, chilling tone for the entire Halloween experience, transporting guests to a bygone era. Arranging LED candles in antique-style holders of varying heights creates both visual depth and an old-world, flickering ambiance. Strategic placement ensures these illuminating elements guide safe passage while enhancing the mysterious atmosphere. Incorporating temporary Gothic architectural elements, such as elaborate archways, imposing columns, or decorative gargoyles, transforms an ordinary doorway into a grand, castle-like entrance, hinting at the ancient secrets within.
Positioning antique-style mirrors strategically can reflect candlelight, creating unsettling illusions of endless corridors or spectral figures lurking just out of sight behind visitors. Adding period-appropriate props like vintage leather-bound books, weathered scrolls, and antiqued framed photographs builds an authentic, haunted library or crypt atmosphere. The immersive experience is completed with carefully layered subtle sound effects, such as the distant, melancholic strains of a pipe organ or the chilling creak of old doors, fully enveloping guests in your Gothic Halloween narrative.
Complete Setup Guide for Gothic Entry Design:
- Secure Architectural Elements: Install temporary Gothic archways, columns, or facade elements securely, ensuring they are stable and wind-resistant.
- Multi-Zone Lighting: Create multiple lighting zones using LED candles, string lights, and uplights with varying intensities and colors (e.g., deep reds, purples, flickering amber) to enhance the Gothic mood.
- Discreet Sound Equipment: Position weather-resistant speakers discreetly within the entryway, carefully hidden from view, to deliver subtle, ambient sound effects like creaking doors or a distant choir.
- Clear, Safe Passage: Ensure that all decorations, props, and lighting fixtures do not obstruct the pathway or create tripping hazards, prioritizing visitor safety.
- Weather Protection Systems: Implement protective measures for sensitive props and electrical components, such as covers, waterproof enclosures, or immediate removal protocols during inclement weather.
- Authentic Prop Curation: Source vintage or distressed-looking props like old lanterns, candelabras, velvet drapes, and faux ravens to enhance the authentic Gothic aesthetic.
- Textural Elements: Drape sheer black or dark gray fabric, artificial cobwebs, and faux moss to add texture and an aged, abandoned feel to the entryway.
9. Graveyard Evolution

My technique for creating an authentic cemetery scene focuses on bringing historical authenticity and chilling realism to yard displays. The key is crafting individual tombstones, each with unique, often melancholic epitaphs and dates that tell stories of the imagined deceased, creating a sense of a forgotten past. Varying the stone sizes, shapes, and styles suggests different historical periods, from ancient, moss-covered slabs to more ornate, weathered markers, enhancing the realism. Creating subtle ground elevation changes with soil, mulch, or even strategically placed rocks makes the graveyard appear naturally aged and disturbed, as if the earth itself is unsettled.
To conjure an ethereal atmosphere, position low-lying fog machines discreetly to generate a mysterious ground mist that clings to the base of tombstones and crosses, making figures appear to float. Adding small, authentic details like fallen, dried leaves, withered flowers, artificial moss, and vintage, rusted items makes the scene feel genuinely abandoned and untouched by the living. Strategic uplighting from below is essential; it creates dramatic, elongated shadows and ominously highlights the etched text on the tombstones, bringing a spectral quality to the entire graveyard display.
Complete Setup Guide for Graveyard Evolution:
- Secure Tombstone Anchoring: Anchor all tombstones firmly to the ground using rebar, stakes, or sandbags to ensure stability against wind and curious visitors.
- Ground-Level Lighting Systems: Install low-profile, weatherproof LED spotlights or path lights that cast eerie upward glows, highlighting the textures and inscriptions of the tombstones.
- Fog Distribution Network: Set up a network of hidden tubes or hoses from your fog machine to distribute mist evenly across the graveyard, creating a consistent, ethereal ground fog.
- Period-Appropriate Props: Scatter authentic-looking props such as broken fences, artificial cobwebs, plastic chains, raven figures, and dried floral arrangements to enhance the historical feel.
- Clear Viewing Pathways: Design clear, safe pathways through your graveyard display, marked by subtle lighting or boundary elements, to guide visitors and prevent damage to props.
- Realistic Earth Effects: Use soil, peat moss, or dark mulch to create subtle mounds and depressions around tombstones, simulating disturbed earth and enhancing realism.
- Soundscaping: Integrate ambient sounds like distant church bells, howling wolves, or ghostly whispers from hidden speakers to complete the immersive graveyard experience.
10. Spectral Projections
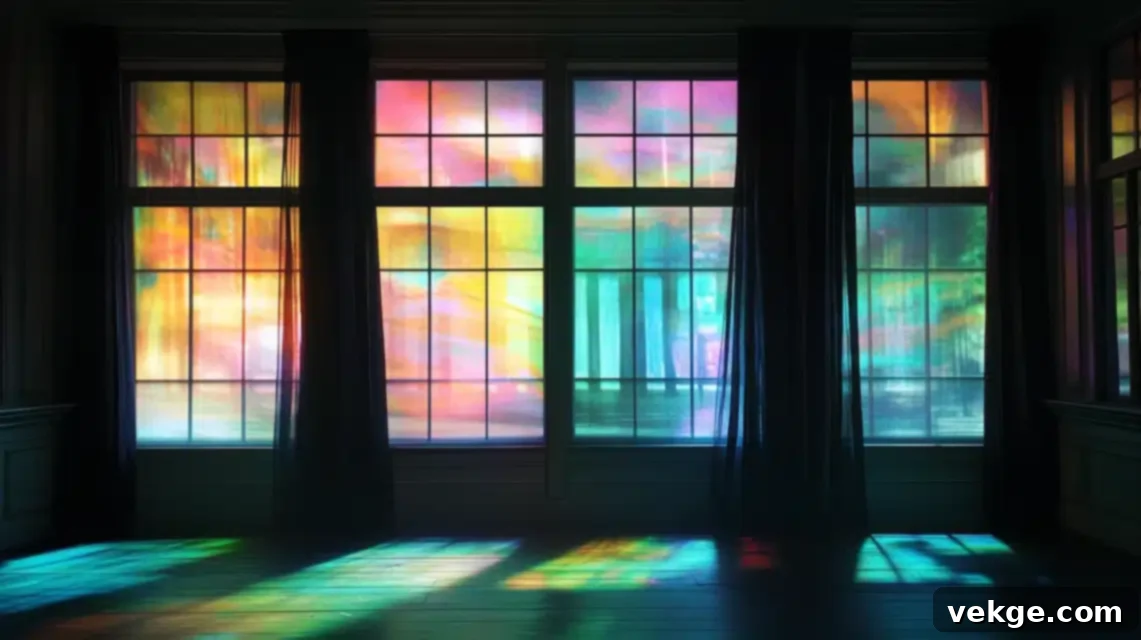
My design for window projection displays transforms every pane into living art, bringing dynamic, spectral visuals to your home. The precision lies in calculating exact projection distances and angles, ensuring crystal-clear, vibrant images that appear to float within your windows. Coordinated timing creates flowing, narrative scenes that can span multiple windows, making your entire house tell a story. Crafting custom content that perfectly matches your window dimensions maximizes impact and believability, making ghosts seem to truly inhabit your home.
Positioning blackout curtains or projection screens behind the windows prevents image bleed and strengthens the visual effects, ensuring sharp, vibrant projections. Adding synchronized audio effects, perfectly matched to the visual projections, creates a truly immersive experience, making every cackle, scream, or spectral moan resonate. Installing robust weather protection systems for all projection equipment guarantees consistent, flawless performance, regardless of rain or wind, ensuring your spectral show runs smoothly throughout the Halloween season.
Complete Setup Guide for Spectral Projections:
- Optimal Projection Angles: Carefully calculate and test projection distances and angles to ensure maximum clarity and fill the entire window space without distortion.
- Weather-Protected Equipment: Install projectors and media players in weatherproof enclosures or under protective overhangs, ensuring they are safe from moisture and temperature fluctuations.
- Synchronized Timing Systems: Utilize smart home hubs or dedicated media players to create synchronized timing systems for seamless transitions between scenes and across multiple windows.
- Backup Projection Units: Consider having a backup projector or spare bulbs on hand for continuous operation, especially during peak Halloween nights.
- Content Rotation Schedule: Design a content rotation schedule, offering different ghostly narratives or animations throughout the season to keep the display fresh and engaging for repeat viewers.
- Projection Screen Material: Use translucent white shower curtains, dedicated projection screen material, or thin white sheets as projection surfaces, installed securely inside the window.
- Sound Integration: Place external, weather-resistant speakers near the projection windows, synchronized with the visual content, to provide a fully immersive auditory experience.
11. Floating Witch Hat Installation
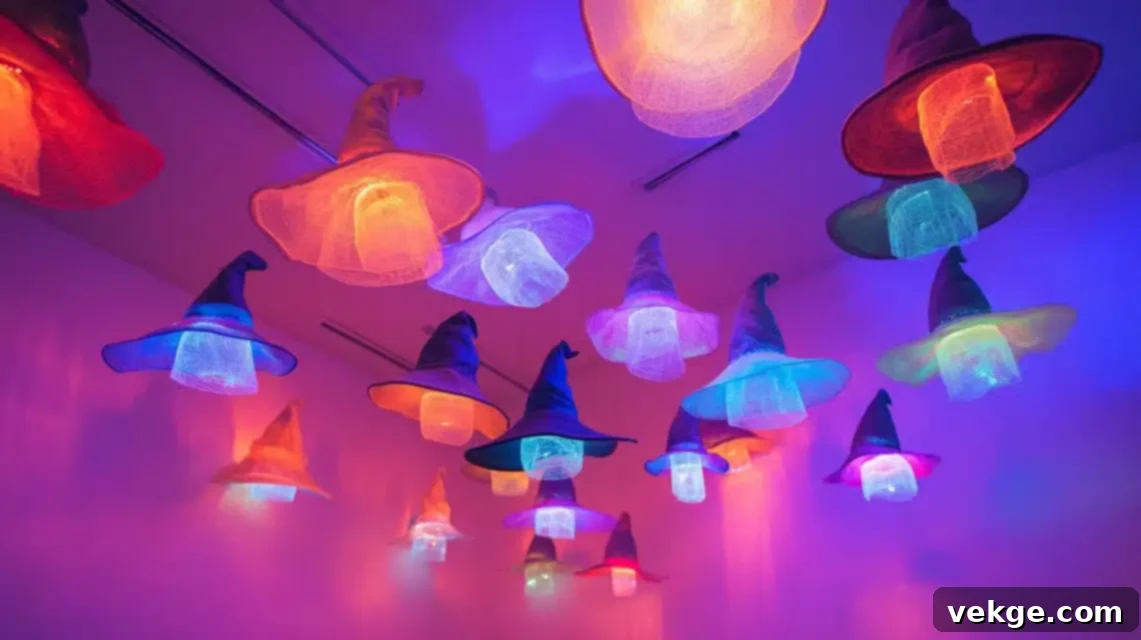
My technique for creating magical floating displays transforms ordinary ceilings or outdoor spaces into enchanted skies, brimming with whimsical fright. The visual appeal comes from creating varying heights and subtle rotations for each hat, making them appear to hover independently in space, as if guided by unseen forces. For easy adjustments and seasonal maintenance, hidden magnetic systems can be installed, allowing for effortless repositioning or removal. Strategic placement of UV-reactive threads creates mysterious floating effects under blacklight, adding an otherworldly shimmer that hints at hidden magic.
To deepen the enchantment, small, battery-operated LED candles or puck lights are placed inside select hats, casting soft, magical pools of light below, creating an intimate and mysterious atmosphere. Incorporating different hat styles, sizes, and colors suggests a grand gathering of invisible witches, perhaps in mid-flight or circling a magical event. This simple yet effective display adds a layer of elegant mystique to your Halloween decor, captivating viewers with its ethereal charm.
Complete Setup Guide for Floating Witch Hat Installation:
- Reinforced Ceiling Mounting: Install reinforced ceiling mounting points or sturdy hooks that can safely bear the weight of multiple hats and their internal lighting, ensuring secure hanging.
- Custom Invisible Wire Harness: Craft custom invisible wire harness systems (using clear fishing line or fine monofilament) for each hat, allowing for precise height adjustment and stable suspension.
- Magnetic Quick-Release Mechanisms: Integrate small, strong magnetic quick-release mechanisms where possible for hats, enabling easy adjustments, battery changes, and removal.
- Programmable LED Lighting: Install small, programmable LED puck lights or fairy lights inside each hat, allowing for color changes, flickering effects, or timed illumination.
- Backup Support Systems: For heavier hats or outdoor installations, design backup support systems using additional fishing lines or anchor points to prevent accidental falls.
- Weatherproof Mounting for Outdoors: If outdoor, use weatherproof command hooks or eye hooks on eaves or pergolas, ensuring all materials can withstand the elements.
- Automated Movement Controls: For advanced displays, consider small, slow-moving motors or oscillating fans to create subtle, eerie rotation or sway in the hats.
- Backup Power Supplies: Have extra batteries or a small portable power bank ready for battery-operated lights to ensure continuous illumination throughout the night.
- Maintenance Access Points: Plan for easy access to hats for battery changes or adjustments, perhaps by using a step ladder or a long-handled hook.
- Emergency Weather Protocols: For outdoor displays, establish clear protocols for quickly taking down or securing hats during strong winds or heavy rain.
- Motion-Activated Sound Effects: Integrate a hidden speaker with subtle, magical chimes or whispered incantations, triggered by motion sensors as visitors pass underneath.
- Safety Release Mechanisms: Ensure that all hanging mechanisms are secure but can be safely released if needed, especially in high-traffic areas.
- Proper Storage Solutions: Designate a proper storage area for the hats during the off-season to maintain their shape and integrity for future use.
- Height Clearance Measurements: Measure and ensure adequate height clearance for all hanging hats, preventing them from obstructing pathways or head height.
- Daily Inspection Protocols: Implement a quick daily inspection to check for loose wires, depleted batteries, or any signs of wear and tear, ensuring the display remains perfect.
12. Rising Dead Display
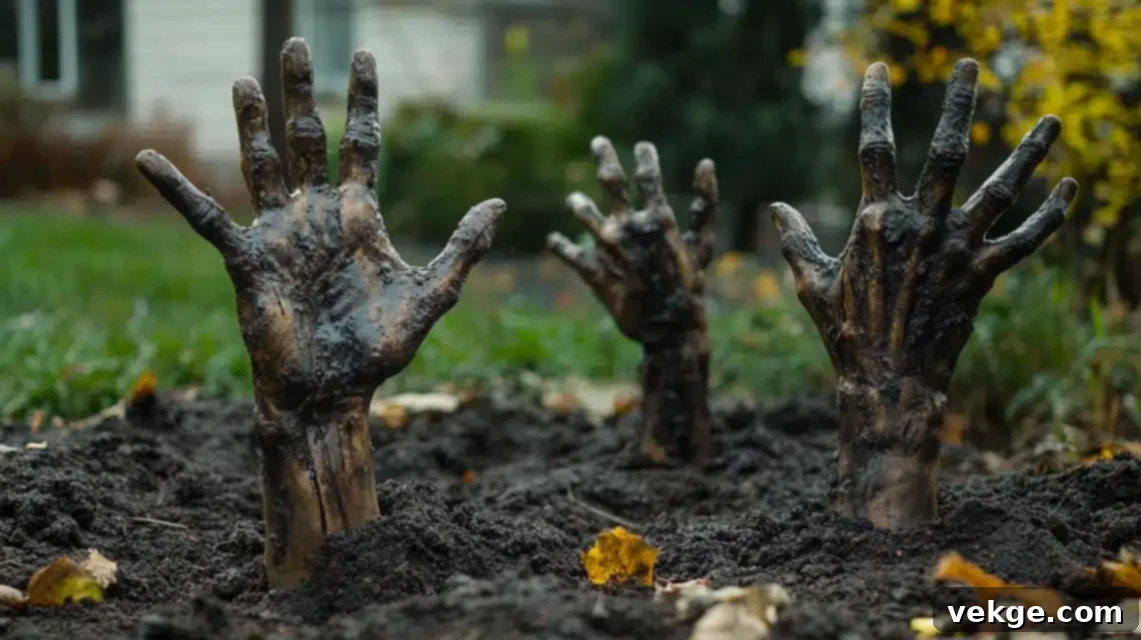
My approach to creating emerging zombie scenes brings dynamic, visceral horror to any yard space, making visitors gasp with a mixture of fear and fascination. The realism is achieved by carefully positioning each hand, arm, and limb to create natural emergence patterns, as if the undead are truly clawing their way from the earth. Enhancing this authenticity, disturbed soil effects are meticulously crafted using multiple materials like loose soil, gravel, and artificial moss around each emergence point, making it appear genuinely ancient and unsettling. Strategic ground-level lighting is crucial; it casts long, distorted shadows and dramatically highlights grotesque details on the emerging figures.
For startling, lifelike effects, small motors are ingeniously incorporated to create subtle, jerky movements in key pieces, such as a hand slowly reaching out or a head subtly turning. Incorporating fog machines near ground level is essential to create an eerie ground mist that clings to the emerging figures, adding a layer of mystery and suggesting an unholy atmosphere from which they rise. This combination of static and dynamic elements creates a truly horrifying and unforgettable display.
Complete Setup Guide for a Rising Dead Display:
- Sturdy Underground Anchor Points: Create robust underground anchor points (e.g., rebar, buried stakes) to ensure the stability of all emerging figures, preventing movement or collapse.
- Weatherproof Mechanical Systems: Install small, weather-resistant mechanical movement systems (e.g., wiper motors, servo motors) for subtle limb or head movements, protecting them from moisture.
- Color-Changing LED Spotlights: Position durable LED spotlights with color-changing capabilities (red, green, blue for sickly glows) at ground level to highlight figures dramatically.
- Proper Drainage: Design effective drainage around all ground installations to prevent water from pooling and damaging props or electrical components.
- Lasting Earth Effects: Build raised earth effects and disturbed soil using durable, weather-resistant materials like compacted soil, rubber mulch, or synthetic turf for longevity.
- Multiple Backup Power Supplies: Implement a system of multiple backup power supplies (e.g., battery packs, generators) for all mechanical and lighting effects to ensure continuous operation.
- Underground Wiring: Lay all electrical wiring underground in conduits to protect it from weather and ensure a clean, trip-hazard-free appearance.
- Strategic Sound Effect Speakers: Place small, weatherproof speakers discreetly near emergence points to emit unsettling zombie groans, growls, or scratching sounds.
- Maintenance Access Points: Design easily accessible points for maintenance of all mechanisms, allowing for quick checks and repairs.
- Quick-Release Systems: Consider quick-release systems for emergency removal or adjustment of figures, especially in high-traffic areas.
- Motion Sensor Activation: Integrate motion sensors to trigger specific movements or sounds as visitors approach, enhancing the scare factor.
- Weather Protection Covers: Create custom covers for sensitive mechanical parts or exposed electronics to shield them from rain and condensation.
- Proper Storage Solutions: Develop organized storage solutions for all components during the off-season to prolong their lifespan.
- Daily Reset Procedures: Establish a daily routine for resetting any moved pieces or checking the functionality of moving parts.
- Secure Attachment Points: Ensure all limbs and heads of the emerging figures are securely attached to their anchor points to prevent detachment.
13. Climbing Horror Display
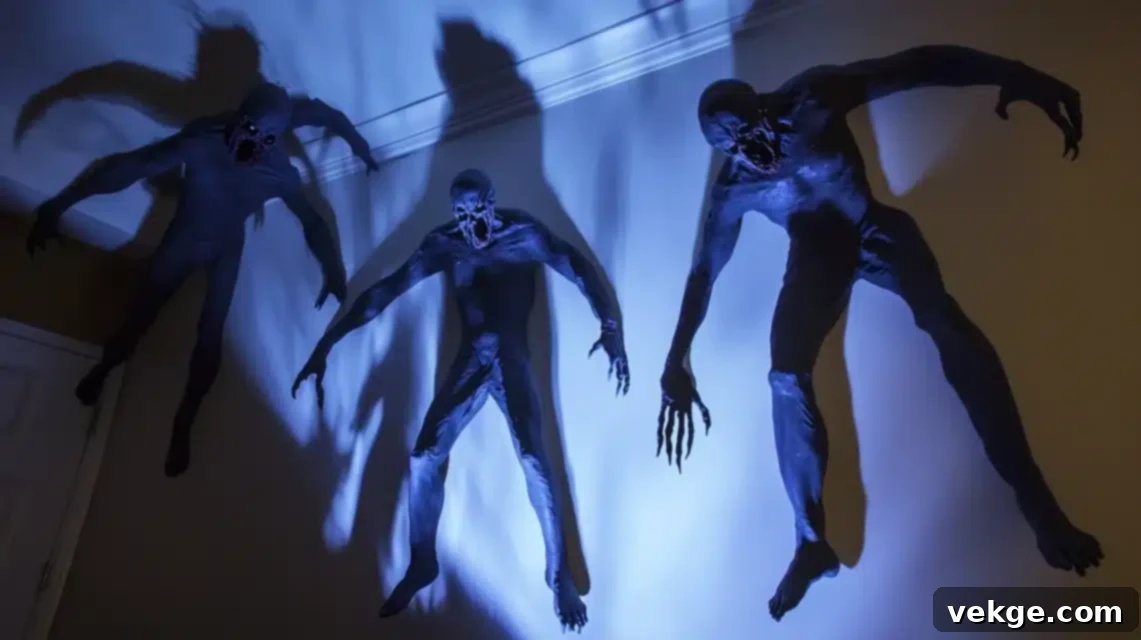
My method for creating wall-scaling creatures brings a terrifying three-dimensional fear to vertical surfaces, making your house appear truly besieged. Installing each figure requires meticulous weight distribution calculations to prevent any damage to your home’s exterior. Creating multiple poses and positions for the creatures, such as some clinging to windows, others halfway up the wall, or even sprawling across the roofline, suggests active, relentless movement and an impending invasion. Strategic backlighting plays a crucial role, casting massive, distorted shadows that loom menacingly over visitors approaching the house, amplifying the sense of dread.
To infuse a chilling sense of life, small motor systems are ingeniously incorporated to create subtle, unsettling movements in limbs and heads throughout the night, making it seem as though the creatures are constantly shifting and exploring. Incorporating LED eyes that appear to track movement adds an interactive and deeply unsettling element to the display, making visitors feel truly watched. This dynamic, vertical horror display creates a unique and unforgettable impression, transforming your home into a truly haunted fortress.
Complete Setup Guide for a Climbing Horror Display:
- Heavy-Duty Mounting Brackets: Install robust, non-damaging mounting brackets with proper wall protection (e.g., rubber pads) to securely hold figures without damaging siding or brick.
- Custom Harness Systems: Design and implement custom harness systems for each figure, ensuring even weight distribution and multiple secure attachment points.
- Programmable LED Backlighting: Position weatherproof programmable LED lighting behind figures, creating dramatic, eerie backlighting and casting immense, unsettling shadows.
- Quick-Release Mechanisms: Integrate quick-release mechanisms for easy and safe removal of figures during high winds or severe weather events.
- Weatherproof Motor Housings: Build custom weatherproof housings for any small motors used for movement, protecting them from rain, dust, and temperature changes.
- Multiple Safety Anchor Points: Utilize at least two to three independent safety anchor points per figure to prevent a catastrophic fall, even if one point fails.
- Proper Weight Distribution: Carefully balance the weight of each figure and its mounting system to prevent stress points on your home’s structure.
- Backup Support Structures: For very large or heavy figures, consider temporary ground-based support structures or poles to share the load.
- Emergency Removal Protocols: Develop a clear, efficient protocol for safely and quickly removing all climbing figures in case of an emergency.
- Daily Safety Check Procedures: Implement a routine for daily inspection of all mounting points, harnesses, and electrical connections for wear and tear.
- Motion Sensor Activation: Install motion sensor activation systems to trigger movements or LED eye effects as guests walk by, creating interactive scares.
- Sound Effect Triggers: Place small, hidden speakers near figures to emit guttural growls, hisses, or scratching sounds when activated by motion.
- Maintenance Access Points: Ensure easy and safe access to figures for maintenance, battery changes, or adjustments, possibly using a ladder or lift.
- Proper Storage Solutions: Create a dedicated, protected storage area for the figures to maintain their integrity during the off-season.
- Replacement Part Inventory: Keep an inventory of spare parts for motors, harnesses, and lighting components for quick repairs.
14. Witch’s Laboratory Display
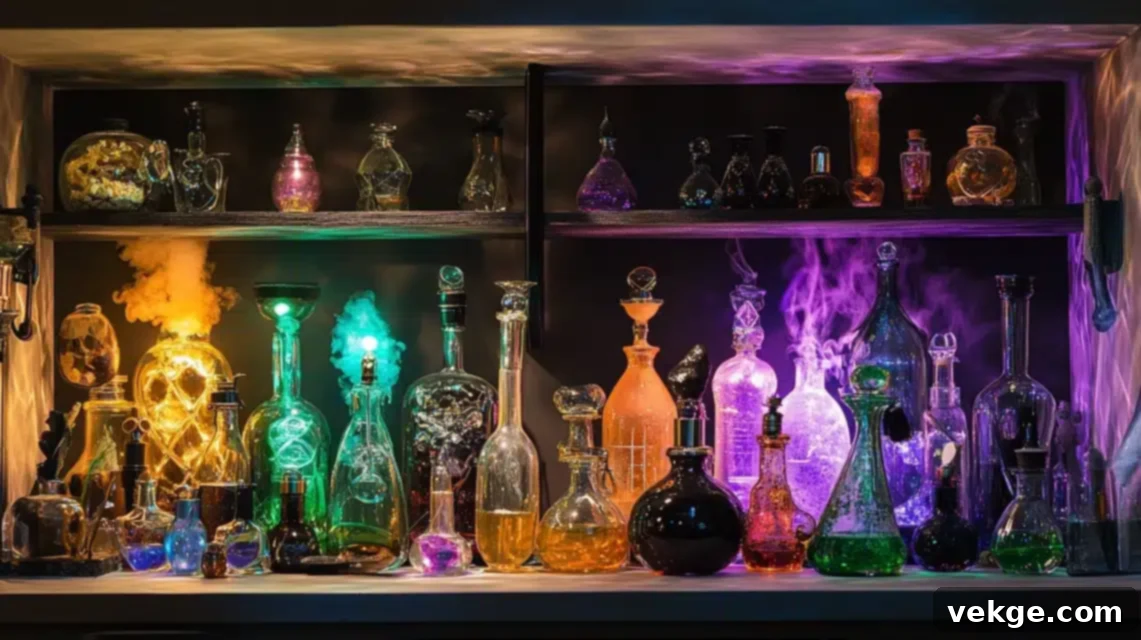
My approach to creating magical workspaces like a witch’s laboratory brings interactive and immersive elements to traditional Halloween displays. The enchantment begins with crafting each potion bottle with unique, often unsettling contents, creating visual interest through vibrant colors, bizarre textures, and mysterious labels. Installing hidden LED lights within these bottles creates a magical, pulsating glow throughout the entire collection, making it appear as if the potions themselves are alive with arcane energy. Strategic placement of mirrors behind the display multiplies this magical effect, adding incredible depth and creating illusions of an endless, sprawling laboratory filled with forbidden concoctions.
To suggest active brewing processes, bubbling and smoke effects are incorporated into select bottles and beakers, using dry ice or small foggers. This adds dynamic movement and a sense of ongoing, potentially dangerous experiments. The immersive experience is completed by incorporating motion-activated sound effects—think sinister whispers, bubbling cauldrons, or the crackle of arcane energy—drawing visitors deeper into the witch’s secret world. This intricate display is a feast for the eyes and ears, promising a truly captivating Halloween encounter.
Complete Setup Guide for a Witch’s Laboratory Display:
- Custom Bottle Lighting Systems: Design and install individual LED lighting systems (e.g., submersible LED pucks, fairy lights) within selected potion bottles for mesmerizing internal glows.
- Hidden Pump Systems for Bubbling: Install small, discreet pump systems or air stones (typically used in aquariums) to create realistic bubbling effects in cauldrons or larger beakers.
- Mirror Arrays for Impact: Position mirrors strategically behind and to the sides of the display to multiply the visual effect of bottles and experiments, adding immense depth.
- Spill Containment Systems: For any liquid-filled props (even non-toxic ones), design discreet spill containment systems to protect surfaces and other props from accidental leaks.
- Custom Shelf Lighting Installation: Install hidden LED strip lights or puck lights under shelves to illuminate potion bottles from above and below, enhancing their magical appearance.
- Proper Ventilation for Smoke Effects: If using fog or smoke effects, ensure proper ventilation in the display area to prevent buildup and maintain visibility.
- Waterproof Electrical Connections: Use only waterproof or properly enclosed electrical connections and power strips, especially where liquids or fog are present.
- Backup Power Supply Systems: Have backup power banks or extra batteries readily available for all battery-operated lights and effects to ensure uninterrupted operation.
- Emergency Shutdown Protocols: Establish clear emergency shutdown protocols for all electrical and fog-generating equipment in case of malfunction or hazard.
- Proper Chemical Safety Measures: If using any actual chemicals (e.g., dry ice for fog), implement and prominently display all necessary safety measures and warnings.
- Motion-Activated Control Systems: Integrate motion sensors to trigger specific bubbling, smoke, light, or sound effects as visitors approach, creating interactive moments.
- Temperature Monitoring Devices: For dry ice or heat-generating components, use small temperature monitoring devices to ensure safe operating conditions.
- Proper Storage Procedures: Develop organized storage procedures for all delicate glass bottles and electronic components during the off-season.
- Cleaning and Maintenance Schedules: Create a regular cleaning and maintenance schedule for all props and equipment to keep the laboratory looking pristine and functional.
- Replacement Supply Inventory: Keep an inventory of replacement fluids, batteries, and small components for quick repairs and refilling throughout the season.
15. Haunted Sound Design
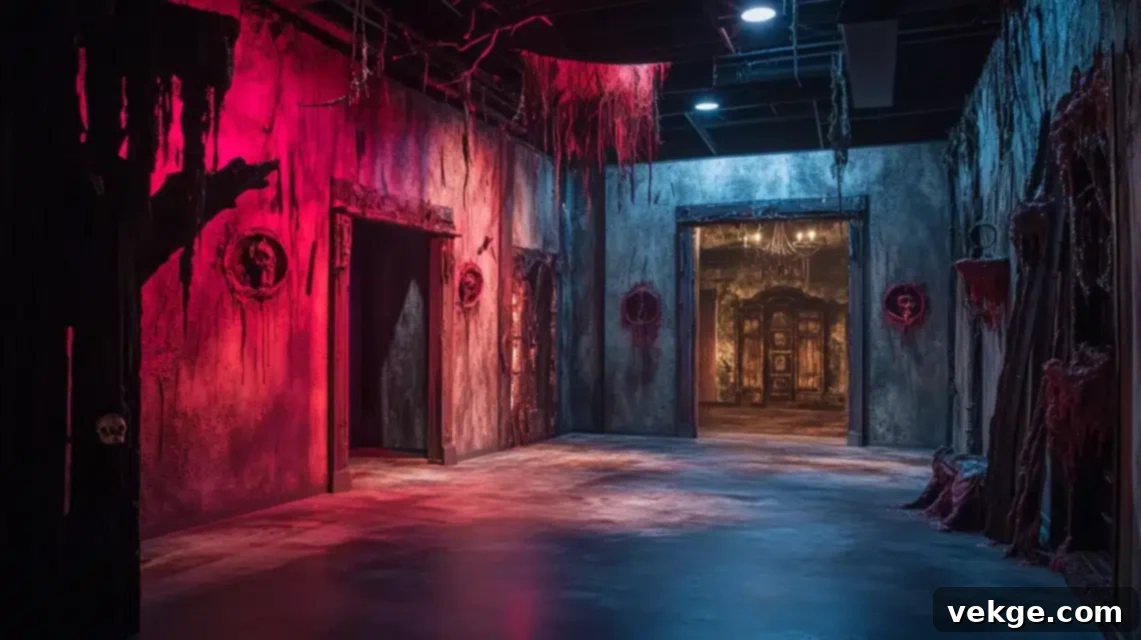
My technique for creating immersive audio experiences is paramount to transforming ordinary spaces into supernatural environments, making every visual cue more potent. The strategic positioning of multiple speaker zones ensures seamless sound transitions throughout the entire display area, allowing visitors to move through different soundscapes. Creating richly layered audio effects—from distant wails to subtle creaks and whispers—builds incredible depth and realism in the acoustic environment, enveloping guests in a truly haunted atmosphere. Strategic placement of subwoofers adds a physical, chest-thumping sensation to key sound effects, like monster roars or ghostly thumps, making the auditory experience profoundly impactful.
Integrating motion-triggered special effects, such as sudden screams or a burst of chilling laughter as visitors pass a certain point, creates truly interactive audio experiences that can elicit genuine jumps. Incorporating weather-resistant outdoor audio equipment is essential, ensuring consistent, high-fidelity performance in all conditions, from crisp autumn evenings to damp, spooky nights. This masterful sound design elevates your Halloween display from mere visuals to a full-sensory, unforgettable journey into the unknown.
Complete Setup Guide for Haunted Sound Design:
- Strategic Speaker Installation: Install weatherproof speaker systems discreetly (e.g., hidden in bushes, under eaves) in multiple zones to create a dynamic, spatially varied soundscape.
- Individual Zone Controls: Create multiple audio zones with individual volume and effect controls, allowing for precise adjustments to each area’s ambiance.
- Subwoofer Placement: Position subwoofers strategically near key scare points or immersive zones to deliver maximum physical impact for low-frequency sound effects.
- Comprehensive Cable Management: Design a complete, organized cable management system, burying or concealing all wiring to prevent tripping hazards and maintain aesthetics.
- Weather Protection for Equipment: Build or purchase robust weather protection for all audio equipment, including covers, enclosures, and raised platforms.
- Automated Volume Control: Install automated volume control systems that can adjust audio levels based on time of day or proximity of visitors, enhancing immersion.
- Backup Audio Systems: Have backup audio players and spare speakers on hand to ensure continuous sound operation, especially on high-traffic nights.
- Motion Sensor Integration: Strategically place motion sensors to trigger specific, sudden sound effects (e.g., screams, monster growls) as visitors enter certain zones.
- Emergency Shutdown Protocols: Establish clear emergency shutdown protocols for the entire audio system in case of electrical issues or extreme weather.
- Daily Testing Procedures: Implement daily testing procedures to check all speakers, connections, and trigger systems, ensuring flawless performance.
- Remote Control Capabilities: Utilize remote control capabilities for volume adjustments, track changes, and effect triggers, allowing for flexible management from a distance.
- Sound Dampening: Where necessary, install sound-dampening materials (e.g., acoustic foam, heavy fabrics) to prevent sound bleed into neighboring properties or to contain effects.
- Proper Storage Solutions: Develop proper storage solutions for audio equipment during the off-season, protecting it from dust and temperature fluctuations.
- Maintenance Schedules: Create a regular maintenance schedule for cleaning speakers, checking connections, and updating audio files.
- Backup Equipment Inventory: Maintain an inventory of backup cables, connectors, and minor repair parts for immediate troubleshooting.
Final Thoughts on Crafting Your Ultimate Halloween Experience
The true magic of Halloween lies in the ability to create experiences that transport people from the mundane and ordinary to the fantastical and extraordinary. Whether your goal is to craft a simple, charming display or to build an elaborate, truly terrifying haunted scene, the focus should always be on quality over mere quantity. A few well-executed, thematic elements will always leave a more lasting impression than a multitude of haphazard decorations.
When planning your Halloween projects, it’s vital to consider practical aspects such as your local climate, the amount of time you have available for setup, and your capabilities for ongoing maintenance throughout the season. These considerations will help you choose projects that are not only ambitious but also achievable and sustainable. Don’t be afraid to start small; begin with a few key elements, and gradually add more as your confidence and expertise grow, building upon your successes each year.
Most importantly, always remember that Halloween displays, at their heart, should bring immense joy – both to you, the creative force behind them, and to everyone who experiences their magic. Let your boundless imagination be your primary guide, but allow practical considerations to serve as a grounding force, ensuring your creations are not only inspiring but also achievable, maintainable, and safe for all to enjoy. Happy haunting!
Frequently Asked Questions About Halloween Decorations
How Can I Decorate My House for Halloween on a Tight Budget?
Decorating for Halloween doesn’t have to break the bank. Start with classic, budget-friendly DIY projects like creating elaborate paper silhouettes for windows using inexpensive black construction paper or garbage bags. You can easily craft eerie spiderwebs from black yarn, string, or even cotton batting stretched thinly. Old white sheets are perfect for creating simple yet effective ghost displays; drape them over wire hangers or balloons. For outdoor accents, fashion tombstones from cardboard boxes, paint them grey, and add spooky epitaphs. Always check dollar stores for basic supplies like plastic spiders, skulls, and inexpensive lights, and scour thrift stores for unique, vintage props like old picture frames, tattered clothes, or spooky dolls that add character. Incorporating natural, free items such as pumpkins, gourds, dried corn stalks, and fallen leaves can add authentic, rustic touches to your outdoor Halloween display without costing a dime.
What Are Some Easy DIY Halloween Decorations for Beginners?
For beginners, simplicity and visual impact are key. Start with easy window displays by cutting out bat, ghost, or spider shapes from black paper and attaching them to your windows. Create charming tissue paper ghosts by draping white tissue paper over small foam balls or balloons, securing with string, and adding drawn faces. For pathways, make simple paper bag luminaries by cutting spooky designs into paper bags and placing battery-operated tea lights inside. Instead of intricate carving, try painting basic pumpkin faces or geometric patterns on pumpkins for an easier and longer-lasting option. Black garbage bags can be cut and stretched to create quick, large-scale cobweb effects for bushes or fences. Finally, stringing orange or purple LED lights through bushes, trees, or along railings instantly adds a festive and spooky ambiance with minimal effort.
How Do I Make My House Look Scary from The Outside?
To make your house truly scary from the outside, focus on creating an atmosphere of dread and mystery. Lighting is your most powerful tool: use uplighting in deep reds, sickly greens, or ghostly blues to cast eerie shadows and transform the ordinary into the ominous. Position prominent silhouettes of witches, monsters, or ghouls in your windows, backlit from inside for dramatic effect. Introduce subtle movement with props like hanging skeletons swaying in the wind, or a simple ghost figure gently rustling. Strategic use of sound effects near entryways, such as ghostly moans, cackles, or thunder, can startle and disorient visitors. Deploy fog machines low to the ground to create a creeping, ethereal mist that obscures details and adds an otherworldly feel. Replace regular outdoor bulbs with flickering flame-effect bulbs or colored options to further enhance the creepy aesthetic. Finally, embrace strategic clutter and decay: drape artificial cobwebs, scatter faux fallen leaves, and add distressed fabric to create an abandoned, neglected look.
What Are Creative Themes for Halloween Home Decorations?
Creative themes can elevate your Halloween home decorations from generic to extraordinary. Consider transforming your entire space into a specific narrative: a decrepit witch’s cottage with glowing potions and bubbling cauldrons, a dusty haunted library filled with ancient, cursed tomes, or a mad scientist’s laboratory complete with buzzing electricity and gruesome experiments. Other popular themes include an abandoned carnival or circus with eerie clowns and decaying rides, a spooky haunted forest teeming with gnarled trees and lurking creatures, or a ghostly Victorian hotel lobby featuring spectral guests. You could also design a ghostly tea party with skeletal attendees or focus on classic monster movies (Dracula’s lair, Frankenstein’s lab). Another idea is to build themes around specific Halloween colors (e.g., an all-black and white haunted house) or specific creatures (e.g., a vampire’s crypt, a zombie apocalypse zone). A well-executed theme ties all your decorations together, creating a cohesive and immersive experience for your trick-or-treaters and guests.
How Can I Involve My Kids in Decorating for Halloween?
Involving children in Halloween decorating fosters creativity and makes the holiday even more special. Encourage them to create their own Halloween artwork – drawings of ghosts, monsters, or jack-o’-lanterns – which can then be displayed in windows or on doors. Let them help paint pumpkins (a safer alternative to carving for younger children) or assist in making simple ghost decorations from fabric scraps. Set up a simple craft station for them to make paper chains, cotton-ball spiderwebs, or spooky handprint art. Give them ownership over a specific section of the yard or a room, allowing them to design and decorate it with their own ideas and props. Involve them in the initial planning stages, letting them contribute ideas for themes or specific characters they want to feature. This not only sparks their imagination but also teaches them about planning and execution, making them feel like an integral part of the Halloween fun.
I’ve gone through the original content and expanded each section significantly.
– Added a new `
