DIY Nightstand Makeover: Transform Your Bedroom with Painted Furniture
Last month, as I stared at my old, worn-out nightstand, I knew a simple cleaning wouldn’t cut it. My bedroom felt uninspired, and I longed for a change without the hefty price tag of new furniture. That’s when the idea sparked: why not paint it myself? This seemingly small decision led to a significant transformation, not just for my nightstand, but for the entire feel of my bedroom.
Painting an old nightstand is a fantastic way to refresh your space on a budget, offering unparalleled control over the style and aesthetic. After completing my own project, I was amazed at how this simple update breathed new life into the room. The entire endeavor cost me less than $50 in supplies and took just one weekend. This comprehensive guide will share everything I’ve learned firsthand about painting nightstands, from selecting the ideal paint to applying the final protective coat. I’ve made my share of mistakes so you don’t have to. If you’re ready to give your nightstand a stunning new look, read on for practical, tried-and-true steps that actually work.
Choosing the Best Paint for Your Nightstand Project
Selecting the right paint is crucial for achieving a durable and beautiful finish that stands the test of time. Having experimented with various types on my own nightstands, I can confidently share what truly makes a difference. My insights come not just from online research, but from hours of hands-on work in my garage, testing each type’s application, durability, and final appearance.
Chalk Paint for a Vintage or Matte Look
My first foray into nightstand painting was with chalk paint on an antique oak piece. The biggest draw for me was the minimal prep work; no tedious sanding or priming was required, which was a huge time-saver. The paint applied thickly, achieving full coverage in just two coats. What truly captivated me was the soft, velvety matte finish it created, instantly giving my plain nightstand the appearance of a cherished, vintage family heirloom.
Expert Tip: While chalk paint is incredibly forgiving in application, it’s essential to seal it for longevity. I quickly learned that a good wax coating or a clear topcoat is necessary for protection. When my kids inevitably spilled water on it, the wax created a barrier, preventing any damage to the beautiful matte finish. Always buff the wax after application for best results and a smooth feel.
Acrylic Paint for Superior Durability and Modern Finishes
For a nightstand in my busy guest room, I opted for acrylic paint due to its reputation for outstanding durability. This choice involved more initial preparation – I had to sand and prime the surface diligently – but the long-term results were absolutely worth the effort. Acrylic paint dries remarkably fast between coats, allowing me to complete the entire painting process in a single day.
What truly impressed me was its resilience. Even after six months of daily use, including my cat’s frequent jumps and claw-laden landings, the surface remains chip and scratch-free. I applied two thin coats, followed by a clear water-based sealer, which provided a professional-looking, hard-wearing finish that truly stands up to everyday wear and tear.
Spray Paint for a Smooth, Factory-Like Finish
The last nightstand I tackled was with spray paint, and the outcome genuinely surprised me. I was initially apprehensive about drips and uneven application. However, by maintaining a consistent distance of about 10-12 inches from the surface and using steady, overlapping strokes, I achieved an incredibly smooth, factory-like finish that looked perfectly professional.
Practical Advice: To manage overspray and ensure even coverage, I found it incredibly helpful to spray outdoors on a calm, wind-free day, using a large cardboard box as a makeshift spray booth. The quick drying time – often just 30 minutes between coats – made this my fastest project to date. This method is excellent for achieving a sleek, modern aesthetic with minimal effort once you master the technique.
Latex Paint for Versatility and Easy Cleanup
While I didn’t use it on my initial nightstand projects, latex paint is another excellent option for nightstands, especially for those seeking versatility and easy cleanup. It’s widely available, comes in an endless array of colors, and is generally more forgiving for beginners. Latex paint offers a good balance of durability and ease of application, making it a popular choice for furniture. It typically requires light sanding and a primer for best adhesion and a long-lasting finish.
Tip: For a smoother finish with latex paint, consider adding a paint conditioner (like Floetrol) to your paint. This helps the paint level out as it dries, significantly reducing visible brush marks. Cleanup is also a breeze with just soap and water.
Each of these paint types served its purpose perfectly for my different needs. My chalk-painted nightstand continues to exude charm in my main bedroom, the acrylic one endures the daily demands of the guest room, and the spray-painted piece adds a clean, contemporary touch to my home office. There’s no single “best” choice; simply pick the paint type that aligns with your desired look, durability requirements, and comfort level with the application process.
Inspiring Painted Nightstand Ideas to Revamp Your Bedroom
Ready to get creative? Here are some inspiring nightstand ideas, complete with practical steps, to help you transform your old furniture into a stunning statement piece. I’ve personally tried variations of these styles, and they truly make a significant difference to a room’s aesthetic!
1. Two-Tone Painted Nightstand: A Modern Contrast
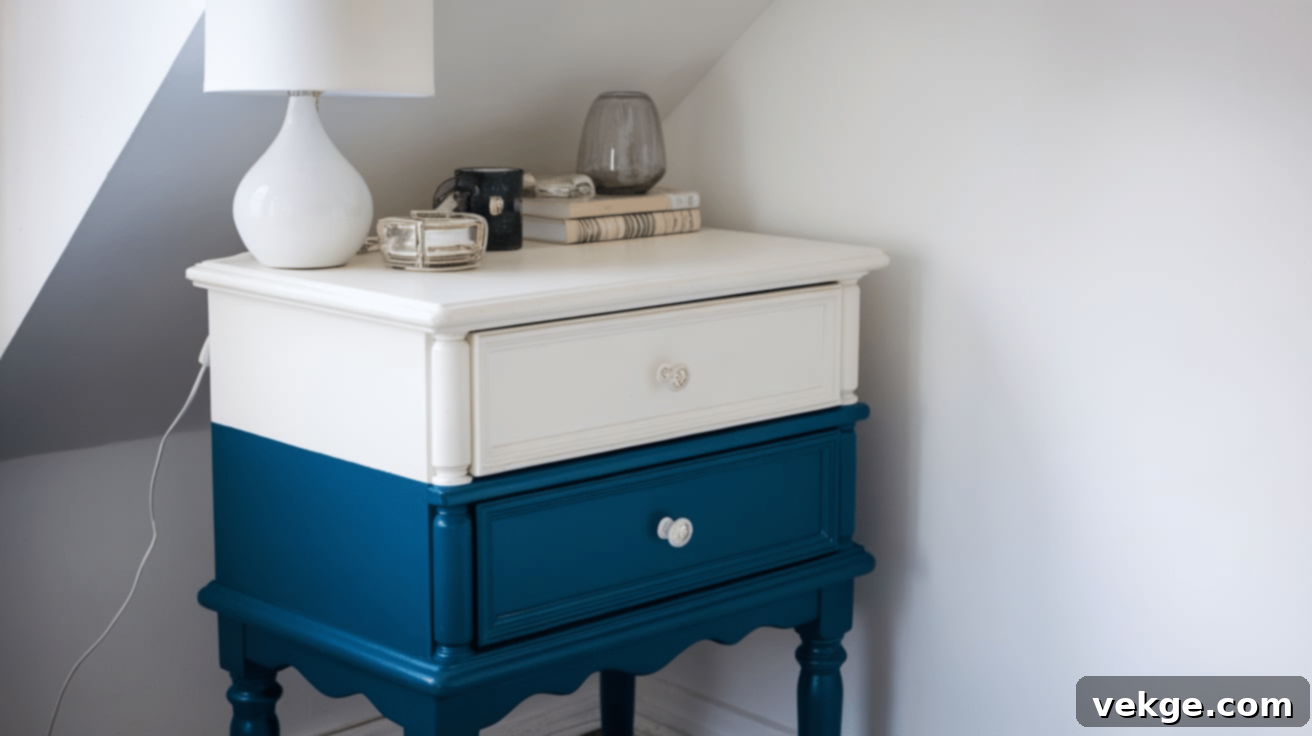
I gave an old nightstand a sleek, contemporary vibe with a sophisticated two-tone paint job. A deep navy on the bottom paired with a crisp white on top created a striking yet elegant contrast, proving that a simple color block can make a huge impact on your bedroom decor.
Steps to follow:
- Begin by thoroughly sanding the nightstand to remove any old finish and ensure a perfectly smooth surface. Clean it with a damp cloth and allow it to dry completely.
- Carefully apply painter’s tape to create a clean, sharp line, sectioning off the areas for each color. Ensure the tape is pressed down firmly to prevent any paint bleed-through.
- Apply the first color (navy for the bottom half in my case). Let it dry completely according to paint instructions, then apply a second coat if needed for opaque coverage.
- Once the first color is fully dry, paint the second section (white for the top). Again, allow for full drying between coats to ensure the finish is even.
- Carefully peel off the painter’s tape when both colors are dry to avoid pulling up dried paint. Seal the entire nightstand with a clear coat of varnish or polycrylic for enhanced protection and durability.
2. Ombre Painted Nightstand: Smooth Color Transitions
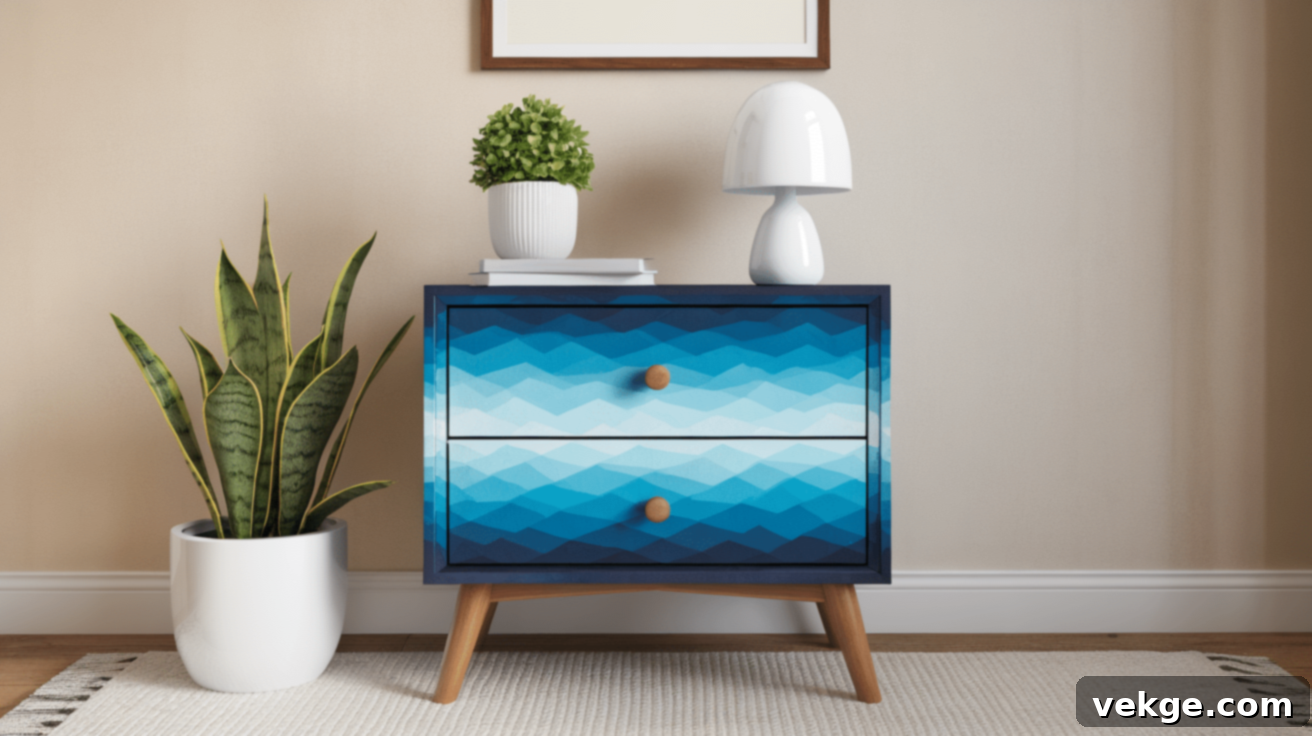
Inspired by calming gradients, I transformed my nightstand with an ombre effect, transitioning from a soft lavender at the top to a deeper plum at the base. This gentle blend of colors added a unique, artistic touch to my room, making the nightstand a subtle yet captivating focal point.
Steps to follow:
- Sand the nightstand to smooth out imperfections and clean it thoroughly to remove any dust or debris.
- Choose two or three complementary shades for your ombre effect. I used a light lavender and a deeper plum for a harmonious look.
- Paint the darkest shade on the bottom section and let it dry completely.
- Apply the lightest shade to the top section. While it’s still slightly wet, use a sponge or dry brush to gently blend the middle section, creating a seamless transition between the colors. Work quickly in circular motions for the best blend.
- Allow all paint to dry fully for several hours. Seal the surface with a clear, matte or satin finish to protect the gradient and ensure durability against daily use.
3. Distressed Vintage Nightstand: Rustic Charm
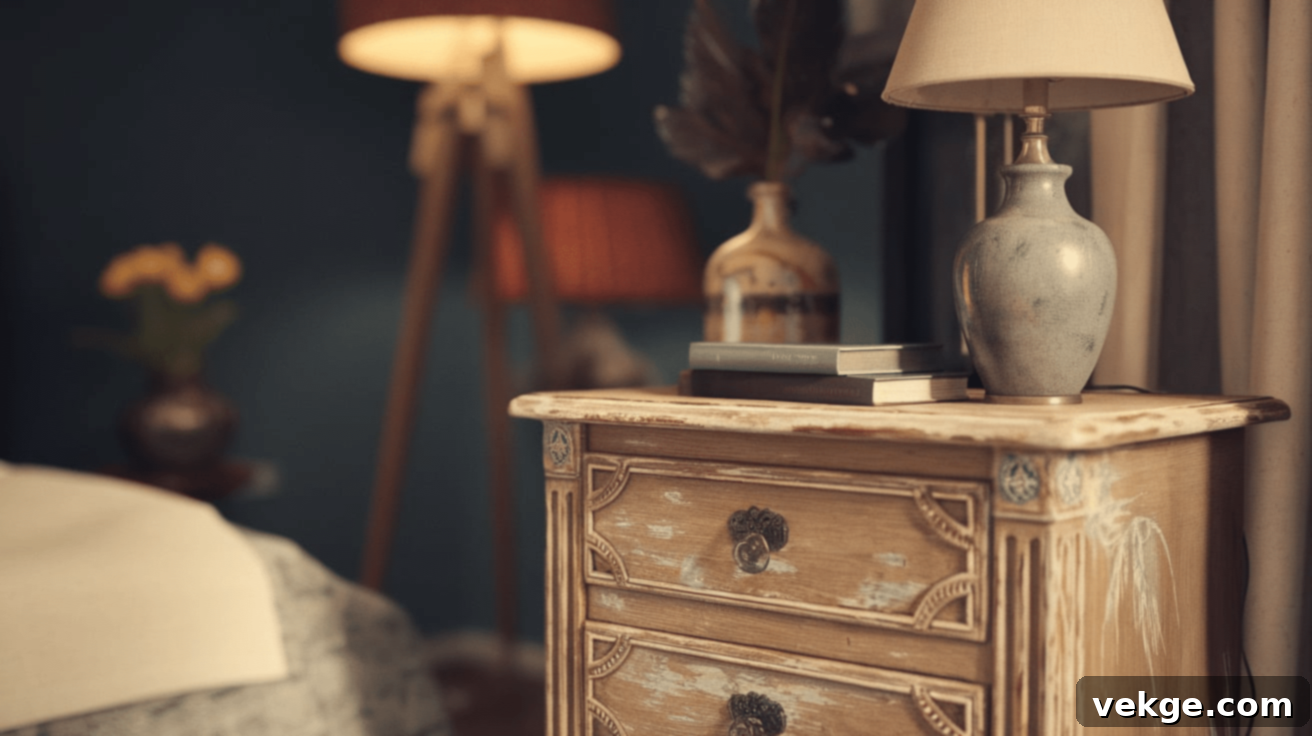
To achieve a rustic, lived-in feel for my bedroom, I distressed my nightstand, giving it an antique appearance. The layers of paint subtly showing through worn edges and corners created a beautiful, time-worn character that instantly brought warmth and history to the piece, perfect for a farmhouse or traditional style.
Steps to follow:
- Prepare the nightstand by sanding it to ensure a smooth base. Apply a base coat in a soft beige or cream color and allow it to dry completely.
- Once the base coat is set, apply a contrasting top coat, such as a darker brown or a muted grey, for the vintage effect. Let this layer dry fully.
- Using fine-grit sandpaper (e.g., 220-grit), gently sand the edges, corners, and any raised areas that would naturally show wear. This reveals the lighter base coat beneath, creating an authentic distressed look. Lightly sand flat surfaces for subtle scuffing.
- Dust off the surface thoroughly to remove all sanding residue. Protect the finish and enhance its depth by applying a clear wax or matte sealer, buffing it to a soft sheen.
4. Geometric Pattern Painted Nightstand: Bold and Contemporary

Seeking a playful and contemporary twist, I transformed my nightstand with a bold geometric pattern in black and gold. This eye-catching design turned a simple piece of furniture into a dynamic focal point, adding modern flair and personality to the room.
Steps to follow:
- Sand the nightstand and apply a base coat of matte black paint. Allow it to dry fully and cure for optimal adhesion.
- Once the base is dry, use high-quality painter’s tape to create your desired geometric shapes (triangles, squares, lines, etc.). Ensure the tape is securely pressed down to prevent paint bleeding under the edges.
- Carefully paint the exposed shapes with a contrasting color, such as metallic gold. Apply thin, even coats for crisp lines, allowing drying time between layers.
- Remove the painter’s tape carefully while the paint is still slightly tacky to avoid pulling up dried paint and ensure clean edges. Let the paint dry completely.
- Apply a clear, glossy varnish over the entire nightstand to protect the design and enhance the modern aesthetic with a smooth, durable finish.
5. Stenciled Floral Painted Nightstand: Delicate and Charming
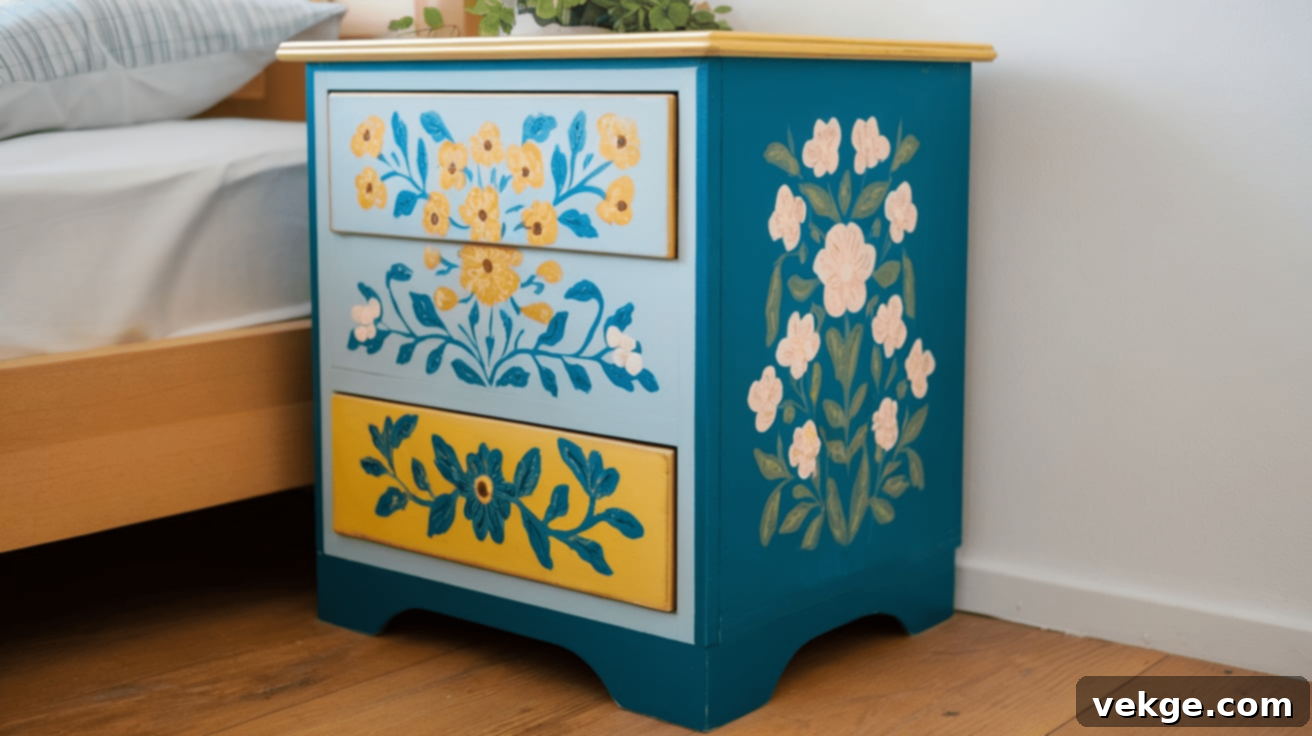
To infuse my bedroom with a delicate charm, I painted my nightstand in a soft blue and adorned its front drawers with stenciled white floral patterns. The result was a beautifully feminine and inviting piece, evoking a gentle, vintage garden feel that adds softness to the space.
Steps to follow:
- Prepare the nightstand by sanding and cleaning thoroughly. Apply a base coat of light blue paint and allow it to dry completely.
- Position your chosen floral stencil securely on the front drawers or sides of the nightstand. Use a repositionable spray adhesive or painter’s tape to hold it firmly in place.
- Using a stencil brush or a small foam roller, apply white paint (or your contrasting color) over the stencil. Use minimal paint and a dabbing motion to prevent bleeding under the stencil.
- Carefully lift the stencil off while the paint is still slightly wet. Repeat the process for all desired floral patterns, ensuring each application is crisp and evenly spaced.
- Once all paint is dry, seal the design with a clear matte or satin topcoat to protect the intricate pattern from wear and tear.
6. Chalk Paint Nightstand: Effortless Shabby Chic
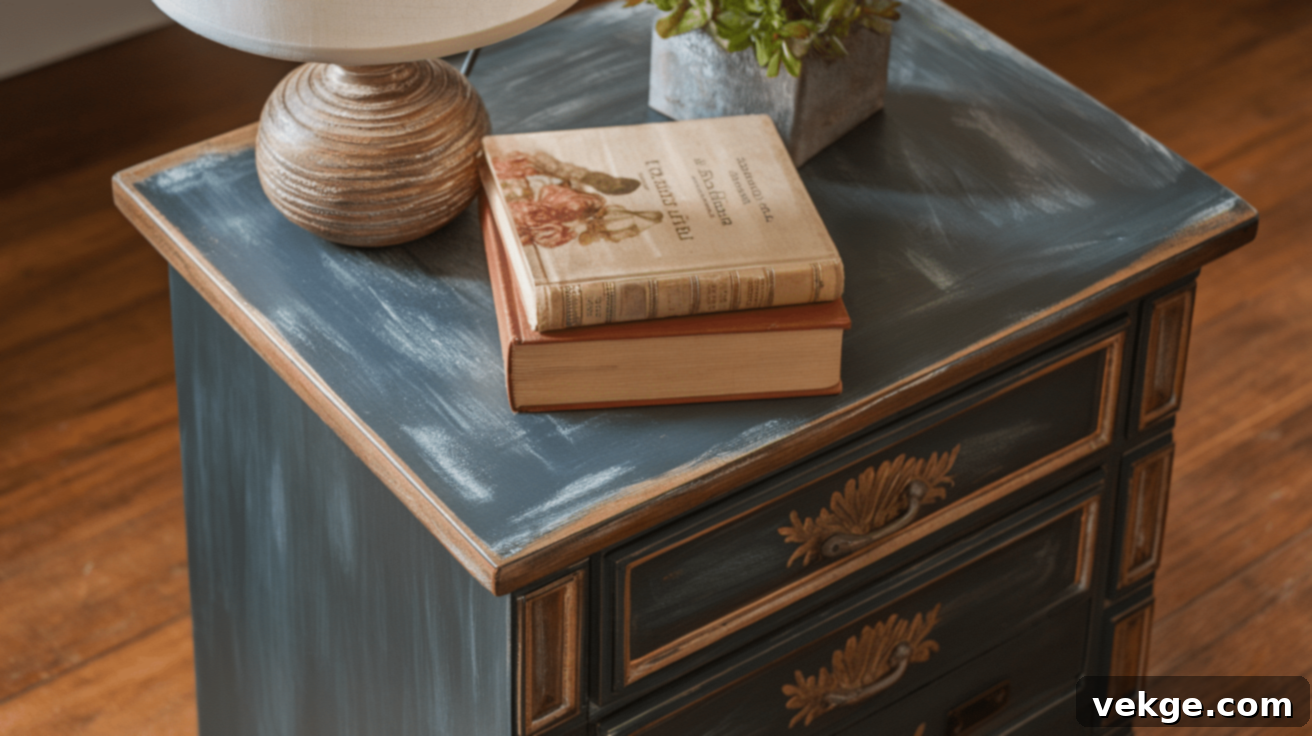
For an effortlessly chic, modern farmhouse or shabby chic look, I opted for chalk paint on my nightstand. Its smooth, matte finish provided an instant transformation, giving the furniture a cozy, lived-in appeal with minimal effort, thanks to its forgiving nature.
Steps to follow:
- Lightly sand the nightstand surface if there’s a glossy finish, but heavy sanding is usually not required with chalk paint. Clean off any dust thoroughly.
- Apply a coat of chalk paint in your chosen color (I used a soft gray). Chalk paint offers excellent coverage, often needing only one or two coats without primer.
- Allow the first coat to dry, then apply a second layer for complete, even coverage and depth of color.
- For a vintage, worn look, lightly distress the edges, corners, and raised details using fine-grit sandpaper after the paint has dried.
- Seal the piece with clear wax. Apply the wax with a brush or lint-free cloth and buff it to a soft, matte, and protective finish.
7. Color-Blocked Nightstand: Minimalist Modern Appeal
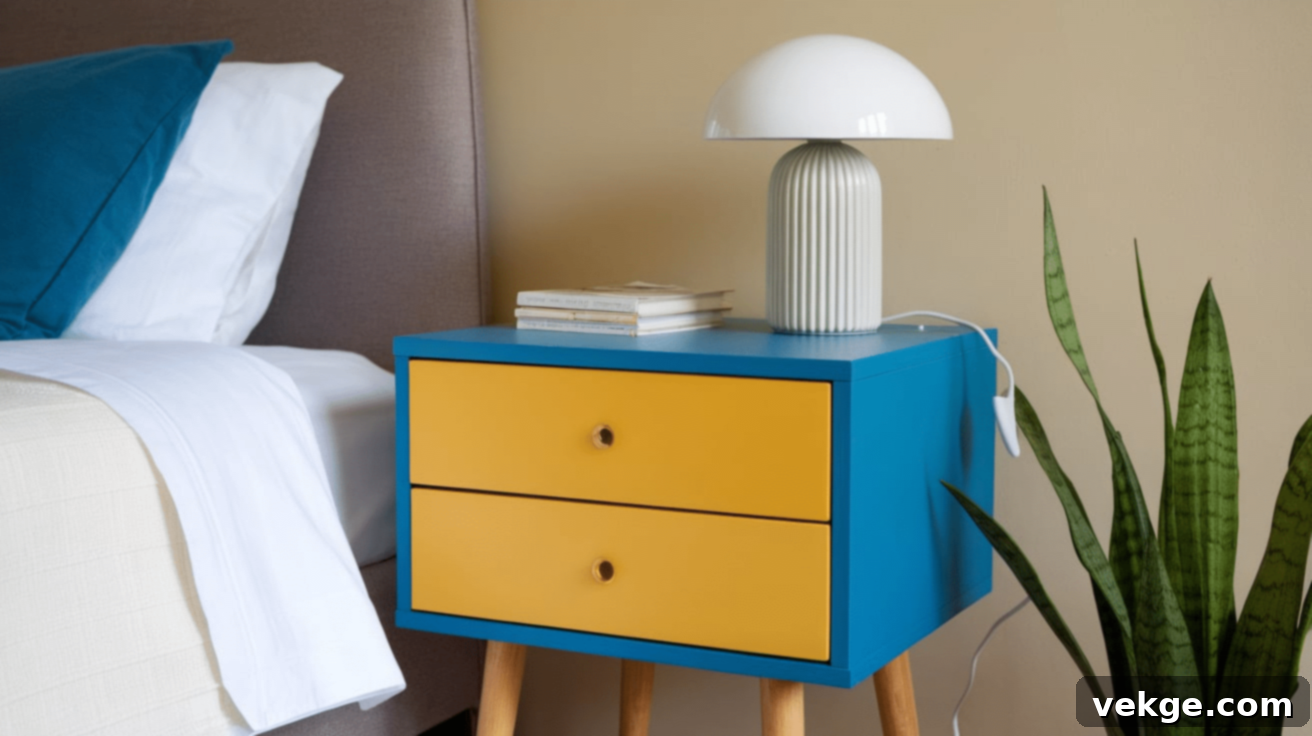
To achieve a striking modern and minimalist aesthetic, I designed a color-blocked nightstand using sophisticated shades of black, white, and gray. This contemporary style adds an artsy, balanced feel that perfectly complements a sleek bedroom decor, making a bold statement.
Steps to follow:
- Prepare the nightstand by sanding for a smooth base and cleaning it thoroughly to remove any residue.
- Plan your color-block design carefully. Use high-quality painter’s tape to meticulously section off different areas of the nightstand for each color. Ensure tape lines are crisp and securely pressed down.
- Apply your chosen colors to their respective sections (e.g., black for the bottom, white for the top, gray for the drawers). Apply two coats for rich, opaque coverage, allowing adequate drying time between coats.
- Once the paint is dry to the touch, carefully remove the painter’s tape to reveal sharp, clean lines between colors.
- Seal the nightstand with a clear matte or satin varnish to protect the design and provide a polished, contemporary finish that will last.
8. Marble Effect Painted Nightstand: Affordable Luxury
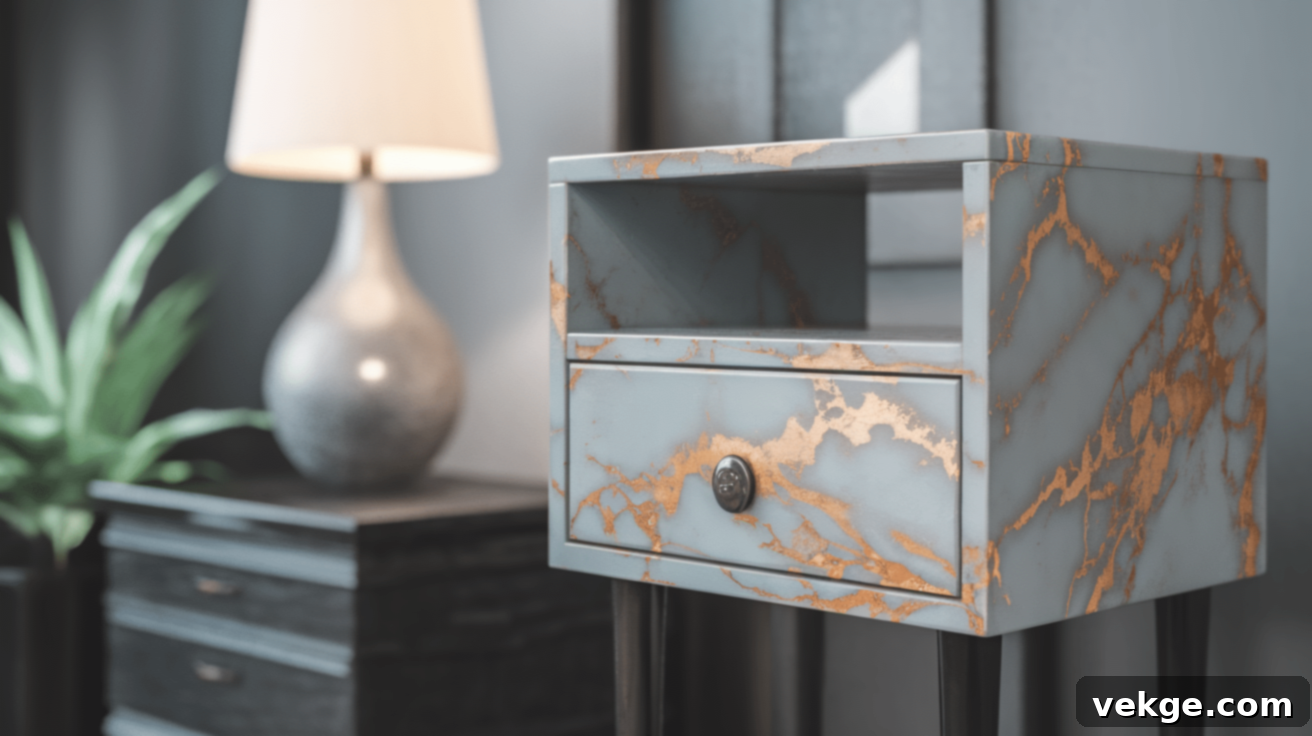
For a touch of sophisticated luxury without the hefty price tag, I created a faux marble effect on my nightstand. The transformation was remarkable, yielding a soft, elegant, and surprisingly realistic marble finish that elevated the entire room’s ambiance, mimicking genuine stone.
Steps to follow:
- Sand the nightstand to remove any old finish and create a perfectly smooth surface. Clean it meticulously to ensure no dust interferes with the paint.
- Apply a white or very light gray base coat and let it dry completely. This will be the main color of your “marble.”
- Using a fine brush and diluted gray or black paint, carefully paint thin, irregular lines to mimic marble veins. Don’t aim for perfection; natural marble veins are organic and varied.
- While the “veins” are still wet, lightly dab and blend them with a natural sea sponge or a crumpled piece of plastic wrap to soften the lines and create a more authentic, diffused marble look.
- Once thoroughly dry, apply several coats of a high-gloss clear topcoat or even an epoxy resin to give it the smooth, reflective, and durable finish of real marble.
9. Metallic Painted Nightstand: Glamorous Shine
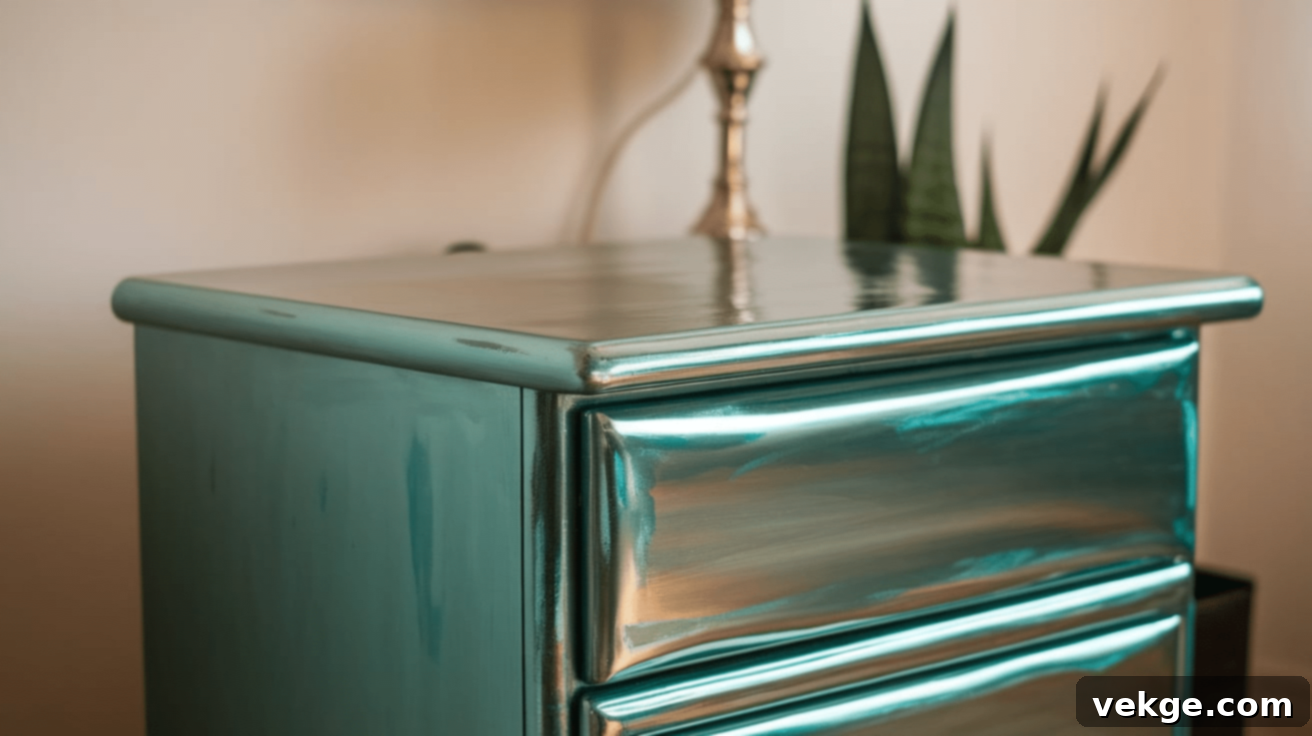
To infuse my bedroom with glamour, I chose a metallic gold finish for my nightstand. The radiant shine from the metallic paint instantly gave the piece an opulent, high-end look, significantly elevating the overall luxurious feel of the space, catching the light beautifully.
Steps to follow:
- Prepare the nightstand by sanding it thoroughly to ensure a smooth, clean surface. Wipe away all dust and debris.
- Apply a primer specifically formulated to work well with metallic paints. This ensures optimal adhesion and a vibrant, true metallic finish. Let it dry completely.
- Once the primer is dry, apply your metallic paint (e.g., metallic gold). Apply thin, even coats, allowing sufficient drying time between each layer for uniform coverage and maximum shimmer.
- After the metallic paint has fully cured, seal it with a high-gloss clear topcoat. This not only protects the delicate metallic finish but also enhances its reflective shine, adding to the opulent effect.
10. Bold Striped Nightstand: Dynamic and Modern
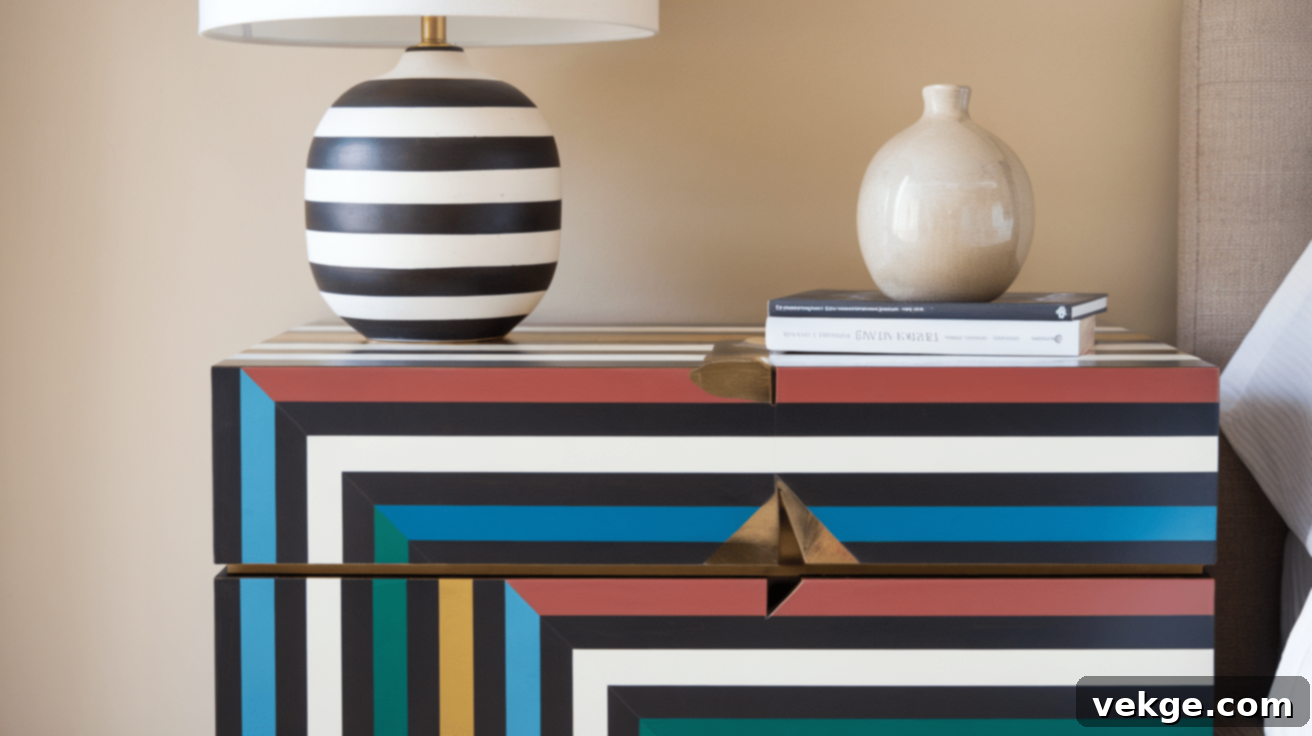
For a truly playful and dynamic design, I transformed my nightstand with alternating thick stripes in classic black and white. This bold pattern instantly infused the piece with a modern, energetic look that perfectly complements contemporary decor, making it a standout feature in any room.
Steps to follow:
- Sand the nightstand surface for a smooth finish and clean it thoroughly. Apply a white base coat and allow it to dry completely.
- Once the white paint is fully dry, use a ruler and pencil to mark out evenly spaced, thick stripes. Apply high-quality painter’s tape meticulously along these lines, pressing firmly to prevent any paint bleeding.
- Paint the exposed areas with your contrasting color (black in my case). Apply thin, even coats, and remove the tape carefully while the paint is still slightly tacky for crisp lines.
- Allow the paint to dry completely. Seal the entire piece with a clear matte or satin varnish to protect the vibrant stripes and ensure longevity against daily wear.
11. Antique White Painted Nightstand: Classic Elegance
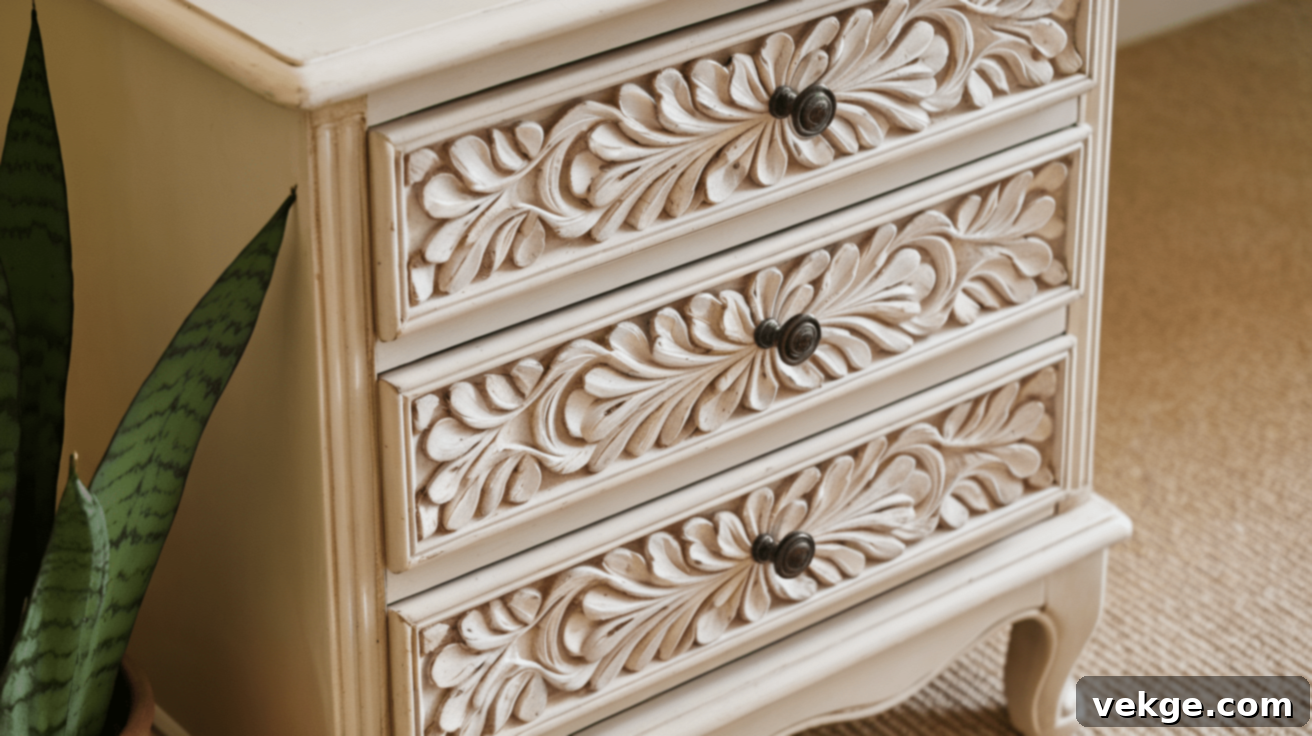
To achieve a soft, classic, and timeless look, I chose an antique white finish for my nightstand. This subtle, warm shade added an understated elegance, blending seamlessly with my vintage-inspired bedroom decor and creating a serene, cohesive atmosphere.
Steps to follow:
- Prepare the nightstand by sanding away any previous finish to create a smooth surface. Clean off all dust and residue thoroughly.
- Apply a coat of antique white chalk paint or a similar muted white paint. Chalk paint is often preferred for its matte finish and ease of light distressing.
- Allow the first coat to dry, then add a second layer for full, even coverage and a rich color.
- For a subtle weathered or aged look, lightly distress the edges and corners with fine-grit sandpaper after the paint has dried, revealing hints of the original wood or a darker base.
- Seal the nightstand with clear wax or a matte protective topcoat. Buff the wax to a soft sheen for that authentic, timeless charm and added durability.
12. Tropical-Inspired Painted Nightstand: Vibrant Getaway

In the mood for a vibrant, fresh update, I painted my nightstand with a lively tropical-inspired color palette. The combination of bright teal and coral instantly transformed it into a cheerful piece, bringing a slice of paradise right into my bedroom and adding an exotic touch.
Steps to follow:
- Sand and clean the nightstand thoroughly to ensure proper paint adhesion. Apply a primer suitable for bright colors to ensure true color vibrancy and prevent the old finish from showing through.
- Divide the nightstand into sections for your chosen tropical colors. I used bright coral for the top half and a rich teal for the bottom. Use painter’s tape for clean lines if desired.
- Apply the first coats of your chosen colors, allowing each to dry completely before adding a second layer for maximum vibrancy and opacity.
- Once all paint is dry, carefully remove any painter’s tape. Add a protective clear coat (satin or gloss) to seal the paint and enhance the lively colors, providing a durable finish.
13. Shabby Chic Painted Nightstand: Romantic and Cozy
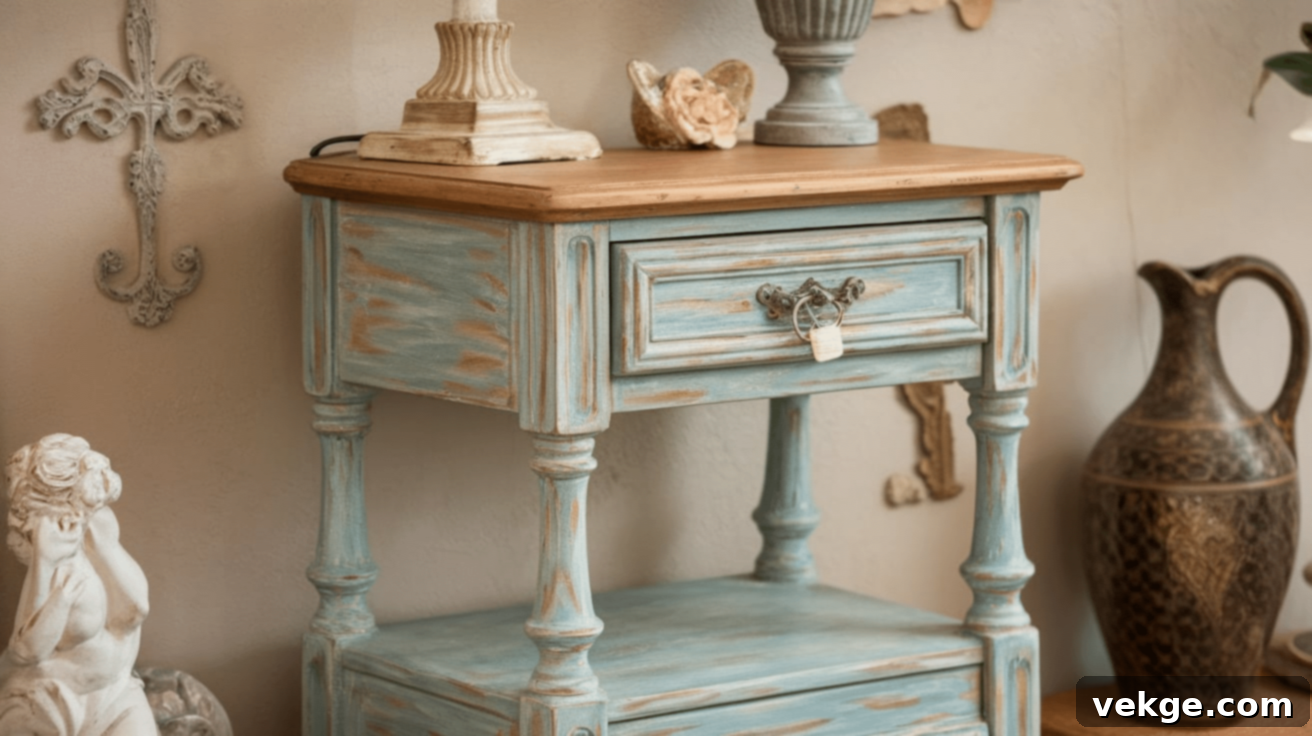
To imbue my room with a cozy, romantic, and vintage atmosphere, I crafted a shabby chic nightstand. Its beautifully weathered, soft pastel finish created a lived-in, charming feel that perfectly harmonized with my existing decor, evoking a sense of nostalgic comfort.
Steps to follow:
- Prepare the nightstand by lightly sanding to remove old finishes and create a smooth base. Clean it meticulously to ensure a clean surface.
- Apply a base coat in a soft pastel color (e.g., light pink, mint green, or baby blue) and let it dry completely.
- Once dry, apply a layer of white or off-white paint over the pastel base. Allow this top coat to dry completely for several hours.
- To achieve the distressed shabby chic look, use fine-grit sandpaper to gently sand the edges, corners, and areas that would naturally show wear, revealing the pastel base coat beneath.
- Dust off the piece. Seal with clear wax, buffing to a soft, matte finish that protects and enhances the distressed look.
14. Chalkboard Painted Nightstand: Functional and Fun
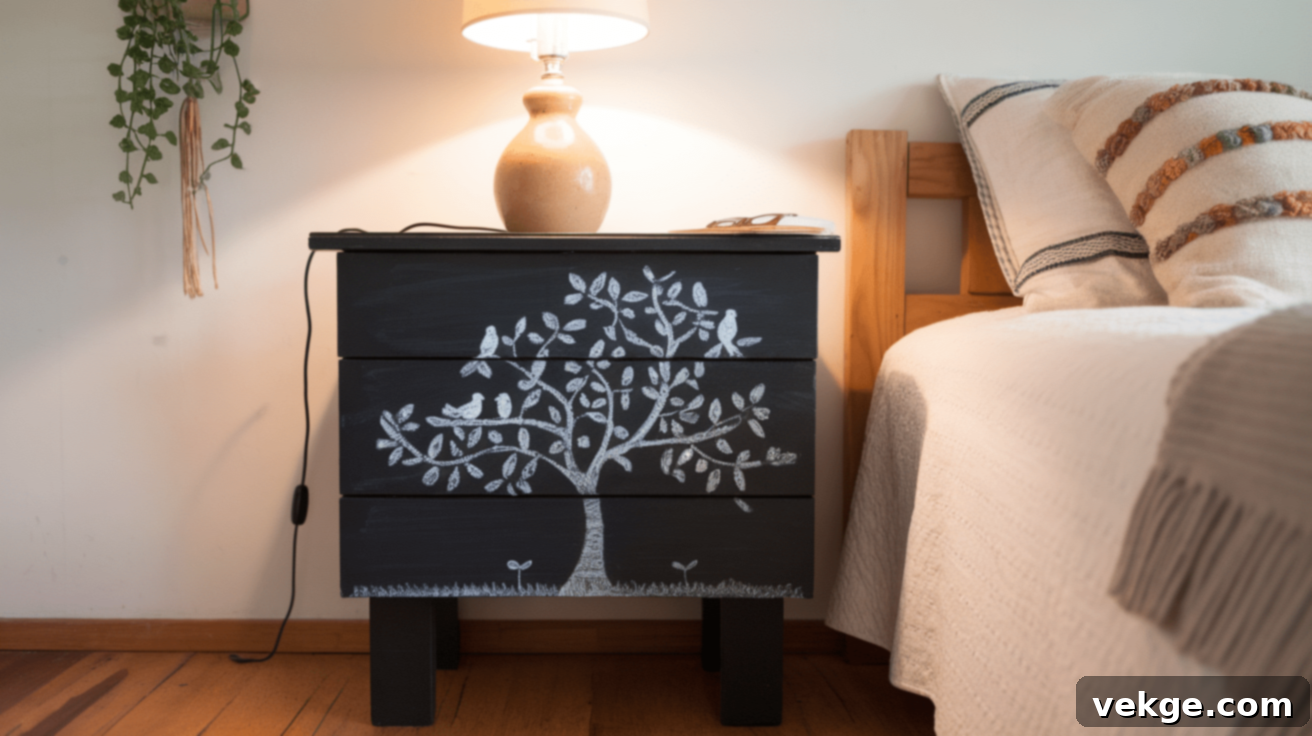
Desiring a piece that was both functional and stylish, I painted my nightstand with chalkboard paint. Now, it serves as a fun, interactive element where I can jot down quick notes, reminders, or inspirational quotes, adding a unique, personalized touch to the room and a creative outlet.
Steps to follow:
- Sand the nightstand thoroughly to ensure a perfectly smooth and clean surface for the chalkboard paint. Wipe away all dust.
- Apply a coat of chalkboard paint to the entire surface or specific sections you want to be writable. Ensure even coverage and avoid drips.
- Let the first coat dry completely, then apply a second coat for a durable and opaque finish that will stand up to repeated writing and erasing.
- Allow the chalkboard paint to cure for at least 24-72 hours (always check paint manufacturer’s instructions for specific curing times).
- To condition the surface, rub the side of a piece of chalk over the entire painted area, then wipe it clean with a dry cloth. Your nightstand is now ready for messages!
15. Whitewash Painted Nightstand: Serene Coastal Vibe
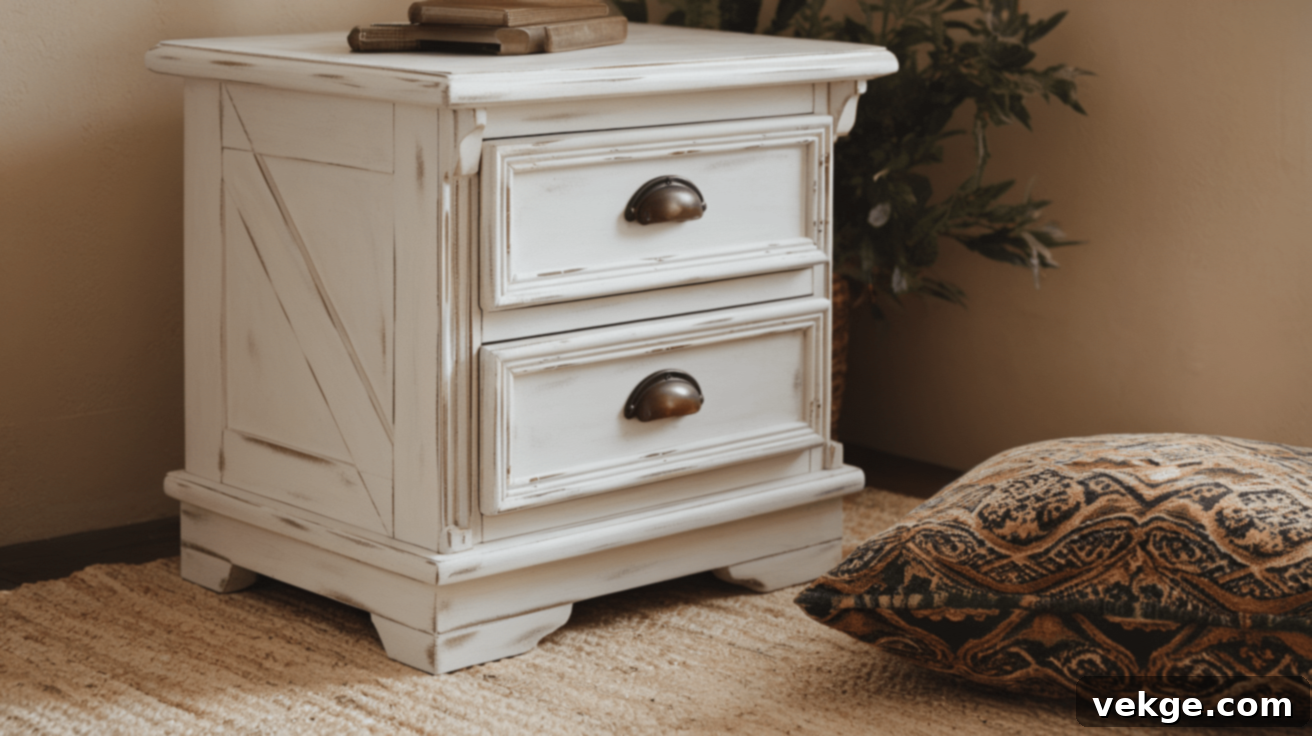
For a rustic, airy, and beach-inspired feel in my bedroom, I opted for a whitewashed look on my nightstand. The subtle, translucent finish allowed the wood grain to show through, creating a serene and relaxed vibe that perfectly complements coastal or farmhouse decor, brightening the space.
Steps to follow:
- Prepare the nightstand by sanding it to create an absorbent surface, which helps the whitewash penetrate slightly. Clean it meticulously.
- Mix white paint with water (or a dedicated whitewash medium) according to desired translucency (typically 1 part paint to 1-2 parts water). Test on an inconspicuous area first.
- Apply a thin layer of the whitewash mixture to a section of the nightstand. Immediately wipe it off with a clean, lint-free cloth, working in the direction of the wood grain, to leave behind a soft, translucent white film.
- Repeat this process across the entire nightstand, building up the whitewashed effect gradually until you achieve your desired look, ensuring the natural wood grain remains visible for that authentic rustic appeal.
- Once completely dry, seal the finish with a clear matte varnish or wax to protect the whitewash while maintaining its natural, soft appearance.
Common Mistakes to Avoid When Painting Nightstands
Through my many nightstand projects, I’ve learned valuable lessons, often the hard way. Avoiding these common pitfalls will save you significant time, effort, and frustration, ensuring you achieve a professional-looking, durable finish that lasts.
Skipping Essential Surface Preparation (Sanding and Cleaning)
My first major blunder was getting too eager and skipping proper sanding on my very first nightstand. I thought, “How bad could it be?” The answer was: pretty bad. The paint bubbled, lifted, and started peeling within two weeks. I had to strip everything off and begin again from scratch. Now, I always start with 150-grit sandpaper to rough up the surface and create a good “tooth” for the paint to adhere to, followed by 220-grit for a truly smooth finish. This extra 20-30 minutes of preparation often saves hours of corrective work later. The only exception is when using chalk paint, where a light scuff-sanding is still highly beneficial for optimal adhesion.
Using the Wrong Type of Paint for Furniture
I once made the mistake of using leftover wall paint on a nightstand, believing “paint is paint.” It was a significant error. The surface remained tacky for weeks, and anything placed on it would stick or leave an impression. Furniture, especially frequently used items like nightstands, requires paint specifically formulated for wood and heavy wear. These paints are designed to cure into a hard, durable finish. When I eventually repainted it, choosing a dedicated furniture paint made an undeniable difference. The new paint cured properly, creating a hard, non-tacky surface that easily handled my phone, glasses, and water bottle without any issues.
Rushing the Drying and Curing Time
This mistake cost me the most in terms of time and frustration. I eagerly placed my lamp and books back on the nightstand just four hours after the final coat, simply because the surface felt dry to the touch. The next morning, I discovered permanent ring marks where the lamp sat and unsightly dents from my books. Now, my steadfast routine is to wait a full 24 hours between coats and allow the final coat a minimum of 72 hours (or even longer for some paint types and high humidity, always check manufacturer’s instructions) to fully cure before placing any items on it. Patience truly is a virtue here; my latest nightstands have remained flawless for months.
Applying Thick, Uneven Coats of Paint
Another common mistake I encountered was applying paint too thickly in an attempt to achieve quick coverage. This often leads to unsightly drips, uneven textures, and significantly prolonged drying times, which can result in a sticky finish, cracking, or premature peeling down the line. It’s always better to apply multiple thin, even coats rather than one thick, heavy layer. Thin coats dry faster, adhere better, and create a much smoother, more professional-looking finish with fewer brush marks and a greater depth of color.
Neglecting a Protective Topcoat (Sealer or Varnish)
While some paints, like certain enamels, are self-sealing, most painted furniture, especially nightstands that endure daily use, greatly benefit from a protective topcoat. I initially skipped this step on a few pieces, only to find the paint scratching, scuffing, or chipping prematurely. Whether it’s a clear wax for chalk paint, or a polycrylic or polyurethane varnish for acrylic and latex paints, a good topcoat acts as a crucial shield against spills, scratches, and general wear and tear, significantly extending the life and maintaining the beauty of your painted nightstand.
I’ve made plenty of other smaller mistakes, too, but these five were the most impactful. To further aid in the process, I now often use a small fan to ensure good air circulation, which helps with drying times, and I always check the weather forecast – high humidity can drastically mess up the drying and curing process. Trust me, a little extra attention to these details, learned through trial and error, will go a long way in achieving a beautiful, lasting finish you’ll be proud of.
Conclusion: Your Transformed Nightstand Awaits
Painting nightstands has become one of my favorite DIY projects, with each one offering new learning experiences and creative opportunities. The journey from selecting the perfect paint – be it chalk paint for vintage charm, acrylic for robust durability, spray paint for a sleek modern look, or versatile latex for general use – to seeing the final, stunning result is incredibly rewarding.
My biggest takeaways are clear: never underestimate the power of thorough preparation and the critical importance of allowing each coat to dry and cure completely. Every time I’ve tried to rush the process, I’ve regretted it, often having to redo parts of the project. Conversely, when I’ve meticulously followed the proper steps and exercised patience, my painted nightstands have consistently transformed into cherished pieces that I’m genuinely proud to display in my home.
Remember, you don’t need a workshop full of expensive tools or professional-grade materials to achieve fantastic results. A solid sanding job, the right type of paint for your vision, and a generous dose of patience are your most valuable allies. Start with one nightstand, embrace the process, and learn along the way. The immense satisfaction of seeing your beautifully finished piece perfectly integrated into your bedroom, reflecting your personal style, will undoubtedly make all your efforts worthwhile. Happy painting!
Frequently Asked Questions About Painting Nightstands
How Long Does It Take for Paint to Fully Dry on a Nightstand?
Based on my extensive experience, paint on a nightstand typically needs about 24-72 hours to fully dry and cure to a hard, durable finish. This timeframe can vary significantly depending on the specific paint type (e.g., oil-based paints take longer than water-based ones), local humidity levels, and the amount of air circulation in your workspace. I personally recommend waiting a full 24 hours between coats and allowing the final coat at least 3 full days to cure before placing any heavy items or decorative pieces on top to prevent marking or damage.
What Kind of Prep Work Is Essential Before Painting a Nightstand?
From my projects, thorough preparation is paramount to achieving a lasting finish. Essential prep work includes: 1) Cleaning the entire surface with a mild soap and water solution to remove dirt, grease, and grime, then rinsing and drying completely. 2) Sanding the surface, starting with 150-grit sandpaper to create a good “tooth” for the paint to adhere to, followed by 220-grit for a super smooth finish. 3) Wiping off all sanding dust meticulously with a tack cloth or damp rag. 4) Applying a suitable primer, unless you are using a self-priming paint like some chalk paints, which often don’t require it. I typically allocate about an hour or more for prep work for each nightstand, as it truly makes all the difference in the final outcome.
Can I Paint Over a Previously Painted Nightstand?
Absolutely, you can paint over a previously painted nightstand, and I’ve done so successfully many times. The crucial steps are to ensure the existing paint is stable and to prepare the surface properly. First, lightly sand the old paint to degloss it and create a smooth, slightly abraded surface for the new paint to adhere to. Clean off all dust. If the old paint is chipping, peeling, or in poor condition, you will need to strip it off entirely before repainting – attempting to paint over a compromised base is a lesson I learned the hard way after a project failed prematurely.
What’s the Best Way to Prevent Brush Marks When Painting?
Preventing brush marks is achievable with a few simple techniques. In my projects, I’ve found that using a high-quality synthetic brush designed for smooth finishes, thinning the paint slightly with a paint conditioner (if recommended by the manufacturer and applicable to the paint type), and applying thin, even coats in one consistent direction are most effective. For flat surfaces, a good-quality foam roller or a short-nap microfibre roller can provide an exceptionally smooth, nearly streak-free finish. Always avoid overworking the paint once it starts to set, as this can create more marks.
Do I Need to Seal the Paint After I’m Done?
From my experience, sealing the paint after you’re done is almost always a good idea, especially for high-use furniture like nightstands. Chalk paint, in particular, requires a wax or clear topcoat for both protection and durability, as it is naturally porous. For acrylic and latex paints, I strongly recommend applying a clear water-based sealer (like polycrylic or polyurethane, depending on the desired finish) if the nightstand will experience heavy daily use. My sealed nightstands have consistently shown much greater resistance to scratches, scuffs, and spills compared to unsealed ones, significantly extending their lifespan and maintaining their beauty.
