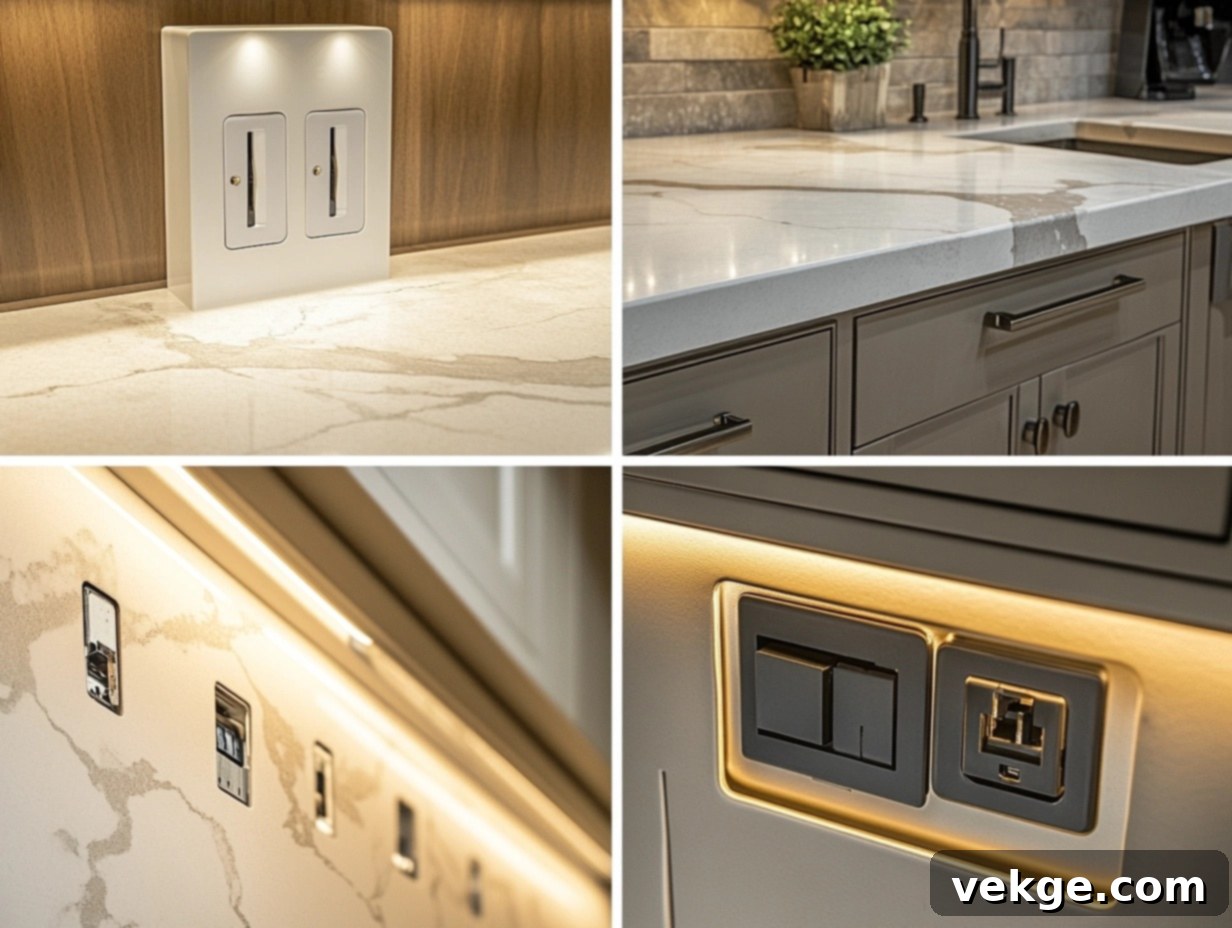
Revolutionize Your Kitchen: The Ultimate Guide to Innovative Hidden Outlet Solutions
In the world of kitchen design, functionality and aesthetics often present a challenge, demanding a delicate balance. However, after designing hundreds of kitchens over my career, I’ve consistently learned that thoughtful and strategic outlet placement is the ultimate key to seamlessly marrying both. Unsightly cords and bulky wall plates can easily detract from even the most beautifully crafted kitchen, marring its overall appeal and creating visual clutter.
This comprehensive guide is born from my extensive experience, aiming to transform your perception of necessary power access into integrated design elements that genuinely enhance, rather than hinder, your kitchen’s overall appeal and efficiency. Join me as I share proven, innovative power solutions that have delighted countless clients and become standard features in modern kitchen renovations. From discreet pop-up units that vanish into your countertops to cleverly integrated drawer charging stations, we’ll explore how to create an uncluttered, high-functioning culinary space without compromising an ounce of style.
Innovative Hidden Kitchen Outlet Ideas for a Seamless Look and Enhanced Functionality
1. Pop-Up Outlet Innovation: Modern Countertop Convenience Elevated
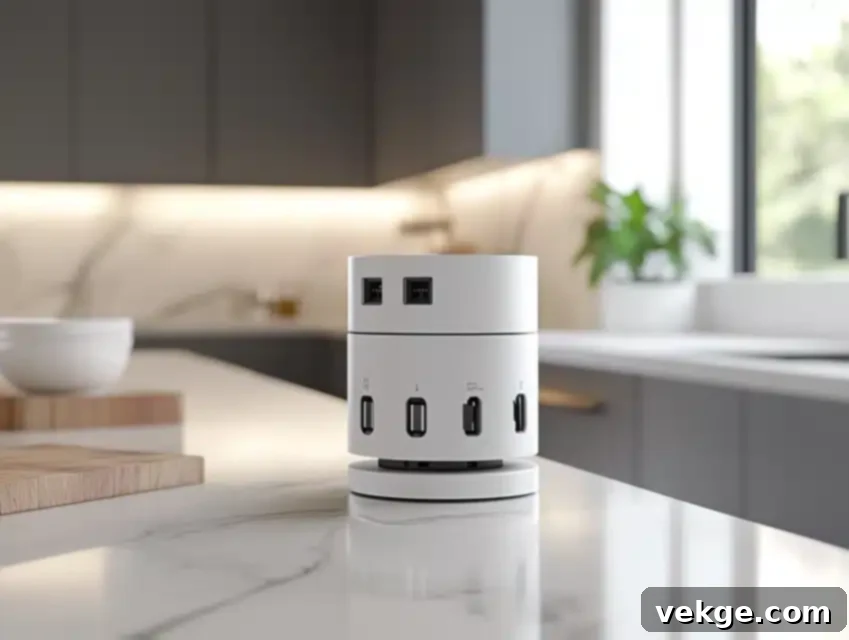
My very first installation of a pop-up outlet marked a significant turning point in how I approached kitchen power solutions. These ingenious units are designed to rise smoothly from your countertop when power is needed and retract completely, disappearing flush into the surface for an incredibly clean, unobstructed look. They are an ideal solution for kitchen islands, peninsulas, or any area where traditional wall access is limited or undesirable, offering unparalleled convenience without visual intrusion.
Each sleek tower typically contains multiple standard electrical outlets alongside essential USB-A and USB-C ports, catering perfectly to modern charging needs for phones, tablets, and small countertop appliances. Furthermore, robust waterproof seals are meticulously engineered to protect the intricate internal mechanism from accidental spills and the rigors of everyday cleaning, ensuring both long-term durability and paramount electrical safety. This innovative and highly functional feature has quickly become one of the most requested elements in my kitchen renovation projects, highly valued for its blend of discreet aesthetics and robust, user-friendly functionality.
Installation Steps for Pop-Up Outlets:
- **Precise Countertop Cutout:** Carefully cut precise holes in the countertop material using a manufacturer-provided template. This step is absolutely crucial for achieving a snug, professional fit and to prevent future issues such as moisture intrusion or instability.
- **Waterproof Housing Installation:** Install the dedicated waterproof housing unit securely beneath the counter surface, ensuring it is perfectly level and thoroughly sealed to protect the internal electrical components from any ingress.
- **Dedicated Circuit Connection:** Connect the unit to a dedicated electrical circuit with the appropriate amperage rating. This is vital to ensure sufficient power for multiple devices without overloading the circuit and to comply with all electrical safety standards.
- **Thorough Mechanism Testing:** Before proceeding with any final sealing or finishing, test the pop-up mechanism and all integrated outlets thoroughly. Verify smooth operation, reliable retraction, and proper electrical function of each port.
- **Drainage Channel Creation (Optional but Recommended):** Where applicable, design and create proper drainage channels or methods for any potential liquid spills, directing moisture safely away from the electrical components.
- **Silicone Gasket Application:** Apply a durable, high-quality silicone gasket around the perimeter of the installed unit at the countertop level. This provides an additional, crucial layer of water protection against splashes and cleaning.
- **Safety Shutoff Integration:** Consider installing additional safety shutoff mechanisms, such as a GFCI (Ground Fault Circuit Interrupter) on the dedicated circuit, to further enhance electrical safety, particularly in a potentially wet kitchen environment.
2. Under-Cabinet Power Solutions: Invisible Backsplash Power and Task Lighting
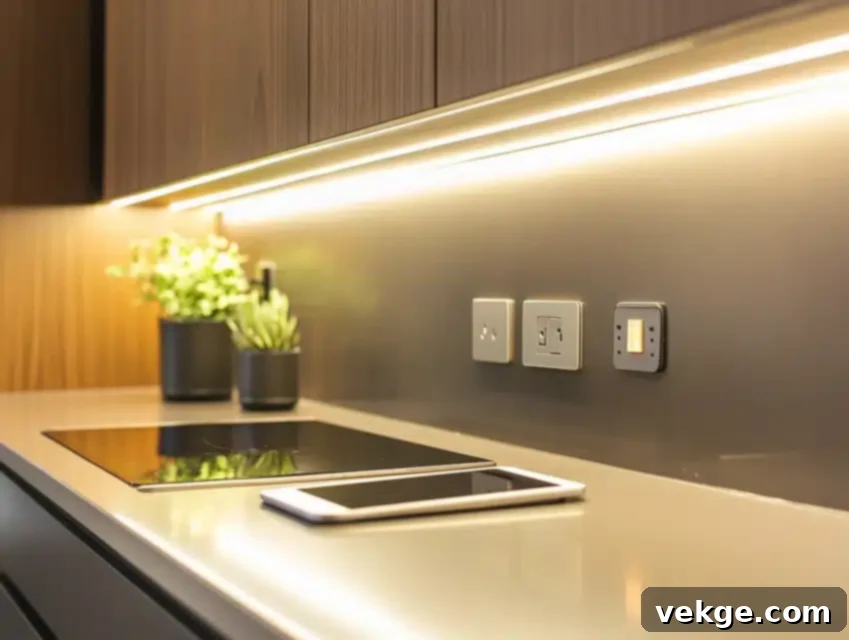
A common client frustration I frequently encounter is the visual clutter created by traditional outlets haphazardly placed on a beautifully tiled backsplash. By strategically relocating outlets discreetly underneath the upper cabinets, I’ve successfully transformed countless clients’ kitchen backsplashes into clean, uninterrupted, and visually appealing design statements. These slim-profile power strips are far more than just concealed outlets; they often provide a greater number of receptacles than traditional wall placements, offering superior convenience and accessibility for various kitchen gadgets.
Many modern under-cabinet solutions also integrate seamlessly with energy-efficient LED lighting, providing excellent, shadow-free task lighting for meal preparation while simultaneously concealing the power access points. Specialized covers are frequently designed to protect these outlets from the inevitable kitchen moisture, steam, and grease, ensuring their longevity, safety, and hygiene. This sophisticated and highly functional solution has become a standard inclusion in all my high-end kitchen designs, offering a sleek, practical, and aesthetically pleasing power delivery system that truly elevates the kitchen experience.
Installation Steps for Under-Cabinet Power:
- **Strategic Power Strip Placement:** Carefully plan the precise placement of the power strip to ensure maximum accessibility for frequently used appliances. This requires considering both optimal reach and discreet visual concealment.
- **Junction Box Installation:** Install proper electrical junction boxes securely behind the cabinet backing. This is an essential step for safe and compliant wiring connections, adhering strictly to all local electrical codes.
- **Dedicated Circuits for Appliance Loads:** Create dedicated electrical circuits specifically for high-load appliances (e.g., coffee makers, blenders, toasters) to prevent circuit overloads and ensure optimal, consistent performance.
- **Moisture-Resistant Outlet Covers:** Install moisture-resistant outlet covers with meticulous care and precision. These specialized covers provide crucial protection against splashes, steam, and grease, which are ever-present in a kitchen environment.
- **Integrated USB Port Inclusion:** Include modern USB charging ports within the power strip design. This accommodates the growing need for conveniently charging mobile devices directly from the kitchen counter without using bulky adapters.
- **Seamless LED Strip Lighting Installation:** Install integrated LED strip lighting alongside the outlets, ensuring it complements the overall aesthetic and provides effective, glare-free task lighting for the entire workspace below.
- **Pre-Mounting Connection Test:** Conduct a thorough test of all electrical connections and the full functionality of both the outlets and the integrated lighting before the final mounting and securing of the power strip to the cabinet underside.
3. Drawer Power Integration: The Ultimate Hidden Charging Station
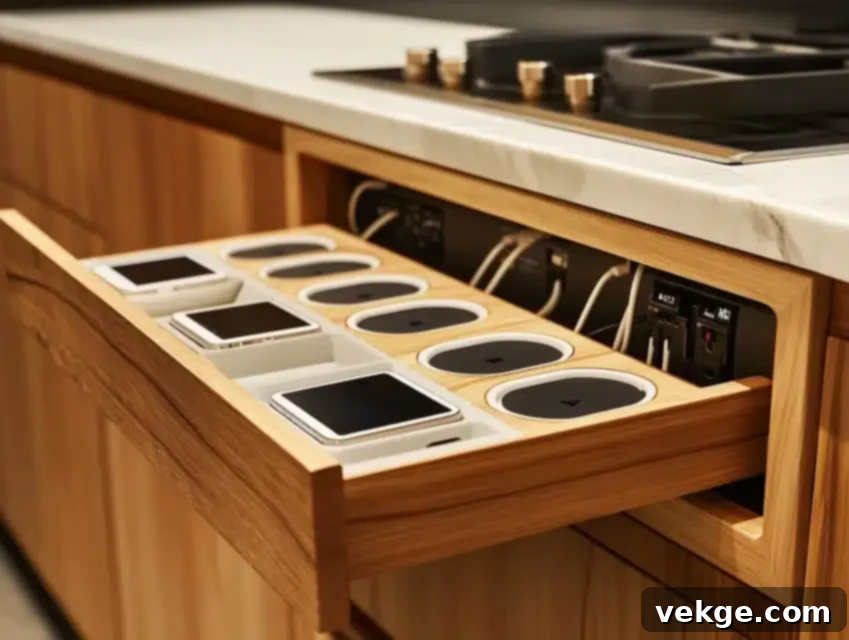
One of my most innovative and client-beloved solutions stemmed directly from a client’s specific need for a dedicated, impeccably organized charging station that would keep electronic clutter completely out of sight. The concept was simple yet brilliant: integrate power directly into a kitchen drawer. Each custom-designed drawer now contains multiple outlets, often complemented by clever cord management systems that keep cables neatly tucked away and untangled, eliminating visual mess.
Crucially, built-in surge protection safeguards expensive devices from unexpected electrical spikes or fluctuations during charging, providing invaluable peace of mind. This ingenious drawer design allows for effortless access to power when needed, while completely concealing phones, tablets, and their associated charging cables when not in use. This solution has rapidly become an essential feature in modern kitchen organizations, providing both unparalleled convenience and an exceptional level of tidiness, making it a favorite for homeowners seeking a truly organized and aesthetically pleasing space.
Installation Steps for Drawer Power:
- **Flexible Power Cable Installation:** Install flexible, high-quality power cables specifically designed to withstand the repeated motion of drawer opening and closing. This ensures long-term durability, prevents wear, and guarantees safety.
- **Adequate Ventilation Creation:** Design and create proper ventilation solutions within the drawer and the surrounding cabinet structure. This is critical to prevent heat buildup, especially when multiple devices are charging simultaneously.
- **Integrated Cord Management Systems:** Incorporate effective cord management systems inside the drawer itself. This includes using clips, tie-downs, or internal channels to keep cables organized, prevent tangles, and facilitate easy access.
- **Surge Protection Device Installation:** Install reliable surge protection devices directly into the electrical system of the drawer outlets. This provides crucial and robust safety for all connected electronic devices against power surges.
- **Safety Shutoff Mechanism Integration:** Implement appropriate safety shutoff mechanisms, such as a micro-switch that automatically cuts power to the outlets when the drawer is closed. This adds an essential extra layer of protection.
- **Thorough Drawer Operation Testing:** Conduct comprehensive testing of the drawer’s movement under various conditions, ensuring the cables move freely without snagging, pinching, or damage throughout its full range of motion.
- **Warning Labels and Instructions:** Affix proper warning labels and clear usage instructions prominently inside the drawer. This informs users about safe operation, ventilation requirements, and recommended weight limits for the drawer.
4. Pull-Out Appliance Station: Effortless Appliance Access and Storage
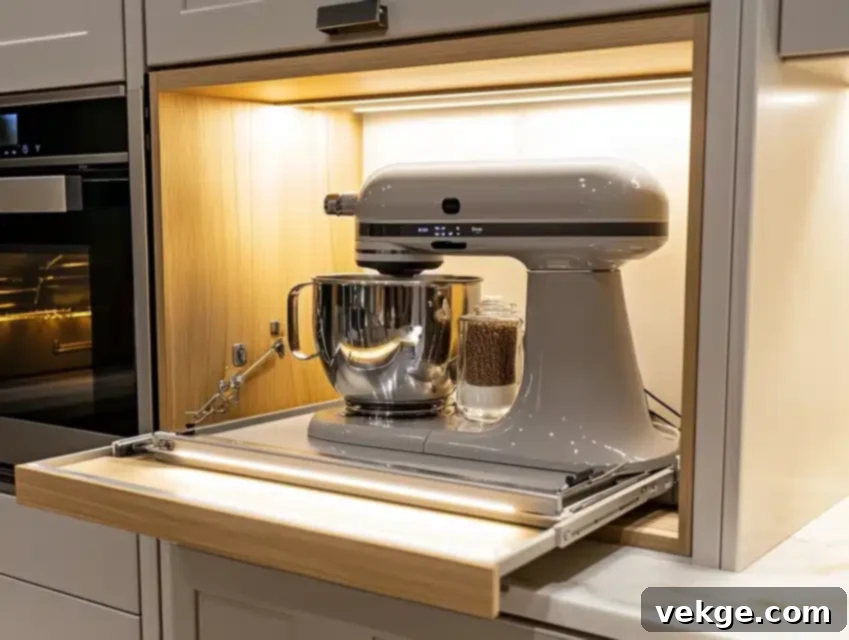
This innovative design has truly revolutionized how many of my clients interact with their small kitchen appliances, transforming daily routines. Instead of the cumbersome task of constantly lifting heavy mixers, blenders, or food processors from cabinets to countertops, this solution offers a dedicated, heavy-duty shelf that smoothly slides out when needed. Crucially, appliances can remain permanently plugged in within the station, eliminating the repetitive need to connect and disconnect every time they’re used.
Built-in outlets strategically placed within the station completely eliminate unsightly counter clutter, as all cords are managed internally and hidden from view. Special ventilation systems are also meticulously incorporated to prevent any heat buildup, allowing appliances to operate safely and effectively even within an enclosed space. These pull-out stations are exceptionally effective at keeping kitchens impeccably organized, maintaining a pristine aesthetic while simultaneously enhancing daily functionality. They are a true game-changer for efficient and ergonomic appliance management.
Installation Steps for Pull-Out Appliance Stations:
- **Heavy-Duty Sliding Mechanism:** Install a robust, heavy-duty sliding mechanism that is specifically rated to support the weight of multiple heavy appliances. This ensures smooth, reliable, and safe operation for many years.
- **Dedicated Appliance Circuit:** Create a dedicated electrical circuit specifically for the appliance station. This is vital to handle the combined power requirements of multiple high-wattage appliances and prevent dangerous overloads.
- **Advanced Ventilation System Integration:** Implement a well-designed ventilation system for efficient heat management. This may involve strategic vents, grilles, or even a small, quiet exhaust fan to dissipate heat generated during appliance operation.
- **Multiple Outlet Installation:** Install multiple, appropriately spaced outlets within the station to comfortably accommodate various appliances, ensuring they are easily accessible and convenient when the shelf is extended.
- **Efficient Cord Management System:** Design and integrate a proper cord management system. This helps to prevent tangles, ensures that appliance cords move freely without obstruction, and keeps the area tidy as the shelf slides.
- **Comprehensive Weight Capacity Testing:** Thoroughly test the weight capacity of the fully loaded shelf with all anticipated appliances. This confirms structural integrity, smooth operation, and long-term durability before final project sign-off.
- **Safety Stops and Locks:** Install essential safety stops to prevent the shelf from being pulled out too far or detaching, and consider adding secure locks or latches to keep it firmly in place when fully retracted or extended.
5. Recessed Backsplash Integration: Seamless Wall Design Achieved
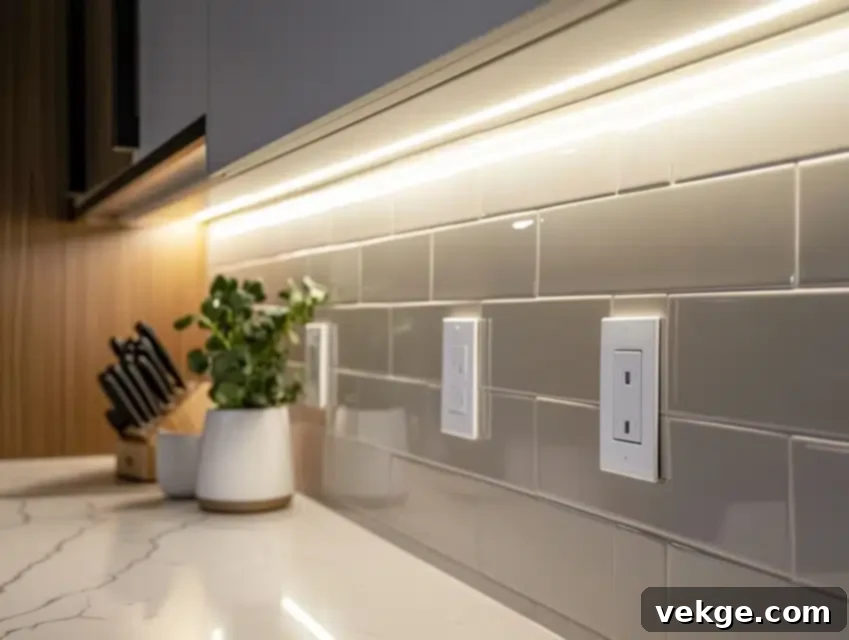
This minimalist design concept was directly inspired by a client’s strong desire for completely seamless kitchen walls, free from any visible interruptions or protrusions. The innovative solution involves recessing each outlet so that it sits perfectly flush with the surrounding tile, stone, or backsplash surface. This meticulous integration creates an almost invisible aesthetic, elevating the overall sophistication and sleekness of the kitchen.
Achieving this refined look requires specialized shallow mounting boxes that allow for proper, code-compliant electrical connections while maintaining a minimal depth behind the delicate backsplash material. For the ultimate discretion, custom covers are often crafted to precisely match the exact tile patterns, grout lines, or material finish, making the outlets virtually disappear into their environment. These recessed installations have profoundly transformed how I approach backsplash design, definitively proving that essential functionality can be achieved without compromising a pristine, minimalist visual. The result is a truly refined, high-end, and uninterrupted finish.
Installation Steps for Recessed Backsplash Outlets:
- **Precise Template Creation:** Create an extremely precise template for each outlet placement on the backsplash material. Accuracy is paramount for ensuring the outlet sits perfectly flush and blends seamlessly.
- **Shallow Electrical Box Installation:** Install specialized shallow electrical boxes with great care and precision. These boxes are specifically designed to fit within the minimal depth available behind the backsplash material.
- **Extreme Tile Cutting Precision:** Cut the backsplash tile or stone with absolute, surgical precision using appropriate tools. This step is critical to achieve a perfectly flush fit around the outlet opening, minimizing any visible gaps.
- **Exact Outlet Depth Mounting:** Mount the electrical outlets at the exact depth required. This ensures that the custom cover plates will sit perfectly flush with the finished tile surface, creating a truly seamless look.
- **Waterproof Gasket Application:** Apply robust waterproof gaskets around all outlets and within the electrical boxes. This prevents moisture from penetrating behind the backsplash and safeguards the electrical components.
- **Pre-Installation Test Fit:** Conduct a thorough test fit of the outlet and its custom cover plate before the final installation. This allows for any necessary, subtle adjustments to be made for a flawless finish.
- **Edge Sealing with Proper Materials:** Seal all edges around the recessed outlets with high-quality, color-matched caulk or grout. This ensures both comprehensive water protection and a visually integrated appearance.
6. Sliding Panel Concealment: Dynamic Hidden Power Access for Minimalist Design
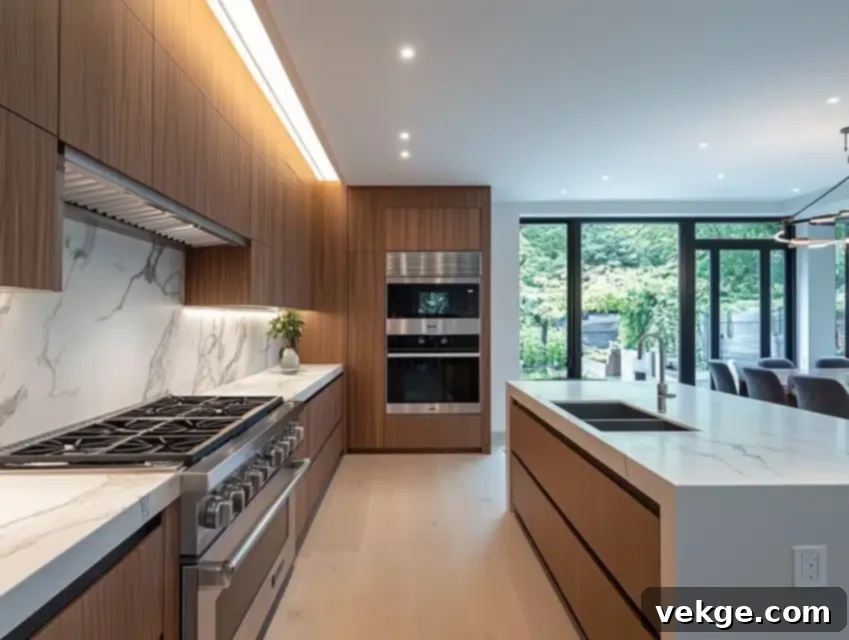
Inspired by a challenging modern minimalist kitchen renovation, this clever and dynamic solution offers power access that can be completely hidden when not in use. Outlets are strategically installed behind custom-designed panels that slide smoothly and effortlessly, revealing the power access only when needed. This sophisticated approach is perfect for maintaining an ultra-clean, uninterrupted aesthetic in contemporary kitchen designs, where every element contributes to a cohesive visual.
The sliding mechanism is meticulously integrated with the surrounding cabinet or wall design, making it almost imperceptible when closed. Custom panels are expertly crafted to precisely match the adjacent materials – be it wood veneer, laminate, or painted surfaces – ensuring a truly seamless and harmonious look. This innovative solution provides the perfect balance of immediate power access and sophisticated concealment, offering both high functionality and unparalleled visual appeal for those who prioritize an impeccably clutter-free environment.
Installation Steps for Sliding Panel Concealment:
- **Sliding Track System Design & Installation:** Design and install a high-quality, precision sliding track system that ensures smooth, quiet, and effortless operation of the concealing panels, preventing any sticking or binding.
- **Proper Outlet Depth Consideration:** Install electrical outlets with careful consideration for their depth. This is essential to ensure the sliding panels can move freely and smoothly without obstruction, both when open and closed.
- **Custom Panel Creation:** Create custom panels that precisely match the existing cabinet materials, finishes, textures, and grain patterns for a flawless and truly integrated aesthetic that blends seamlessly.
- **Soft-Close Mechanism Addition:** Incorporate advanced soft-close mechanisms into the sliding system. This prevents panels from slamming shut, ensuring quiet operation, extending the lifespan of the components, and enhancing user experience.
- **Safety Stops Installation:** Install effective and secure safety stops to precisely control the range of panel movement, preventing them from sliding too far or becoming accidentally dislodged from their tracks.
- **Ventilation Behind Panels:** Create proper and adequate ventilation channels or discreet openings behind the panels, especially if appliances might be plugged in for extended periods, to prevent dangerous heat buildup.
- **Multiple Operation Tests:** Thoroughly test the panel operation numerous times before project completion, meticulously checking for smoothness, perfect alignment, long-term durability, and overall reliability in various usage scenarios.
7. Corner Space Utilization: Maximizing Every Inch of Your Kitchen
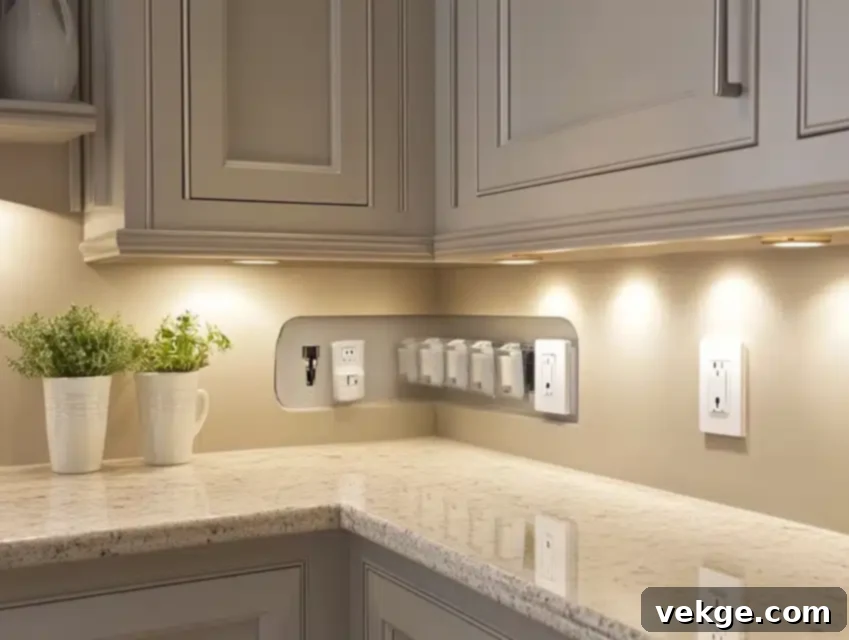
This ingenious space-saving solution came to light during my focused efforts to maximize every usable inch, particularly in smaller kitchen designs where real estate is at a premium. Often overlooked and underutilized, kitchen corner spaces can be brilliantly transformed into highly functional power hubs. By strategically installing outlets directly into these corners, power is efficiently provided in areas traditionally considered wasted space, thereby freeing up prime wall and backsplash real estate for design elements or other functional needs.
Specialized angled electrical boxes are meticulously used to facilitate proper wire management within the typically tight corner configurations, ensuring safe, code-compliant, and discreet installations. This strategic placement inherently keeps appliance cords neatly tucked away from the main work areas on the countertop, significantly enhancing both kitchen safety and workflow efficiency. This innovation has proven so remarkably effective and space-saving that it has become a standard feature in many of my compact and efficiency-focused kitchen designs, offering a smart and aesthetically pleasing way to expand crucial power access without sacrificing valuable counter space.
Installation Steps for Corner Outlets:
- **Precise Corner Angle Calculation:** Accurately calculate the precise corner angles and dimensions required for the proper fit of the outlet boxes. This ensures they integrate cleanly and seamlessly with the adjacent cabinet or wall structures.
- **Secure Corner Mounting Box Installation:** Install specialized corner mounting boxes securely. These are specifically designed to fit snugly into the corner, providing a stable, compliant, and discreet housing for the electrical components.
- **Proper Wire Pathway Creation:** Establish proper and clear wire pathways behind the cabinets. This ensures all electrical wiring is neatly routed, securely fastened, and thoroughly protected from any potential damage or pinching.
- **Protective Covers for Splashes:** Add durable protective covers specifically designed for corner outlets. These provide an essential extra layer of splash protection, which is crucial for outlets located near sinks or active prep areas.
- **Ground Fault Protection Circuits:** Install mandatory ground fault circuit interrupter (GFCI) protection on these circuits. This is a critical safety measure for any outlets situated in areas prone to moisture or water contact, as per electrical codes.
- **Accessibility Testing from Multiple Angles:** Thoroughly test the accessibility of the outlets from multiple angles and positions. Ensure that plugging in various appliances is easy, comfortable, and unobstructed by surrounding elements.
- **Clear Circuit Identification Labeling:** Create proper, clear, and durable labeling for circuit identification. This is invaluable for future maintenance, troubleshooting, and ensures electricians can easily identify the correct circuit breaker.
8. Appliance Garage Integration: Organized & Always Ready Power Hub
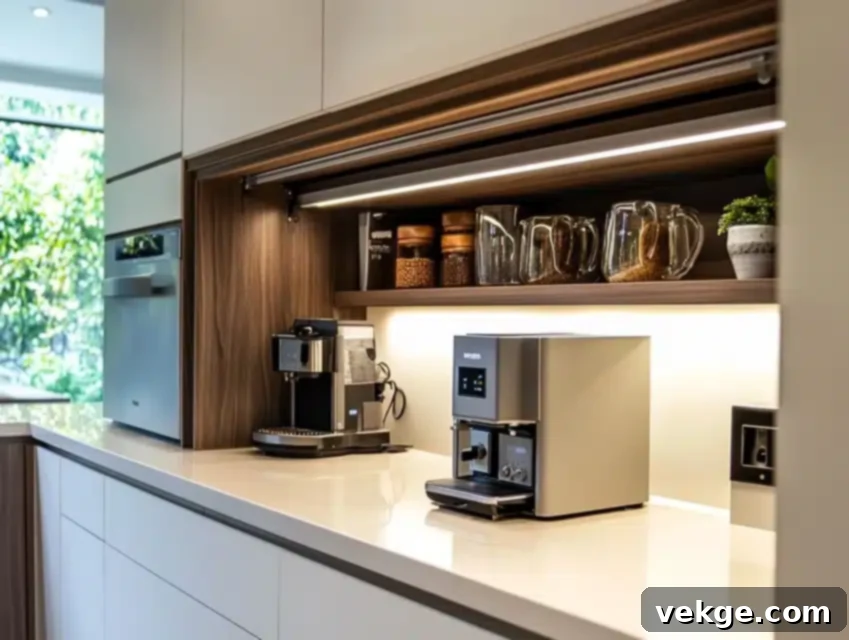
After witnessing countless cluttered countertops and the ongoing struggle with appliance storage, I developed this comprehensive solution that brilliantly combines smart storage with readily available power. The core concept arose from a client’s persistent frustration with the constant, repetitive cycle of moving heavy appliances in and out of cabinets every single time they were needed. My design offers a dedicated “appliance garage” – a cleverly concealed and custom-built space where mixers, blenders, coffee makers, and toasters can remain permanently plugged in, yet completely hidden from view when not in use.
The built-in power strips within these garages meticulously eliminate the unsightly tangle of cords that typically plague kitchen counters, contributing to a pristine aesthetic. Crucially, specialized ventilation systems are integrated to ensure that appliances can operate safely even with the garage doors closed, effectively preventing any dangerous overheating. This innovative solution has fundamentally transformed how my clients utilize their daily appliances, offering unmatched convenience, a perpetually tidy countertop, and a highly organized, aesthetically pleasing kitchen environment. It truly brings harmony to form and function.
Installation Steps for Appliance Garage Power:
- **Robust Ventilation System Design:** Design and install a robust and effective ventilation system capable of safely handling continuous appliance operation. This might involve strategic vents, grilles, or even a small, quiet exhaust fan.
- **Multiple High-Power Circuits:** Install multiple dedicated circuits, particularly for high-power appliances that draw significant current, to prevent circuit overloads and ensure all devices can run efficiently and safely.
- **Dedicated Appliance Storage Spaces:** Create specific, appropriately sized, and ergonomically designed storage spaces for each appliance. This ensures easy access, a perfect fit without obstruction, and efficient organization within the garage.
- **Automatic Lighting Integration:** Incorporate automatic, energy-efficient LED lighting that activates seamlessly when the garage door opens, brilliantly illuminating the interior for easy visibility and an enhanced user experience.
- **Specialized Door Mechanisms:** Install specialized door mechanisms (e.g., pocket doors, tambour doors, bi-fold doors) that allow for smooth, effortless opening and closing, maximizing accessibility and preserving adjacent space.
- **Heat Monitoring System Integration (Advanced):** Consider integrating a sophisticated heat monitoring system or temperature sensor, particularly for fully enclosed garages, which can alert users or even automatically shut off power if temperatures become too high.
- **Thorough Extended-Use Scenarios Testing:** Conduct comprehensive testing of the appliance garage under extended-use scenarios with various appliances. This critically verifies the effectiveness of the ventilation and the stability of the electrical circuits over prolonged periods.
9. Toe-Kick Power Access: Everyday Convenience at Your Feet
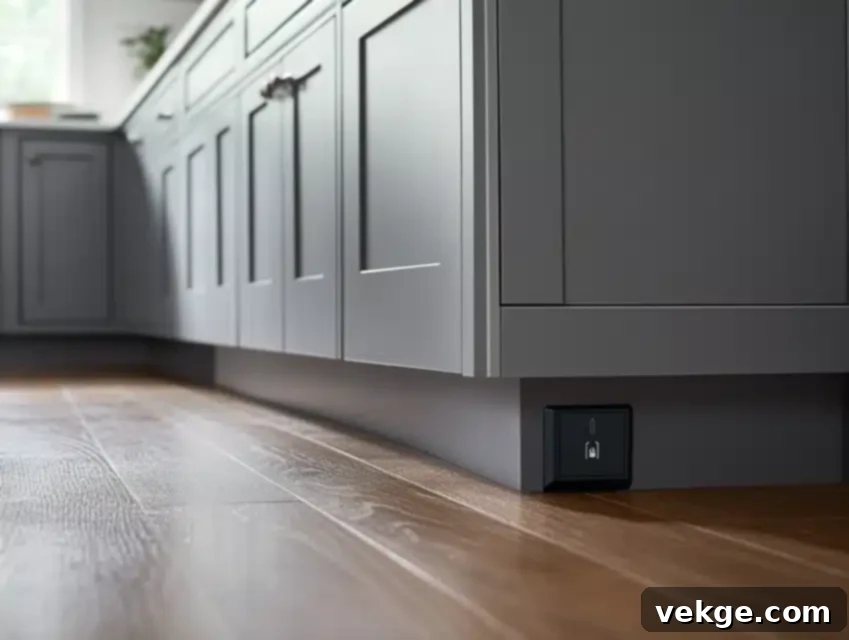
My most practical and, surprisingly, one of the most popular innovations arose directly from observing a client’s daily struggle with vacuum cleaning her kitchen. The traditional high-wall outlet placement consistently required constant bending and stretching, turning a simple, routine chore into an inconvenient and sometimes uncomfortable task. To elegantly address this ergonomic challenge, I integrated power access discreetly at floor level, expertly nestled within the toe-kick space of the base cabinets.
These specialized toe-kick outlets feature robust, water-resistant covers that provide essential protection against daily kitchen spills, splashes, and routine cleaning activities, ensuring long-term safety and durability. The sheer convenience of having an easily accessible outlet at floor level for vacuums, floor polishers, or even seasonal decorative lighting has made this an exceptionally requested and beloved feature among my clients. It’s a small, thoughtful detail that makes a surprisingly significant difference in everyday kitchen ergonomics, utility, and overall user comfort.
Installation Steps for Toe-Kick Power Access:
- **Waterproof Housing Design & Installation:** Design and install robust, waterproof housing specifically engineered for safe and compliant floor-level installation, providing critical protection against moisture, splashes, and debris.
- **Mandatory GFCI Protection:** Install ground fault circuit interrupter (GFCI) protection as a mandatory safety measure for this circuit. This is absolutely crucial for any outlets located in proximity to potential wet conditions, as per electrical codes.
- **Proper Drainage Channel Creation:** Create proper drainage channels or slightly sloped surfaces around the outlets to ensure that any spills or cleaning liquids are efficiently directed away, preventing any water ingress to the electrical components.
- **Low-Profile, Debris-Resistant Covers:** Add low-profile, highly durable covers that are specifically designed to prevent the accumulation of dust, dirt, and kitchen debris, thereby maintaining cleanliness, functionality, and aesthetics.
- **LED Power Status Indicators (Optional):** Install small, unobtrusive LED indicators that visually confirm the power status of the outlet, making it easy to quickly see if the circuit is active without needing to test it.
- **Proper Cleaning Access Points:** Design the installation to include proper and easy-to-use cleaning access points, allowing for simple, periodic removal of the covers for cleaning and maintenance without complex disassembly.
- **Thorough Water Resistance Testing:** Conduct thorough and rigorous water resistance testing before final completion, simulating spills and cleaning scenarios to ensure the complete integrity of the seals and the protection of electrical components.
10. Flip-Up Counter Integration: Disappearing Countertop Power for Pristine Surfaces
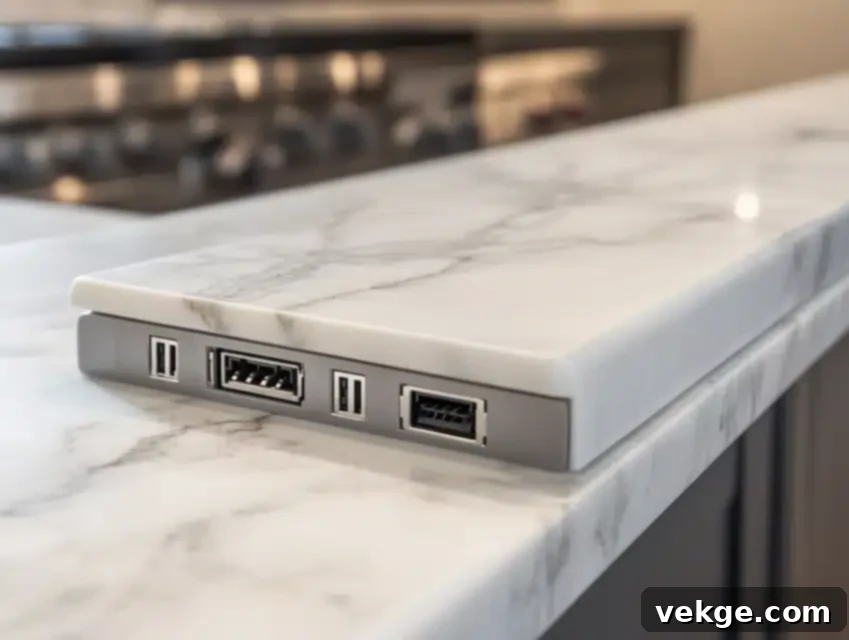
This elegant and highly sought-after power solution was developed in direct response to a client’s fervent desire for absolutely pristine and uncluttered countertops, free from any visible interruptions. I engineered a sophisticated system where power access remains completely concealed within the countertop itself, only to elegantly “flip up” and reveal itself when power is specifically needed. When not in use, it seamlessly retracts and disappears flush, meticulously preserving the smooth, continuous lines of the counter surface and maintaining a minimalist aesthetic.
The intricate mechanisms involved require meticulous engineering and precision craftsmanship to maintain the counter’s structural durability and integrity while allowing for smooth, reliable, and consistent operation. Each unit is thoughtfully designed to include both standard electrical outlets and convenient USB charging ports (USB-A and USB-C), catering to a wide range of modern devices. Furthermore, specialized, robust seals are incorporated to rigorously protect the internal electrical components from kitchen spills and splashes, ensuring both paramount safety and long-term, dependable performance in a busy kitchen environment.
Installation Steps for Flip-Up Counter Integration:
- **Precise Countertop Cutouts:** Create extremely precise measurements and execute exceptionally clean cutouts in the countertop material. This is crucial for achieving a snug fit, a professional finish, and minimizing any potential gaps.
- **Waterproof Housing Installation:** Install the dedicated waterproof housing unit completely and securely beneath the counter surface, ensuring it forms a robust and impenetrable barrier against moisture.
- **Proper Support Structure Reinforcement:** Add a proper and sturdy support structure around the edges of the countertop opening. This is vital to maintain the structural integrity and durability of the counter after cutting.
- **High-Quality Spring Mechanism:** Install high-quality, durable spring mechanisms that ensure a smooth, effortless, and consistent “flip-up” and “flip-down” operation of the power unit, preventing any sticking or abrupt movements.
- **Watertight Seal Creation:** Create watertight seals around the entire unit, both at the countertop level and where the housing meets the counter underside, providing comprehensive and reliable moisture protection.
- **Operation Testing Under Various Conditions:** Thoroughly test the unit’s operation under various usage conditions, including with light pressure applied to the counter, to ensure consistent and reliable performance over time.
- **Safety Features for Power Management:** Integrate essential safety features for power management, such as a mechanism that automatically cuts power to the outlets when the unit is in its closed, retracted position, significantly enhancing user safety.
11. Material-Matching Outlet Covers: The Art of Invisible Power Points
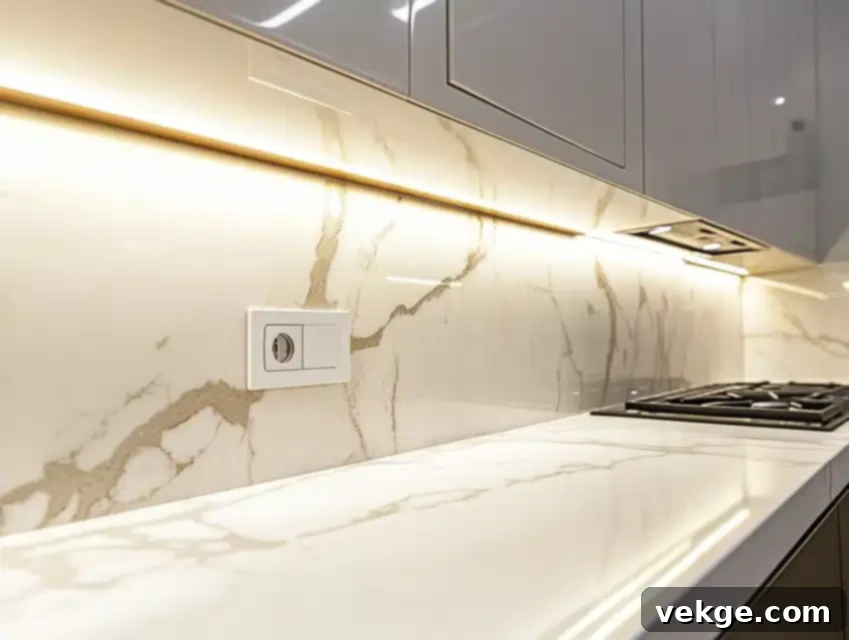
The inspiration for this nuanced design enhancement stemmed from a deeply personal frustration: how often traditional, stark white or beige outlet covers disrupted the visual harmony of an otherwise beautifully installed kitchen backsplash. Even the most exquisite marble, granite, or custom tile installations were frequently marred by these obvious, contrasting plastic plates. To overcome this pervasive aesthetic challenge, I developed advanced techniques and custom processes to match outlet covers precisely to the surrounding wall or backsplash materials.
This involves creating custom-colored, custom-textured, or even custom-fabricated covers that blend so seamlessly they become virtually invisible against the chosen surface. This meticulous attention to detail is not merely about superficial aesthetics; it profoundly elevates the entire kitchen design, transforming a necessary functional element into an integrated, almost artistic component. The result is a truly cohesive, high-end visual experience that clients consistently rave about, appreciating the thoughtful completion of their kitchen’s design narrative.
Installation Steps for Material-Matching Covers:
- **Exact Color & Texture Matching:** Create exact color and texture matches to the surrounding wall or backsplash materials. This may involve sophisticated custom paint mixing, specialized faux finish techniques, or even thin material wraps.
- **Specialized Mounting Systems:** Install specialized mounting systems that allow for precise depth adjustment and secure attachment of the custom covers, ensuring they sit perfectly flush with the surface without any gaps.
- **Proper Backing for Material Stability:** Add appropriate backing or sturdy support structures behind the decorative covers. This is particularly important for heavier or more delicate custom materials to ensure stability, flatness, and longevity.
- **Perfect Edges Around Openings:** Achieve perfectly cut and impeccably finished edges around the outlet openings on the custom cover plates. Precision in this step is absolutely key for a flawless, integrated, and professional look.
- **Moisture Protection Behind Covers:** Install robust moisture protection (e.g., a vapor barrier, specialized sealant, or gasket) behind the decorative covers, especially in areas prone to splashes, to safeguard electrical components.
- **Durability of Finish Testing:** Thoroughly test the durability of the custom finish against wear, heat, humidity, and common cleaning agents before final completion. This ensures the covers will maintain their pristine appearance over time.
- **Protective Coatings Application:** Apply specialized protective coatings (e.g., a high-quality clear coat, sealant, or UV protector) for long-term wear resistance, UV protection, and ease of cleaning, significantly extending the life of the custom finish.
12. Sliding Cover Innovation: Elegant Concealment for a Clean Aesthetic
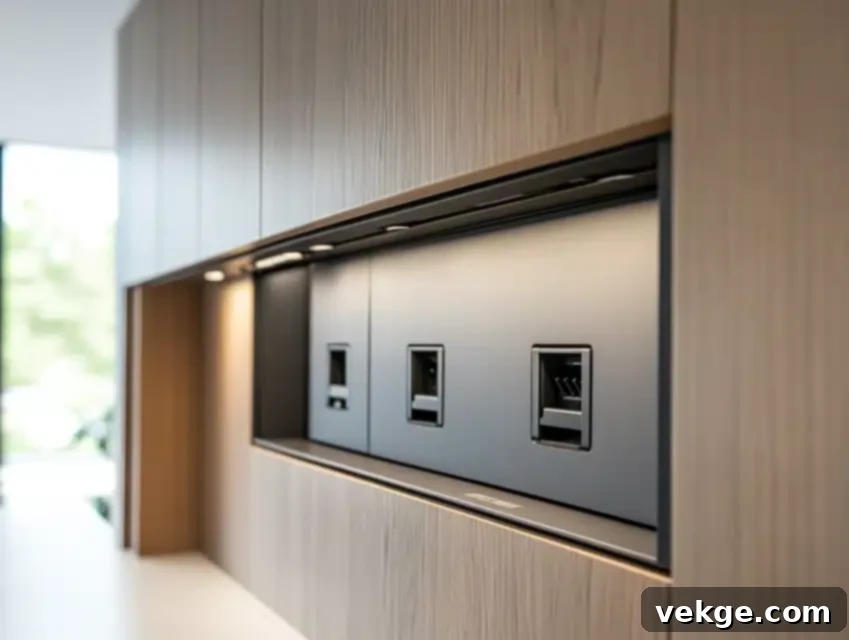
This ingenious power concealment solution was conceived during a particularly challenging modern minimalist kitchen project where every single detail needed to contribute to an overarching sleek, uninterrupted aesthetic. The concept involves integrating electrical outlets behind custom-fabricated sliding covers that completely conceal them when not in use. This provides an elegant, highly functional, and visually dynamic way to hide power points while maintaining immediate and effortless access.
Specialized tracks are carefully installed with precision engineering to ensure an ultra-smooth and silent operation of the covers, preventing any catching or binding that could detract from the seamless user experience. Critically, these custom-fabricated covers are meticulously designed to match the adjacent cabinet finishes or wall materials perfectly, creating an illusion of continuous surface and exceptional visual harmony. This design seamlessly brings both essential function and a profound sense of sophistication to kitchen walls, making it a standout feature in high-end, contemporary kitchen designs.
Installation Steps for Sliding Cover Innovation:
- **Specialized Track System Installation:** Install a high-quality, precision-engineered track system designed for smooth, silent, and effortless sliding movement, ensuring the covers operate without any resistance or friction.
- **Custom Material-Matched Covers:** Create custom covers that exactly match the surrounding cabinet or wall materials, textures, and finishes, achieving complete visual integration and a harmonious aesthetic.
- **Soft-Close Mechanism Addition:** Incorporate advanced soft-close mechanisms into the sliding system to prevent the covers from slamming shut, enhancing the user experience, protecting components, and ensuring quiet operation.
- **Proper Sliding Movement Stops:** Install precise and robust stops for the sliding movement. This ensures the covers open and close accurately to their intended positions, maintaining perfect alignment and preventing over-travel.
- **Ventilation System Behind Covers:** Create an effective and discreet ventilation system behind the covers. This is important to manage any heat, especially if appliances might be plugged in for extended periods in a concealed space.
- **Thorough Usage Scenario Testing:** Test the operation under various usage scenarios, including frequent opening and closing, to confirm long-term durability, smoothness, reliability, and consistent performance over time.
- **Electrical Protection Safety Features:** Add robust safety features for electrical protection, such as GFCI outlets or an interlock system that deactivates power when the covers are closed, significantly enhancing user safety.
13. Island Drawer Power Solutions: The Smart & Organized Kitchen Hub
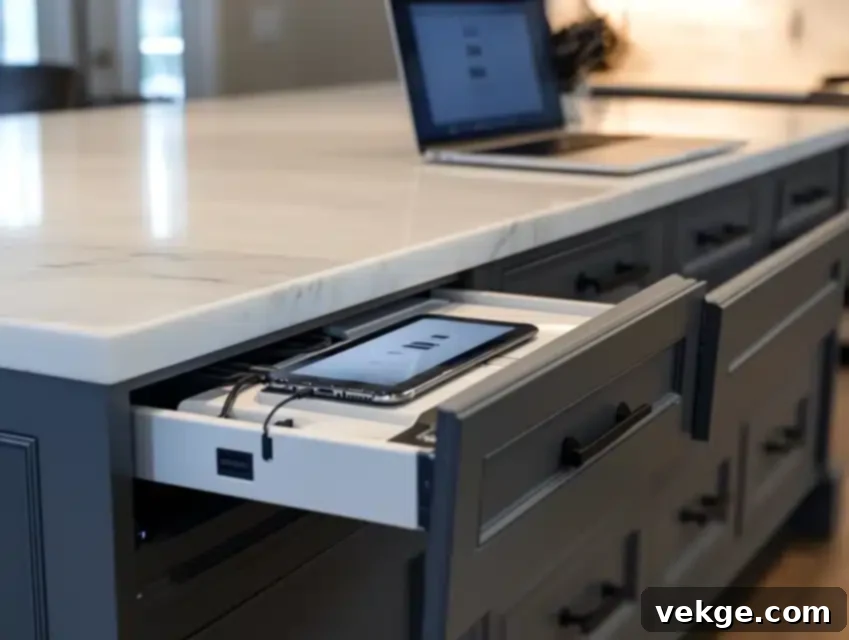
My latest innovation seamlessly merges essential storage with advanced charging capabilities, creating the perfect smart and organized hub within the heart of the kitchen: the island. Recognizing the kitchen island as a central gathering, cooking, and sometimes even a workspace, I designed drawers that serve a crucial dual purpose: organized storage for kitchen essentials and a discreet, high-tech power station. Each custom-designed island drawer is thoughtfully equipped with multiple electrical outlets, often including versatile USB-A and USB-C ports, and features robust built-in surge protection to safeguard valuable electronic devices.
Specialized cord management systems meticulously integrated within the drawers keep all devices neat, organized, and out of sight while charging, effectively eliminating tangled wires and maintaining a pristine island surface. Furthermore, dedicated ventilation systems are cleverly implemented to prevent any heat buildup, ensuring safety and optimal performance during extended use when multiple devices are simultaneously plugged in. This comprehensive solution has rapidly become a standard and highly anticipated feature in my modern kitchen island designs, offering unparalleled convenience, advanced organization, and maintaining a pristine, functional central workspace.
Installation Steps for Island Drawer Power:
- **Flexible Power Cable Installation:** Install highly flexible, durable, and code-compliant power cables specifically designed to endure the constant movement of drawer opening and closing, ensuring long-term reliability and safety.
- **Proper Ventilation Channels:** Create effective ventilation channels or discreet openings within the island structure and drawers to ensure adequate heat dissipation, especially when multiple devices are charging simultaneously.
- **Specialized Cord Management Systems:** Incorporate specialized cord management systems, such as internal clips, spools, or channels, to keep charging cables organized, prevent tangles, and facilitate easy connection and disconnection.
- **Multiple Outlet Type Installation:** Install various outlet types, including standard AC receptacles and multiple USB-A and USB-C ports, to cater to the diverse and evolving charging needs of modern electronic devices.
- **Clear Power Option Labeling:** Create proper, clear, and durable labeling for different power options (e.g., “High Power USB-C,” “Standard AC”) within the drawer, ensuring users can easily identify and utilize the correct port.
- **Full Load Drawer Operation Test:** Thoroughly test the drawer’s operation under a full load (i.e., with devices charging and cables routed). This confirms smooth movement, proper functionality, and stability without obstruction.
- **Safety Shutoff Features:** Add essential safety shutoff features, such as an automatic power cut-off when the drawer is closed, to enhance user safety and prevent potential overheating or other electrical hazards.
Strategic Methods to Hide Kitchen Outlets: Beyond Innovative Products
While innovative, specialized products offer incredible solutions for new kitchen installations or major remodels, sometimes the simplest and most cost-effective methods can make the biggest visual difference. Here are practical and strategic approaches to subtly conceal existing or newly installed outlets, ensuring they blend seamlessly and discreetly into your kitchen’s aesthetic, enhancing its overall harmony.
1. Choosing the Right Outlet Covers for Optimal Visual Harmony
The journey to a truly seamless and visually cohesive kitchen often begins with the careful and deliberate selection of appropriate outlet covers. Understanding your kitchen’s existing materials, its precise color palette, and its overarching design style is paramount. I always advocate for using premium-grade, high-quality paintable covers as they offer the ultimate flexibility for custom color matching. Unlike standard, often stark white or beige plastic covers, these can be expertly prepped and finished to blend perfectly with walls, backsplashes, or even adjacent cabinet panels.
Beyond simple color, meticulously consider the finish – whether matte, satin, or gloss – to ensure it flawlessly complements the sheen of the surrounding surfaces. High-quality covers are not just about aesthetics; they are designed for superior durability, resisting wear and tear from everyday use, cleaning chemicals, and kitchen humidity. Opting for covers that can be subtly textured or even wrapped with thin veneers of your actual backsplash material (where deemed safe and code-compliant by an expert) elevates customization to an unprecedented level, making the outlet truly disappear into its environment and creating a sophisticated, integrated look.
2. Advanced Painting Techniques for Professional Outlet Concealment
My approach to painting outlet covers has been meticulously refined through extensive experimentation and countless projects, ensuring a finish that is both aesthetically flawless and remarkably durable. Proper surface preparation is the absolute cornerstone of a long-lasting and chip-resistant finish. This critical step involves lightly sanding the cover with fine-grit sandpaper to create a mechanical bond for the primer, followed by thorough cleaning with a degreaser to remove any grease, dust, or residue.
Next, specialized primers specifically designed for plastic surfaces are expertly applied. These primers create an optimal bonding surface for the topcoat, significantly preventing common issues like chipping, peeling, or uneven adhesion. I always recommend applying multiple thin, even coats of high-quality paint, allowing ample drying time between each application. This precise technique builds better, more uniform coverage and results in a far smoother, professional-looking finish than attempting a single thick layer. Finally, a durable clear protective topcoat (choosing matte, satin, or gloss depending on the desired original look of the surface) is applied to shield the paint from wear, moisture, UV degradation, and harsh cleaning chemicals, ensuring the cover maintains its pristine, camouflaged appearance for many years to come.
3. The Meticulous Matching Process for Invisible Integration
Achieving a perfect and truly invisible match between an outlet cover and its surrounding environment requires an acute attention to detail, a keen artistic eye, and a methodical approach. My process always begins with thoroughly testing colors under various lighting conditions – crucial natural daylight, focused task lighting, and ambient evening light – because colors can appear drastically different depending on the illumination. Custom color mixing is often absolutely essential to achieve the exact hue needed to blend flawlessly with complex marble patterns, varied granite tones, intricate tile designs, or subtle painted walls.
Beyond color, accurately matching texture is equally, if not more, important for complete concealment. Techniques like light sanding, careful sponging, specialized brushwork, or even advanced faux finishes can meticulously replicate the subtle textures of natural stone, the grain of wood, or the slight unevenness of brushed metals. I often create multiple test samples that are placed directly against the surface to be matched, allowing for precise, iterative adjustments. This meticulous, iterative process ensures that the outlet cover becomes an invisible, seamless extension of its environment, truly completing the kitchen’s cohesive and high-end design. Regular, gentle maintenance of these custom finishes will keep them looking fresh, perfectly integrated, and enduringly beautiful over time.
Conclusion: Harmony of Form and Function in Superior Kitchen Design
After years dedicated to designing and implementing hundreds of innovative hidden outlet solutions, my greatest and most enduring takeaway is that truly successful integration hinges on a harmonious and precise blend of paramount safety, effortless accessibility, and impeccable aesthetics. These innovative approaches are far more than just simple functional upgrades; they are transformative design elements that fundamentally alter the perception and utility of a kitchen. By thoughtfully and strategically concealing necessary power access, we elevate the entire kitchen, ensuring it not only performs with peak efficiency but also radiates a clean, uncluttered beauty that enhances rather than detracts from its overall appeal. The modern kitchen, in my philosophy, should be a sanctuary of both culinary creativity and serene, uninterrupted design.
When embarking on your own kitchen project, whether a full renovation or a thoughtful upgrade, remember these fundamental principles to ensure your hidden power solutions are both exceptionally effective and enduringly beautiful:
- **Prioritize Safety Above All Else:** Always ensure all electrical installations comply rigorously with local codes and include essential safety features like GFCI protection, especially in any areas prone to moisture or water.
- **Consider Daily Usage Patterns:** Design your outlet placement and type (e.g., pop-up, drawer) specifically around how you and your family actually use your kitchen. Frequently used appliances demand easily accessible and convenient power.
- **Plan for Future Needs:** Anticipate future technological advancements, potential new appliances, or changes in appliance usage. A flexible and adaptable power system will serve you far better in the long run.
- **Maintain Proper Clearances:** Ensure there is always adequate space around outlets for proper ventilation, easy plug access, and critically, to prevent any dangerous heat buildup, especially within enclosed spaces.
- **Choose Quality Components:** Invest wisely in high-quality, durable electrical components, mechanisms, and materials that are built to last and engineered to withstand the unique rigors of the kitchen environment.
- **Document Installation Details:** Keep meticulous and detailed records of all hidden outlet installations, including precise wiring diagrams, component specifications, and product manuals, for future maintenance, troubleshooting, or modifications.
- **Schedule Regular Maintenance:** Periodically check all hidden outlets and their associated mechanisms for any signs of wear, damage, loose connections, or buildup of debris to ensure continued safe, efficient, and reliable operation.
Frequently Asked Questions About Hidden Kitchen Outlets and Power Solutions
How Can I Effectively Hide Electrical Outlets in My Kitchen to Improve the Look?
From my extensive professional experience, the most impactful solutions for significantly enhancing kitchen aesthetics through cleverly hidden outlets include integrating under-cabinet power strips that free up backsplash space, installing sophisticated pop-up outlets directly into countertops or islands for discreet access, or opting for elegantly recessed outlets that sit flush within your backsplash. The key is to meticulously choose methods that perfectly align with your kitchen’s daily usage patterns while maintaining convenient, immediate, and safe access to power. For optimal functionality and a truly bespoke, integrated look, consider strategically combining multiple solutions; for instance, under-cabinet lighting with integrated outlets for dedicated task areas, complemented by a pop-up outlet for a central island workstation where appliances are frequently used.
What Are the Best Methods for Concealing Kitchen Outlets for Various Needs?
For foundational concealment needs, particularly along your main cooking and prep areas, I highly recommend starting with under-cabinet installations; they effectively clear the backsplash and create an uninterrupted visual flow. For kitchen islands or high-traffic countertop areas, pop-up outlets offer unparalleled functionality and a seamless aesthetic when retracted, providing power only when required. Furthermore, for outlets that absolutely must be situated on a visible wall or backsplash, custom material-matching covers can work wonders, blending the outlet almost invisibly into your chosen backsplash material. Each solution offers a unique balance of accessibility, aesthetics, and cost-effectiveness, and the “best” method often depends on the specific area of your kitchen, your desired level of concealment, and your budget, all while rigorously maintaining stringent electrical safety standards.
Are There Innovative Products that Allow Outlets to Be Hidden Yet Fully Accessible?
Absolutely, the modern market has seen a remarkable surge in truly innovative products specifically designed for both advanced concealment and effortless accessibility. Beyond the increasingly popular pop-up towers and flip-up counter units that elegantly retract into surfaces when not in use, I highly recommend exploring specialized drawer charging stations, which brilliantly keep all your electronic devices organized, charged, and completely out of sight. Appliance garage power strips are another fantastic and highly functional option, allowing you to keep frequently used small appliances permanently plugged in but discreetly tucked away behind cabinet doors. These cutting-edge modern products combine unparalleled convenience with a sleek, minimalist design, perfectly suited for the contemporary, high-functioning kitchen.
How Do I Maintain Code Compliance when Installing Hidden Outlets in My Kitchen?
Maintaining rigorous code compliance is paramount for both the safety of your home and family, and for legal and insurance purposes. I cannot stress enough the critical importance of working exclusively with licensed, certified electricians who possess a thorough and up-to-date understanding of all local electrical codes and regulations (e.g., NEC in the US, or equivalent national/local standards). Key compliance aspects include mandatory GFCI (Ground Fault Circuit Interrupter) protection in all wet or damp locations, correct circuit loading to prevent dangerous overloads, adherence to appropriate spacing requirements between outlets, and ensuring all installations meet specific enclosure, ventilation, and accessibility standards. Furthermore, meticulous documentation of all installations, including detailed wiring diagrams, product specifications, and obtained permits, is invaluable for future maintenance, professional inspections, or any subsequent modifications.
Can I Install Hidden Outlets Myself, or Do I Need a Professional Electrician?
While minor cosmetic changes, such as simply swapping out an existing outlet cover for a pre-made, material-matched one, might be within the safe scope of a skilled DIY enthusiast, I strongly and unequivocally recommend professional installation for any solution involving new wiring, cutting into cabinets or valuable countertops, or integrating complex mechanical mechanisms. Electrical work inherently carries significant safety risks, requires specialized tools, and demands an in-depth, expert knowledge of electrical codes, wiring principles, and rigorous safety protocols. Investing in professional installation by a licensed electrician ensures not only the paramount safety of your home and family but also guarantees correct functionality, compliance with all legal and insurance requirements, and a superior finish that meets high aesthetic and durability standards. It is an indispensable investment in your peace of mind and the long-term integrity and value of your kitchen.
