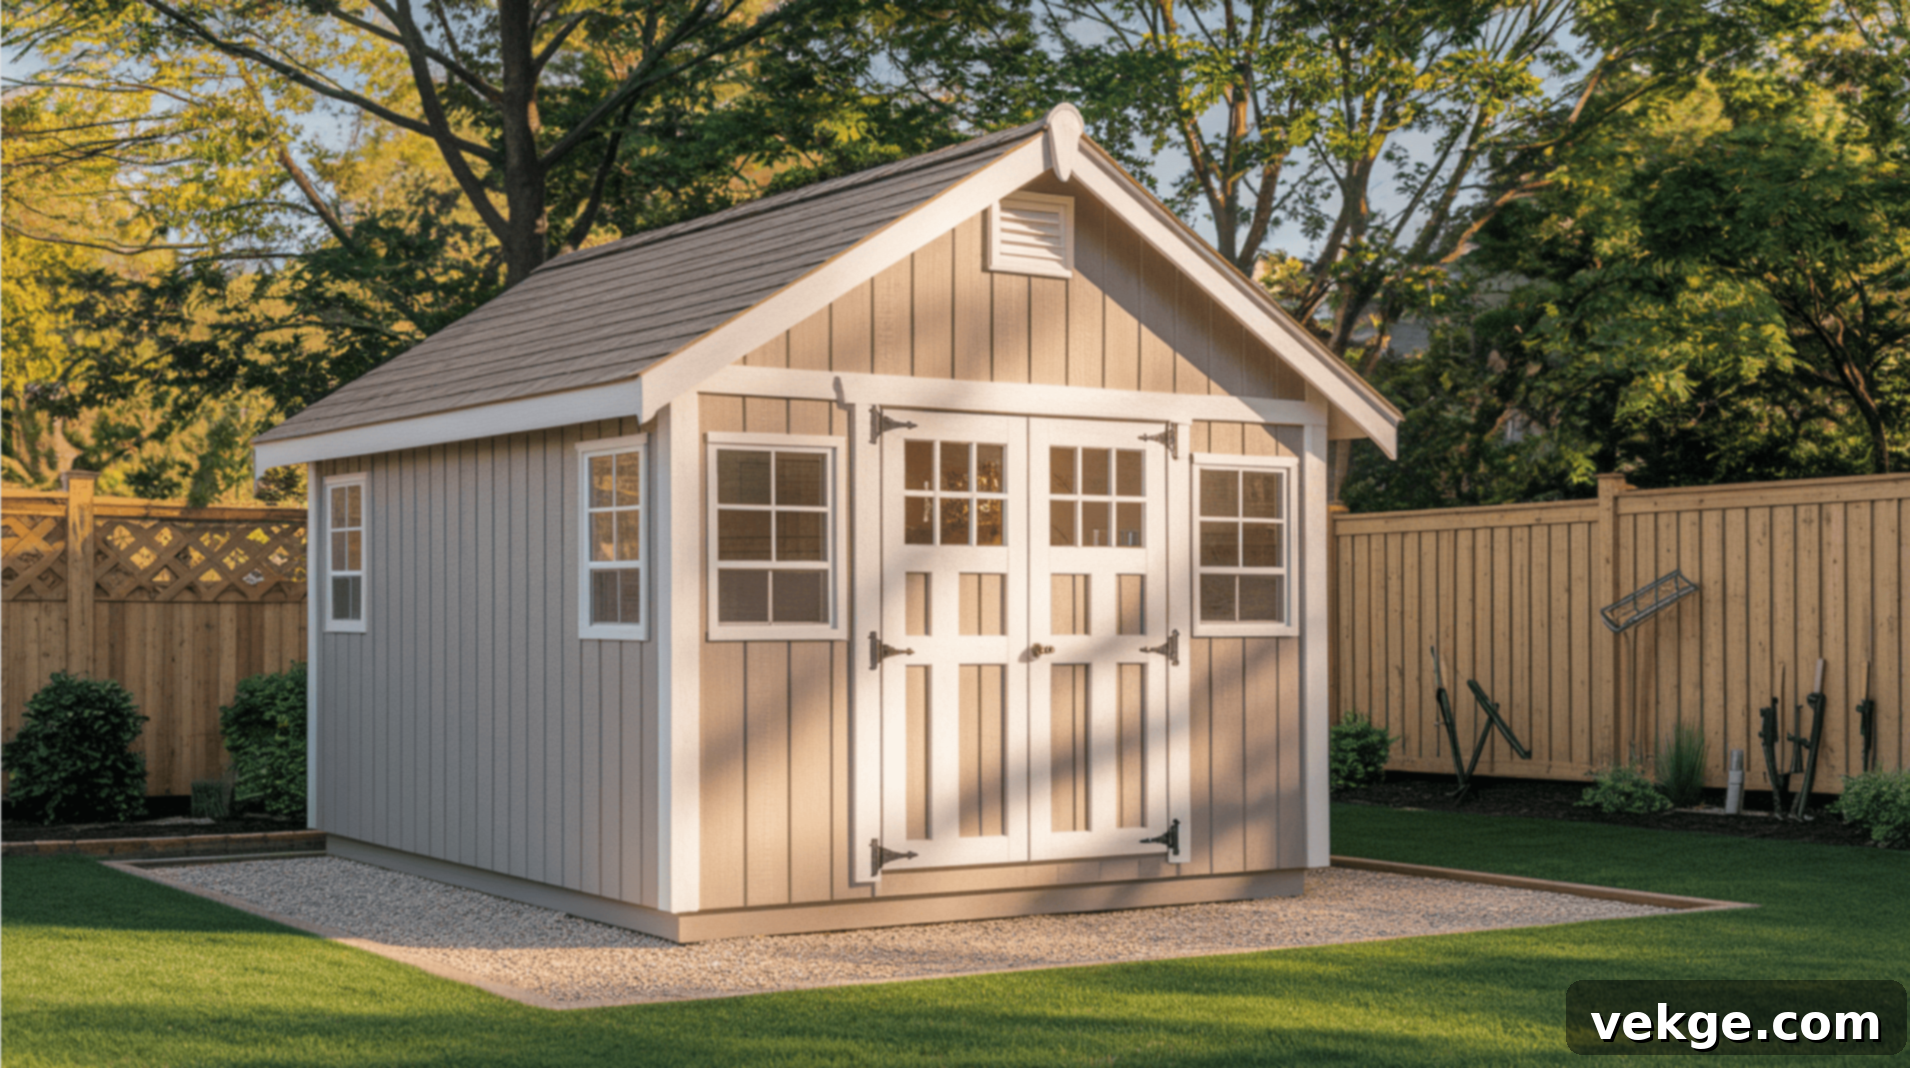
Mastering Your Backyard: The Ultimate Guide to 12×16 Shed Plans and DIY Construction
Are you searching for the perfect shed size that offers generous storage without monopolizing your entire backyard? Look no further than 12×16 shed plans. These well-balanced designs strike a remarkable equilibrium between practical utility and a manageable footprint. They are substantial enough to be incredibly useful, yet not so large that they overwhelm your outdoor space.
This comprehensive guide will walk you through everything you need to know about building your own 12×16 shed. We’ll explore various plan options, provide complete materials lists, offer smart layout ideas, and give you step-by-step instructions that are genuinely easy to follow. Whether you’re an experienced DIY enthusiast or a complete beginner, you’ll discover an approach that perfectly matches your skills, budget, and vision. Let’s embark on this exciting journey to create your ideal backyard structure!
Why a 12×16 Shed Size is the Ideal Choice
A 12×16 shed provides a spacious 192 square feet of floor area, offering ample room for serious storage, a dedicated workspace, or even a versatile hobby studio. This generous size comfortably accommodates riding lawnmowers, an extensive collection of garden equipment, seasonal decorations, and still leaves plenty of room to move around freely without feeling cramped. Imagine having all your tools organized and accessible, or a dedicated zone for your creative pursuits.
Beyond simple storage, this dimension excels as a hobby workshop, an inspiring art studio, or a quiet backyard office, ideal for remote work away from household distractions. The additional square footage, compared to smaller 8×10 or 10×12 sheds, makes a significant difference when you need to spread out projects, set up large equipment, or create distinct functional zones within the shed.
Financially, a 12×16 shed offers excellent value. The cost per square foot tends to decrease as shed sizes increase, meaning you get more usable space for your investment. Crucially, most local building codes typically require permits for structures exceeding 200 square feet. This means a 12×16 shed often falls just under these local regulations, potentially saving you time, paperwork, and permit fees. However, always double-check with your local municipality, as regulations can vary.
Exploring 12×16 Shed Plans and Their Diverse Types
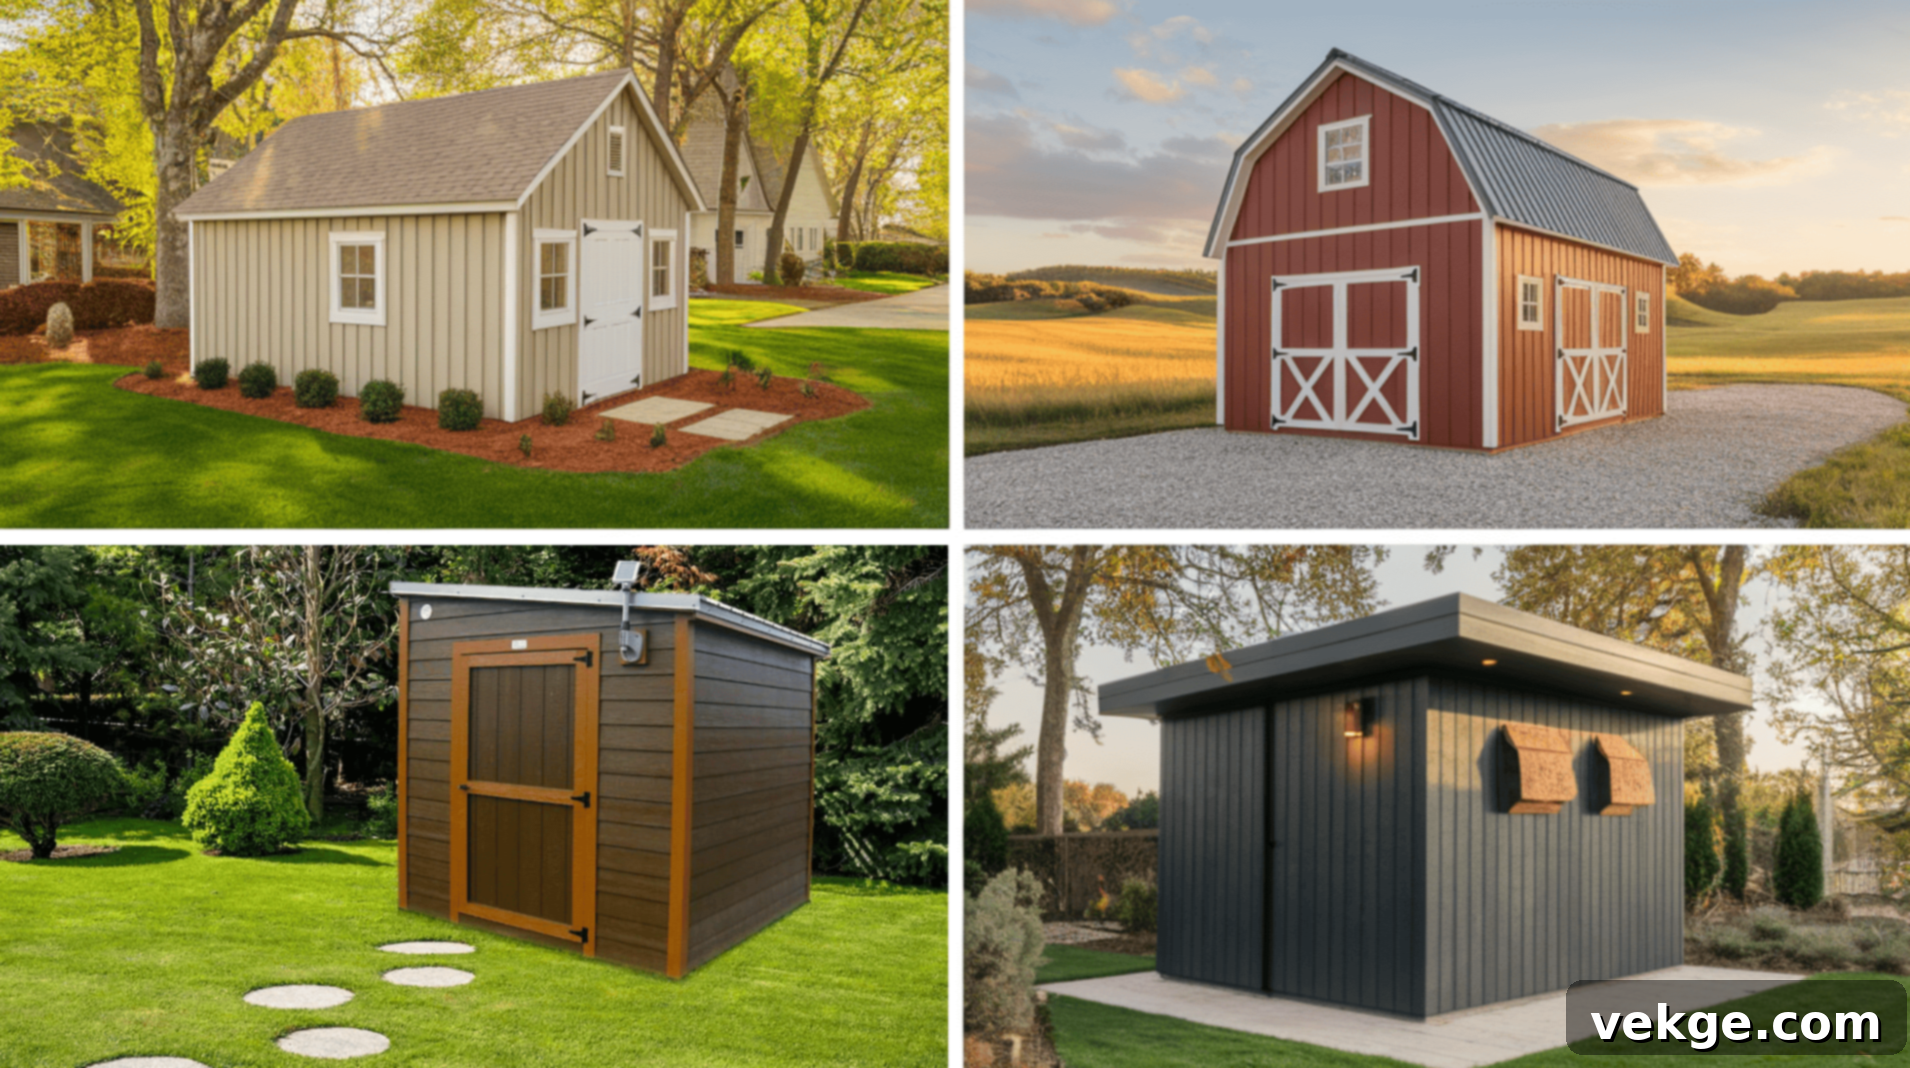
Your 12×16 shed can be customized with several distinct roof styles, each offering unique advantages in terms of storage capacity, aesthetic appeal, and construction complexity. Choosing the right design depends on your specific needs, the desired look, and your comfort level with various building techniques.
1. Gable Roof Shed Plans (The Classic Choice)
The classic gable roof is by far the most popular and recognizable choice for DIY builders due to its straightforward construction. Characterized by two slanted sides that meet at a central ridge, it efficiently sheds water and provides decent headroom inside. Its traditional design seamlessly blends with most home styles, offering a timeless and clean look.
A significant benefit of the gable design is the potential for overhead storage or a small loft area, utilizing the peak height for less frequently used items. For added convenience and precision, many lumber yards can pre-cut your rafters, significantly reducing construction time and ensuring accurate angles for a stronger roof structure. This makes it an excellent choice for beginners.
2. Barn-Style Shed Plans (Maximizing Vertical Space)
Also known as gambrel roofs, barn-style sheds provide significantly more interior height and storage volume compared to standard gable designs. The distinctive dual-slope design creates abundant headroom, particularly in the center, which is ideal for walking around, storing tall equipment like an ATV, or building extensive vertical shelving units. This style truly maximizes the usable space within the same 12×16 footprint.
While offering superior vertical storage, barn-style roofs do require more complex cuts and precise measurements, involving compound angles. This makes them better suited for builders who have some prior carpentry experience or are looking for a more challenging and rewarding project.
3. Lean-To Shed Plans (Space-Saving and Simple)
Lean-to sheds are the perfect solution when yard space is limited or if you intend to build your shed against an existing structure like a house or garage. The single-sloped roof is the easiest to construct, eliminating the need for a ridge beam or complex opposing angles. This simplifies the framing process considerably.
This design is highly efficient for narrow yards, side yards, or areas with specific height restrictions. Furthermore, lean-to sheds are often the most budget-friendly option, requiring fewer materials and less construction time, making them attractive for those looking for a quick and economical build.
4. Modern Flat Roof Designs (Sleek and Contemporary)
Modern flat roof sheds offer a sleek, minimalist, and contemporary aesthetic that complements modern home architecture beautifully. This simple design maximizes interior height consistently across the entire space, avoiding any sloped ceilings that might reduce headroom. This uniform height makes it easy to install full-height shelving or create a versatile open plan.
While construction uses straightforward basic framing techniques, proper drainage and waterproofing are paramount for flat roofs to prevent water pooling and leaks. This style is particularly well-suited if you envision adding rooftop storage, a green roof, or solar panels in the future, as the flat surface provides an ideal base.
Essential Material List for a 12×16 Gable Shed Build
Having a comprehensive materials list ready before you begin is crucial for a smooth and efficient building process. This list covers everything you’ll likely need to construct a robust 12×16 gable shed from the ground up, minimizing frustrating trips to the hardware store.
| Category | Materials Needed |
|---|---|
| Foundation | Concrete blocks (for pier and beam) or materials for a concrete slab (gravel, rebar, concrete mix), pressure-treated skids (4×4 or 6×6 lumber for wood base), galvanized steel frame (optional for pre-fab bases), leveling shims, gravel (for drainage). |
| Framing | 2×4 or 2×6 lumber (pressure-treated for floor joists/rim joists, standard for walls, roof rafters/trusses), structural screws or framing nails, hurricane ties (for roof truss/rafter to wall connection), metal joist hangers. |
| Flooring | 3/4-inch pressure-treated plywood or OSB for the subfloor. |
| Siding | T1-11 plywood panels, wood siding (cedar, pine), vinyl siding, or metal panels. Trim boards (1×4 or 1×6) for corners and openings, exterior caulk. |
| Roofing | OSB or plywood sheathing (1/2-inch or 5/8-inch), roofing felt or synthetic underlayment, 3-inch ribbed metal panels or asphalt shingles, drip edge flashing, roofing screws or nails, ridge cap. |
| Ventilation | Gable vents (plastic or metal), soffit vents, ridge vents, solar vents or exhaust fans (optional for enhanced airflow), vented skylights (optional for light and air). |
| Doors & Windows | Pre-hung 8 ft double barn doors or a custom-built double door assembly, pre-hung steel entry door (for added security), fixed windows, sliding windows, or casement windows. Hardware (hinges, latches, locks). |
| Finishing & Extras | Fascia and soffit boards, exterior paint or wood sealer/stain, loft boards (plywood or OSB if adding a loft), ramp materials (pressure-treated framing + decking boards), shelving materials, electrical supplies (if adding power), insulation (optional). |
Important Note: Always double-check quantities based on your specific shed design plans, desired finishes, and local building requirements. It’s a wise practice to purchase about 10-15% extra lumber and fasteners to account for mistakes, cuts, and material waste during construction. Some optional items, like solar vents or extensive loft materials, can be added later as your budget allows.
How To Build Your 12×16 Shed: A Step-by-Step Guide
Constructing a 12×16 shed typically involves five primary phases, taking you from site preparation and foundation laying to the final finishing touches. Each step is foundational to the next, so dedicating adequate time and precision to each phase will ensure a strong, durable, and professional-looking end result.
Step 1: Build a Strong, Level Base and Foundation
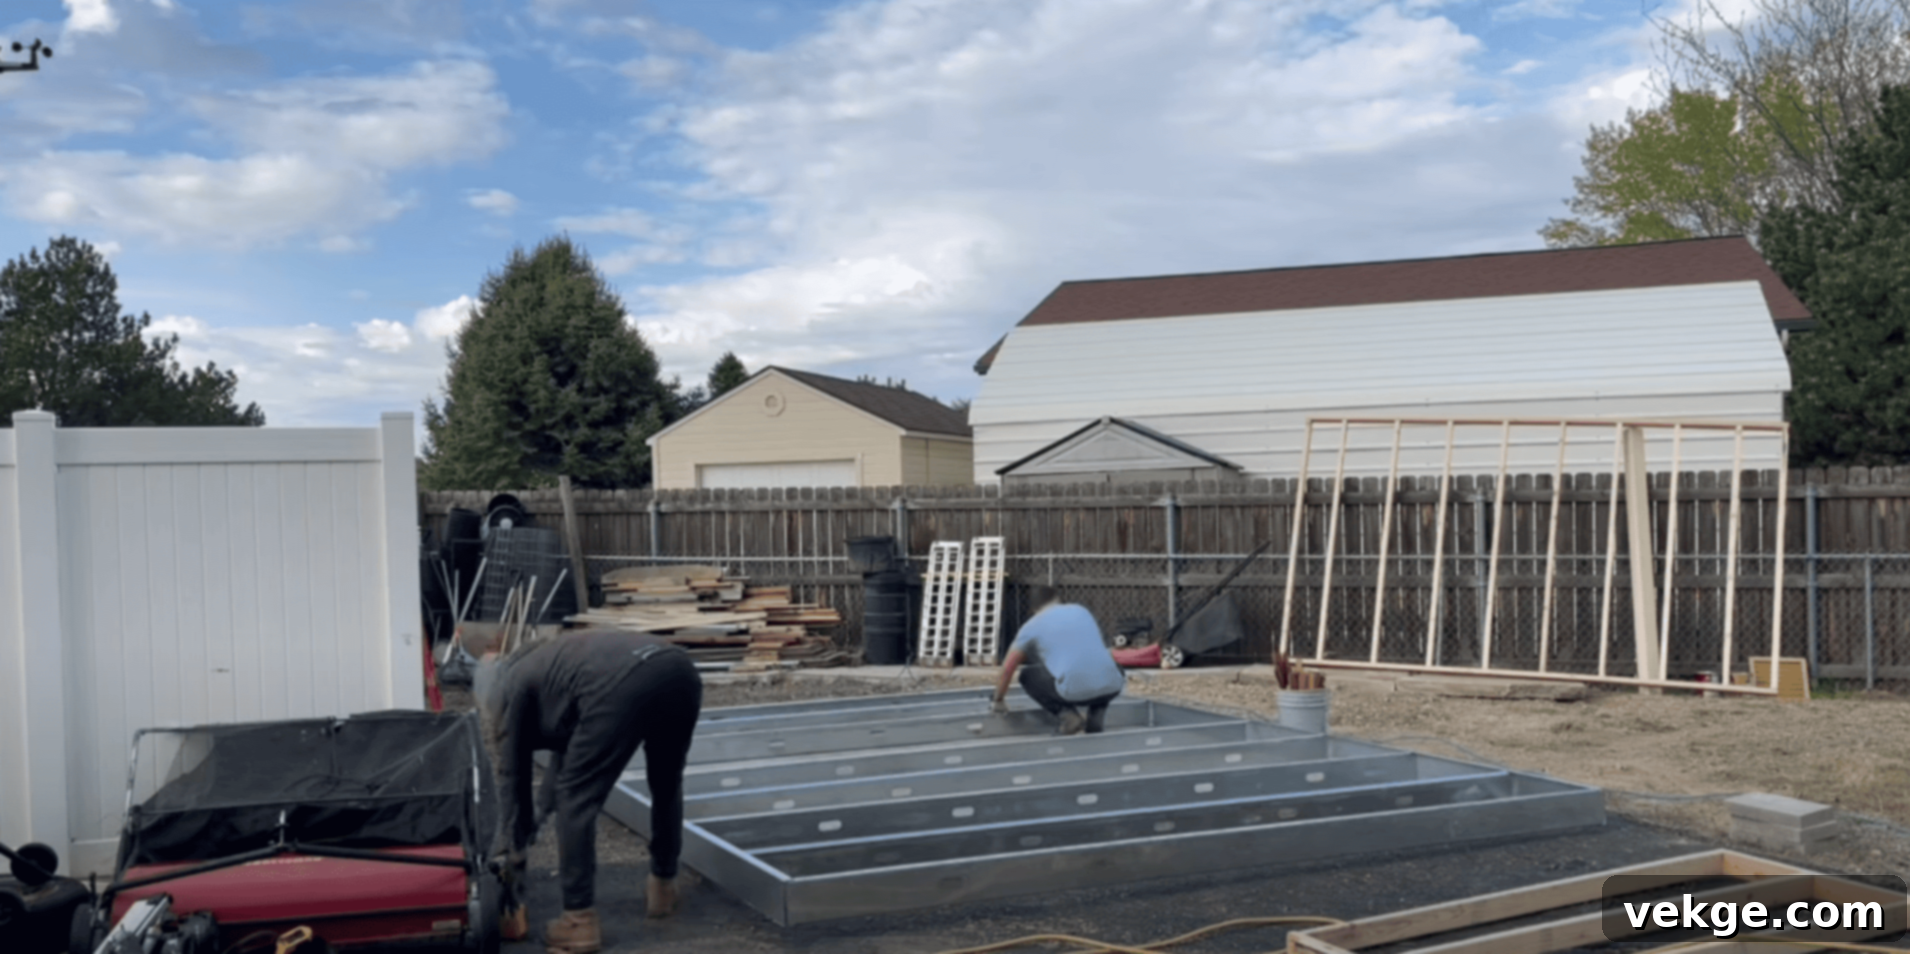
The foundation is the most critical part of your shed, determining its stability and longevity. Start by thoroughly preparing your site: clear the area of debris, level the ground as much as possible, and ensure proper drainage away from the shed. You can then choose between a galvanized steel base, a wood frame on skids (often referred to as a “skid foundation”), or a concrete slab.
- Steel bases are excellent for perfectly level ground, offering a sleek, low-profile look and robust support.
- Wood skids (typically 4×4 or 6×6 pressure-treated timbers) are ideal if you anticipate needing to move the shed in the future, as they allow for easier relocation. They also raise the shed slightly off the ground, promoting airflow and preventing moisture damage.
- Concrete slabs provide the most permanent and durable foundation, excellent for heavy equipment and preventing moisture intrusion.
Regardless of your choice, it is absolutely crucial to ensure the base is perfectly level using concrete blocks, gravel, and shims before you begin framing. An unlevel base will lead to crooked walls, doors that don’t close properly, and structural stresses that can shorten your shed’s lifespan.
- Prepare the ground by laying a few inches of compacted gravel and a weed barrier before placing your foundation to improve drainage and prevent vegetation growth.
- Use a long level or a builder’s transit level across all corners and the center to confirm perfect leveling before attaching any floor panels.
- Always add shims under low spots rather than attempting to lift the entire structure, which can compromise stability.
- Ensure proper anchorage of the foundation to the ground to resist high winds.
Step 2: Frame the Walls and Decide on the Right Height
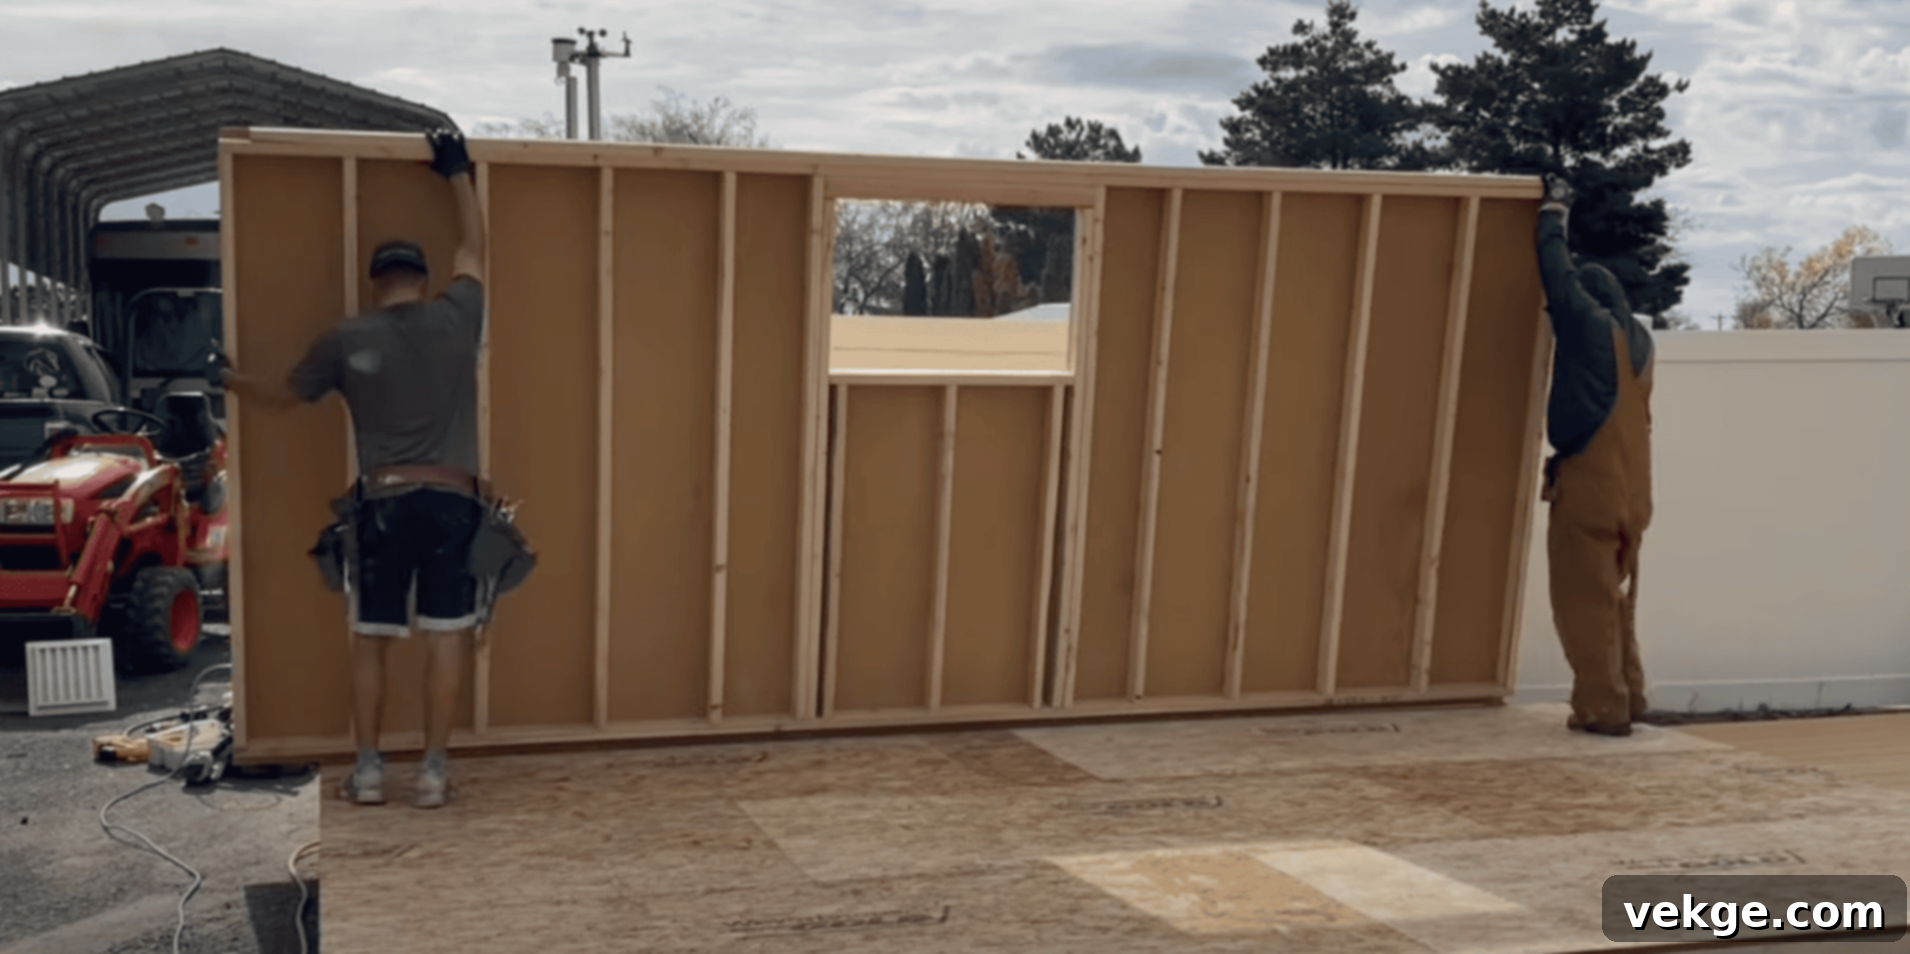
With a solid foundation in place, the next step is to frame the walls. This involves building each wall section (side walls and gable walls) on the ground, complete with studs, top plates, and bottom plates, and then raising them into position. Most sheds utilize standard 7-foot walls, but consider going taller, perhaps 8 feet or even 9 feet, especially for a 12×16 footprint.
Taller walls significantly enhance vertical storage capacity, allowing for higher shelves, better clearance for tall equipment, and the comfortable addition of a loft. Lofts are fantastic for organizing tools, seasonal gear, and storage boxes, freeing up valuable floor space for daily use and larger projects.
- For maximum versatility, 8-foot or even 9-foot walls make a substantial difference, especially if you plan to install tall shelving units or a workbench.
- If adding a loft, incorporate a robust center support beam and extra blocking during wall framing to help bear the additional weight safely.
- Always use high-quality screws (structural or exterior-grade) rather than nails for framing joints. Screws provide a tighter, more secure connection that resists shifting over time.
- Ensure consistent stud spacing (typically 16 or 24 inches on center) for easy siding attachment and structural integrity.
Step 3: Select and Install the Right Siding and Ventilation
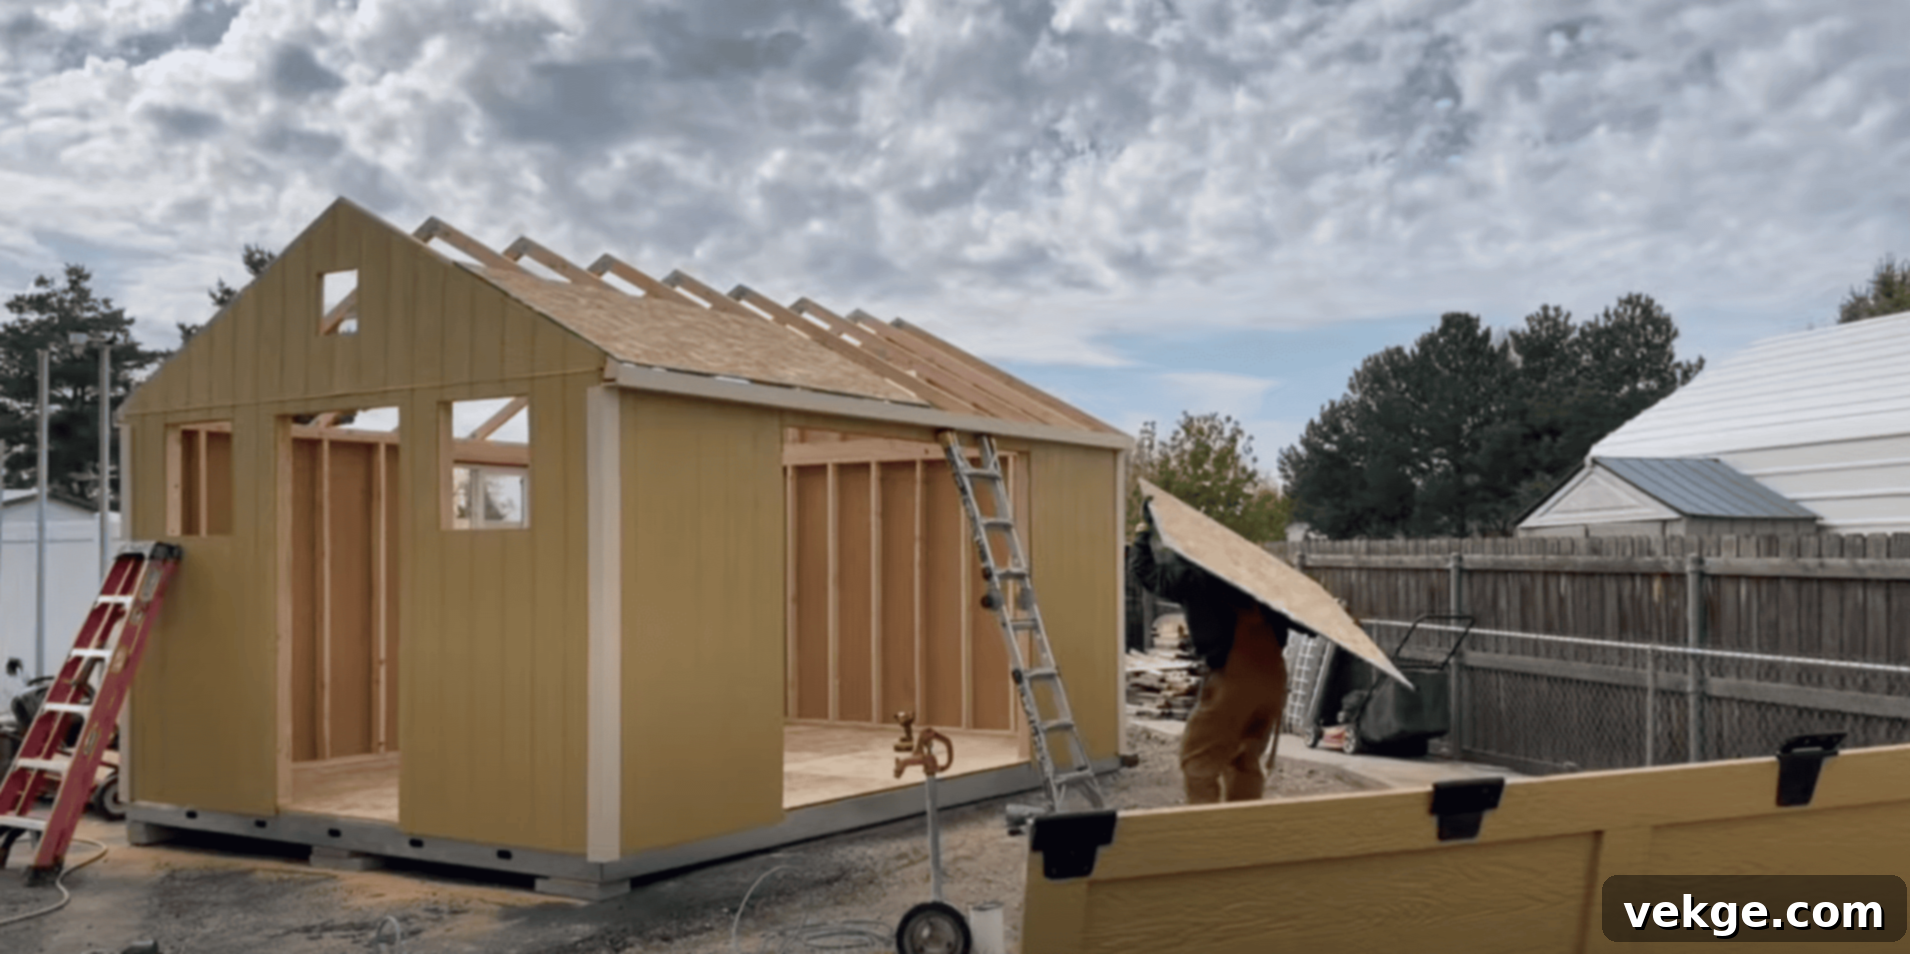
The siding not only protects your shed from the elements but also contributes significantly to its aesthetic appeal. You can choose vertical siding panels like T1-11 for a modern, clean finish, or opt for traditional horizontal siding (like lap siding or panels) to match the style of your main home. Carefully consider the material’s durability, maintenance requirements, and overall look.
Proper ventilation is crucial for the longevity of your shed and the protection of its contents. Install gable vents on both ends of the shed to create cross-ventilation, which helps reduce heat buildup in summer and prevents moisture accumulation, minimizing the risk of mold and mildew. For enhanced airflow, especially if you plan to spend considerable time in the shed, consider adding solar-powered vents or vented skylights that provide both light and air circulation.
- For optimal cross-ventilation, ensure vents are placed on opposing gable ends.
- Vented skylights are a dual-purpose solution, providing ample natural light while also allowing hot air to escape, keeping the interior cooler.
- Solar-powered fans are an excellent self-sufficient option as they operate automatically with sunlight and require no complex wiring.
- Ensure all siding is properly sealed and painted/stained to protect against weather damage.
Step 4: Strategically Choose Doors and Windows
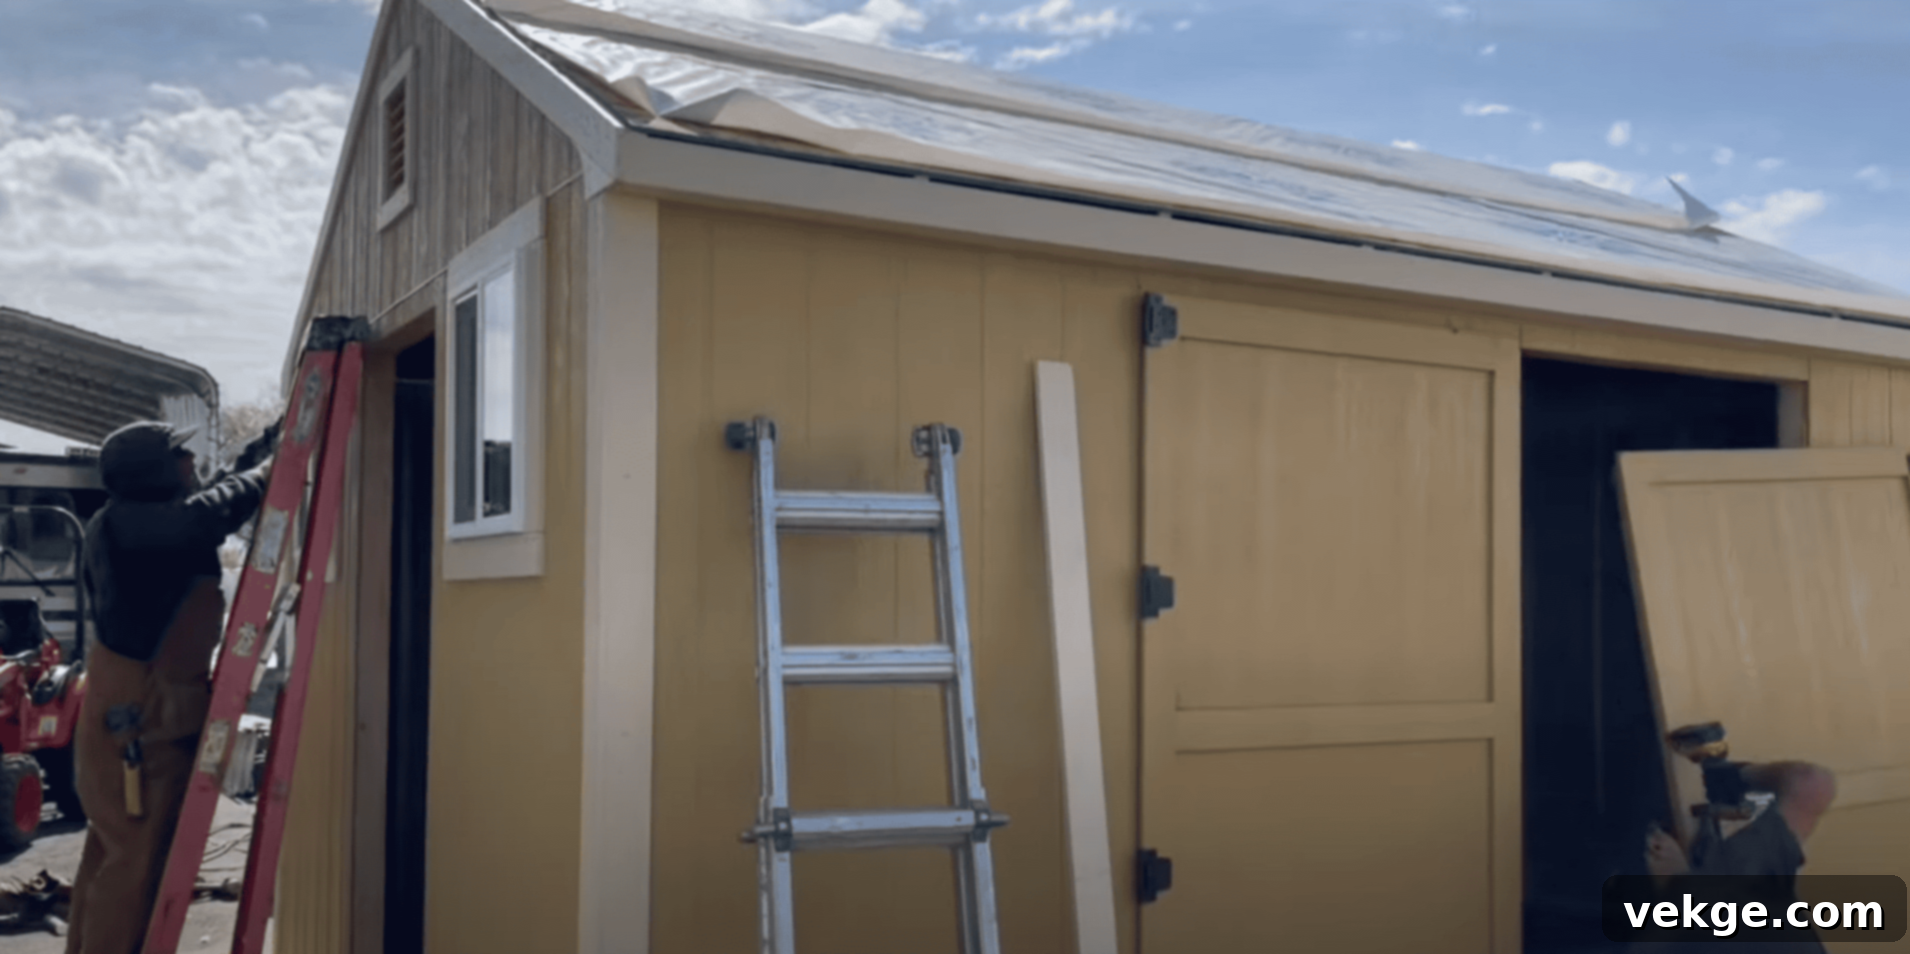
The placement and type of doors and windows greatly impact your shed’s functionality and natural lighting. Double doors (typically 8 feet wide) are highly recommended for a 12×16 shed, as they provide essential access for large items like riding mowers, ATVs, wheelbarrows, or bulky furniture. Consider adding a separate, smaller side entry door for everyday access, which can be particularly convenient.
However, remember that every door and window opening reduces the available wall space for shelving and storage. To maximize storage, use fixed windows placed higher on the walls. These allow abundant natural light to stream in without sacrificing valuable wall real estate below. Always keep your interior layout plans in mind to avoid blocking future shelves, workbenches, or tool organization systems.
- Design your shed with one large double door for occasional bulky items and a separate, smaller single door for daily foot traffic and ease of access.
- Fixed windows are excellent for letting in natural light while maintaining security and full wall space below for storage.
- Avoid excessive doors or windows if your primary need is maximum storage, as they reduce the structural integrity of walls and usable interior space.
- Ensure rough openings are precisely framed to accommodate pre-hung doors and windows without issues.
Step 5: Install the Roof and Apply Finishing Touches
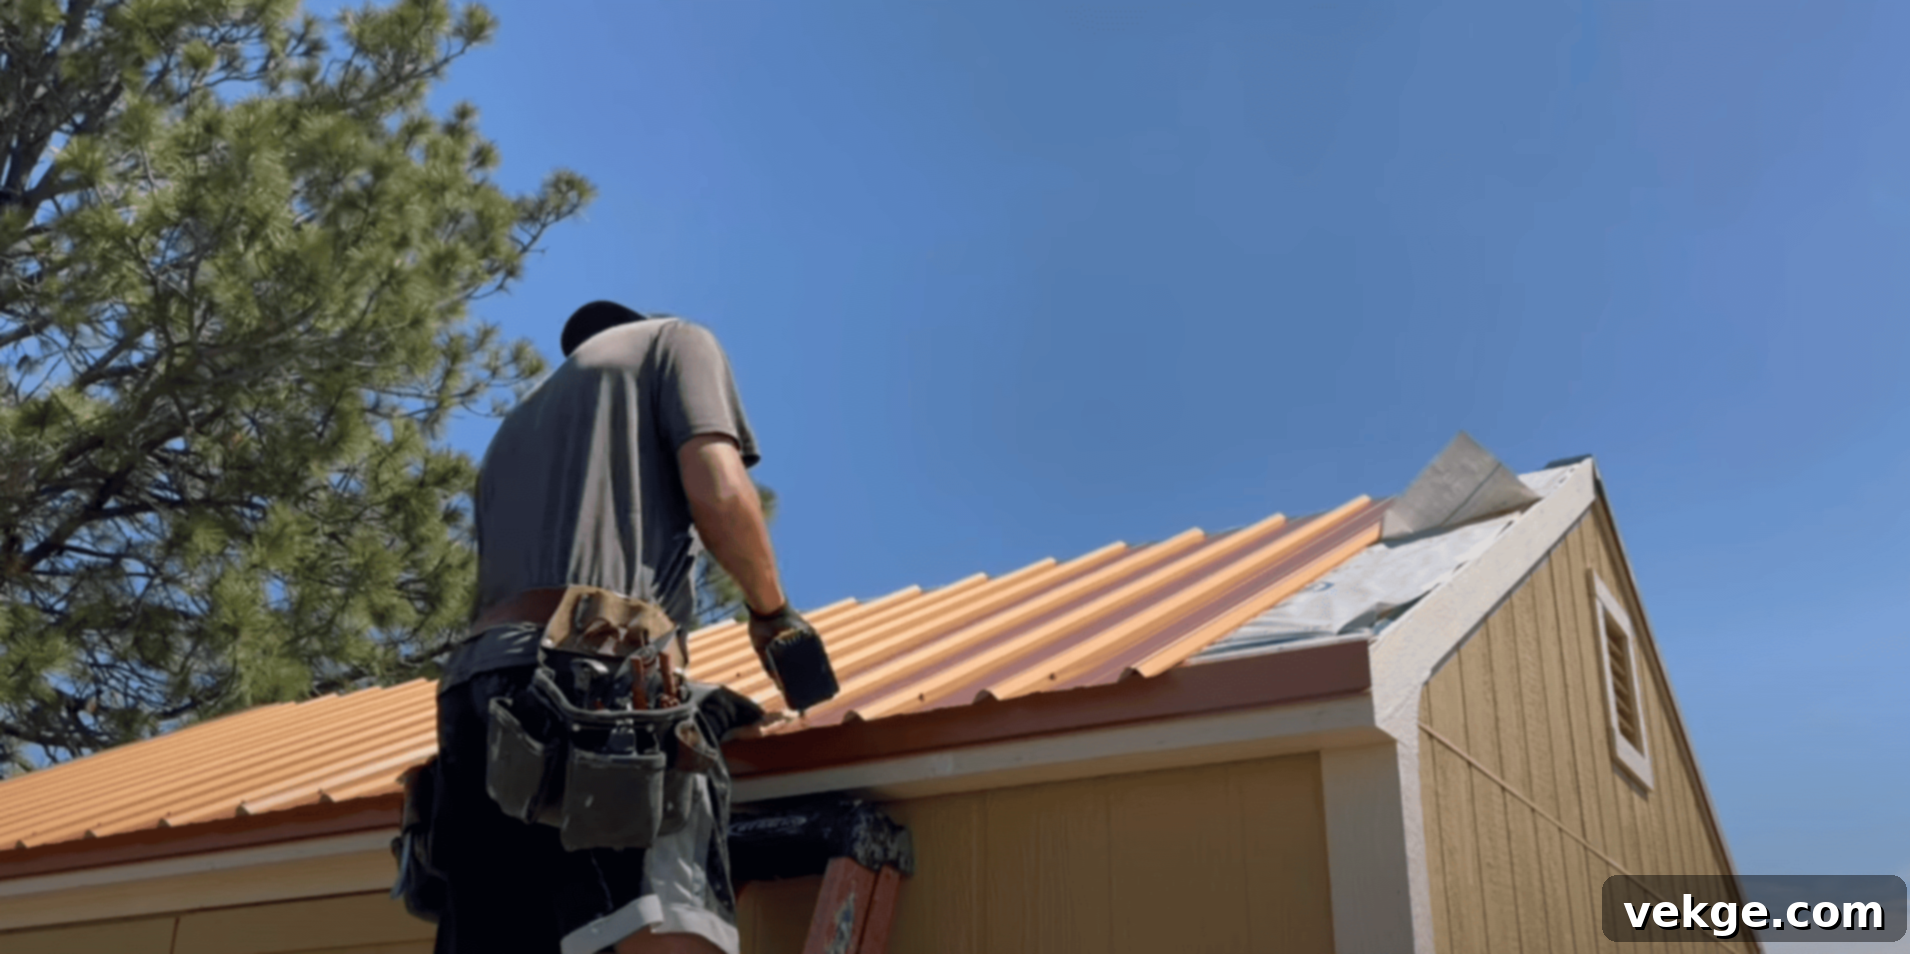
The roof is your shed’s primary defense against the elements. You have two main material choices: metal or asphalt shingles. A metal roof is highly durable, handles strong winds exceptionally well, and typically lasts longer than shingles. It offers a clean, modern aesthetic and performs particularly well in areas with heavy snow or rustic/mountainous environments.
Asphalt shingles, while often more budget-friendly, are also very durable and a popular choice. They come in a wide range of colors and styles, allowing you to easily match your existing home. Choose the roofing material that best fits your local climate, budget, and desired aesthetic. Additionally, add roof overhangs (typically 6 to 12 inches) to provide shade, protect the siding from rain, and give your shed a more finished, “house-like” appearance.
- Aim for 6 to 12-inch overhangs on all sides to provide better protection for your siding and a more aesthetically pleasing finish.
- Always apply appropriate sealants and flashing at all roof edges, penetrations, and seams to prevent any potential leaks.
- Matching the roof color and style to your house creates a cohesive and attractive look for your property.
- Don’t forget fascia boards and soffits to complete the roof structure and protect the rafter ends.
- Once the exterior is complete, apply a good quality exterior paint or stain to protect the wood and enhance its lifespan.
Watch How It’s Done: Shed Plans 12×16 Video Tutorial
Sometimes, seeing the process in action makes all the difference. Check out this helpful video tutorial that provides visual guidance on building a similar shed, offering valuable insights that complement these written instructions.
Customization Ideas to Transform Your 12×16 Shed
Once the basic structure of your 12×16 shed is complete, the real fun begins: customizing it to perfectly suit your specific needs and preferences. These thoughtful upgrades don’t necessarily break the bank but can dramatically transform your shed from a simple storage box into a truly functional, comfortable, and personalized space.
- Add a Small Porch or Awning: Create a covered outdoor workspace, a cozy seating area, or simply protect your entrance from rain and snow. A small overhang can significantly enhance usability and curb appeal.
- Build a Dedicated Loft Area: Maximize your vertical storage by adding a sturdy loft. This is ideal for stashing seasonal items, holiday decorations, or rarely used boxes, keeping your main floor clear for daily activities and larger equipment.
- Install Basic Electrical: Wiring your shed with outlets and overhead lighting is a game-changer. It allows you to work safely after dark, use power tools, charge batteries, and even run a small heater or fan, extending the shed’s utility year-round.
- Enhance Natural Lighting: Strategically add more windows on multiple walls. This not only floods the interior with natural light, making the space feel more open and welcoming, but also reduces the need for artificial lighting during the day.
- Incorporate Custom Shelving & Workbenches: Design and build shelves that fit your tools and supplies perfectly. A robust workbench is essential for any workshop, providing a dedicated surface for projects.
- Consider Insulation: If you plan to use your shed year-round as a workshop or office, insulating the walls, ceiling, and even the floor will make it much more comfortable in extreme temperatures.
Start with one or two upgrades that align most closely with your primary use for the shed, and gradually add more features over time as your budget and needs evolve. These thoughtful customizations will make your shed feel less like an outbuilding and more like a valuable, integrated extension of your home.
Pro Tips to Ensure Your Shed Lasts for Decades
Want your new 12×16 shed to stand strong and functional for many years to come, rather than deteriorating after just a few seasons? Implementing these simple maintenance and construction tips can make a profound difference in its longevity and performance:
- Invest in a Solid Foundation: A properly constructed foundation is paramount. Whether you choose a concrete slab or a robust pier-and-beam system on a carefully graded gravel base, ensuring it is level and provides adequate drainage will protect your shed against ground moisture, shifting, and rot.
- Prioritize Ventilation and Vapor Control: Install gable vents on both ends, and consider soffit and ridge vents, to ensure continuous airflow. Additionally, use a vapor barrier under your flooring and behind your wall siding (where appropriate) to prevent moisture buildup, which is a leading cause of mold, mildew, and wood rot.
- Conduct Regular Seasonal Inspections: Make it a habit to inspect your shed thoroughly every spring and fall. Look for loose screws, cracked caulk, peeling paint, damaged roofing, or any gaps around doors and windows that might allow water or pests to enter. Addressing small issues promptly prevents them from becoming major repairs.
- Ensure Comprehensive Weather Protection: Reapply exterior paint or wood stain every 3-5 years, or as recommended by the manufacturer. This protective coating is your shed’s first line of defense against UV damage from the sun, driving rain, and corrosive snow, preserving the integrity of your siding materials.
- Manage Surroundings: Keep vegetation trimmed back from the shed walls to prevent moisture retention and pest access. Ensure gutters (if installed) are clear and direct water away from the foundation.
A little proactive upkeep now can save you from significant repair bills and headaches down the road. By adhering to these fundamental principles, your 12×16 shed will remain in excellent condition, serving your needs reliably for years to come.
Summing It Up: Your Dream 12×16 Shed Awaits!
Building your own 12×16 shed using these detailed plans offers incredible flexibility, allowing you to craft a space that perfectly meets your unique requirements. Whether you opt for the simplicity and classic appeal of a gable roof, or the expansive vertical storage of a barn-style design, you will undoubtedly end up with a robust and functional structure that serves your family for many decades.
Carefully select a plan that aligns with your budget, the dimensions of your yard, and your intended use. Then, gather your materials, organize your tools, and prepare for a rewarding DIY project. Remember to always consult your local building codes and regulations before beginning construction to ensure compliance. For added confidence and precision, consider downloading detailed, step-by-step plans from a reputable source.
Say goodbye to cluttered garages and overflowing basements! Your storage problems are about to become a distant memory. So, grab those plans, embrace the challenge, and start building your dream 12×16 shed this weekend. The satisfaction of a job well done, and a beautifully organized backyard, is just around the corner!
