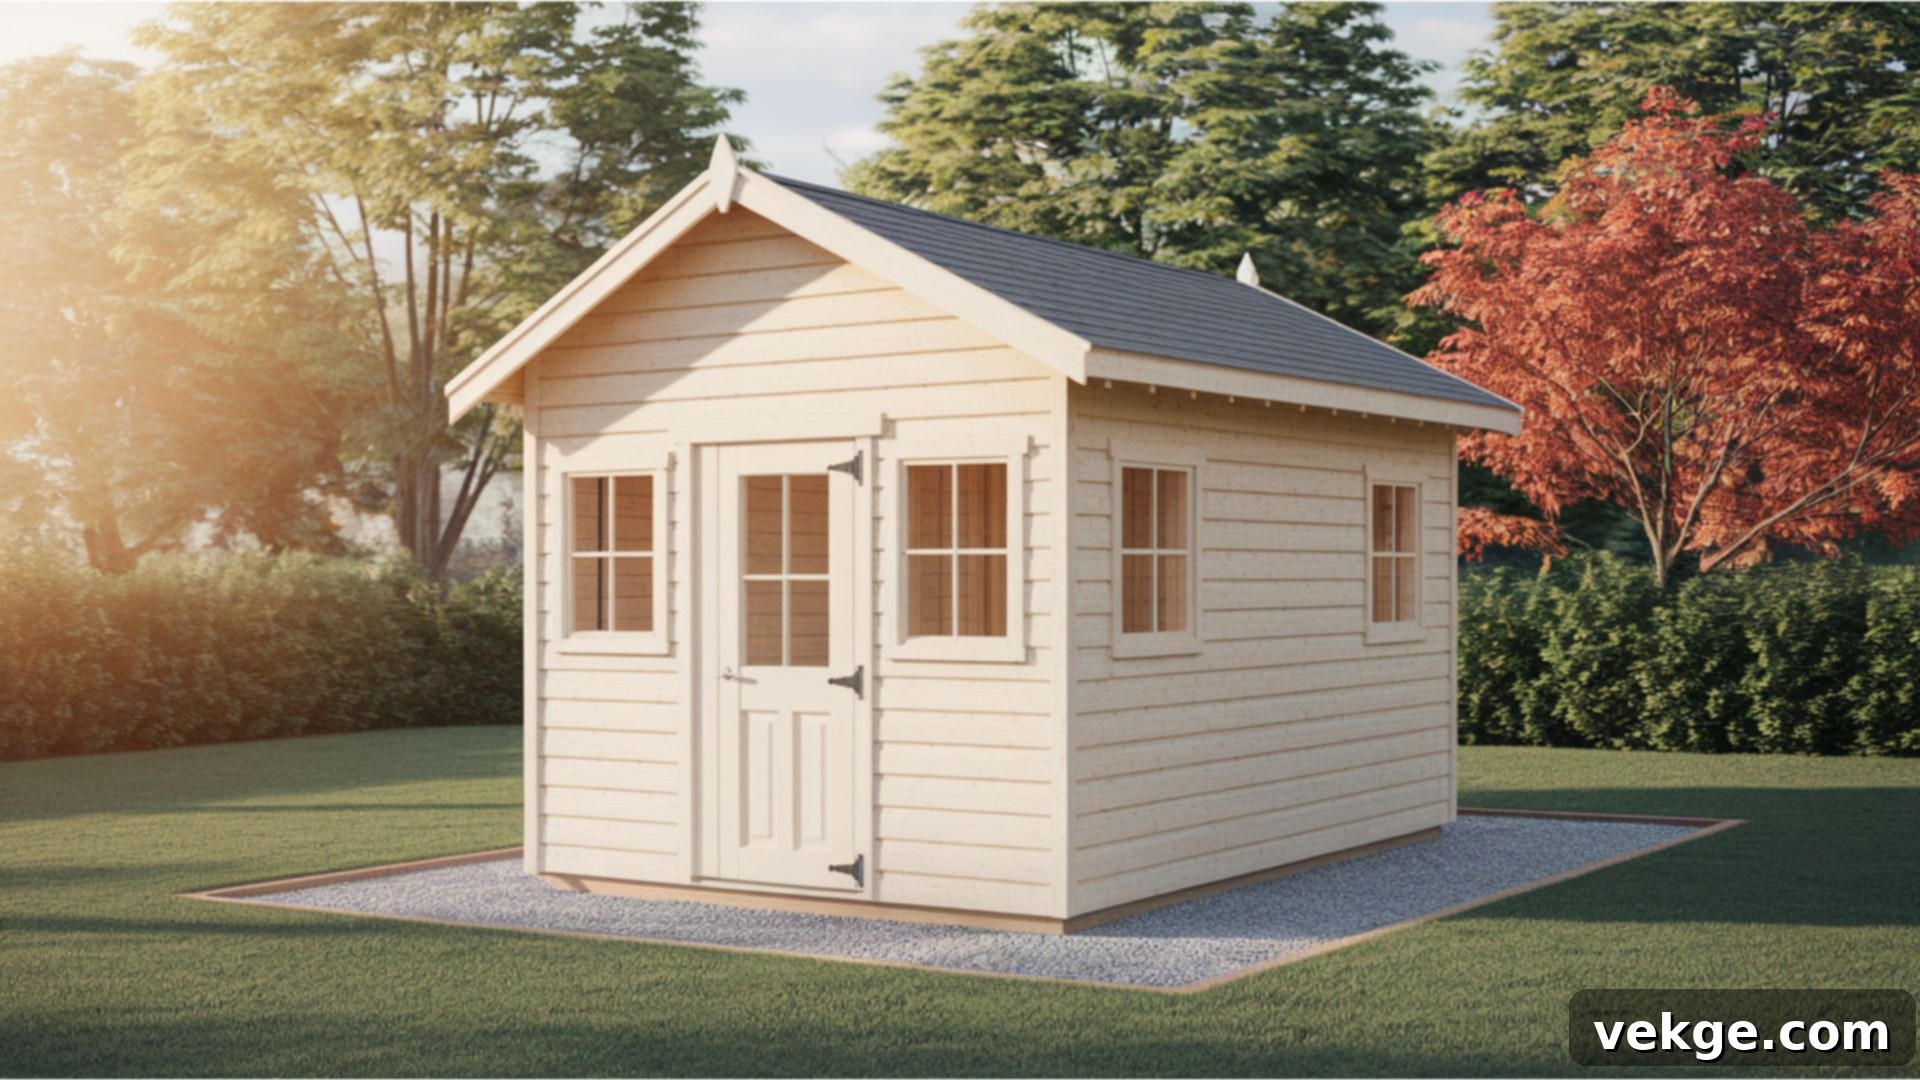
Build Your Dream 10×16 Shed: Ultimate DIY Plans & Expert Guide
Are you looking for an affordable, practical, and easy-to-build backyard storage solution? A 10×16 shed offers a generous 160 square feet of space, hitting the sweet spot for many homeowners. This versatile structure can transform your backyard, providing ample room for tools, gardening equipment, a dedicated workshop, or even a peaceful home office away from the main house.
From my experience, this particular size strikes the perfect balance: it’s spacious enough to be incredibly useful for a variety of purposes, yet still manageable for a DIY construction project. The best part? In many areas, sheds of this size don’t even require building permits, which significantly simplifies the entire process. If you’re seeking straightforward, reliable 10×16 shed plans, you’ve landed in the right place. I’m here to guide you through efficient layouts, comprehensive material lists, and practical building tips that genuinely work, helping you achieve a sturdy and functional shed with your own hands.
Why Choose a 10×16 Shed? The Ideal Backyard Companion
The 10×16 shed truly represents an optimal balance between ample storage capacity and maintaining valuable backyard space. With 160 square feet, you gain significant room for all your outdoor essentials without overwhelming your property. Imagine easily storing your lawnmower, leaf blower, seasonal decorations, bicycles, and an array of hand tools, all while still having comfortable space to walk around and access everything inside.
This size is incredibly adaptable, extending far beyond simple storage. It’s perfectly suited for creating a functional workshop where you can tackle various projects, establishing an organized garden potting station, or even carving out a quiet retreat for your hobbies, whether it’s painting, woodworking, or simply enjoying a moment of solitude. Its generous dimensions allow for creative interior layouts that cater to your specific needs.
One of the most appealing aspects of a 10×16 shed is its common exemption from stringent building permit requirements. Most local jurisdictions typically set a threshold for structures under 200 square feet. At 160 square feet, a 10×16 shed comfortably falls beneath this limit in many regions, making the planning and construction process considerably less bureaucratic. While it’s always crucial to verify your specific local building codes and HOA rules before you begin, this size frequently allows homeowners to expand their usable space with minimal red tape.
Essential 10×16 Shed Layout Options: Selecting Your Roof Style
The roof style you choose for your 10×16 shed isn’t just about aesthetics; it significantly impacts the overall look, construction complexity, and functional headroom of your finished structure. Each design offers distinct advantages, making the selection dependent on your personal preferences, intended use, and existing building experience.
| Layout Style | Pros | Cons | Best For |
|---|---|---|---|
| Classic Gable | Straightforward construction, excellent water drainage, traditional appearance. Offers good attic storage potential. | Standard interior height might feel limited for very tall items or overhead workspaces. | First-time builders, general storage, matching existing home aesthetics, cost-effective projects. |
| Barn (Gambrel) | Exceptional headroom and attic space, creating a loft for extra storage. Distinctive, rustic appearance. | More intricate roof framing, potentially higher material costs due to complex angles and larger roof area. | Workshops requiring tall equipment, significant overhead storage, desire for a unique barn-like look. |
| Lean-To | Simplest construction, low profile, ideal for placement against an existing structure or fence. | Limited headroom and reduced interior volume compared to other styles. Less flexible in design. | Small backyards, areas with height restrictions, maximizing space against a wall, minimalist storage needs. |
When reviewing these options for your 10×16 shed plans, consider both your practical needs and your comfort level with different construction techniques. Many first-time shed builders find the classic gable design to be the most forgiving and a great starting point before attempting more complex architectural styles.
Materials and Estimated Cost Breakdown for Your 10×16 Shed
Building a 10×16 shed is a significant investment, but it’s often far more cost-effective than buying a pre-built unit. To help you budget effectively, here’s a detailed cost breakdown for the primary materials. Please note that prices are estimates and can fluctuate based on your geographical location, the quality of materials selected, and current lumber market conditions. Always gather local quotes before making any purchases.
| Material | Estimated Cost Range (USD) |
|---|---|
| Treated 4×4 lumber (skids/runners, critical for ground contact) | $48.00–$90.00 |
| Gravel (for foundation support/leveling, ensures proper drainage) | $15.00–$75.00 |
| Concrete/deck blocks (elevates the shed, prevents moisture wicking) | $18.00–$36.00 |
| Treated 2×6 boards (floor joists/band boards, structural integrity of the floor) | $160.00–$300.00 |
| Tongue & groove subfloor panels (provides a solid, interlocking floor base) | $368.27–$520.00 |
| 2×4 studs (wall framing, the skeletal structure of your shed walls) | $155.10–$378.60 |
| Sheathing panels (OSB/plywood, exterior walls and roof deck, adds rigidity) | $300.00–$600.00 |
| Dimensional lumber (rafters, forming the roof structure) | $160.00–$300.00 |
| Ridge beam (peak support for the roof, essential for stability) | $20.00–$50.00 |
| Roofing felt (tar paper, secondary layer of weather protection under shingles) | $30.00–$80.00 |
| Dimensional shingles (main roofing material, provides durability and aesthetic appeal) | $150.00–$240.00 |
| 3-tab shingles (for starter strips and ridge caps, completes the roof seal) | $20.00–$40.00 |
| Drip edge metal (protects roof edges from water damage) | $40.00–$80.00 |
| Lag bolts & nails (fasteners for all structural connections) | $10.00–$25.00 |
| Sealant (Lexel or similar, for waterproofing critical joints) | $20.00–$40.00 |
| Total Estimated Cost Range (Core Structure & Roofing) | $1,514.37–$2,854.60 |
This estimate comprehensively covers the core structural components and roofing for your 10×16 shed. It does not, however, include the cost of essential tools, exterior paint or stain, a door, windows, or any interior finishes. Remember to factor these additional items into your overall project budget. Always double-check local prices and consider potential bulk discounts before purchasing materials.
NOTE: Costs listed here are estimates only and may vary significantly by location, material quality, brand preference, or supplier. It is vital to confirm current local prices before committing to any purchases for your shed project.
How to Build Your 10×16 Shed: A Step-By-Step DIY Guide
Embarking on the journey to build your own 10×16 shed might initially seem daunting, but by breaking it down into these five primary, manageable steps, the process becomes much clearer and achievable. Each phase builds logically upon the last, so dedicate sufficient time to ensure accuracy and quality at every stage before proceeding. This methodical approach will prevent headaches and rework down the line.
Step 1: Prepare and Layout Your Foundation
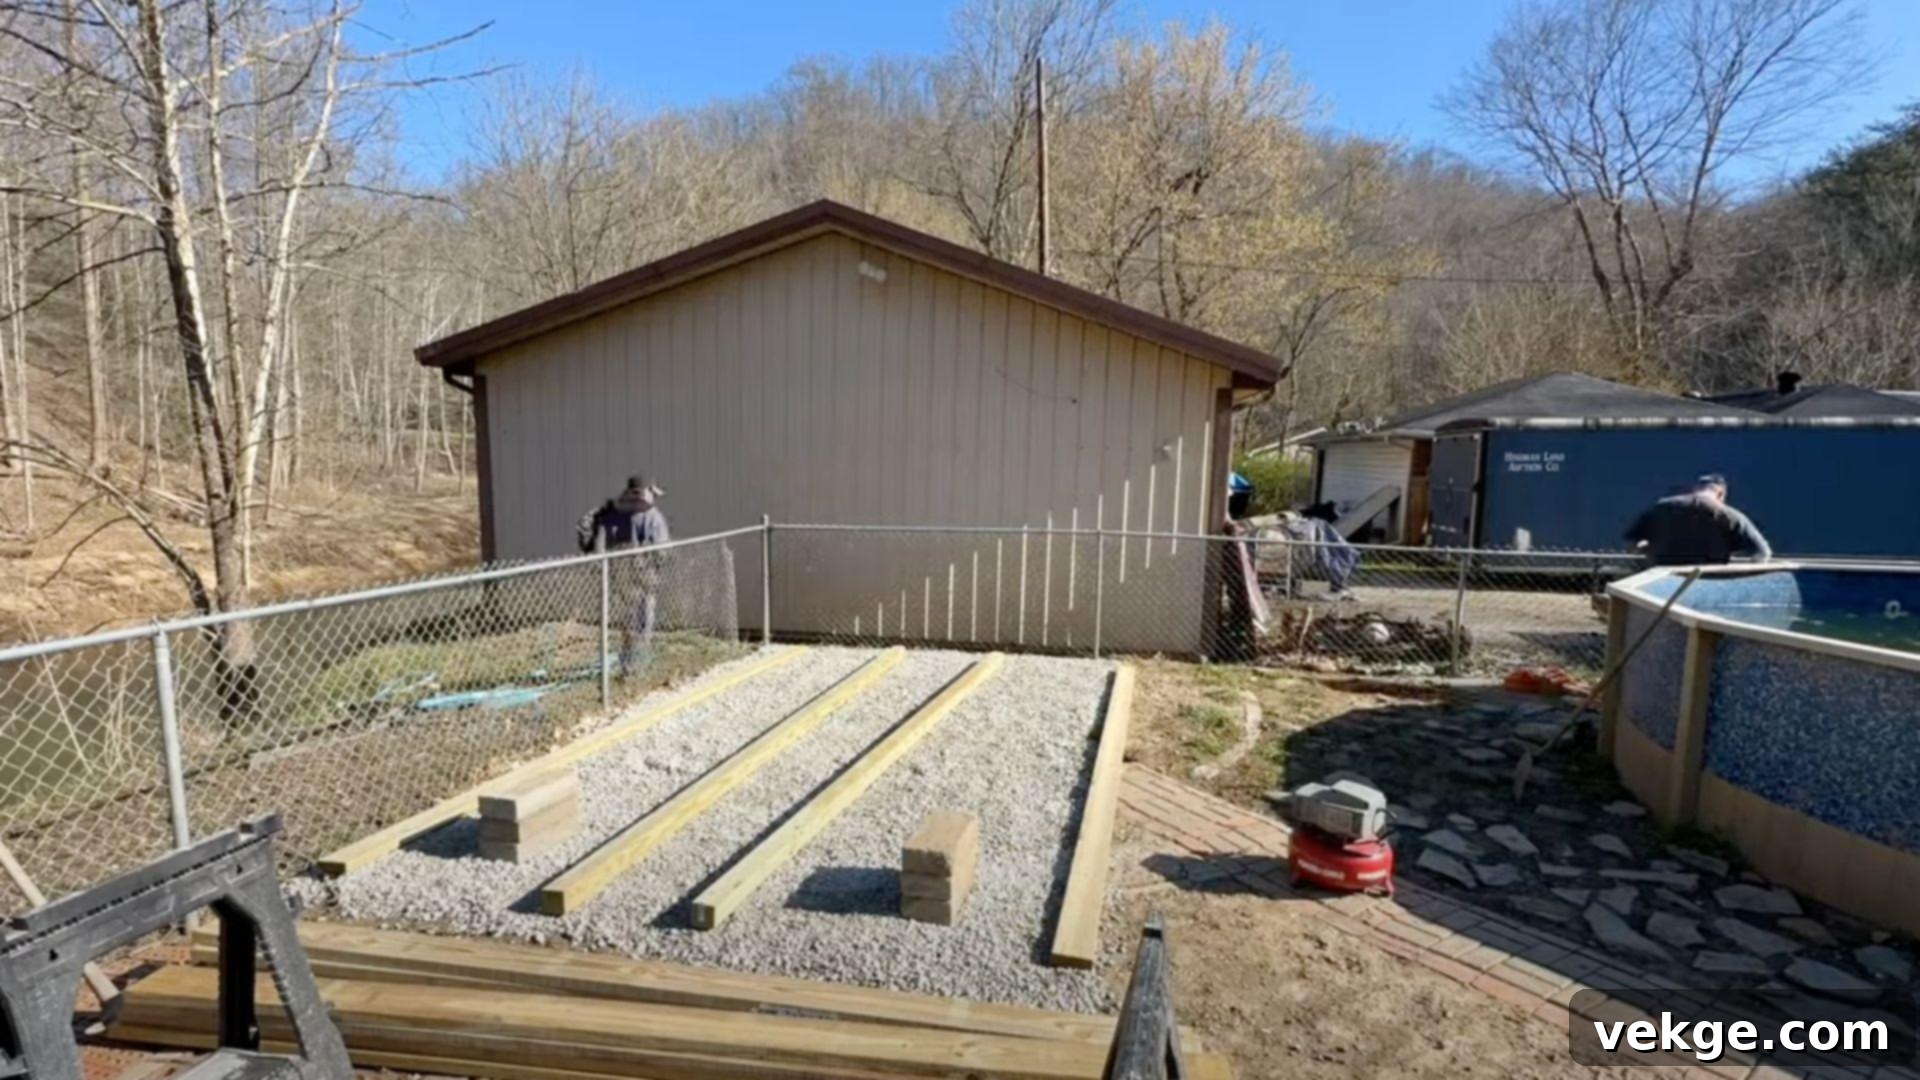
The foundation is literally the bedrock of your entire shed project. Begin by meticulously clearing the designated area, ensuring it’s free of debris, vegetation, and any uneven spots. Once cleared, unload and organize your materials nearby for easy access. Construct a sturdy 4×4 box frame using treated lumber, which will serve as the skids for your shed. Use gravel to create a level and well-drained support pad beneath these skids. Ensure the highest point of your foundation aligns precisely with your desired shed height, establishing a proper grade.
Crucially, use a long level or a builder’s level to check alignment across all sides and corners. A perfectly level and square foundation is not merely aesthetically pleasing; it is fundamental to the structural integrity of your shed. It simplifies every subsequent step, from framing the floor to installing the roof, saving considerable time and preventing costly mistakes later in the build.
Pro Tips for Foundation Prep:
- Shim Blocks: Keep a supply of composite or treated wood shims on hand to correct any minor unevenness under your skids.
- Pad Height: Plan your gravel pad height carefully, considering drainage away from the shed and accessibility.
- Settle and Recheck: After compacting the gravel, allow it to settle for a day if possible, then recheck the level before starting construction to account for any shifting.
Step 2: Build the Floor Frame and Apply Sheathing
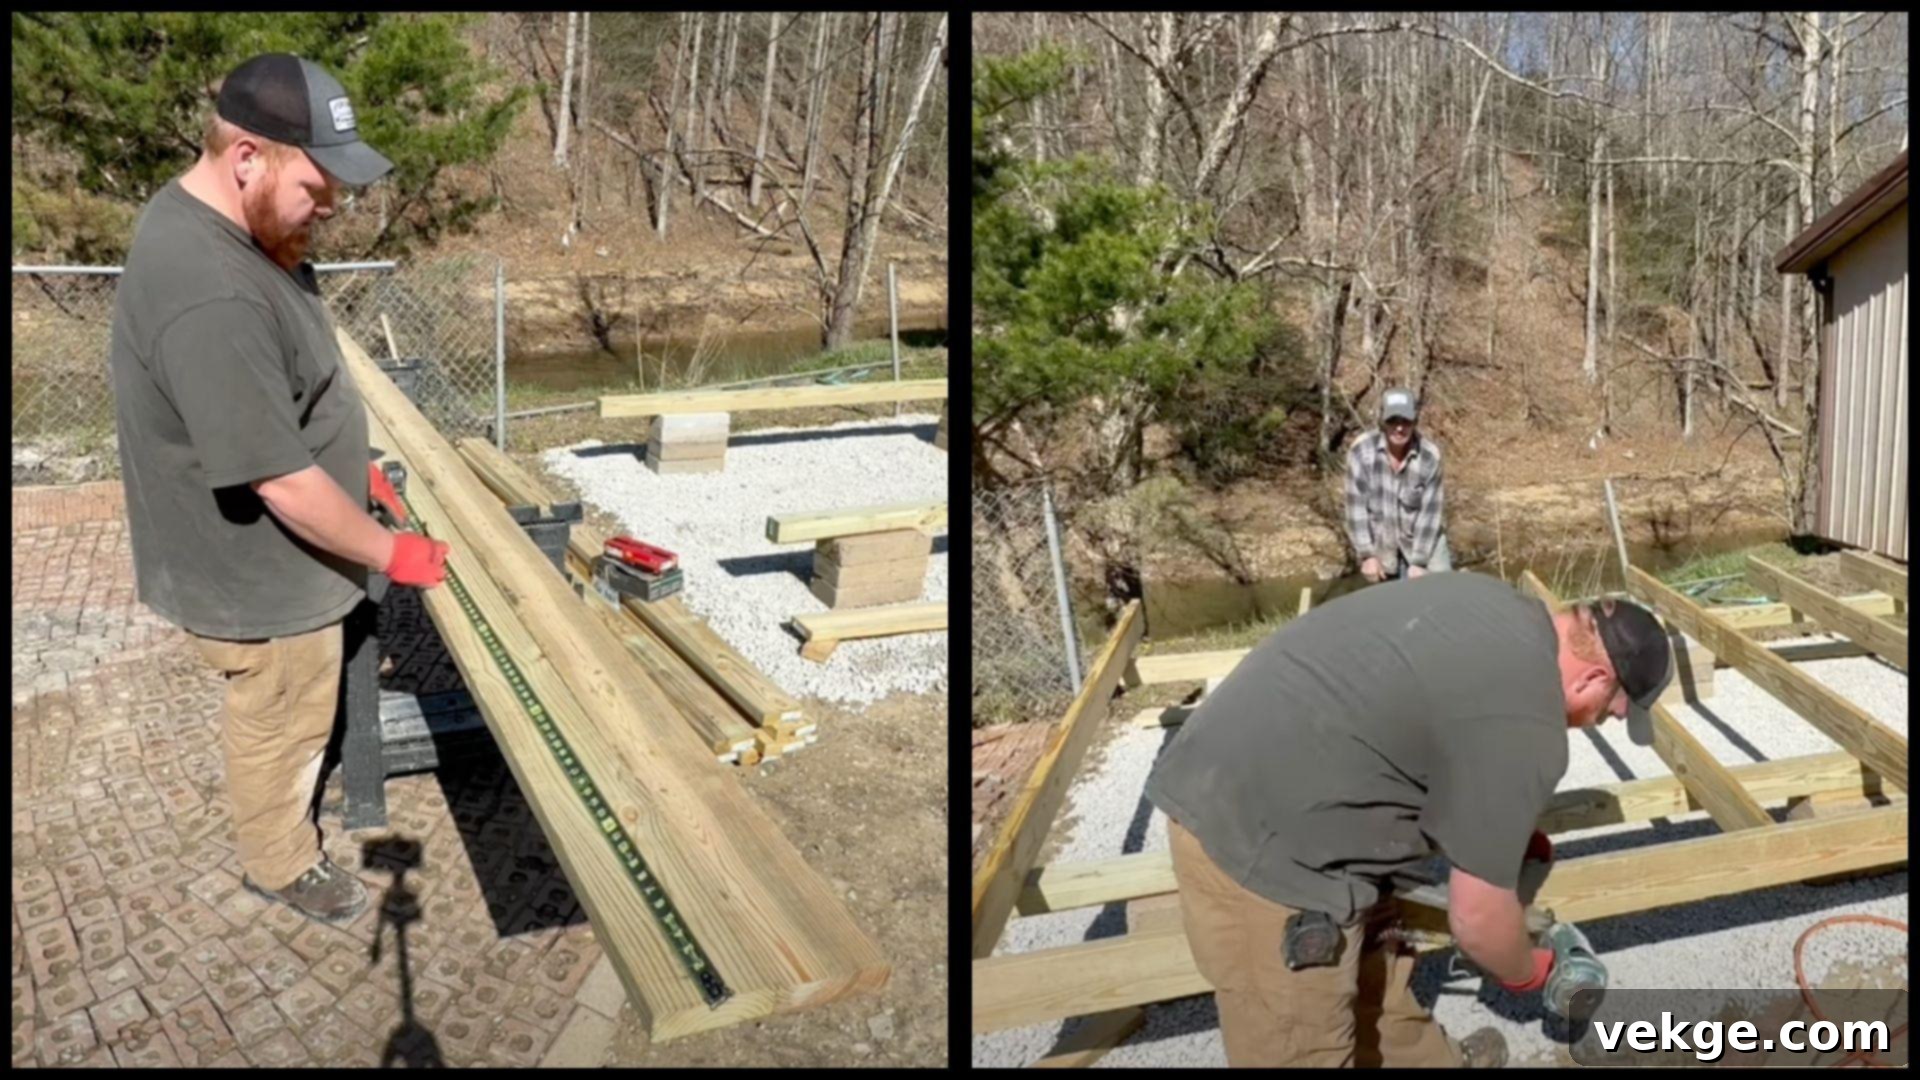
With a solid foundation in place, it’s time to construct the floor frame. Precisely cut your treated 2×6 lumber to size; the floor joists should fit snugly inside the perimeter band boards. For optimal support and strength, space your floor joists every 24 inches on center. Use appropriate fasteners, typically 3-inch deck screws or galvanized nails, to securely connect the joists to the band boards. For added rigidity and to prevent racking, reinforce corners with lag bolts or hurricane ties.
Before laying your subfloor panels, apply a continuous bead of construction adhesive to the top edge of each joist. This adhesive, combined with fasteners, dramatically reduces squeaks and strengthens the floor system. Lay the tongue and groove subfloor panels perpendicular to the floor joists. This orientation ensures better distribution of weight and minimizes floor flex over time. Stagger the panel seams for enhanced structural integrity.
Pro Tips for Floor Construction:
- Layout Marks: Before nailing, clearly mark the exact layout for each joist on your band boards to ensure accurate spacing.
- Quieter Floor: Generously apply a high-quality construction adhesive (like Liquid Nails Subfloor Adhesive) to all joists before laying sheathing for a remarkably quiet and stable floor.
- Exact Width: Ensure all floor framing boards are cut to exact measurements. Even small discrepancies can accumulate and affect the squareness of your shed.
Step 3: Frame and Stand the Walls
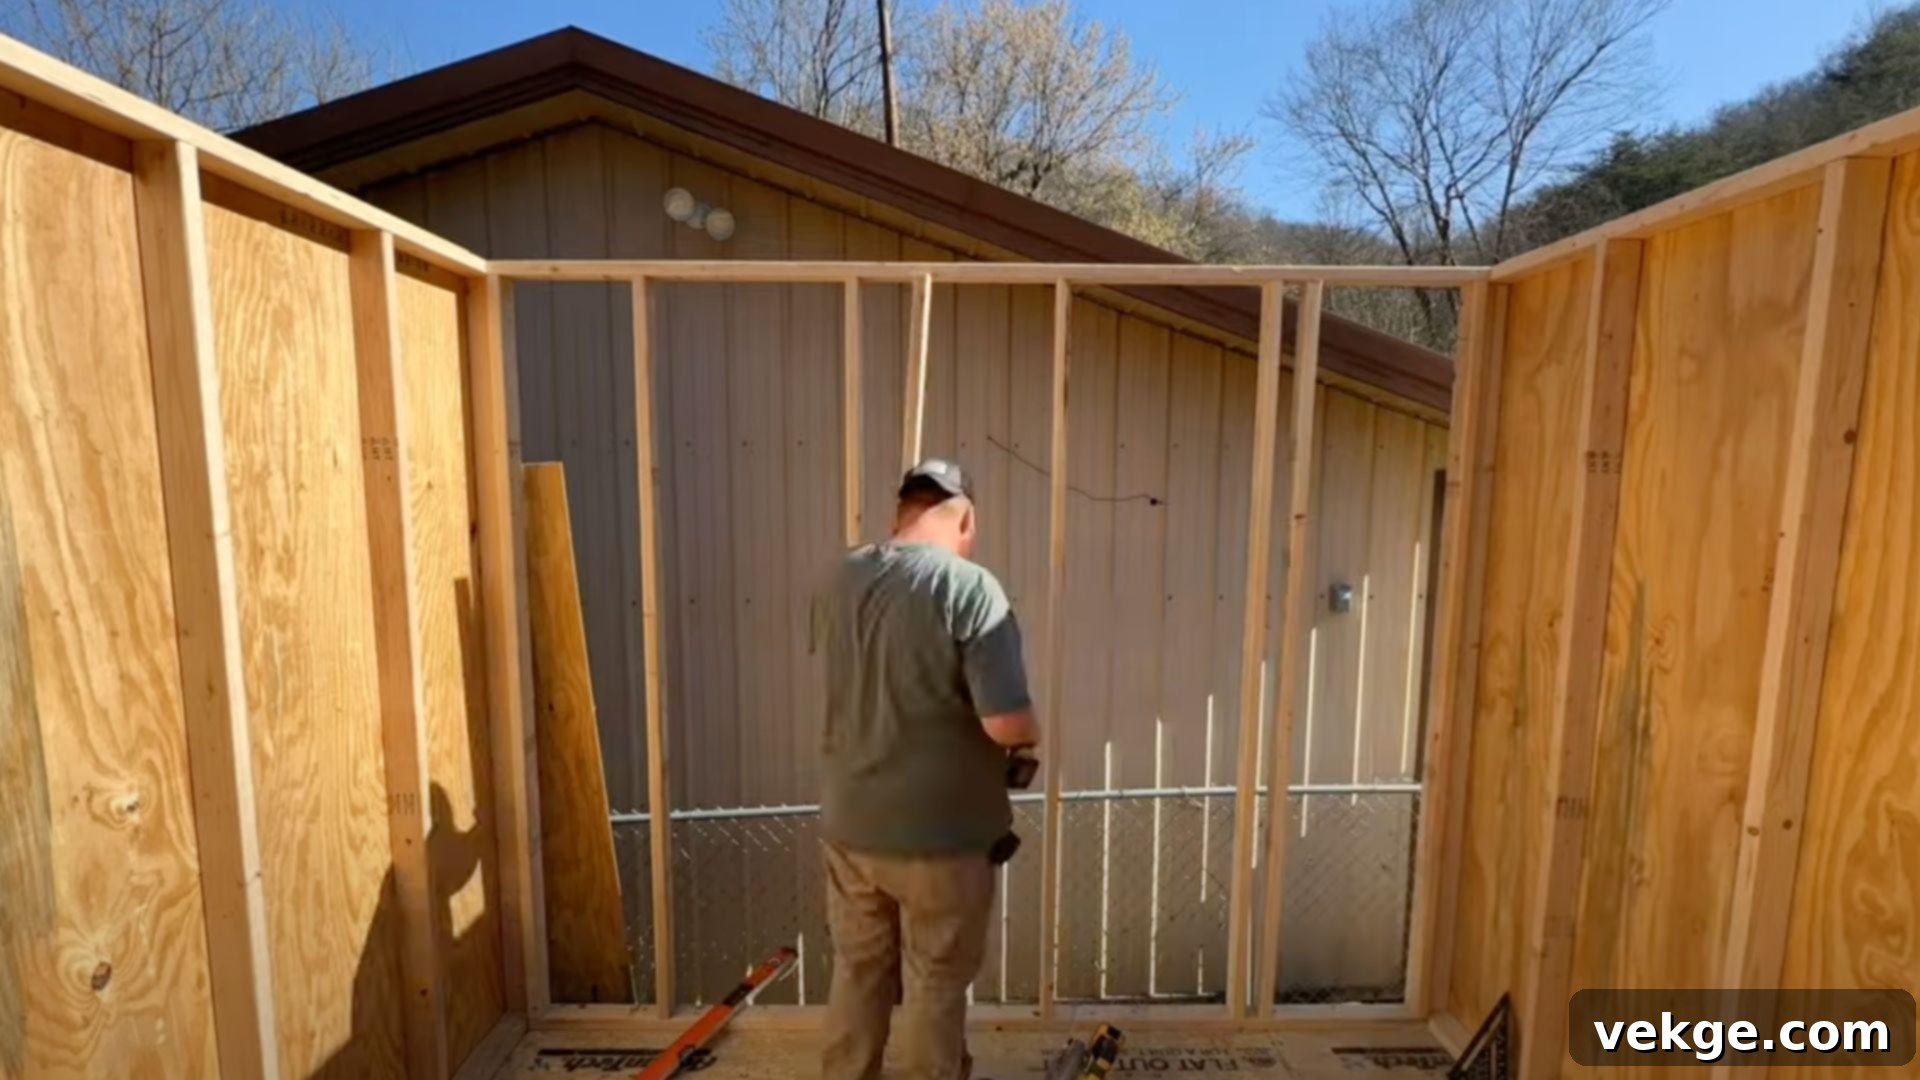
Next, you’ll construct the skeletal framework of your shed’s walls. Cut your 2×4 wall studs to the required length, ensuring they allow for a slight overlap on the floor band for easier fastening. Lay out the precise locations for each stud on both the top and bottom plates (the horizontal boards that cap and base the wall frame). Nail each stud securely in place, forming complete wall sections on the flat ground.
Once each wall section is assembled, carefully lift them into position on the floor frame. Use temporary “kicker boards” or braces to prevent the walls from slipping or toppling during the lift. Securely nail the bottom plates of each wall to the floor frame. To maintain plumb and square walls until all sections are joined and braced, use diagonal bracing or temporary supports from the top plate to the floor. Ensure corners are perfectly square before permanently fastening them.
Pro Tips for Wall Framing:
- Consistent Marking: Always mark your stud layouts from one consistent direction (e.g., left to right, or using the same edge of the tape measure) to prevent cumulative errors.
- Ring-Shank Nails: Opt for ring-shank nails when framing. Their unique design offers superior holding power, creating a much stronger connection.
- Pre-Sheathing: For smaller sheds, consider adding the wall sheathing to the frame while it’s still on the ground. This makes the walls much stiffer and easier to stand, though they will be heavier.
Step 4: Install Rafters and Roof Sheathing
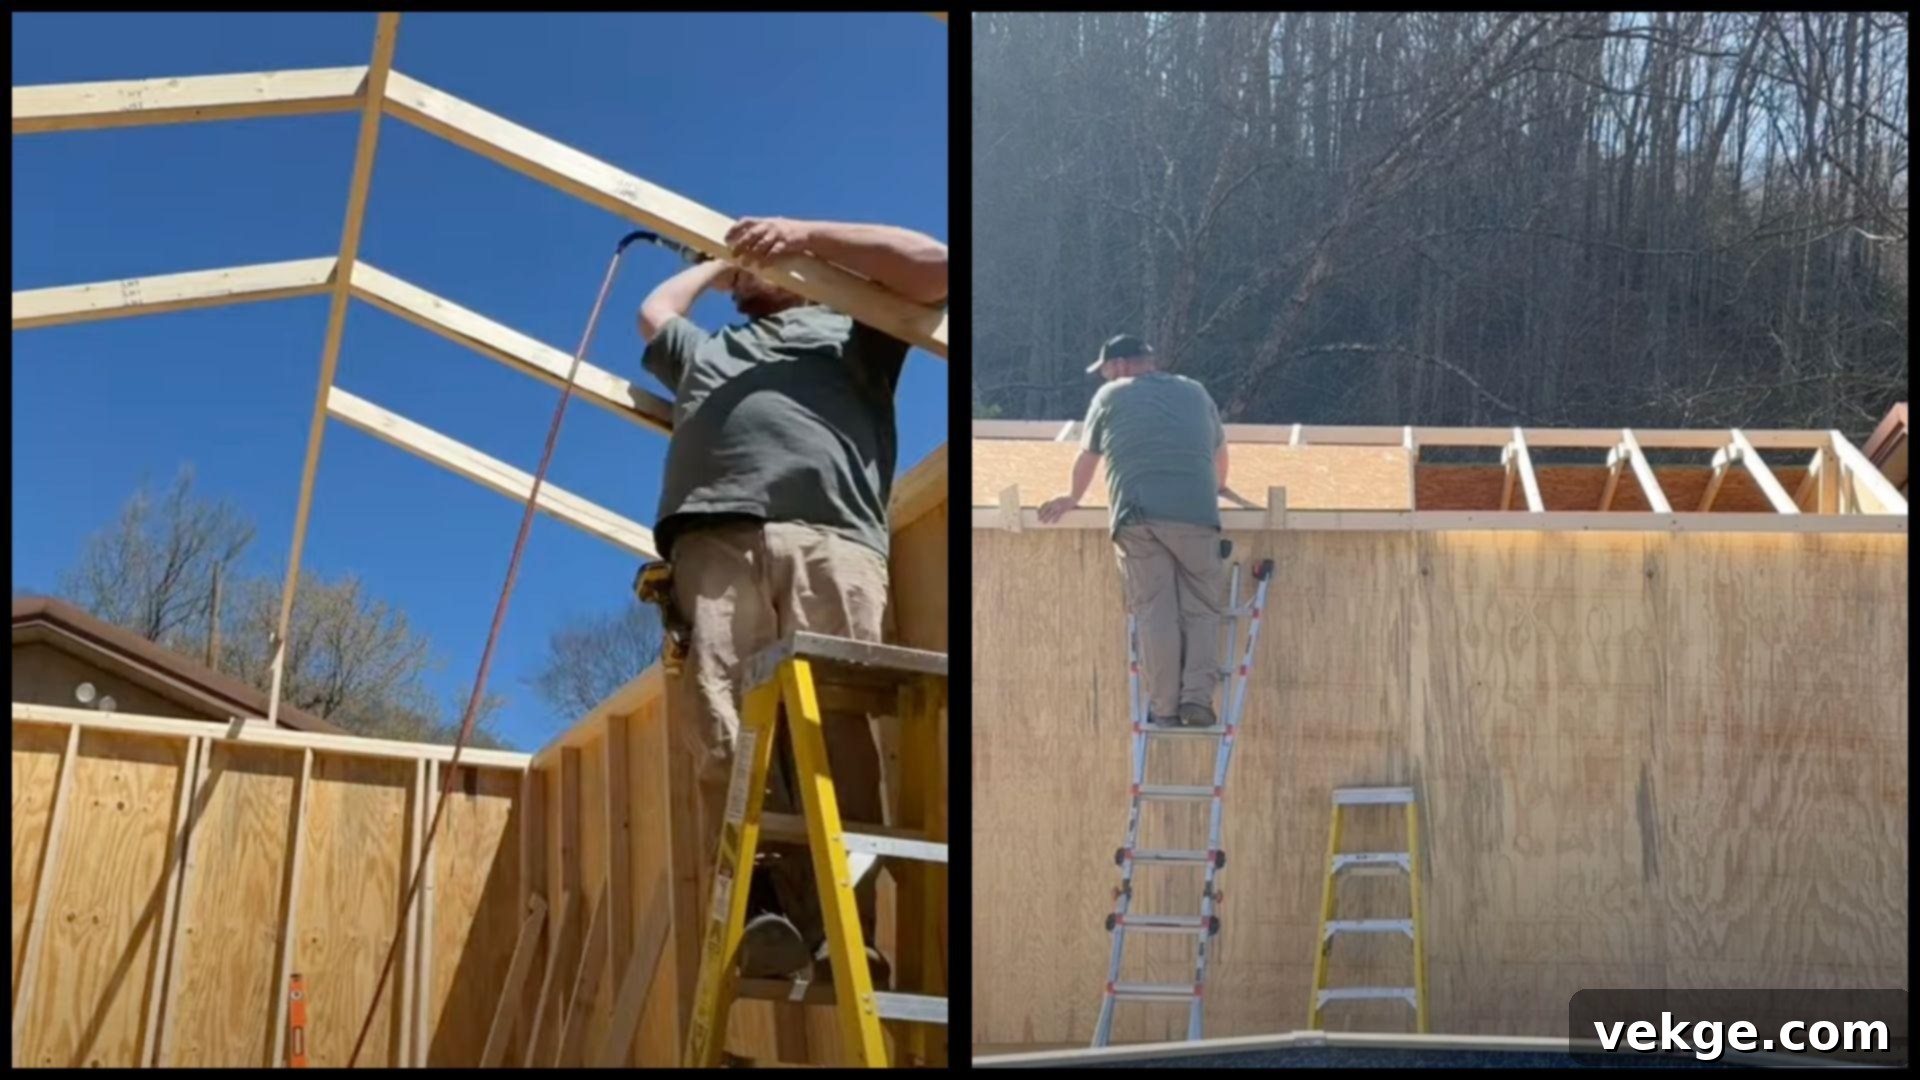
The roof structure is next, providing protection and defining the shed’s character. Begin by accurately measuring and marking the roof’s peak, which is determined by your chosen pitch (e.g., a 4-inch rise per foot of run). Mount a sturdy center brace, often called a saddle or ridge support, to firmly support the ridge board – the highest horizontal beam of your roof. This ensures a strong and straight peak.
Next, align your rafter marks across both the top plates of your walls and the ridge beam. Cut each rafter precisely according to your shed plans, ensuring consistent angles and lengths. Securely fasten each rafter to both the top plates and the ridge beam using appropriate hangers or nails. Once the entire rafter framework is complete, lay your roof sheathing (typically OSB or plywood) over the rafters. Use chalk lines to keep your sheathing rows perfectly straight and ensure a clean, even surface for your roofing materials.
Pro Tips for Roof Construction:
- Rafter Template: Create a single, accurate rafter template first. This allows you to quickly and consistently cut all subsequent rafters identical, saving time and ensuring accuracy.
- Positive Stops: When cutting rafter tails for the gutter board, use positive stops on your saw setup for repeatable, uniform cuts.
- Flush Rafters: Ensure all rafters are flush with the exterior face of the top plates. This provides a clean overhang and a smooth surface for your fascia boards later.
Step 5: Add Shingles, Trim, and Ridge Caps
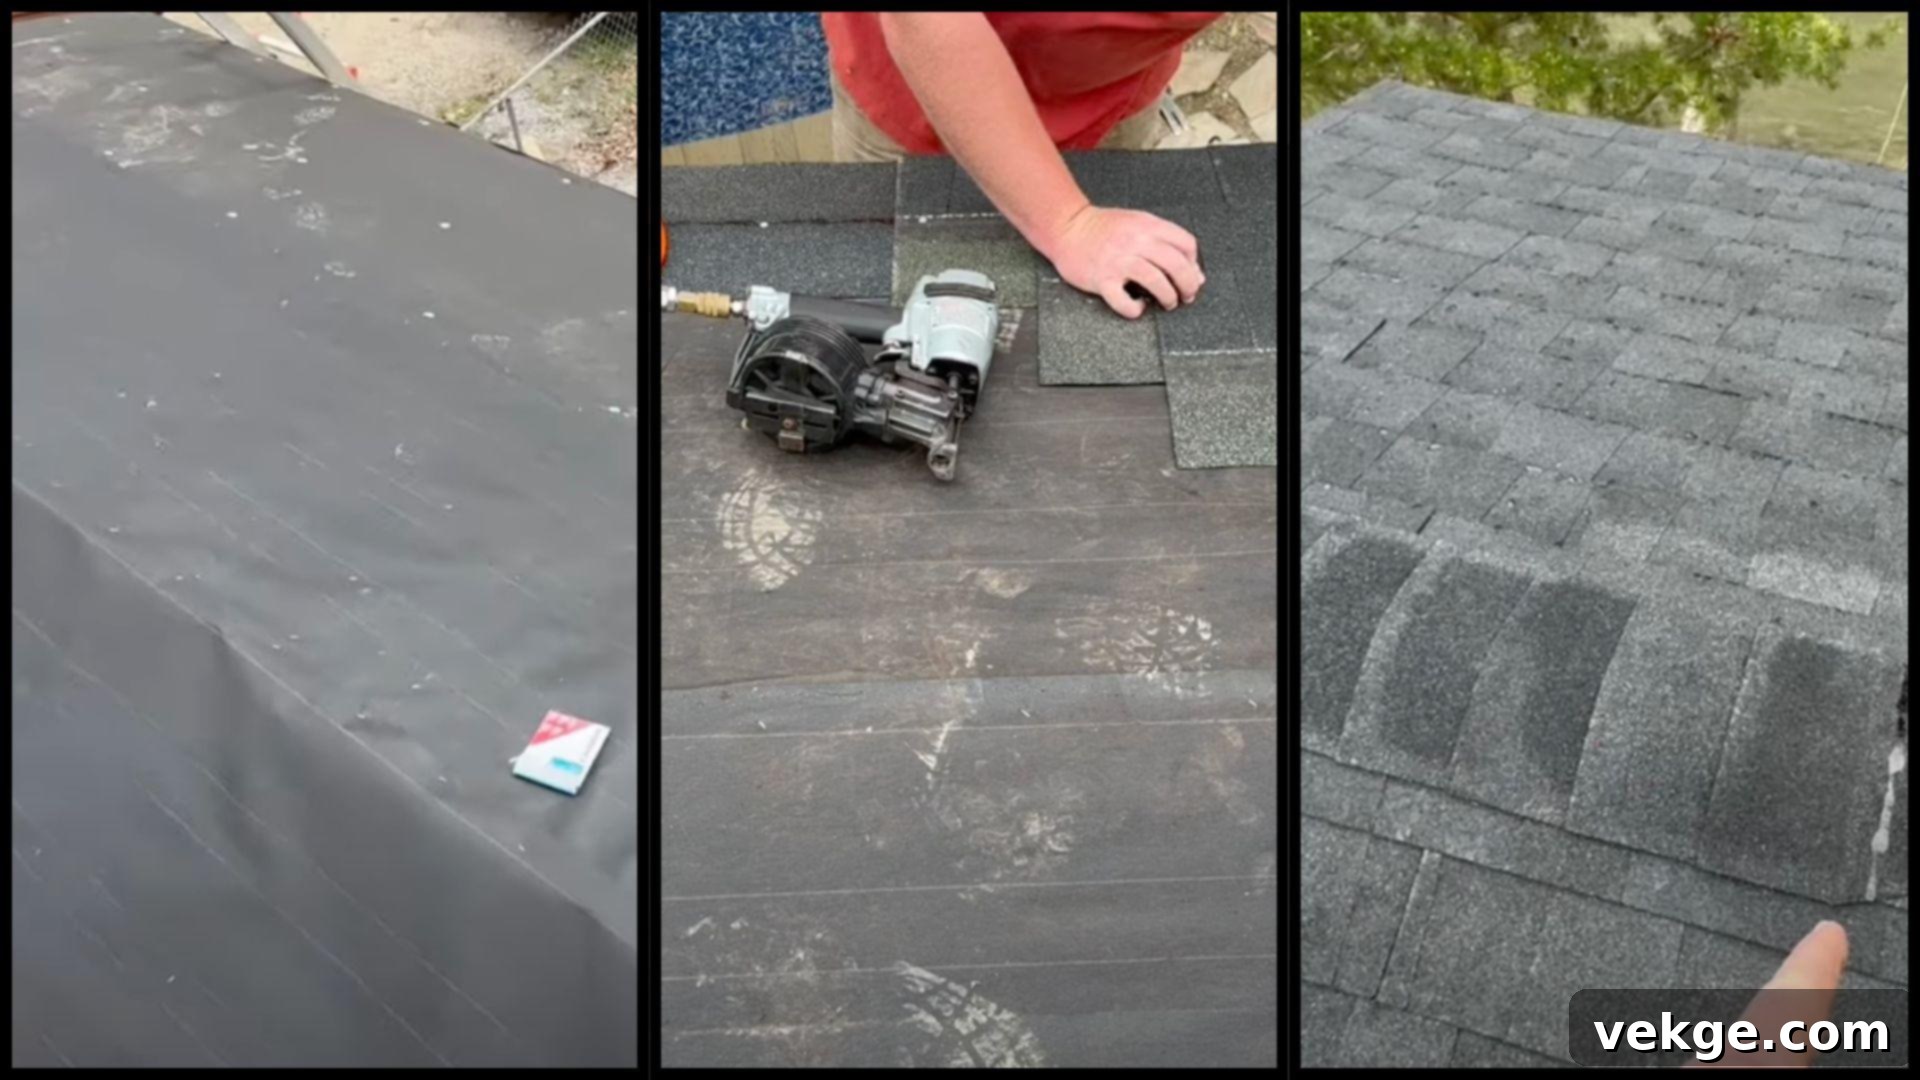
The final step in making your shed weatherproof and aesthetically complete is installing the roofing materials. Start by rolling out roofing felt (tar paper) across the entire roof deck, overlapping each course according to manufacturer specifications, and stapling it securely. This provides a crucial secondary barrier against moisture. Next, install drip edge metal along all roof edges – it directs water away from the fascia and prevents water from wicking up under the shingles.
After the drip edge, apply starter strips along the eaves. Then, begin laying your main shingles. To create a professional and durable staggered pattern, cut your initial shingles into sections (e.g., 6″, 11″, and 17″) for the first few courses. Nail the shingles in neat, overlapping rows, ensuring proper exposure and alignment. Finally, create and install ridge caps using three-tab shingles bent over the ridge line. For enhanced waterproofing and longevity, apply a high-quality sealant, such as Lexel, under the final ridge cap pieces.
Pro Tips for Roofing:
- Lexel Sealant: Always use a robust, flexible sealant like Lexel under the final ridge caps and at any vulnerable points for maximum water protection.
- Protect Underlayment: When cutting shingles, avoid cutting directly over the tar paper or roof sheathing; use a scrap board underneath to prevent accidental damage.
- Overlap Consciously: Follow the manufacturer’s guidelines for shingle overlap and nail placement precisely. Overlapping too little or too much can compromise the roof’s integrity.
For a Detailed Walkthrough, Watch This Comprehensive Video Tutorial:
Optimizing Your Space: 10×16 Shed Floor Plan and Interior Ideas
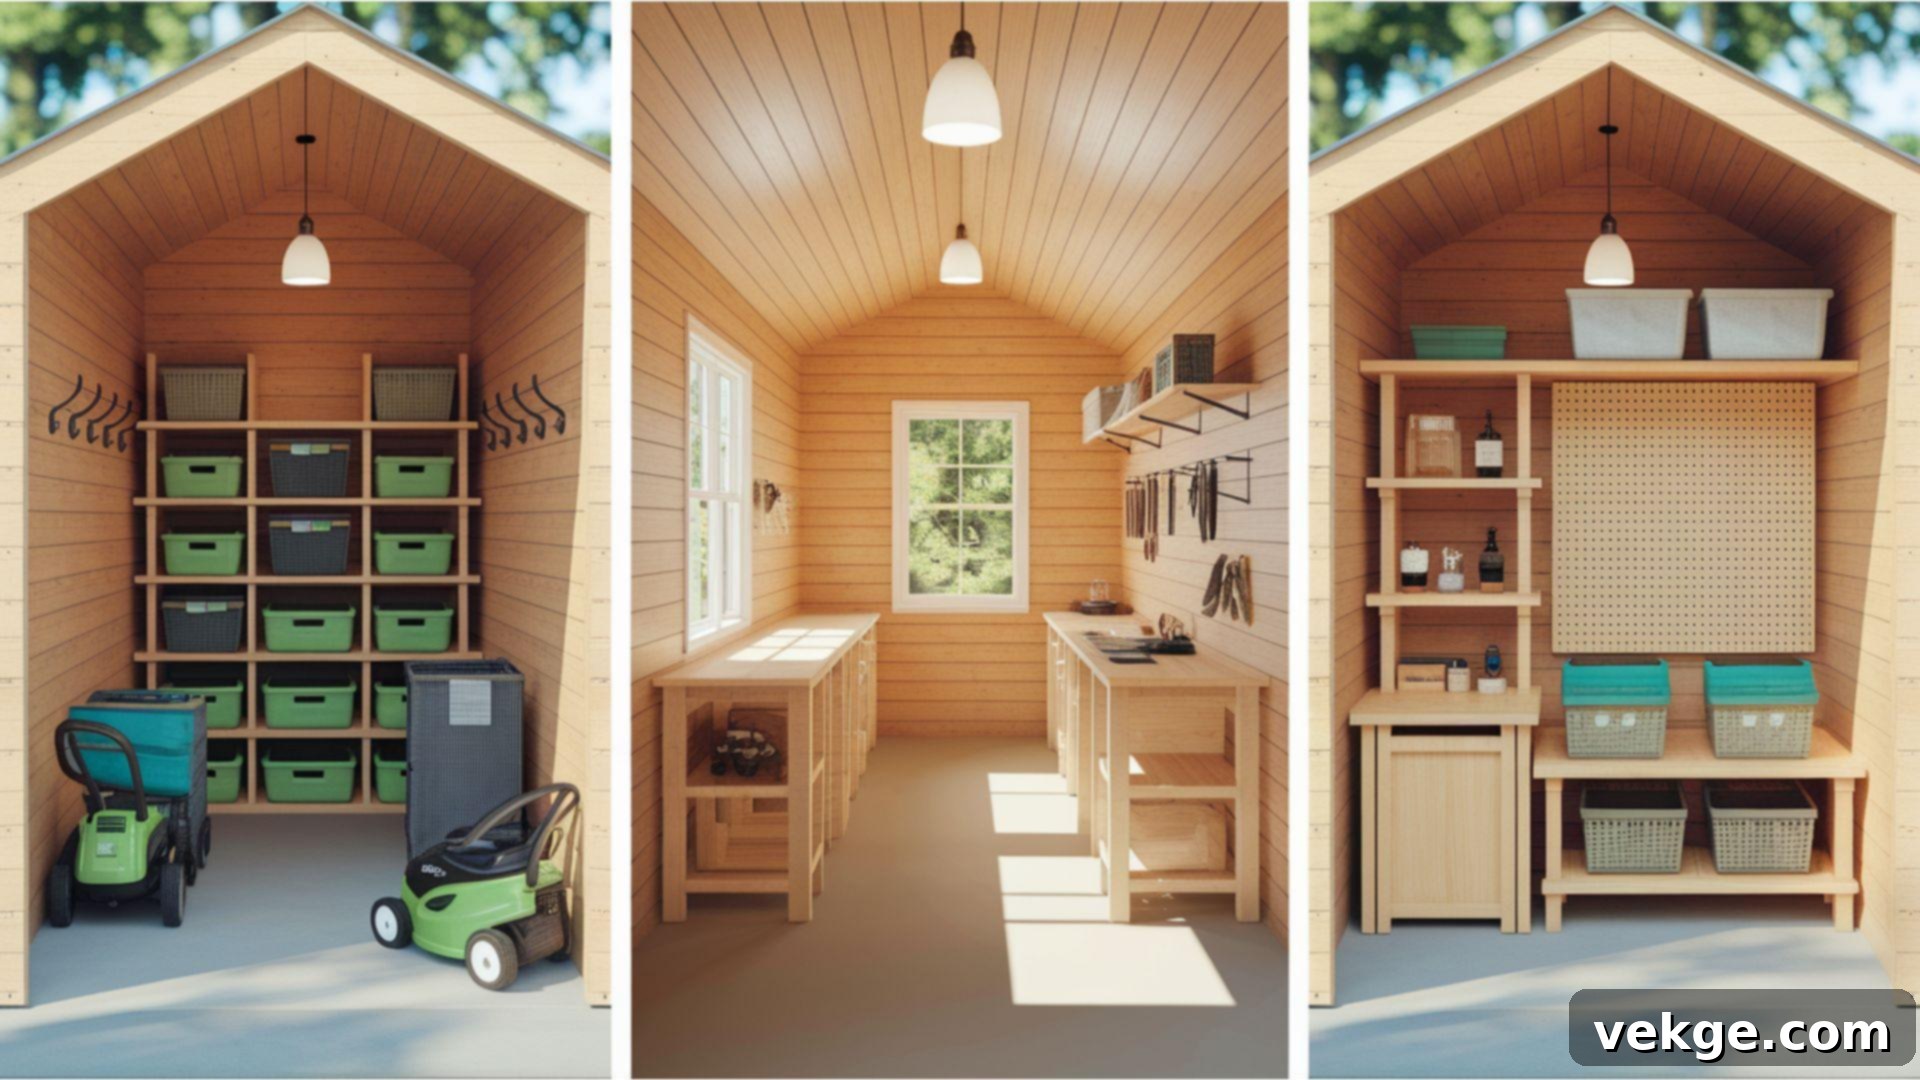
The interior layout of your 10×16 shed is where its true versatility shines. With 160 square feet, you have ample room to design a space that perfectly suits your specific storage, hobby, or workshop requirements. Before you start building, carefully consider your primary needs and how you envision using this valuable space.
1. Open Storage Plan
This layout prioritizes maximum open floor space. It involves keeping the entire 10×16 area clear of any permanent interior walls or large, fixed furniture. This design is ideal for storing substantial items such as riding lawnmowers, ATVs, kayaks, large holiday decoration bins, or bulky seasonal equipment that demands a wide-open entry and maneuverability. While the floor remains unobstructed, you can still strategically add wall-mounted hooks, pegboards, and even overhead shelving or rafters to maximize vertical storage without encroaching on the main floor area.
2. Shelving and Workbench Setup
If organization and dedicated workspace are your priorities, this setup is highly effective. Install sturdy shelving units along one or two walls, maximizing vertical storage for smaller tools, supplies, and containers. Position a robust workbench under a window to capitalize on natural light, creating an ergonomic space for projects, repairs, or potting plants. For enhanced efficiency, arrange frequently used tools on a pegboard directly above the workbench, keeping them within easy reach. This design creates a clear distinction between storage and active work areas.
3. Split Layout (Half Storage, Half Workspace)
For those who need both significant storage and a dedicated workspace, a split layout offers the best of both worlds. Conceptually, you can divide the 10×16 shed down the middle. One 8×10 section can be optimized for bulky item storage, featuring heavy-duty shelving or simply an open floor for larger equipment. The other 8×10 section can then be transformed into your specialized workshop area, complete with a workbench, tool storage, and perhaps even a dedicated craft or hobby zone. This separation prevents clutter from migrating between zones and allows each area to be tailored to its specific function.
Practical Tips for Customizing Your 10×16 Shed
Once the basic structure of your 10×16 shed is complete, the real fun begins: customizing it to perfectly meet your functional and aesthetic desires. Small, thoughtful upgrades don’t have to be expensive but can dramatically enhance the usability and longevity of your new outdoor space. Consider these additions:
- Add Insulation: Installing insulation between the wall studs, under the floor, and in the ceiling cavity will help regulate the interior temperature. This keeps your shed cooler during scorching summer months and significantly warmer in the winter, making it a much more comfortable space for working or storing temperature-sensitive items.
- Run Electrical Wiring: If you plan to use power tools, have adequate lighting, or charge devices, consider running electrical wiring to install outlets and overhead lights. This transforms your shed into a fully functional workshop or office, allowing you to work after dark or on cloudy days.
- Paint or Stain the Exterior: Beyond aesthetics, applying a high-quality exterior paint or wood stain is crucial for protecting the wood from harsh weather elements, UV rays, and moisture damage. Choose a color that complements your main house for a cohesive look.
- Install Organization Systems: Maximize every square inch of your 10×16 shed by installing various organization systems. Think about wall hooks for garden tools, pegboards for hand tools, overhead storage racks for seasonal items, and shelving units for smaller supplies.
- Ventilation: Add vents near the eaves and ridge, or install a small exhaust fan, to ensure proper airflow. This helps prevent moisture buildup, reduces humidity, and keeps the interior fresh, especially important if storing chemicals or operating machinery.
These simple yet impactful additions will convert your shed from a basic storage unit into a highly functional and enjoyable space. Start with one or two upgrades that address your most pressing needs, and gradually add more features over time as your budget and time allow.
DIY vs. Professional Build: Making the Right Choice for Your 10×16 Shed
When planning your new 10×16 shed, one of the most significant decisions you’ll face is whether to tackle the project yourself or hire a professional builder. Both routes have distinct advantages and disadvantages that should be carefully weighed against your personal skills, budget, and time availability. Here’s a clear side-by-side comparison to help you make an informed choice:
| Factor | DIY Shed Build | Professional Shed Build |
|---|---|---|
| Time Required | Typically 4–7 days for an average DIYer, depending heavily on skill level, weather conditions, and dedicated work hours. Can extend to weeks if working only on weekends. | Usually 1–3 days for an experienced crew, often completing the project within a single workday if prefabricated components are used. |
| Skill Needed | Moderate to advanced carpentry skills are recommended. Requires proficiency with power tools, accurate measurements, and understanding of basic construction principles. | None from your side; all expertise is handled by certified professionals. Ensures quality and adherence to building codes. |
| Customization | Offers the highest degree of customization. You have full control over every detail, from material choices and interior layout to window placement and door style. | Somewhat limited by the company’s standard designs and available options. Extensive customization often incurs higher costs. |
| Tools Needed | You must own or rent a comprehensive set of power tools (circular saw, drill, nail gun, level, etc.) and hand tools. This can be an added expense if you don’t already have them. | All necessary tools and equipment are provided by the service. No need for personal investment in specialized gear. |
| Cost Efficiency | Significantly lower labor costs, resulting in substantial overall savings. You pay primarily for materials. | Higher upfront cost due to professional labor, insurance, and overhead, but you save on time and potential errors. |
| Satisfaction | Extremely high sense of achievement and pride if the project is completed successfully. You learn valuable skills along the way. | High if the job is done right; completely stress-free for the homeowner. You get a ready-to-use shed without the effort. |
| Long-Term Value | High if built correctly and according to best practices. Quality materials and craftsmanship contribute to durability. | High with professional workmanship, often accompanied by warranties on labor and materials, ensuring expert construction. |
Ultimately, both DIY and professional options can result in a strong, functional, and long-lasting 10×16 shed. The DIY approach is ideal for those who enjoy hands-on work, have the necessary skills, and prioritize cost savings and full customization. Conversely, opting for a professional build is best if you value speed, convenience, and a completely stress-free experience, even with the higher price tag.
Wrapping It Up: Your New 10×16 Shed Awaits
Constructing your own 10×16 shed using these detailed plans is a rewarding endeavor that grants you the much-needed storage or workspace without draining your finances. You’ll not only realize significant cost savings compared to purchasing a pre-built unit, but you’ll also experience the immense satisfaction and pride that comes from creating something durable and functional with your own hands.
If you’re new to building or feeling a bit overwhelmed, remember there’s no need to stress. Approach the project methodically, focusing on one simple step at a time, and you’ll be genuinely surprised by what you can accomplish. By following these clear 10×16 shed plans, you’ll end up with a high-quality shed that perfectly fits your backyard space, caters to your specific needs, and beautifully reflects your personal style. It’s more than just a shed; it’s an extension of your home and a testament to your DIY spirit.
Do you have questions, need clarification on a step, or find yourself stuck at any point? Please don’t hesitate to leave a comment below—I’m always happy to help guide you through the process. For more helpful guides like this one, offering other shed builds, practical DIY plans, and innovative backyard projects that truly work, feel free to browse our extensive collection of blogs on the website!
